There is only one Soviet era piece of armor I have ever attempted to date. That was a DML 1/35th scale Iraqi T-72. Never finished it and in fact need to find where the heck it is. The only other Academy armor kit I have built to date is the Hummer. And that kit was bought when it first came offered by Academy in 1992. That kit is finished just been adding bits of details to it ever since off and on. This will be my first attempt of a T-34/85 of any kind. So lets go take a peek in the box.
Popping the lid reveals documentation and the instruction sheet. Parts molded in Dark Green plastic in separate parts bags.
The instruction booklet has the pic of the tank on page 1.
Paint chart/guide lists the colors recommended to use as well as several vendors available to choose from that carry those paints available. Nice.
Opening the booklet to page 2, starts with step 1 building the lower hull. The back of the booklet shows several marking choices for tanks operating in the N. Korean conflict but also late WWII as there is an option to build an earlier variant within the kit.
Academy also has a warning document that lists do's and don't for novice modelers.
Another document to assure the kit is complete with all the parts to build it, but in case of inspection and you find missing or duplicate parts that may prevent you from completing the kit this will help in getting those parts replaced.
The decal sheet contains the markings for 5 tanks. Rather simple set as these tanks were only painted one color Russian Dark Green. Your choice of which version or scheme you wish to build.
Finally Academy provides a fret of PE for the rear deck screen.
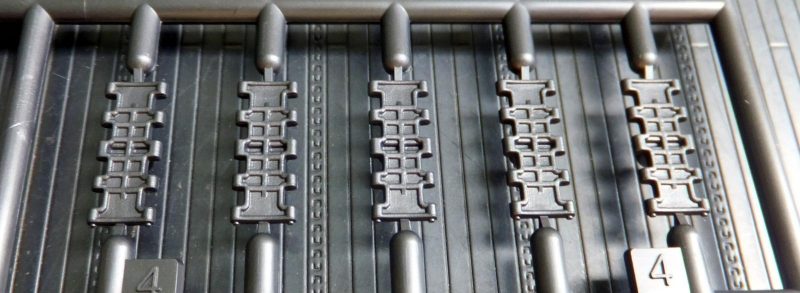
Now to the plastic. The first sprue from the top are the tracks molded in Gun Metal Steel color. No rubber or vinyl tracks, you build the tracks provided in styrene.
-

1. These interlock as the wrap over the drive sprockets
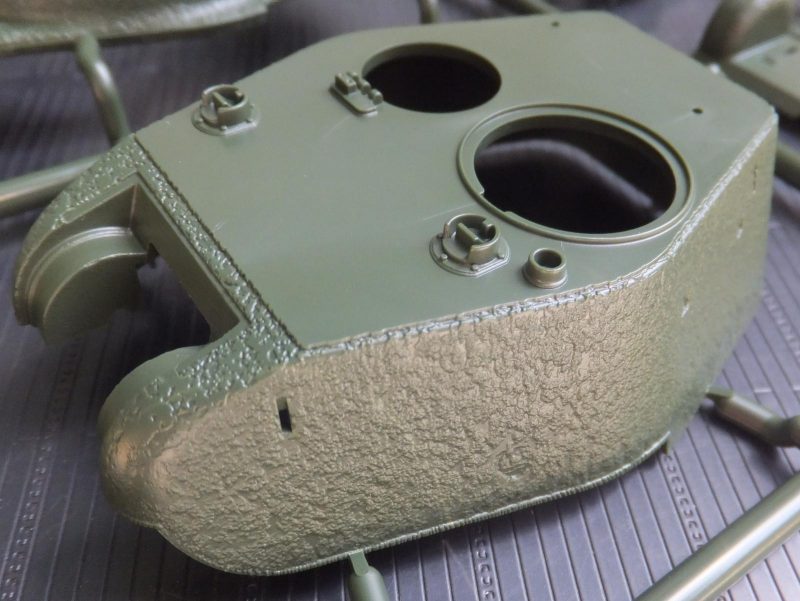
The next sprue contains the late and early turret, rear deck plate, front plate and mantle.
What is cool is the texture on the turret. The first turret is the type used in the N. Korean conflict, the 2nd choice is late WWII.
Academy really put some thought into this with the rough cast texture on the turret and through out other parts of the tank.
-

1. Better view of the texture
2. WWII turret
The front plate also has this feature as well.
The rear deck plate, the mufflers and fuel tanks will hang on this when we get to that part of the build.
The filter covers on the Korean version, these sit on top of the turret.
The next sprue contains. The hatch cupola and the 2 different type of hatches used on the T-34, Korean or WWII Russian. Also the gun barrel is molded as one piece.
The different types of hatches.
Then the WWII style of filters that sat on top of the turret.
The next sprue contains the upper hull and components.
The upper hull is 1 piece and will all kinds of details added along the way. As most of the grab handles, hooks, levers and latches will be added on as we progress along.
Front fenders
The next sprue contains the mutli piece lower hull. A first for me as to date all the tanks I have built the lower hull was a 1 piece tub with some of the suspension molded on already. Not the case on this kit.
The side panel where the suspension will be attached to.
The lower hull panel. The side rails attach to this on each side.
Another set of fender's, apparently as I look at this sprue there are two style of fenders for this tank.
Academy gives you a choice of a molded in plastic rear deck screen or the other choice of attaching the PE screen.
Spare track, machine gun rear mount and headlamp.
The next sprue, 1 of 2 for the Christie style of suspension for the T-34. Has the drive sprockets , shocks and springs. Fuel tanks and upper hull details.
The shock and springs nice details, which you will not see once the kit is assembled.
Set of external fuel tanks.
The idlers nice details on these wheels.
Provided thread for the steel cable, cut to length for on each side.
1 of 5 sprues for various handle details for the hull.
And finally 1 of 4 sprues for the road wheels. Very nice details.
No clear parts.
Next up is to start getting this bad boy together.
more to follow...
1 additional image. Click to enlarge.