USMC M8 Greyhound 1/35th Tamiya

Started by Chuck A. Villanueva · 74 · 2 years ago
  • Profile Photo
    Chuck A. Villanueva said 3 years, 5 months ago:

    Thanks Spiros, the floor is rough will touch it up later on as the build progresses.
    Now to finally complete the basic interior with the radio set. Painted OD with black and silver details.


    Next place it on the shelf on the LH side of the compartment just aft of the driver.

    Now to work on the upper hull plate.

    The upper plate is carefully placed over the interior compartment and locate the end of the steering column in the notch on the lower hull.

    The inside upper surfaces of the plate is OD.

    Now the upper structure is installed.

    Next the engine access door panels are installed. One on each side of the rear deck panel.

    Next up to assemble and install the road wheels.

    More to follow...

  • Profile Photo
    Spiros Pendedekas said 3 years, 5 months ago:

    Wonderful progress, Chuck @uscusn!
    The interior looks amazing, you've done a fantastic job!
    And I love the Tamiya kit as well. Tamiyas are such sweet kits! Ok, not all of them, but most of them, all the new ones included!
    Waiting for your next steps!

  • Profile Photo
    Erik Gjørup said 3 years, 5 months ago:

    Nice interior Chuck. And with the deck on I suppose that'll be yet another milestone passed.

  • Profile Photo
    Chuck A. Villanueva said 3 years, 5 months ago:

    Thanks Spiros and Eric, it will look a bit busier I get the turret assembled and installed. A bit of a ways to go.

  • Profile Photo
    Chuck A. Villanueva said 3 years, 4 months ago:

    Now time to get the wheels assembled.

    Tamiya road wheels are well detailed out of the kit, though are some nice resin wheels available even with snow chains which are a nice touch and also weighted as well. I will stick with the kit wheels. The face is moulded with the well defined tires.
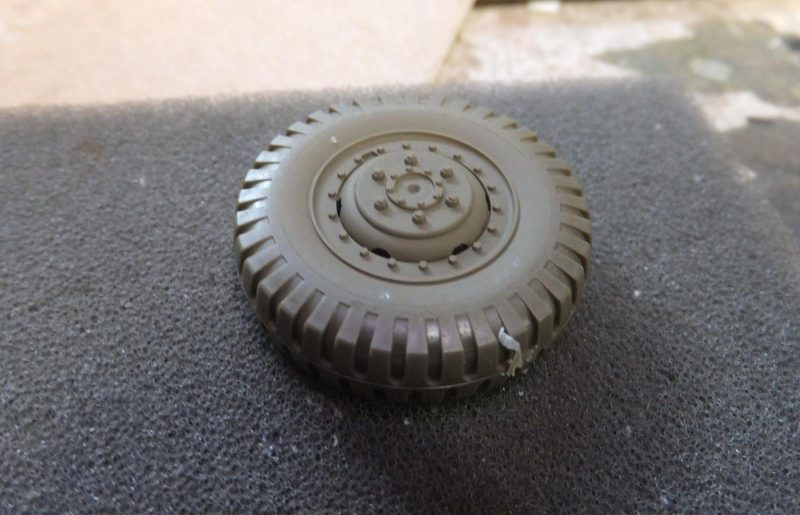
    The back side has a rim and sidewall as a separate insert.
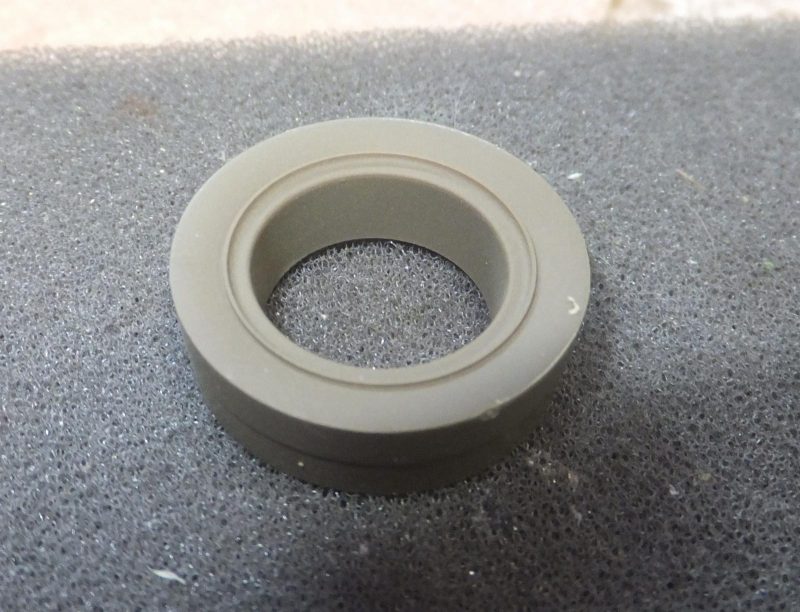
    A polycap will be inserted into the rear center hub of wheel.
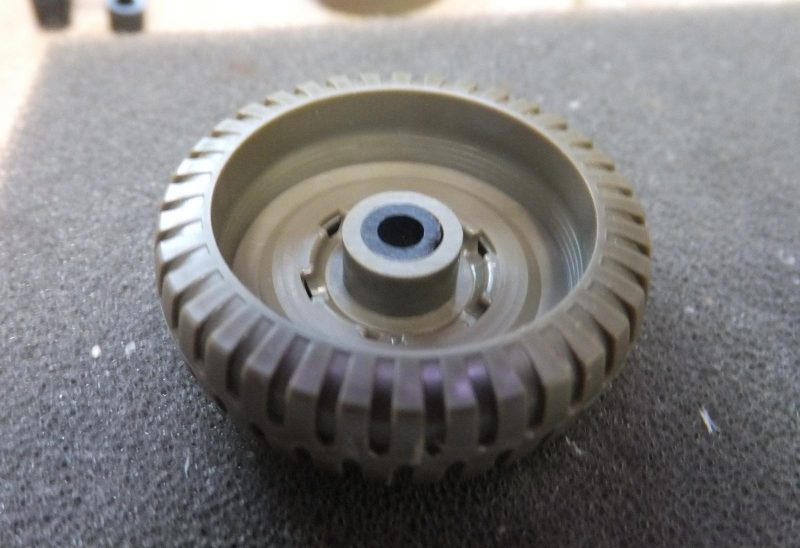
    Next a retainer ring is then inserted.

    Now the rear sidewall and rim is then placed into the back of the wheel.
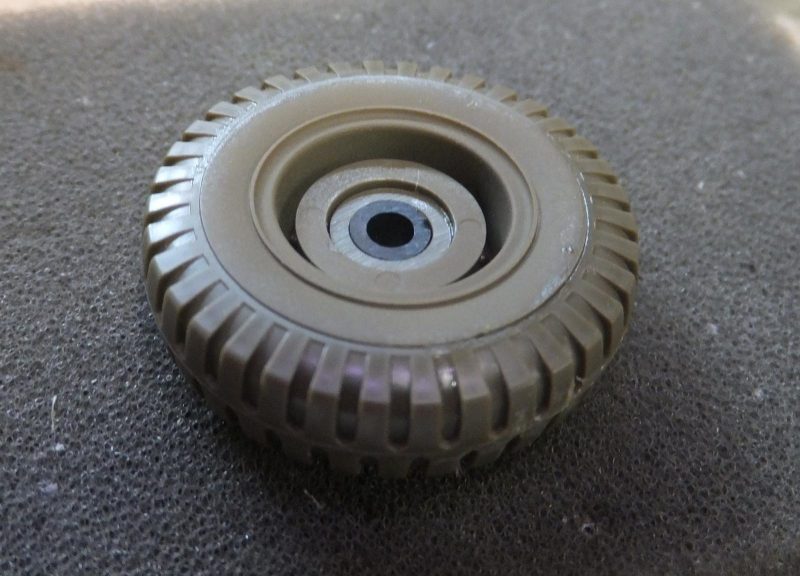
    Finally the backing plate is attached.

    The complete set of 4 rear and 2 front wheels are assembled.

    The tires are then painted Tamiya Tire Black.

    Then all the road wheels are carefully pushed into the axles. Being careful to make sure the front wheels are in front and the 4 rear wheels are in the back. The polycaps assure the right amount of pressure to stay in place, even on the resin front differential.

    Now to install the 2 rear engine vent covers on the rear deck.

    Right before inserting all 6 wheels, I went under the suspension to dirty it up a bit. Using the Mig washes.

    Going over the front rear differentials, transfer case and drive shafts. And over the springs as well.

    Next is to add a bit more weathering and upper deck details.

    more to follow.

  • Profile Photo
    Erik Gjørup said 3 years, 4 months ago:

    The Tamiya wheels look rather good. No need for resin unless you want to go for a ride in the snow I guess 🙂
    Very busy belly you got here Chuck (@uscusn).

  • Profile Photo
    Spiros Pendedekas said 3 years, 4 months ago:

    What amazing looks, Chuck @uscusn!
    Those wheels look really great! No need (for me) for resins, as the weighted effect is usually minimal at this type of tires.
    Your greased/dirtied effect underneath is stunning!

  • Profile Photo
    Chuck A. Villanueva said 3 years, 4 months ago:

    Thanks Eric, the details were quite good for the kit wheels besides the resin wheels available for this kit are quite pricey.
    Spiros, thanks only real good reason would be if your going to do a snow dio type scenario where chained wheels would be considered over the kit wheels. The bottom washes are just a start for now. It does get nasty under these vehicles.

  • Profile Photo
    Chuck A. Villanueva said 3 years, 4 months ago:

    Next to add some details on the upper hull.


    The LH side window cover is attached outside of the drivers compartment.

    Some PE bits on the LH front section, antenna base and an angle brace that the kit does not provide.

    Next the sponson tool box which not all Greyhounds have is attached between the front and rear set of wheels.

    16 additional images. Click to enlarge.

  • Profile Photo
    Erik Gjørup said 3 years, 4 months ago:

    Lots of small details - lots of interesting stuff for the eye in the finished build.

  • Profile Photo
    Spiros Pendedekas said 3 years, 4 months ago:

    It's amazing how all these details transform a good kit into a jewel, Chuck @uscusn!

  • Profile Photo
    Chuck A. Villanueva said 3 years, 3 months ago:

    Thanks Erik and Spiros, the older moulding if I remember correctly had most of the smaller detail parts moulded with the the hull, not separate parts or not included in the kit at all.

  • Profile Photo
    Chuck A. Villanueva said 3 years, 3 months ago:

    Getting back into the Greyhound, more detail parts to add. Starting with the PE headlight guards.

    RH side storage rack is assembled.

    Then attached to the RH center panel.

    Next to prepare and install the front fenders, these were removable on the actual vehicle. A few pics on the web showing M8's and 20's with the front and rear fenders removed or missing, Sometimes just the rear set removed and the the front set still attached or vice versa. Or 1 missing.

    Next the LH rear fender is prepared and installed.

    RH side install of the fenders.

    Next to add more details as we start to work on the turret.

    More to follow...Semper Fi

  • Profile Photo
    Spiros Pendedekas said 3 years, 3 months ago:

    Looking great as it proceeds, Chuck @uscusn.
    Those PE headlight guards rock!

  • Profile Photo
    John Healy said 3 years, 3 months ago:

    Looking good. This is an interesting vehicle.