USMC M8 Greyhound 1/35th Tamiya

Started by Chuck A. Villanueva · 74 · 2 years ago
  • Profile Photo
    Chuck A. Villanueva said 3 years ago:

    This update will complete the interior of the turret and attach the turret gun ring.


    Starting with the ring mount. And 3 support mounts are attached to the ring.

    With the cement not set, the ring is attached in place on the turret. 3 contact points assure a nice fit with no play in the assembly once set in place.

    23 additional images. Click to enlarge.

  • Profile Photo
    Erik Gjørup said 3 years ago:

    That is one very interesting assembly of parts, all coming together to make a nice looking assembled turret.

  • Profile Photo
    Chuck A. Villanueva said 2 years, 11 months ago:

    Thanks Eric, it did at first seem to be quite a bit for such a light recon vehicle, but it is well done and really adds some details to make it look a bit busy.

  • Profile Photo
    Chuck A. Villanueva said 2 years, 11 months ago:

    With the turret assembled. The ring gun mount nice and secured. A once over around the scout car is given. Before installing the .50 cal Browning.
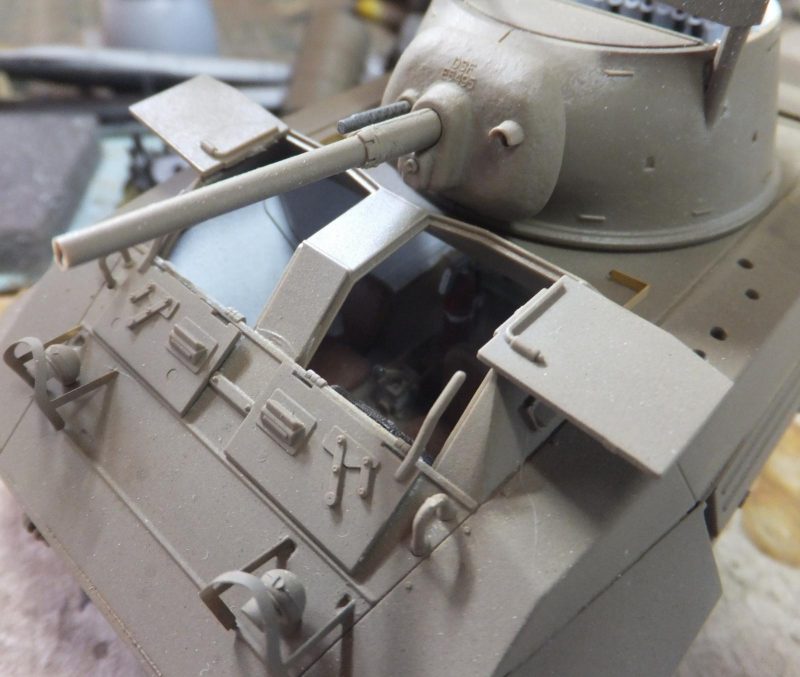

    The Browning is painted then assembled. Using Vallejo Gun Metal. And then going over it with a silver pencil.

    The mount is painted OD, The box of shells is a darker shade of Olive Drab

    The side rails are then mounted on each side of the turret. They were carefully removed from the sprue as they are quite flimsy and fragile. Fortunately they came off the sprue ok, no bends.

    Next the gun mount that rolls around the ring when in use.

    Then attached in the forward firing position.

    The Browning is complete, grip handles attached, they are brown. Belt fed shell canister is attached.

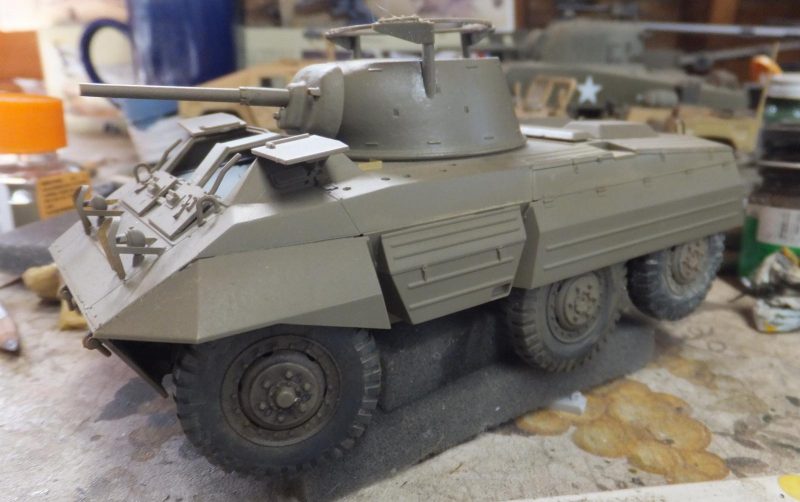
    The .50 is placed on the rear deck for now. Will do some shading over the base coat/

    Some faded OD is misted over the top of the armored car. Hard to tell under the fluorescents.

    Dry brushing over the raised portions with the Faded OD with a couple of drops of white.

    Then over again with a darker shade of od.

    next up a clear coat, then decals,

    more to follow..

  • Profile Photo
    Erik Gjørup said 2 years, 11 months ago:

    Busy indeed @uscusn. Starting to look a lot like a scout car Chuck. Looking forward to the final reveal in the sun so we can see all the effort put into the paint too.

  • Profile Photo
    Chuck A. Villanueva said 2 years, 11 months ago:

    Thanks Eric, almost there, a bit more weathering it after the decal process. With this almost done on deck after the Greyhound. A sneak peek.

    1 attached image. Click to enlarge.

  • Profile Photo
    Spiros Pendedekas said 2 years, 11 months ago:

    Chuck, my friend @uscusn, this looks totally amazing!

  • Profile Photo
    Chuck A. Villanueva said 2 years, 11 months ago:

    Thanks Spiros, now to add some markings.
    Not much in a way of finding any M8 pics serving in Korea, but being part of the !st Marine Tank Battalion they first appeared at Inchon in 1950.


    There are no decals for an M8 in Korea,, so taking the liberty of using decals from Bison Decals of USMC armor that participated in the Korean War. Using the stars and USMC serials to create an M8 in theatre.

    The Marines did like to make sure the markings were clear.

    Once the decals are applied, Vallejo clear flat was applied to seal them.

    Next to add the final details and some weathering.

    more to follow.

  • Profile Photo
    Spiros Pendedekas said 2 years, 11 months ago:

    Looks great in those Marine style markings, my friend @uscusn!
    Looking forward to final steps and weathering!

  • Profile Photo
    John Healy said 2 years, 11 months ago:

    This shaped up fantastic , Chuck. It’s an interesting vehicle and looks like a great kit.

  • Profile Photo
    Chuck A. Villanueva said 2 years, 11 months ago:

    Semper Fi Spiros!

    John it is a fun kit to build, right amount of details, with a bit of help and enhanced with some PE from Eduards.

    After the flat coat is applied, now to add the details. Starting with the pioneer tools. Shovel and axe. These are located on the LH side of the turret.

    The Pick axe is painted and then attached to the RH side of the turret.

    Next the .50 Browning is mounted on the ring. Mix of faded OD is dry brushed around high point in and around the hull and turret.

    Then some extra bags, blankets and bags are painted up and attached around the hull and turret.

    Using Faded OD, Khaki Drab, Dark Od to paint and highlight the details of each item.

    The tent (could be) is placed on the front glacis plate just in front of the headlamp guards.

    Various satchels, personal bags are hung around the turret and on the rear deck.

    Still have some ammo boxes to paint and detail to add, more to follow.

    1 additional image. Click to enlarge.

  • Profile Photo
    Chuck A. Villanueva said 2 years, 11 months ago:

    Now to finish up with some detail bits. First some ammo crates. These are a pair of resin crates.

    First using Dark Brown overall to paint the crates.

    Next Polly Scale wood deck tan thinned is washed over the dark brown.

    Next a dirty wash is applied over the wood tan.

    Then Tan is dry brushed over each crate.

    Then placed on the rear deck of the M8

    The helmet is painted camo. Faded OD is the base for the cover, then spots of OD, DK Green and khaki drab are randomly applied around the helmet as used by the Marine Corps.

    Set of binoculars are painted black and then along with the helmet place on the turret.

    Finally the grab handles and door release handles are prepared before attaching to the rear access hatches..

    3 on each side. are attached to each engine hatch.

    And with that final detail, it's a wrap.

  • Profile Photo
    Paul Barber said 2 years, 11 months ago:

    Brilliant Chuck, just been back through the whole build - a fantastic build log and an outstanding outcome to this project!

  • Profile Photo
    Spiros Pendedekas said 2 years, 11 months ago:

    Congratulations, my friend @uscusn!
    This is an outstanding result, full of details. Loved all those final add-ons!