Tonight was the first time I have had the chance to get anything done on the Ki-44.
I covered the canopy frames using bare metal foil. Once this was done, I went over the frame work, using a "Rosie the Riveter" tool to emboss a fake set of rivets on the frames.
This is how it looked when completed.
The wing structure surrounding the landing light was painted using Tamiya Clear green, over a silver base to replicate the look of Aotake Blue-Green. The actual reflective background for the lens on the landing light was also covered using Ultra Bright Chrome foil. It was installed, and the clear landing light cover was added next.
In all actuality, this area could have been left alone as unpainted bare metal. I'm not 100 percent sure if this location was treated with Aotake preservative or not. I simply did this to have a color contrast between the landing light and the surrounding area. This made the light more observable.
The pitot tube was added, and I used a Molotow chrome pen to accent the tip of the pitot. It's better looking in real life than how it shows in this next photo.
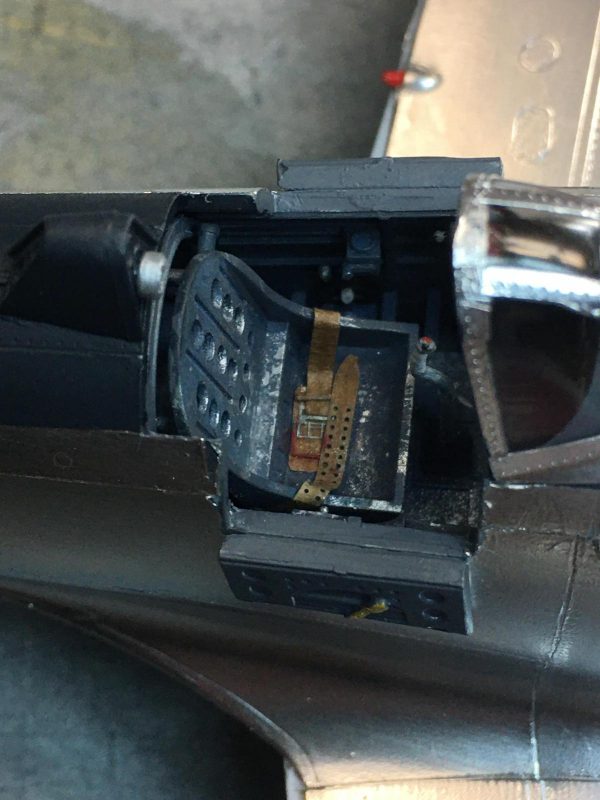
The seat harness was fixed. One side had fallen off during construction. I added it back on tonight, in a slightly different pose. This was a worthwhile investment, as these aftermarket harness kits are highly detailed, and require assembly prior to installation.
-

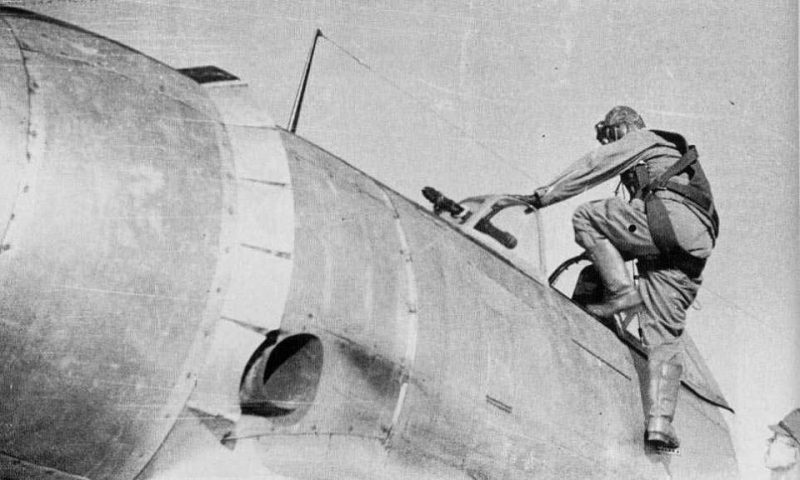
One word of wisdom I should bring up here about the fold down cockpit side doors. From what I have gathered, these doors were most often left in the "UP" or "CLOSED" position. It appears that the only time these doors were down was to perform maintenance, or if they needed to be opened by the pilot in case of emergency, such as when bailing out. They do however allow one to look into the cockpit more easily, and that was the primary reason why I chose to cut them open on this build. If you look for actual wartime photos that show the doors open, more often than not you will see they are closed. I even found a cool picture showing a Japanese pilot entering the cockpit, and as he was doing this, he was actually standing on the top edge of the door to gain entry.
-

I had managed to get some Dark Sea Blue paint over spray on the instrument panel. This happened when I painted the anti glare panels on the fuselage topside. Carefully I soaked a Q-Tip in some paint thinner, then gradually worked away the offending paint deposits until the clarity was restored. This was very tricky, as I was thinking I would destroy the IP decal at any second. I'm leaving it alone now...
The wing mounted weapons were painted and installed, as were the fuel filler cap ahead of the windscreen, and the antennae mast was added as well.
It was time to take some pictures after the sliding portion of the canopy was installed.
Here's another picture using the Monotone filter on the camera on my phone...
The engine didn't show up very well in the first two pictures, so I repositioned the work light on the hobby desk, and took two more photos. Here's the first one.
And another photo using the monotone filter...
This one is almost finished now. I have to add decals to the main gear doors, and paint the navigation lighting. This will be followed by stringing the radio lead from the mast to the tail section. It's so close now...
I still have to paint the propeller. When I do this, I plan on painting the props for the pair of 1/48 scale Hasegawa Ki-45 Toryu's, one for the 1/32 scale Hasegawa Ki-61...and a 1/32 Raiden prop will also be in the mix. These builds are coming up next, so please stick around for these to happen soon. They will be in their own separate build journals, so as not to cause confusion.
Stay safe everyone.
As always, comments are encouraged.