1/48 Fine Molds Ki-10 ”Perry” Biplane

Started by Louis Gardner · 51 · 11 months ago
  • Profile Photo
    Louis Gardner said 3 years, 4 months ago:

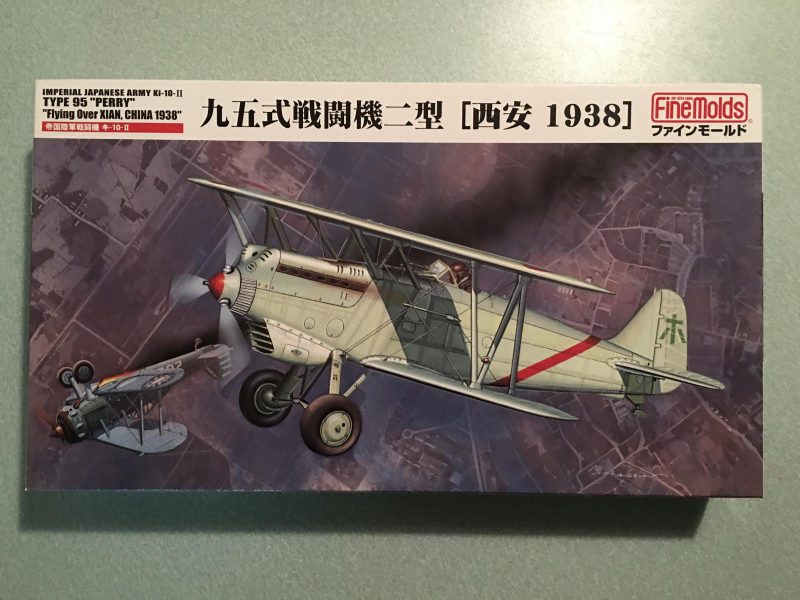
    As luck would have it, I had recently looked at this model and was thinking about building it. But since I have way too many builds already underway, the common sense part of my brain kicked in, and I wisely placed the box back on the shelf... Then, after seeing one of these pop up in the headlines section, it didn't take much convincing for me to pull this one back down, and start cutting plastic. Before I knew what happened, the impulse part of my brain kicked in, and it was off to the races... See what styrene glue fumes can do to you ? 🙂

    I'm happy to report that so far this has been a very enjoyable build. Most of this work was done about a week or so ago. Please follow along and I'll bring it up to speed. Part of the reasoning behind wanting to build this model was that I have several of the Hasegawa Ki-45's and Ki-61's on the work bench. Both of these types use the same color for the cockpit interior. I have seen several of these Ki-10's built on line, and one in particular has a beautifully photographed cockpit, painted in the same "earth brown" color I was going to be using for the cockpits of the Toryu and Hien builds.

    You see where this is going don't you ?

    I wanted to paint the cockpit / interior parts for this Ki-10 model at the same time...and the Fine Molds instruction sheet has these same Earth Brown equivalent color call outs mentioned too. So I thought I was on the right track... But was I ?

    The first thing I did was I went over to Aircraft of Japan and did some reading. There it was discussed on how these interiors were painted. The article then went on to describe the painting process of the exterior, with how three different colors used in series. Sanding was done in between the last two coats, hand sanded in between the coats to get the best possible finish.

    The article went on to explain in good detail how the cockpit interior was painted in a color called #3, "Hai Ran Shoku", or Ash Indigo color. Mr. Millman went on to post up his computer generated color chips of what this color looks like.

    Now armed with some very useful information, I started painting and assembling things, in record time. This color sometimes looks more blue "ish" than gray. It's a custom color that I have mixed up. It's very close in appearance to WW2 German Luftwaffe uniform gray in natural lighting.

    Here's a few pictures of the cockpit as it was being assembled.


    Once installed, not too much is visible of the cockpit. I did go back and add the kit supplied instrument decals after these pictures were taken. It improves the overall look tremendously.


    There's a nice radiator assembly.

    I covered the front and rear face of it with "Matt Aluminum" bare metal foil, then gave it a light wash of black to make the honey comb details pop.


    There's even a neat little coolant pipe included with the radiator.

    Once the radiator and cockpit were installed, the fuselage halves were glued together.


    The rest of the fuselage was assembled, the tail surfaces added, and the lower wings installed.

    This one is going together very fast, and I'm hoping it will be an easy one to paint, using my home brewed custom mix of #1 Hai Ryoku Shoku "Ash Green Color" for the entire exterior of the airframe. You can see a little of this color inside the fuselage sections, near the radiator.

    Who knows ?

    I might decide to paint it in a China camouflage color scheme.

    Time will tell. As always, comments are encouraged.

  • Profile Photo
    Tom Cleaver said 3 years, 4 months ago:

    Another project where I am glad you hauled out your machete and decided to hack a path through the elephant grass. I have this kit sitting on the shelf behind me where I am writing right now, and was planning to it with the A2N3 - until I got bumped by other things. But you doing this and John Healy having done his A2N means I have good "maps to the minefields" available now.

    It's your usual great work. Thanks!

  • Profile Photo
    Erik Gjørup said 3 years, 4 months ago:

    Just to quote you my friend @lgardner:

    Before I knew what happened, the impulse part of my brain kicked in, and it was off to the races……. See what too much styrene glue fumes can do to you ?

    Yet another great project gets squeezed in between others. Strapped in, popcorn ready.

  • Profile Photo
    Spiros Pendedekas said 3 years, 4 months ago:

    Wow, Louis @lgardner, that was a snap! And, what a great one!
    This is a much beloved plane and the kit looks great!
    I love your color research, deep and validated, as usual.
    This will be a stunner when finished.
    Eagerly awaiting your camo choice!

  • Profile Photo
    Louis Gardner said 3 years, 4 months ago:

    Tom, @tcinla
    This is a nice little kit for building. The rigging doesn't appear to be "too bad", but I have had one minor problem so far. It was nothing to do with the kit, and involved a part that went flying across the room. I'll explain in detail in my next update. I am looking forward to seeing you complete your A2N3. John Healy has done a magnificent job with his... I have my machete at hand, but I honestly think a small pair of grass clippers would be more appropriate. This is a fun model to build... Thanks for the compliments.

    Erik, @airbum
    Yes I am just as amazed as you are. See what glue fumes can do to you ?
    If I would have known this plane didn't have the same cockpit color as the Ki-45's and Ki-61 types, it would still be sitting on the shelf... and I would have more time to dedicate to other builds... like the 1/48 Tamiya Mosquito.. Please keep your popcorn handy 🙂 Thanks my friend for the continued support and motivation.

    Did I ever tell you that you are a 109 building machine ? You really are... 🙂

    Spiros, @fiveten
    Yes this little kit is going together very fast ! I also think it's a good looking plane, and it reminds me of an Italian CR-32... probably because of the nose shape and two wings... 🙂
    I try to be as correct as possible when I build my models as far as the color research goes. So I can spend hours digging online looking for various materials. Right now I'm still not sure what color scheme I will be going with on this build. But soon I must make a decision, as this will determine if this plane has wheel spats or not...

    Thanks again everyone, and please stand by for the next installment.

    Merry Christmas !

  • Profile Photo
    Louis Gardner said 3 years, 4 months ago:

    Here's the latest update on the Ki-10 "Perry" from the Iron Werke.

    There is a small gap present on the upper cowl where it meets the upper fuselage decking. In hindsight, I could have pushed this part even tighter against the front, to close up that seam a little bit more. I decided to fill this area in using 0.010 thickness plastic card stock.

    I pressed it in place, and marked the outline with a pencil.


    The plastic was removed and cut to shape using scissors.

    It was then reinserted into the gap on the fuselage. Then it was glued in place and will be sanded down smooth later.

    The left lower wing also had a small gap present where it joins at the wing root. So I simply added a small strip of 0.010 X 0.020 plastic in this area and glued it down too. This did cause the wings to not be in alignment any more. This will be addressed next, and I hope this is an easy fix. Maybe I should have left it alone...

    The fuselage had a very minor seam that ran along a few small places on the bottom of the fuselage. I brushed on some liquefied styrene and this will dry over night. The entire area didn't need filling, it was just easier to do it this way.

    The same treatment was done to the upper rear fuselage deck.

    Had I used more glue during assembly, the excess would have squished out and this problem wouldn't be here. The overall fit is very good. These problems were caused by me and not a fault of the kit.

    The propeller was covered using "Ultra Bright Chrome" bare metal foil.


    The backside was brush painted using Brown. I'll have to go back and look at the bottle, I think I used Model Master Italian Brown enamel for the color.

    Fine Molds has a series of ultra tiny parts that are designed to be glued in place on various locations of the plane. These are rigging terminal ends...


    Did I say they were tiny ? They are also very good at flying... I lost one when I heard a "Zing" as my tweezers closed. After my wife and I both spent several HOURS looking for it on the concrete floor of our garage, it remains MIA to this day.
    The one that was lost was part #G1. You can see it's mirror opposite part G6

    So I had to scratch build a new part... Since it is so tiny, it took me forever to carve and file a new one using a leftover plastic tree from the kit. Here you can see the new scratch built part is glued in place.

    What a chore ! I hope that none of the rest decide to go flying too...
    As always, comments are encouraged.

    Merry Christmas

  • Profile Photo
    Tom Cleaver said 3 years, 4 months ago:

    @lgardner - thanks for the update and the list of things to do slightly differently. I'm taking notes. Good to know you only needed grass clippers. 🙂

  • Profile Photo
    Spiros Pendedekas said 3 years, 4 months ago:

    Louis @lgardner, I saw some great use of sheet and liquefied styrene!
    Nice progress!
    I can see that the garage concrete floor monster is no less unforgiving than our well known carpet monster...

  • Profile Photo
    Louis Gardner said 3 years, 4 months ago:

    Tom, @tcinla
    You will be quite happy with how this kit builds up, once you get to building yours. Other than the small gaps that appear in the one lower wing, and then there’s one along the upper fuselage to contend with, it’s smooth sailing. The wing root gap is most likely me being a numb skull with my gluing technique (or lack there of).

    Here’s a few thoughts about the things I would do differently, if I were to build this one again.

    There’s a small square box that sits on top of the fuselage where the engine would normally be. It’s used as a location device and mount for the upper cowling. If you were to shave off a small portion of one end of that box, closest to the cockpit, then you could shove the upper engine cover more tightly against the front of the fuselage. This part is the one that has the beautifully molded cooling fins on it. The same type of part is found on an Italian CR-32 biplane.

    Then you could use a slightly thicker piece of sheet plastic, ( 0.020 would be my guess), where I installed the gap shim on my model. It’s the cockpit end of the engine cover. If built in this manner, you will have a single gap place to deal with.

    If done properly then I can see how a person can build it without using any filler at all.

    The gaps along the rear fuselage were created by me being too stingy with the glue. Had I used more of it, chances are that it would have squished out of the seams and then it would really be an easy fix with a few swipes of a razor blade.

    If I were to get another one of these little jewels, that’s my method of attack.

    Spiros, @fiveten
    The main reason why I started building models in our garage was simply because of the concrete floor. I figured it would be much easier to find parts that I have dropped. For the most part it has been working. But every once in a while I end up feeding the concrete monster too.

    Here you can see how the liquified styrene is put to good use. I really like this stuff and again I thank you for the tip about it.

    Thanks gentlemen for the kind words and I hope to post another installment soon.

  • Profile Photo
    George Henderson said 3 years, 4 months ago:

    Good progress Louis. I'll have to check out that gloop stuff. Like you and many others, I got tired of those thick attachment points and the pings and ended up buying some Tamiya Fine Craft Saws. These have a very fine blade and you can cut right next to the part. These are also great for clear parts and if done carefully there is no need for clean-up. Since I started using these, no more pings. These are also great for adding panel lines. Lay down some blue masking tape and start gently, adding a bit more pressure with each pass. Sometimes the new panel line is thinner than the ones on the model

  • Profile Photo
    Erik Gjørup said 3 years, 4 months ago:

    I have come to the same conclusion on my builds recently - use more of the thick glue for major assembly. Saves a lot of filling later on. Thank you for sharing everything in this build Louis (@lgardner)

  • Profile Photo
    Louis Gardner said 3 years, 4 months ago:

    George, @blackadder57
    Thank you for providing this information to me. I never knew these micro saws existed. They do look to be quite handy... Thankfully, I was able to get the remaining rigging attachment points installed last night, but I had to be extra careful not to launch another one...

    Erik, @airbum
    I am happy to report that the liquefied styrene has worked it's magic again... and the resulting seams are now perfect. Please stand by and I will explain in the next installment.

    Thank you gentlemen for commenting.

    Merry Christmas to you guys and your families.

  • Profile Photo
    Louis Gardner said 3 years, 4 months ago:

    Here are the results of the work I did last night and tonight.

    The rigging attachment points were cut away carefully from the plastic sprues. Thankfully none of them went airborne this time. Here you can see them installed into the underside of the upper wing.


    The plastic card filler was sanded down to final shape and the surrounding area was polished. While I was sanding things, the Liquefied styrene I brushed on seams last night was sanded down too. It polished out very nicely, and should be an invisible repair once painted. Again I firmly believe this was my fault and not a problem with the kit.

    The landing gear was assembled and glued in place. The wing struts were also glued in place on the lower wings and fuselage. I didn't glue them in place on the upper wing just yet.

    I want to paint the underside of the upper wing separately, and pre paint the fuselage areas that will be hard to get to once the top wing is installed first. Once the preliminary painting is done, I will install the top wing.

    Here you can see the struts and the spinner have been installed. The spinner was only tack glued together, and slightly pressed into position. After painting it will be removed, and the propeller will get inserted into the spinner... Then I will permanently press it back on.


    Here's why I temporarily installed the upper wing. I wanted to be sure the struts fit... and they did , like a glove ! I placed the upper wing in place while the glue dried on the struts. This wasn't necessary however. It would have worked without this additional safety measure.

    Here you can see how quickly this plane has come together. By pressing the upper wing in place, it almost looks finished ! But it still has some work left to do, mainly painting.

    I have to decide if I'm going to be using the wheel set with the landing gear spats or not. Chances are I will be. The kit offers both types of wheels. One set is for a regular wheel and tire assembly, while the other has a set of wheel pants ( or spats or trousers, depending on what you prefer to call them).

    Once the struts had dried, I removed the top wing and glued the radio antennae mast in place. It's located in the center of the wing, slightly offset to one side.

    The box is almost empty now... I'm running out of parts. This one went together very fast, and the fit has been good.

    This is how the Ki-10 looks at the moment... It's almost ready to paint.

    As usual, comments are encouraged.

    Merry Christmas to everyone !

  • Profile Photo
    George Henderson said 3 years, 4 months ago:

    Great job Louis. Looks like one of the easiest biplanes to build. I just used the saw to remove an Avenger turret from the sprues. The cut was so clean that no further clean up was required. As a precaution, I always lay some tape along the clear piece to avoid scratching

  • Profile Photo
    Spiros Pendedekas said 3 years, 4 months ago:

    Louis @lgardner, you are a building machine! You make challenging things look easy and smooth!
    Your Ki-10 looks amazing so far, screaming for some paint!
    Well done, my friend, eagerly waiting for your progress on this beauty (of a plane and a kit).