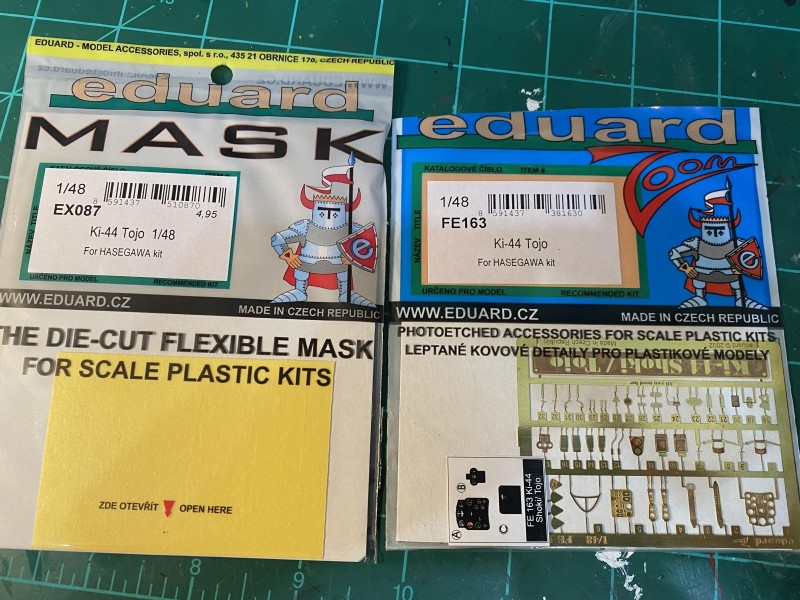
I have had this kit for a while, but I hadn't really wanted to build it until recently. I was looking through one of my references on Japanese aircraft when I found a diagram of an all-black Shoki used near the end of the war. I ordered the stuff that I would need to complete the kit, namely some Eduard photoetch, an Eduard canopy mask, and some Lifelike decals.
Research:
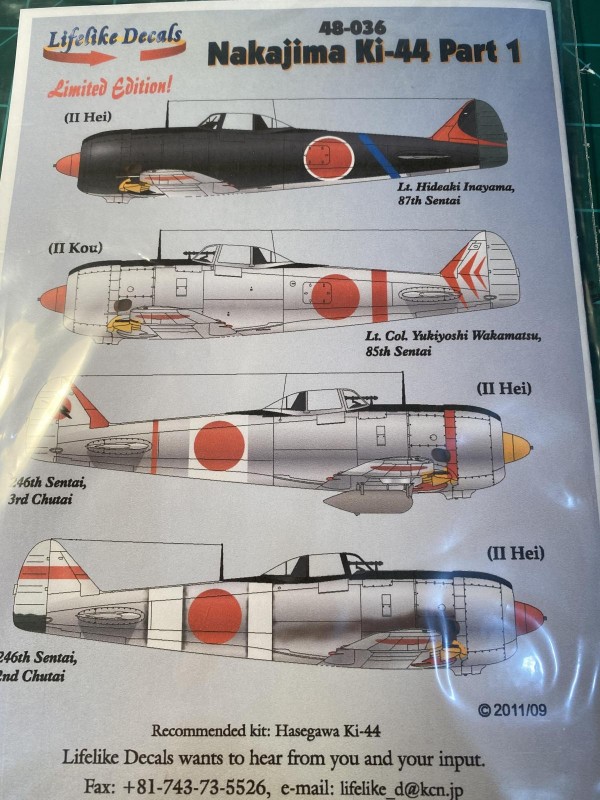
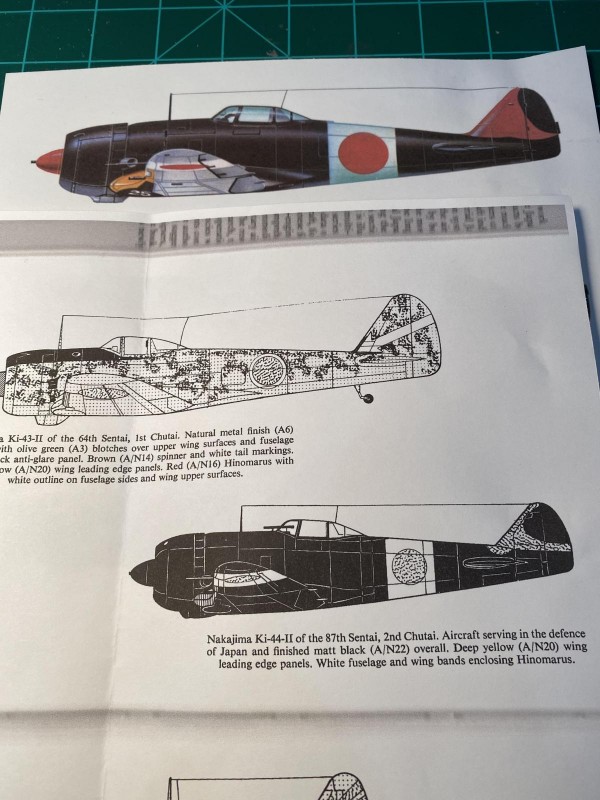
While I was waiting for the add-ons to come in, I wanted to do a little research on the paint scheme. Although I managed to find the same aircraft in several references, it seems there is a lot of uncertainty over the exact color scheme used. All of the sources agree that the plane was flown by Lt. Hideaki Inayama of the 87th Sentai, and they all agree that most of the plane was painted black, but most of the other info is a little fuzzy. One source says that the plane was black overall, including the bottom of the aircraft, and had yellow leading edges. Another source had the same description, except that they say the plane had white bands around the rear fuselage and wings. Another source agreed with everything, including the white bands, except they say it had a light gray bottom. There is information on the instructions that came with the decals that discuss the confusion over the markings. Lifelike says that the pilot was interviewed in the 1960s and thought he remembered a blue diagonal band on the rear fuselage, and possibly some white bands. So there is a blue band included in the decals, as well as white bands for the rear fuselage and wings, although they probably wouldn't have both been used at once. There is also some disagreement where the plane was located when it flew in this scheme. One source says it was flown out of China in 1944 and 1945, while other sources say it flew in this paint scheme while stationed near Tokyo in homeland defense. After all of this research, I decided I would simply take the parts of each paint scheme that I liked and come up with something that I liked and think appropriate. So, my Shoki will be black on top and gray underneath, with yellow leading edges, and white bands on the fuselage and wings. All the sources agree on the all-red tail insignia used on the aircraft. A couple of the sources show the rudder being a dark green color, so I may add that for a little contrast.
-
1. All black, sort of
2. Dark green
-
1. All black
2. Gray underneath
Planning the Build:
The kit is what you would expect from Hasegawa. It is fairly well detailed, with crisp panel lines, and a decent cockpit. Whatever detail was missing from the kit cockpit I figured would be supplemented by the Eduard photoetch, which included a bunch of parts for the cockpit and several parts for the exterior. When I examined the photoetch, I was disappointed to see that the instruments that go in back of the panel are printed on paper, not clear acetate. This is the second Eduard photoetch set that I have used in the last few weeks that used paper to depict the instruments and I was concerned that the paper might not react well to the various finishing and weathering techniques I use for the cockpit. Since both of the sets that used paper were for an older kit, I assume that this was something Eduard did a while ago and have since replaced the paper with acetate.
-
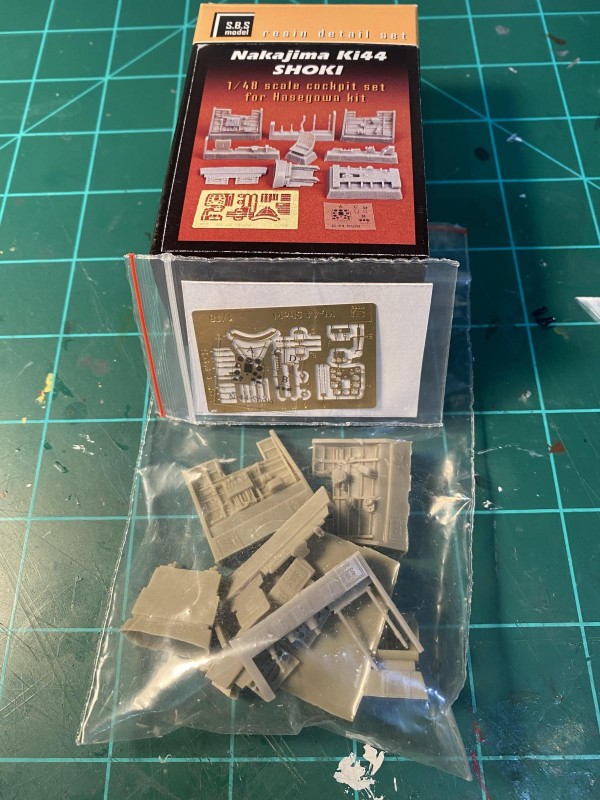
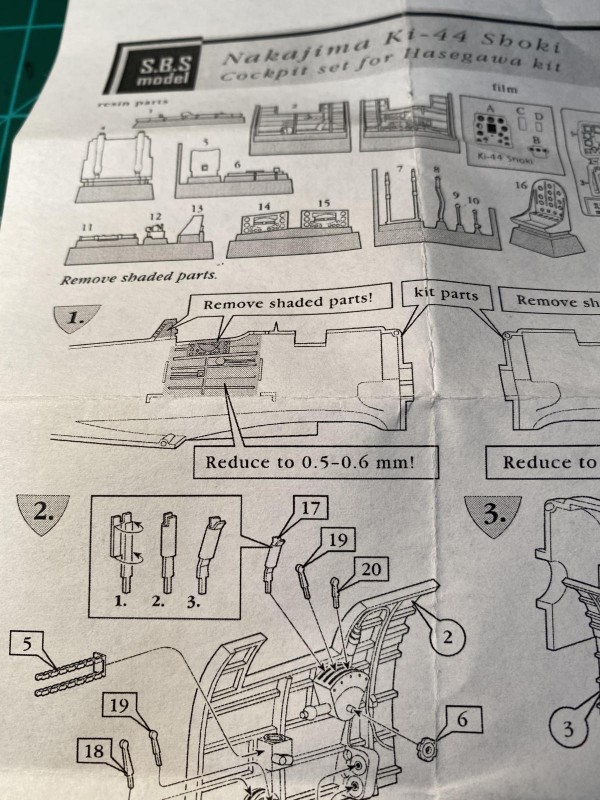
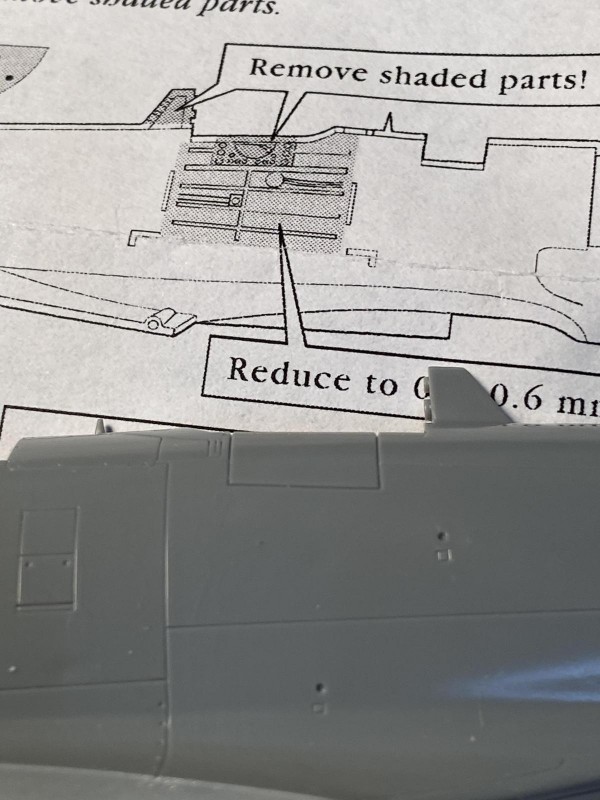
It was about this time that I found a resin cockpit set for the Shoki by SBS Models. It looked very nice online, and the price was right, so I ordered it. When it finally came in, I found that it was worth the wait. The resin is very detailed and should really look great, provided my painting skills don't disappoint. It also included some great photoetch, and some clear acetate instruments (problem solved). One thing did make me hesitate, and that was their instruction that you had to remove the molded-on cockpit details from the inside of the fuselage (no surprise there), but they said that the plastic fuselage walls needed to be ground down to .5 mm in thickness. I don't use metric measurements much, but I knew that .5 mm was pretty thin. I decided to give it a try, so out came my Dremel tool and I carefully managed to bring the walls down to something fairly thin. I don't have a caliper to measure the walls, but my TLAR (That Looks About Right) measurements make me think I am close to .5 mm.
-
-
-
-
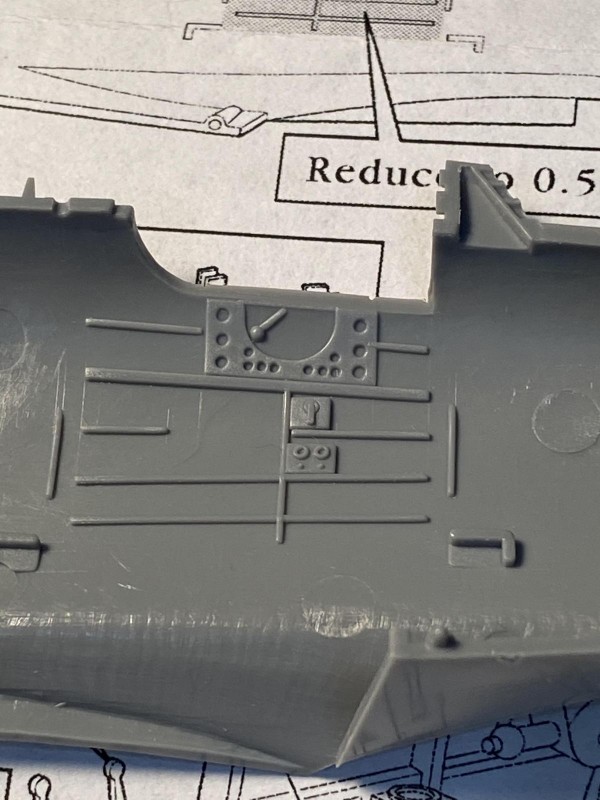
1. Molded on detail, including folding panel
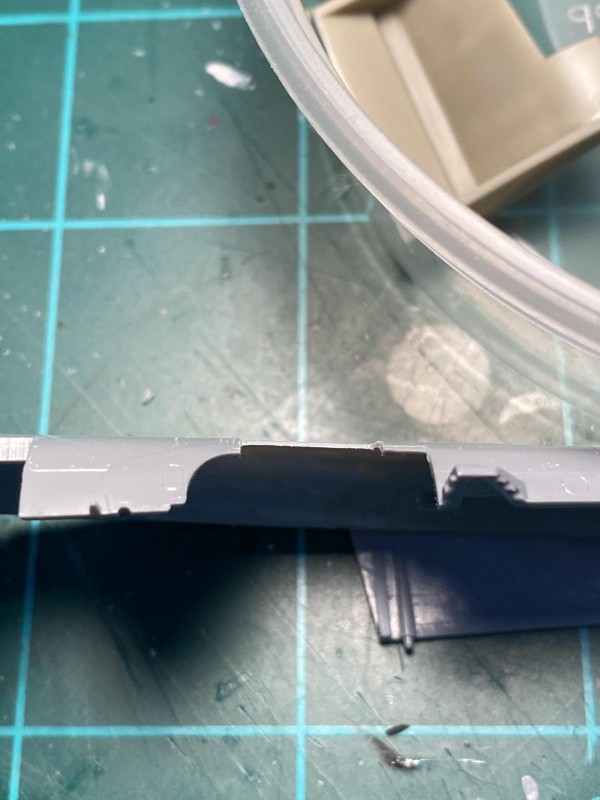
The Shoki also had two panels, one on either side of the cockpit, that would fold down to make cockpit entrance easier. These panels are molded into the fuselage, but are separate pieces in the resin set, so these were cut off with a razor saw.
-
1. Folding panel on exterior
After the grinding session, I went about the job that I hate the most about using resin: removing the casting plugs. My razor saw made pretty short work of this process, and I used a sanding stick to clean up the cuts. I always worry about the sanding dust from this process, which is toxic, but I managed to get the process done with little dust. Probably not a big surprise to anyone, my next building session will be construction of the cockpit.
-
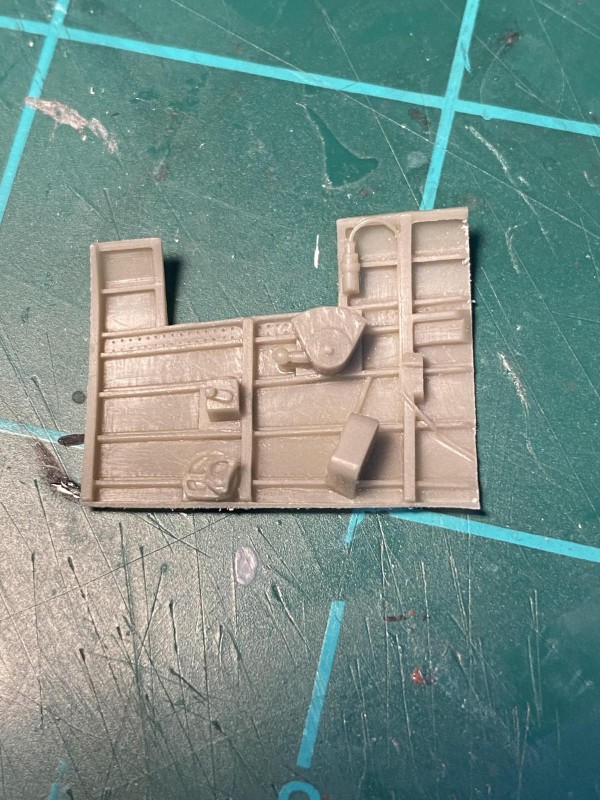
1. Side wall with plug removed
-
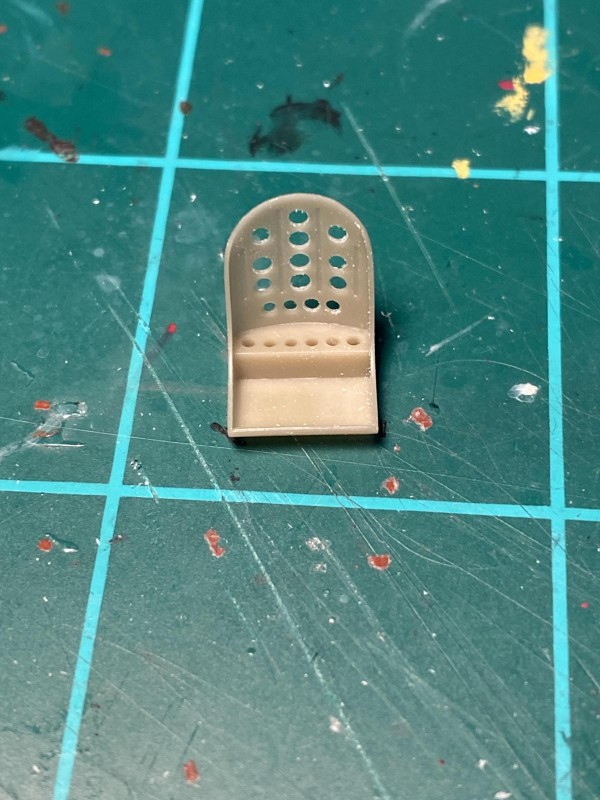
1. Resin seat looks really good
-
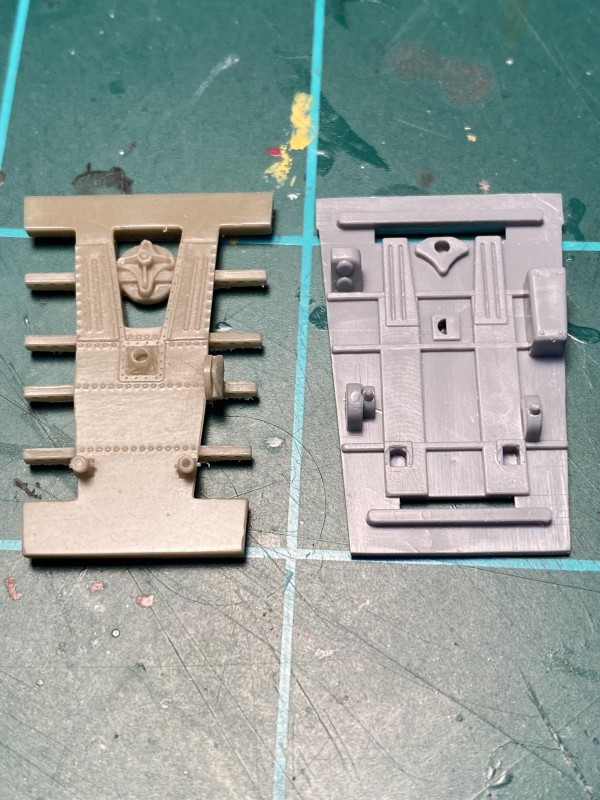
1. Kit versus resin look very different
Everyone stay safe.