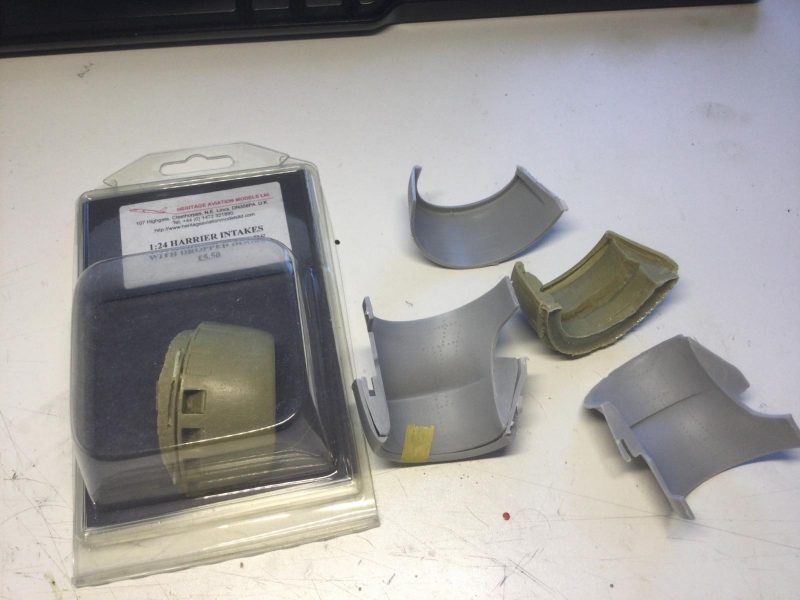
After further thought, I had another look at the Heritage Resin set and finally compared it to the kit plastic. I realized that the cruder parts of the resin intakes were meant to be invisible. Turns out that most of the ugliness of the intakes will be hidden by the kit parts for the front of the engine, which fit inside!
-
1. The front part of the kit engine fits inside the kit intake.
2. The other part is the engine half for the starboard side.
Apologies to the craftspeople at Heritage for dissing their efforts somewhat. There are still some largish issues, like cleaning up lumps of excess resin that block the slotted fit but these are much more easily eliminated than what I originally envisioned.
-
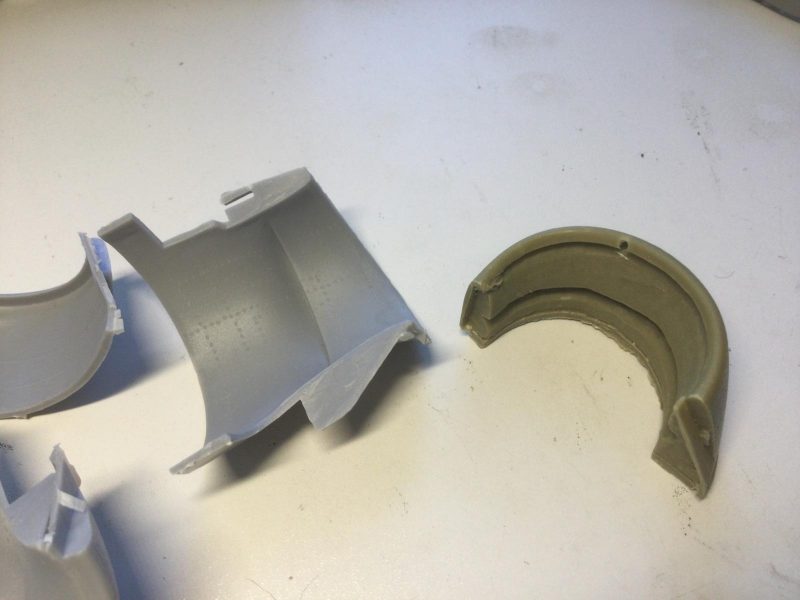
1. Slot here for kit part
2. Ugly lump of resin that blocks insertion.
-
1. I just have to sand/saw this bit out to allow the kit part to pop in and then fill and sand around the edges.
I may use the intakes after all. The intake doors, which also annoyed me somewhat, can be given a little curvature with the couple of passes of a sanding stick. Having dry fitted the major components, I am quite pumped to get this together. Fit is good to excellent for the original GR-3 fuselage and wing components.
-
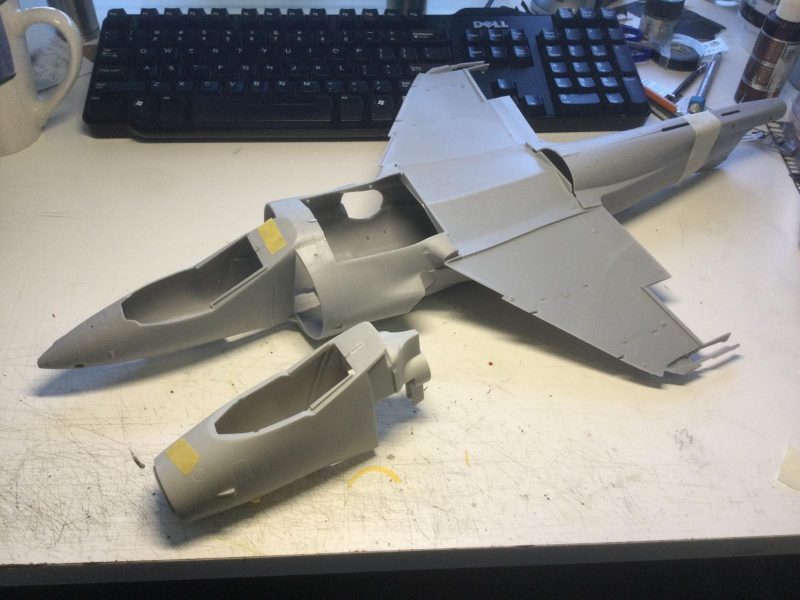
1. FRS 1 part to replace GR3 forward fuselage. I hope to buy another kit and build a 1/24 GR=3 one day. It looks good.
I will start sawing soon to try fitting the SHAR forward section.
-
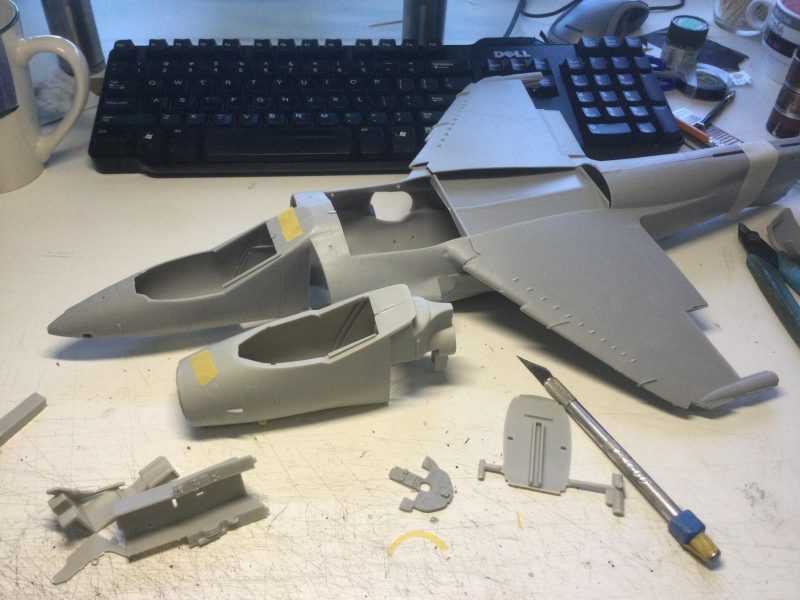
1. The larger components fot the wings just fall together -good alignment and no warping, thank goodness.
I have also been comparing the cockpit components of the Heritage set and the kit. As you can see, the resin seat is clearly based on the kit seat as the central solid piece. One problem with the resin seat is that it has a number or air bubble worm holes that make it look like its been eaten a bit by moth grubs.
-
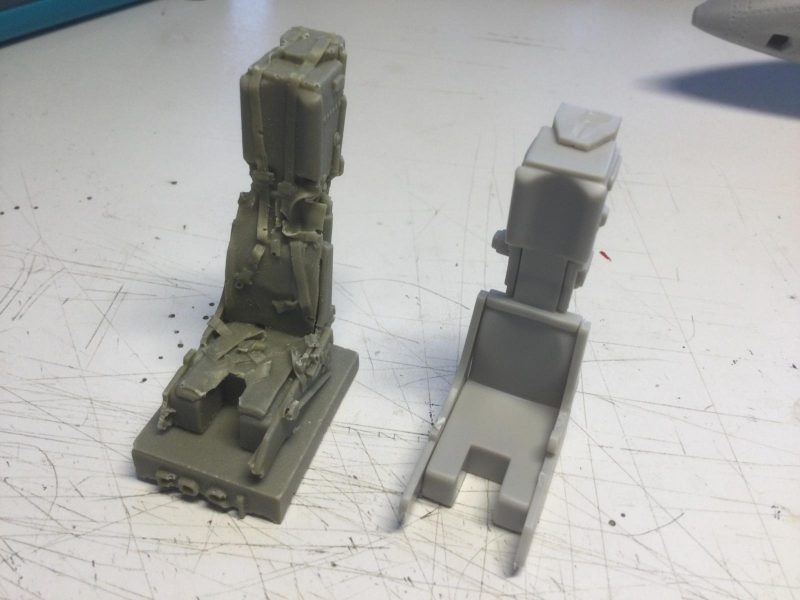
1. Moth holes from air bubbles in headrest, belts pads, etc. - many in awkward to fill places
-
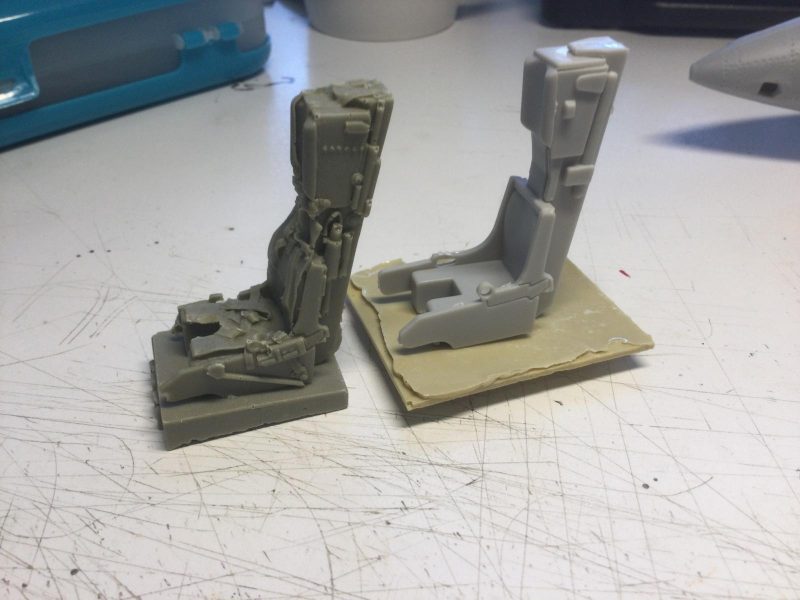
1. I can add my own details and paint as I go, thus avoiding the trickiness of painting tiny details already in place.
These would be hard to fill. I will go with my plan to build up the kit seat using styrene sheet , milliput, paper and spare parts, and do the belts with photo-etch, masking tape and paper. I think I can do just as nice-looking a seat, if not better minus worm holes, especially if I study my references carefully. I also have a bunch of ejection seat decals in 1/32 that should work for 1/24 pretty well when used selectively.
The side consoles on the resin pit are nice but I don't like the lumpy bits of excess resin. I may be able to clean it up quickly.
-
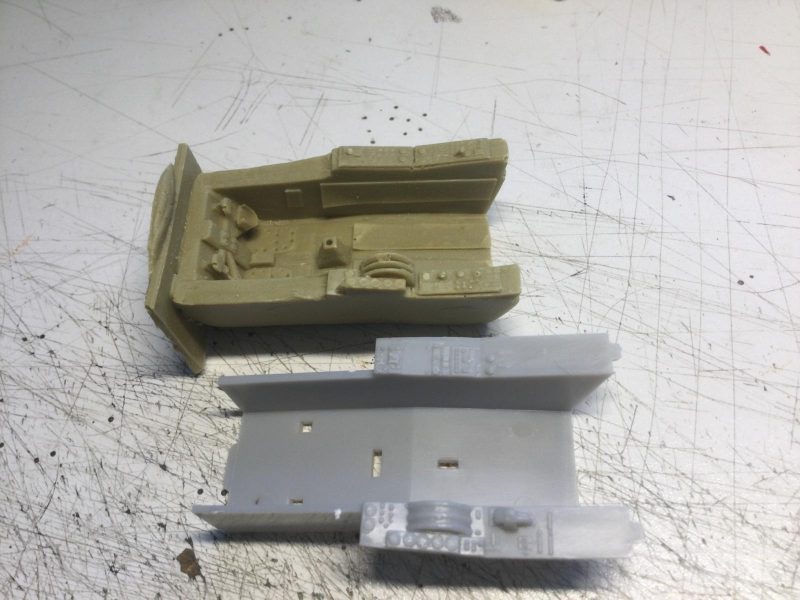
1. More resin lumps and chunkiness in parts - not good because too visible in 1/24, I think.
Painting and decaling will be key to how it looks. I will have parallel pits going for a while until I decide which works better.
Anyway, good to see that the kit looks like it will assemble pretty fast, fit wise, with lots of super visible detail. There is definitely something to be said for huge models when your eyesight is failing somewhat. I hope this is interesting for you. Next time I post, it will be with some actually assembly and painting done, promise 🙂