BAE Sea Harrier FRS 1 - 1/24th Scale

Started by Colin Gomez · 27 · 1 year ago
  • Profile Photo
    Colin Gomez said 3 years, 8 months ago:

    This is my second proposed build for this topic.

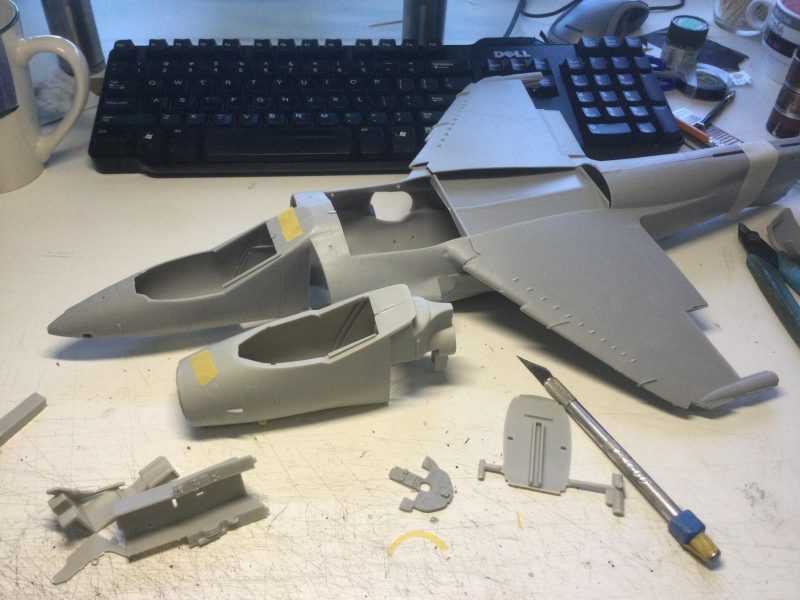
    The actual kit is in my garage at the moment and I will have to pull it out to share the details inside the box. . This is a bit of a monster and will no doubt be on and off project for the year. Nonetheless, it is one I've been looking to do for awhile. I have an aftermarket canopy and will do some scratch building for the cockpit. I don't intend to display any engine detail through open panels, so that will simplify things. It will need some re-scribing and filling work but I hope it will be otherwise simple enough. Certainly an attractive aircraft for me and a great historical subject.

  • Profile Photo
    Spiros Pendedekas said 3 years, 8 months ago:

    Hi my friend @coling!
    First, congratulations on the conception f this GB!
    Such a great idea!
    Second...Wow! an 1/24 Airfix Sea Harrier! Now, that's a monster!
    Built by you, I can foresee an masterpiece coming along!

  • Profile Photo
    Erik Gjørup said 3 years, 8 months ago:

    The SHAR is such a beaute. Looking forward to it, not least in that scale! Bring it on!

    Thanks for the invite by the way.

  • Profile Photo
    John Healy said 3 years, 8 months ago:

    That’s a big one! They are very impressive when competently built. I’m sure you’ll do it justice. Too big for me, but I’ve been thinking of doing a couple 1/48 Harriers in the near future.

  • Profile Photo
    Colin Gomez said 3 years, 8 months ago:

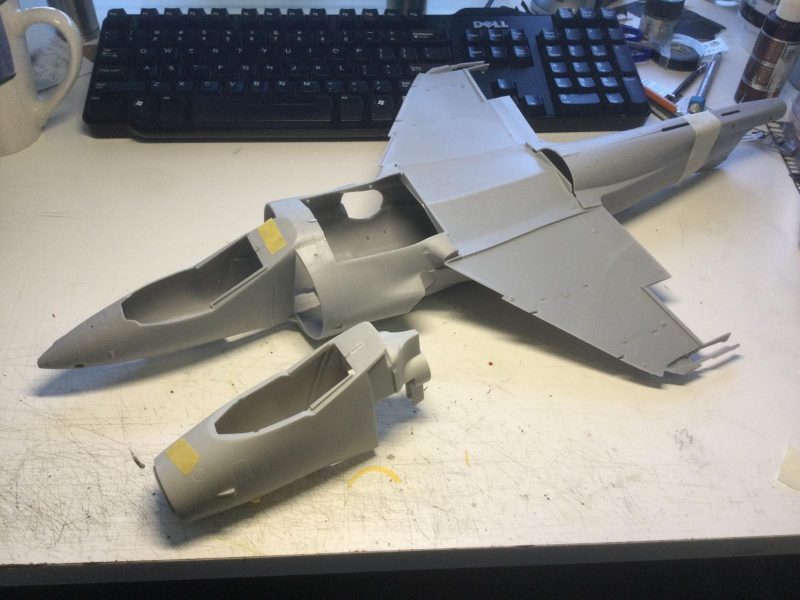
    Thank you, Spiros, Erik and John and welcome to the Group Build! Glad you like the big Sea Harrier. Large as the Airfix SHAR is, it is actually nearly the same dimensions as my 1/32 Tamiya Phantom II. This means it will easily go in either of two display cabinets I have. As I Iook at the model now, I see the main challenge will be filling in and smoothing out the overdone rivet detail. This is really unavoidable, given that the new nose you need to graft onto the the old GR 1 kit is completely smooth and almost devoid of riveting.

    Filling rivet holes is something I have never done before and it had put me off till now contemplating putty dust. Lots of wet sanding then (chin up). 🙂 Anyway, on further thought, the detail doesn't have to be completely erased, just toned down so we will see how that works out. The other challenge will be the auxiliary intake doors. These have always looked neat to me and should be fun to do at a large scale. I will have to go from this: to this: Once again, other modelers have risen to the challenge, so we will see.

    Here is an interesting first hand account of SHAR action against FAA Skyhawks. One of my builds against the other. The video isn't the greatest but the first hand narrative is gripping.

  • Profile Photo
    Adrian Starling said 3 years, 8 months ago:

    Colin, I am looking forward to following your build with interest. Glad to see another 1/24 monster on iM!

  • Profile Photo
    Colin Gomez said 3 years, 8 months ago:

    Thanks, Adrian. I am glad to get going on this. It is a nice kit at a reasonable price, all things considered. Welcome aboard the Group Build!

  • Profile Photo
    Spiros Pendedekas said 3 years, 8 months ago:

    Those are some obvious rivets, my friend Admin @coling!
    Since you've decided to fill them, there's some serious job ahead!
    However, in full confidence, I state that your skills will produce a masterpiece and I look forward to it!
    This is going to be some BIG bird!

  • Profile Photo
    Greg Kittinger said 3 years, 8 months ago:

    Great video! I'm also thinking a Sea Harrier for one of my builds.

  • Profile Photo
    Erik Gjørup said 3 years, 8 months ago:

    It sounds like a great plan Colin to just nearly fill the rivets. With a hunch of filler and some primer, paint and some clear coat, I think you are on the right track.

  • Profile Photo
    Colin Gomez said 3 years, 8 months ago:

    Thanks, Spiros, Greg and Erik. Glad you liked the video, Greg. Jet combat requires incredibly fast decision making. Hearing a pilot's first-hand account like this really evokes the terrifying challenges involved. For the same reason, I have always liked the History Channel's Dogfights series, even if the CGI is pretty crude sometimes. Too bad they don't do actual history anymore on that channel.

    I have been digging up my resources for the Sea Harrier. To my surprise i found I had a very good book reference and a full detail set.

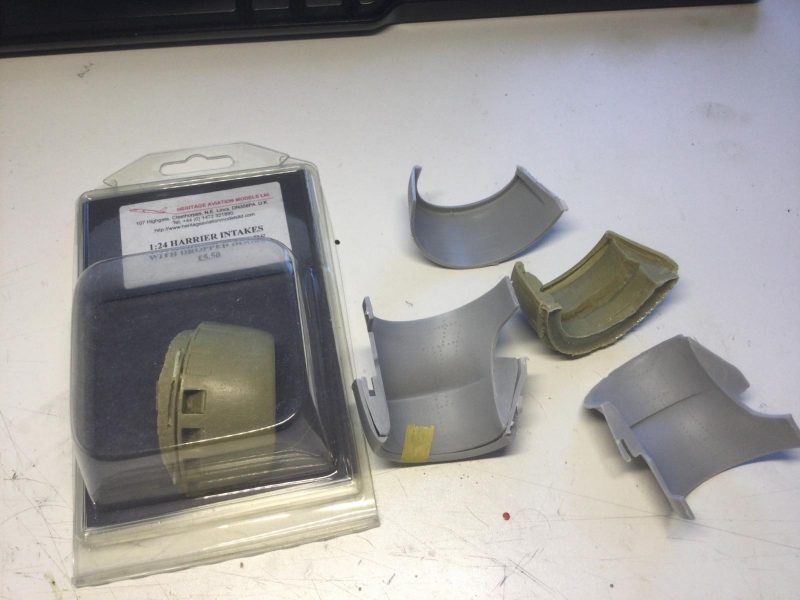
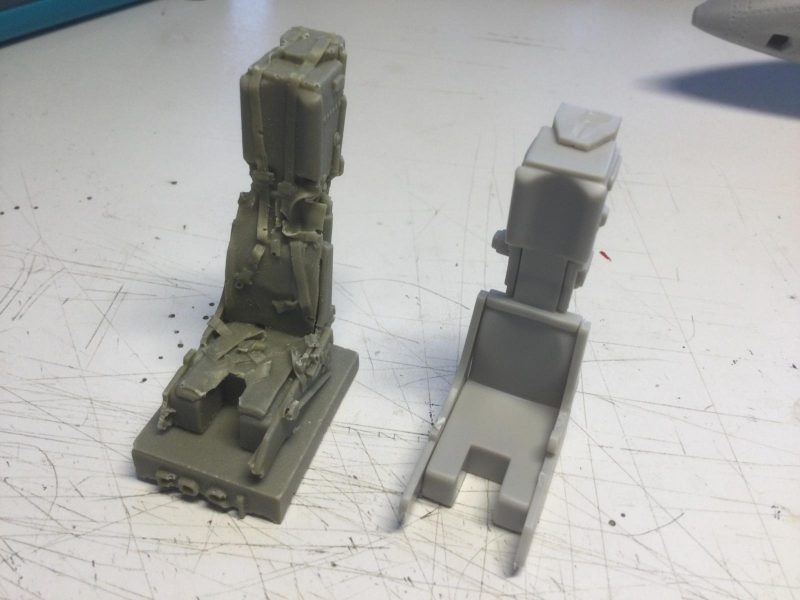
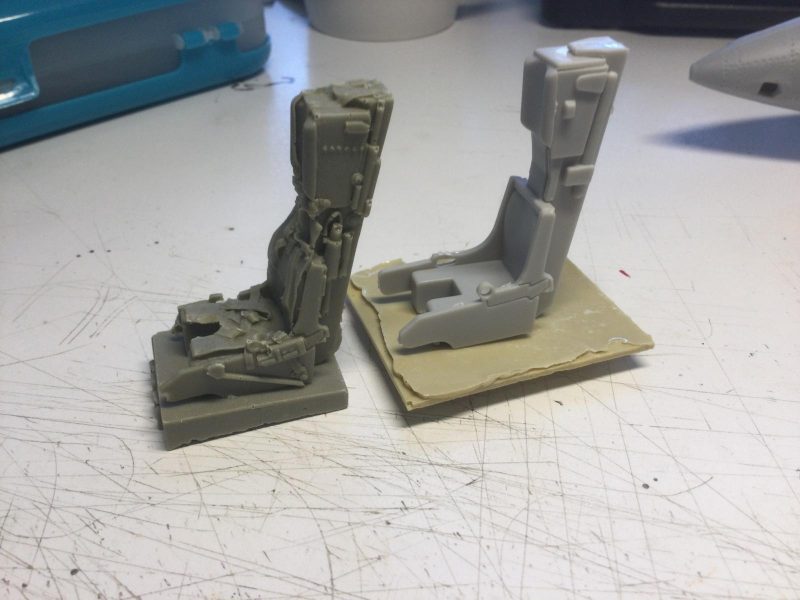
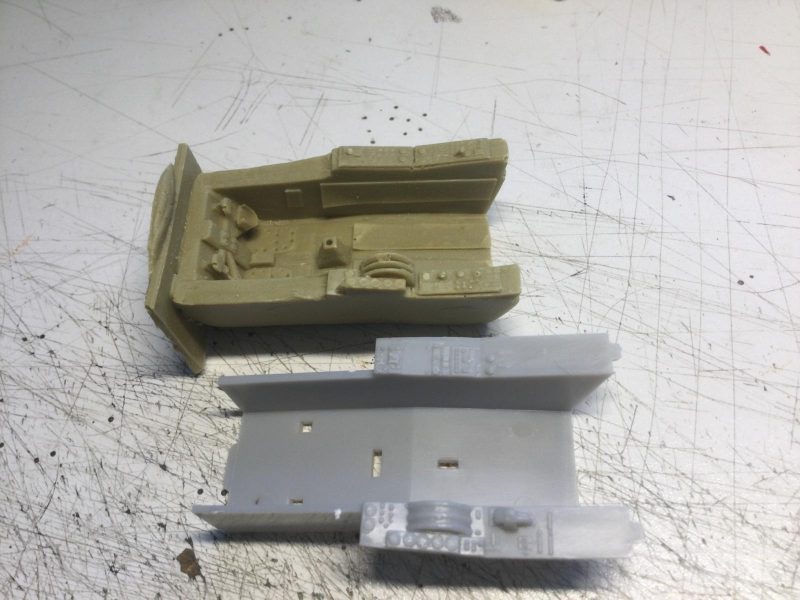
    I remembered having the vac canopy but not the whole resin cockpit set. Also encouraging, at first, was the intake set with dropped doors. On closer inspection, I see they are probably unusable (which is probably why I forgot I had them). Amongst other things the inside of each intake is a mess. I don't want to fill all of this (especially with Miliput, which I think is the main option. I hate sanding the stuff). Another issue is the intake doors, which don't curve enough to follow the curve of the intake. I will use the intakes as a partial guide to create my own, but I don't want to install these. As for the resin cockpit, it looks pretty good. Here are a few major components. I will probably use most of the bits but will need to add punched out decals for the instrument panel. The seat is nice but I may also give this a pass. I am always hesitant about resin ejection seats and I might also do my own here, with this as a partial reference. I like to layer on the seat elements, painting each separately for more realism. Just painting complete resin seats makes me feel like I am cheating with one of the most visible parts of the model. . I think I got the whole set on sale a while back, otherwise it is hard to explain why I purchased it, given my building preferences.

    Anyway, I am moving along with this project. More to report once I get parts trimmed from trees.

  • Profile Photo
    Spiros Pendedekas said 3 years, 8 months ago:

    Well, This looks like an exceptional book, @coling!
    Yep, the resin intakes look great upon first look, then, something to be desired is evident...
    Looking forward to see your seat (though, I admit, the resin one looks yummy!)

  • Profile Photo
    Paul Barber said 3 years, 8 months ago:

    1/24! Epic!

  • Profile Photo
    Colin Gomez said 3 years, 8 months ago:

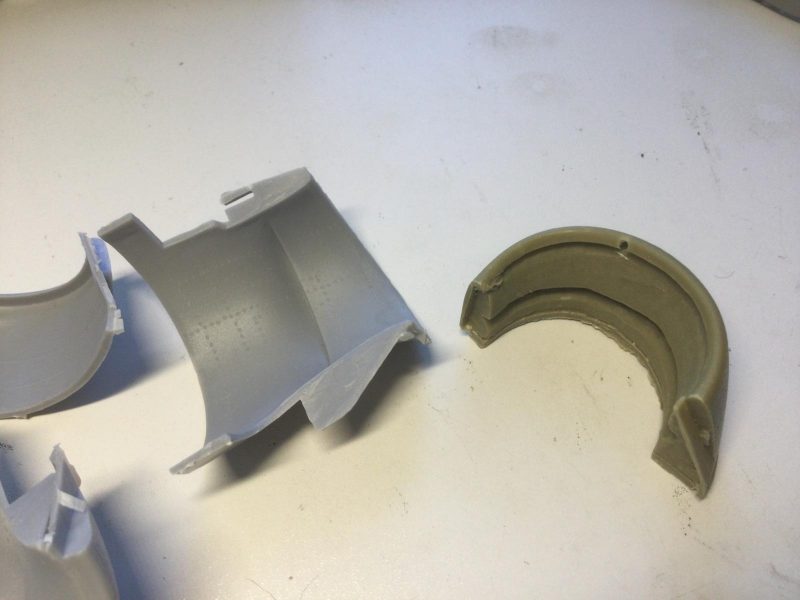
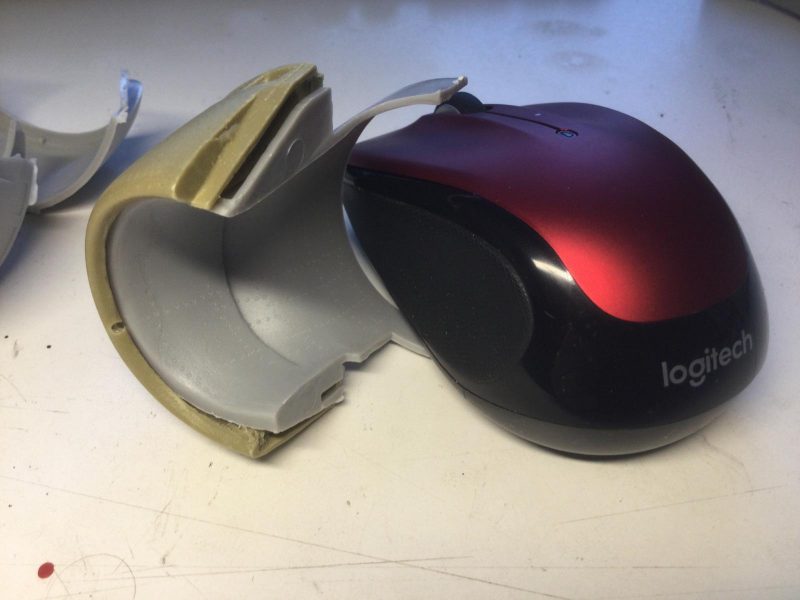
    After further thought, I had another look at the Heritage Resin set and finally compared it to the kit plastic. I realized that the cruder parts of the resin intakes were meant to be invisible. Turns out that most of the ugliness of the intakes will be hidden by the kit parts for the front of the engine, which fit inside!

    Apologies to the craftspeople at Heritage for dissing their efforts somewhat. There are still some largish issues, like cleaning up lumps of excess resin that block the slotted fit but these are much more easily eliminated than what I originally envisioned. I may use the intakes after all. The intake doors, which also annoyed me somewhat, can be given a little curvature with the couple of passes of a sanding stick. Having dry fitted the major components, I am quite pumped to get this together. Fit is good to excellent for the original GR-3 fuselage and wing components. I will start sawing soon to try fitting the SHAR forward section. I have also been comparing the cockpit components of the Heritage set and the kit. As you can see, the resin seat is clearly based on the kit seat as the central solid piece. One problem with the resin seat is that it has a number or air bubble worm holes that make it look like its been eaten a bit by moth grubs. These would be hard to fill. I will go with my plan to build up the kit seat using styrene sheet , milliput, paper and spare parts, and do the belts with photo-etch, masking tape and paper. I think I can do just as nice-looking a seat, if not better minus worm holes, especially if I study my references carefully. I also have a bunch of ejection seat decals in 1/32 that should work for 1/24 pretty well when used selectively.
    The side consoles on the resin pit are nice but I don't like the lumpy bits of excess resin. I may be able to clean it up quickly. Painting and decaling will be key to how it looks. I will have parallel pits going for a while until I decide which works better.

    Anyway, good to see that the kit looks like it will assemble pretty fast, fit wise, with lots of super visible detail. There is definitely something to be said for huge models when your eyesight is failing somewhat. I hope this is interesting for you. Next time I post, it will be with some actually assembly and painting done, promise 🙂

  • Profile Photo
    Erik Gjørup said 3 years, 8 months ago:

    Thank you for this thorough presentation and your thoughts on the items - always nice to se a fellow modeler check things for you 🙂