1/72 Fine Molds Ki-100-1a

Started by Magnus Fridsell · 68 · 9 years ago · Japan, Ki-100
  • Profile Photo
    Magnus Fridsell said 10 years ago:

    Sorry for not answering @editor: mostly ruler! But it works quite well freehand as well, especially if you have decided where to go before starting... I think that freehanding a whole wing for example would end up in a mess of planless crisscrossing 🙂 !

    Tonight's update:

    Interior finally painted! My usual strategy: even if it isn't detailed, it should LOOK detailed!


    And finally our poor cousin, the OTHER fuselage half!

    Regards

    Magnus

  • Profile Photo
    Simon Whitney said 10 years ago:

    Looking really nice Magnus.
    Glad that you enjoyed your visit to London.

  • Profile Photo
    Magnus Fridsell said 10 years ago:

    Thanks Simon! London is always super, I have been there a lot in the 1990s but this was the first time with my kids!

    Regards

    Magnus

  • Profile Photo
    Jaime Carreon said 10 years ago:

    Wow! Now I'm jealous. That's a good looking cockpit...

  • Profile Photo
    Gregor d said 10 years ago:

    Looks like there's plenty of detail in there to me! Try building old Airfix 1/72 for no/little detail. The Ki-100 is looking great to me Magnus, keep up the good work.

  • Profile Photo
    Magnus Fridsell said 10 years ago:

    Jaime and Gregor! Thanks!

    I think the weakest part of the model is the lack of exhaust pipes and I planned to rebuild them from the start. Today, finally the Albion brass tubing I ordered for the project arrived in the post.


    I made a simple "tool" to be able to press the round tubing into an oval section with consistent results for all the exhaust tubes. A taped piece of plasticard limits the closing of the pliers.

    I started by rolling the tube gently under the scalpel, scoring marks at even distances around the tube. I then pressed the tube to an oval section and finally broke the tube into short pieces, the scores acting as break lines.


    Tubing in the pliers!

    In order to get some margins for adjustment I glued the tubes using epoxy, it gets you some much needed time to get everything lined up before setting compared to super glue.

    And the final result take 1...


    ...and take 2! I'm very pleased with myself 🙂 !

    Regards

    Magnus

  • Profile Photo
    Simon Whitney said 10 years ago:

    Nice Magnus, nice. Thinking out side the box.

  • Profile Photo
    Magnus Fridsell said 9 years, 12 months ago:

    Simon! Thanks!


    Wing to fuselage fit is less than excellent... I went for this solution, we'll see how it turns out! Will fill the leading edge with Milliput before going to bed tonight!

    Regards

    Magnus

  • Profile Photo
    Magnus Fridsell said 9 years, 11 months ago:

    Sorry for the delay but I have been moving my photo library (almost 1 Tb worth of photos from twelve years of digital photography) and I didn't want to mess around before everything was up and running again!
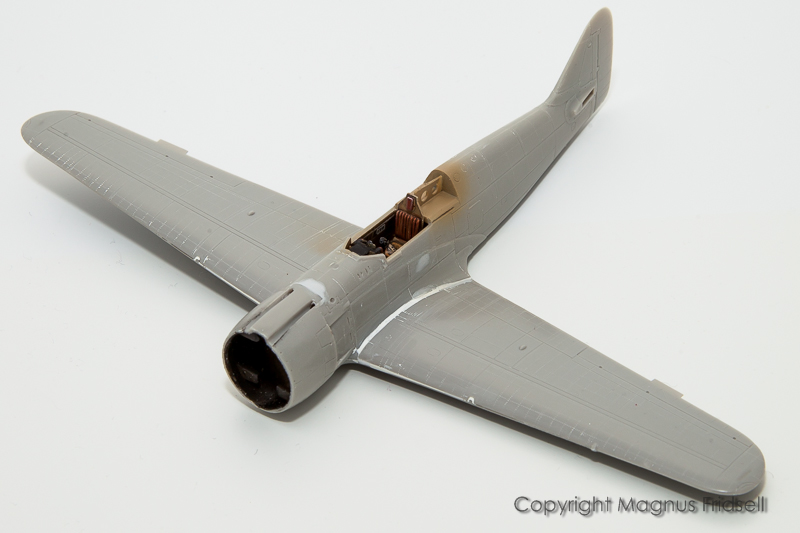

    That wing leading edge and wing root joint was just a minor problem. Milliput made my day (once again!)!
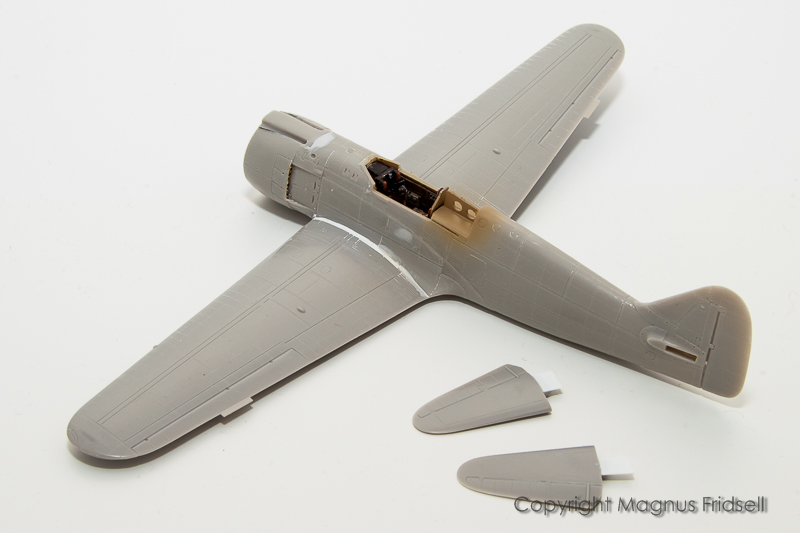

    Stabilizers ready for attachment. Another part that needed a bit of adjustment to fit!
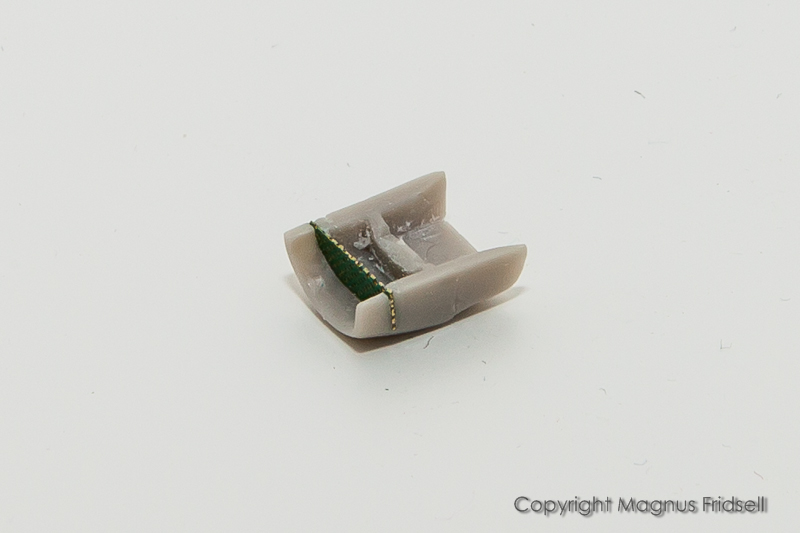

    Nose intake dressed up using some left-over PE. I made a cut using a razor saw almost through the part, slid the PE in place, soaked the edges using CA glue and trimmed the excess and sanded smooth. Easy-peasy!
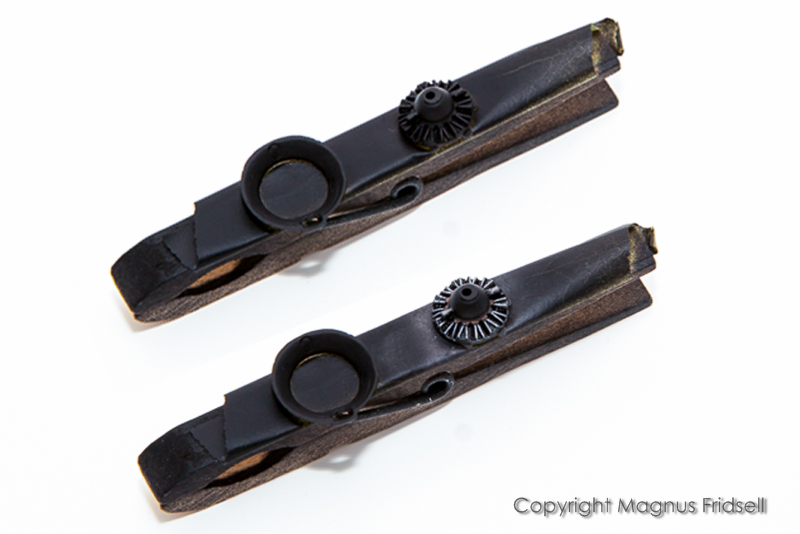

    Composite image of engine showing it before and after detail painting. If using silver and copper pencils is allowed to be called "painting"... An easy trick that I will try to use more in the future!
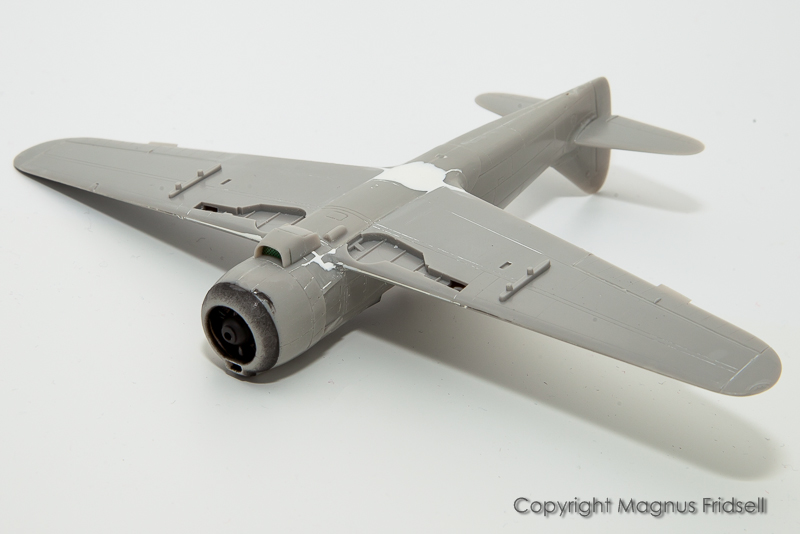

    And finally the model with the intake installed!
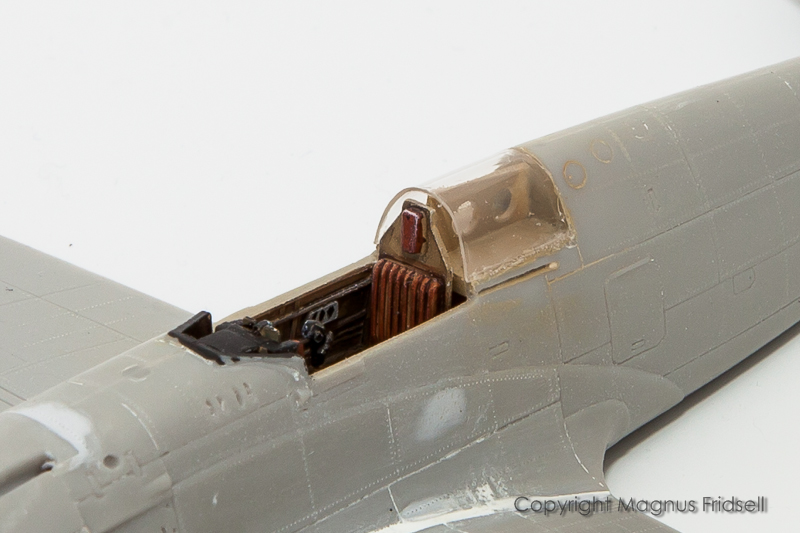

    Oh, I almost forgot! Rear part of canopy has been installed, and it reminds me why I utterly dislike vacform canopies. They are hard to glue (no, it doesn't work with white glue, it simply doesn't bite good enough and epoxy is all rubbery and impossible to sand afterwards and the bloody CA fogs the plastic and isn't really that strong even if it sounds like that) and difficult to sand and polish. This one was finally installed using Humbrol Clearfix (the least bad of them all: less weak than white glue and bites better into the plastic, not as rubbery as the epoxy and not as generally abominable (never thought I would need that word) as CA glue) with the remaining crevices filled using CA (couldn't stay away from that stuff anyway...). In short: vacform canopies don't pull my strudel. Not at all...

    Regards

    Magnus

  • Profile Photo
    Simon Whitney said 9 years, 11 months ago:

    OK Magnus we wont pull your strudel mate , but I think that fixing any clear parts to be a pain at times, I have been using Revells Contacta Clear. It`s a mix of P.V.A and C/A. It does the job but slow.
    Your build is looking really cool and I cannot wait to see it posted in Headlines.

    Simon.

  • Profile Photo
    Editor said 9 years, 11 months ago:

    You confirm my feelings about vac canopies. The only way I even found to make the vac canopy seam look good is trimming it to a drop-fit to eliminate any need for filler (which is quite difficult) and then fixing it in place with Future (which will fill in the seam).

    Very creative way of making these exhaust stacks.

  • Profile Photo
    Magnus Fridsell said 9 years, 11 months ago:

    @superfreak Simon! So there is one thing that I haven't tried yet then 🙂 ! I'll see if I can pick up some Revell glue somewhere 🙂 !

    @editor Martin! Let's have a canopy workshop and a few beers, preferably at the same time 🙂 !

    Magnus

  • Profile Photo
    Magnus Fridsell said 9 years, 11 months ago:


    On the IPMS Stockholm forum (crossposting in Swedish, have a look, might be interesting 🙂 ) someone asked what kind of pencils I was using for the engine. They are Derwent Metallic pencils that I bought many years ago for doing chipping, which I found to be difficult at best. Since then they have just been laying around in my rather full "redundant tool's box" but this time they came in handy. As usual: never throw anything away (or in this case, more likely, hand it over to the kids 🙂 ).

    Regards

    Magnus

  • Profile Photo
    Gregor d said 9 years, 11 months ago:

    Wow, Magnus this project is really taking off, great attention to detail with the exhausts, and I enjoy seeing your problem solving for those unexpected fit or lack of detail issues. I look forward to your next instalment 🙂

  • Profile Photo
    Jaime Carreon said 9 years, 11 months ago:

    Looking good, Magnus, can't wait to see the finished model!

    Re your canopy - if you can find it, try some RC-56 cement, made by JZ Products. It's a white glue made specifically for attaching canopies. I used it first on my RC airplanes and found it works just as well on the plastic ones. It dries clear, and gives you some working time before it dries. It's also pretty good for filling the seams between clear and solid parts, and it is paintable.

    BTW - after a couple of beers, everything looks better! 🙂