1/72 Fine Molds Ki-100-1a

Started by Magnus Fridsell · 68 · 9 years ago · Japan, Ki-100
  • Profile Photo
    Magnus Fridsell said 9 years, 11 months ago:

    Gregor! Here it is (that next instalment πŸ™‚ )!

    Jaime! I'll see if I can find some RC-56!

    I now remember that a few years ago I used and epoxy product called J-B Weld that worked very well. An strong epoxy that set hard, not rubbery. I'll have to find a new pair of tubes!


    Windscreen freshly glued!

    I split the sliding part of the canopy from the windscreen, the fit gets a bit more forgiving then. I've also masked some of the clear parts using BareMetal foil as ususal. Painting is slowly creeping closer...

    Regards

    Magnus

  • Profile Photo
    Jaime Carreon said 9 years, 11 months ago:
  • Profile Photo
    Gregor d said 9 years, 11 months ago:

    Coming along nicely Marcus, neat filling on that wing joint πŸ™‚

  • Profile Photo
    Magnus Fridsell said 9 years, 11 months ago:

    Jaime and Gregor! Thanks!

    Tonight I have a little party-trick to show. Or at least a masking trick but that might be more appropriate around here πŸ™‚ ! Hang on!

    A few years ago I bought a box of plastic erasers, I suppose I meant to use them the common way: for erasing... However, since most of my work nowadays is done in 3D in the computer (all erasing done electronically, simply great πŸ™‚ ), they just sat there until I figured out that they could come in handy for modelling.

    Since then, I have used them in all kinds of ways, the two favourite ones being cutting them into custom-made contoured sanding sticks for those hard-to-reach places and for masking.

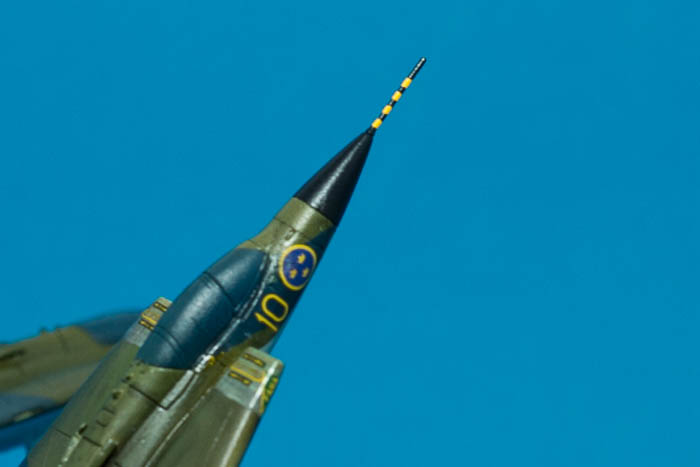
    First time I tried it was on a 1/144 scale Draken, a lot easier than to mess around with tape in this size!


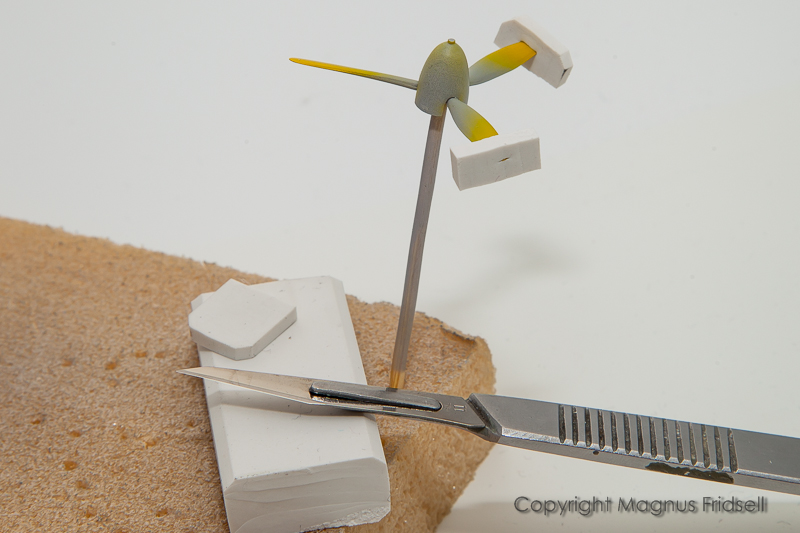
    Cut an even slice of eraser the width you would like your prop tip bands. Make a slit through it with a scalpel blade (backing the eraser with your thumb will offer a nasty surprise by the way...) (Slicing the eraser to measure makes it easier to judge the width of the band since you just stick the blade through the slit until it is level with the outside of the masking slice but I suppose the eraser can be cut wider and the distance to the edge of the band can then be measured from the spinner out as well!)


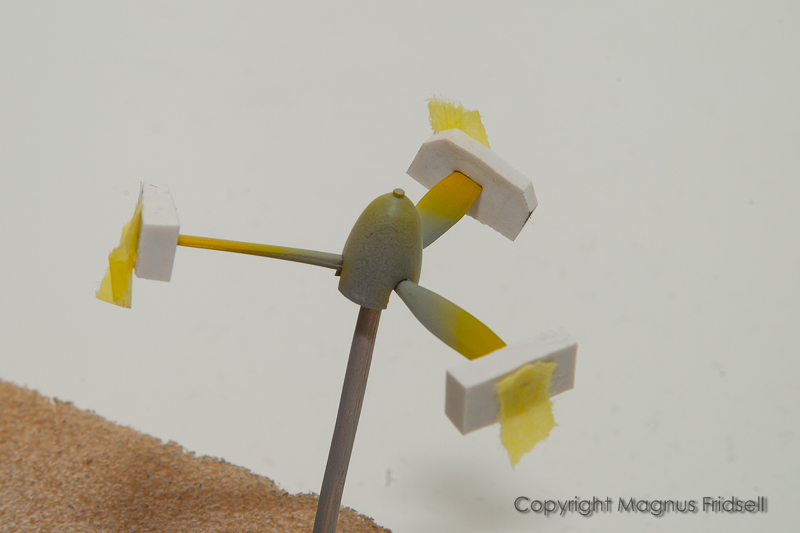
    I suffer badly from paint paranoia: I add bits of masking tape to protect the tips of the prop. Even if I paint carefully I am convinced that I would end up with brown-edged prop tips if I didn't add the tape...


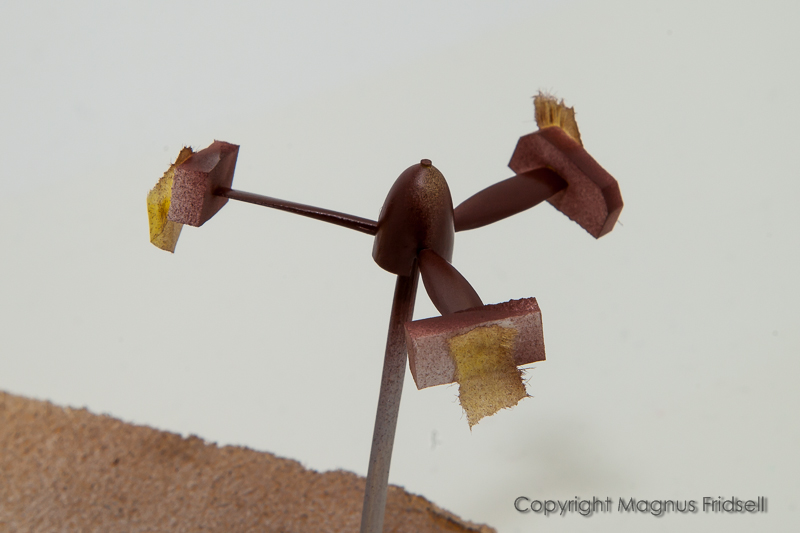
    Painting. I consider this method quite safe but I do try to avoid spraying straight towards the intersection between the eraser and the prop blade.


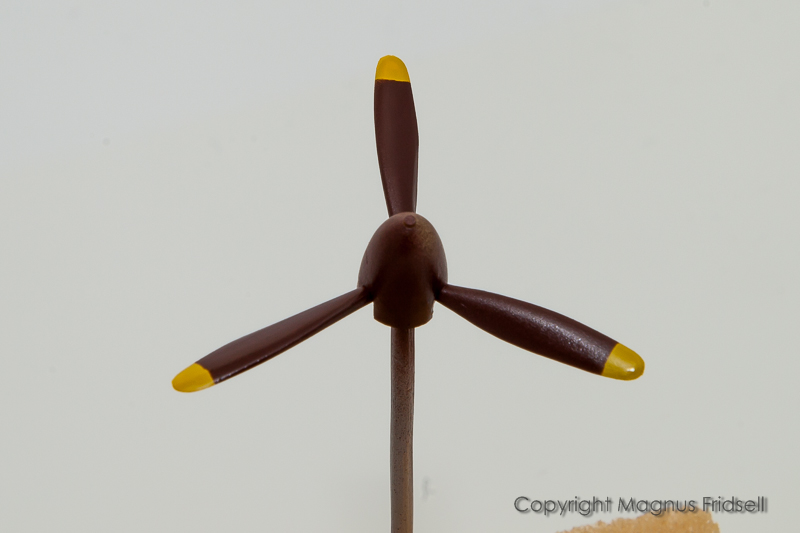
    And the final result! Fairly even but maybe a bit wide, I'll have to adjust this later.

    Regards

    Magnus

  • Profile Photo
    Magnus Fridsell said 9 years, 11 months ago:

    Some minor detailing done yesterday.


    A new antenna post instead of the plastic one that I cut off early in the project. This is made from 1/0.8 mm diameter Albion Alloy aluminium tubing that I pressed flat using a pair of pliers and then sanded to a slight wedge shape. I avoided pressing the lower end so that I could mount it in a 1 mm hole drilled in the fuselage spine. Aluminium is very pliable and easy to handle.


    Another use for Albion tubing, this time brass. There will be one final section inserted after painting forming a full pitot tube assembly. The hole in the leading edge to the right was just a test... OK, I admit it, I managed to drill in the wrong spot...

    Neighbouring sizes fits into each other making this kind of work a breeze. Cutting is done by carefully rolling the tube below a scalpel blade and then simply snapping it. In 99% of the cases I get a perfectly square and clean cut, if there are any burrs they are easily removed using the tip of a drill.

    Regards

    Magnus

  • Profile Photo
    Magnus Fridsell said 9 years, 9 months ago:

    A long summer with plenty of travelling and a weather simply too hot for modelling has taken its toll on progress. Now things are finally back to normal. What worries me is that there are only two weeks left for the group build...


    A bit of Tamiya rattle can silver...


    ...as a basis for future chipping using hairspray and/or salt...


    ...and a painted spinner! That red looks a bit too bright for being Japanese but I can always tone it down during weathering.

    Regards

    Magnus

  • Profile Photo
    Simon Whitney said 9 years, 9 months ago:

    Looking good Magnus, I like the trick with the plastic eraser!
    Another way of masking I suppose.

  • Profile Photo
    Gregor d said 9 years, 9 months ago:

    Great to see you back Marcus! More fine work. Keep it going πŸ™‚

  • Profile Photo
    Jaime Carreon said 9 years, 9 months ago:

    Looking good, Magnus. Can't wait to see the finished model!

  • Profile Photo
    Magnus Fridsell said 9 years, 9 months ago:

    Friends! Good to see that I still have some followers left despite my rather irregular posting (and building πŸ™‚ ) habits!

    I had a painting session this Friday with quite some progress...


    Salt chipping, tried it out on my old Tempest wreck before going live on the Ki...


    ...and this is what it looks like after a coat of paint. Salt doesn't stick very well...


    ...while we are at it anyway, let's mask some hinomarus... Compass cutter for cutting circles in masking tape and a further quick coat of green to seal the edges...


    ...before applying some white as a base...


    ...for some read. Maybe I should have gone for some other undercoat (yellow?) since the red looked rather pink at first...


    ...but after a few thin coats it turned an acceptable red...


    ...quite classy really!

    Chipping is (as usual) a bit over the top (and then I haven't even brushed away all of the salt πŸ™‚ ) but I will try to tone it down later on. I also realised that one of the secrets of using salt chipping is applying the water using an airbrush so that you get an even mist of water covering the surface, a paintbrush doesn't work!

    The Japanese green (that looks rather dark in the photos) was a story in itself: it is mixed straight from the Fine Molds mixing recipe using only primary colours. A rough equivalent is said go be Gunze H60 but I didn't have that one in stock.

    Regards

    Magnus

  • Profile Photo
    Magnus Fridsell said 9 years, 8 months ago:


    Another quick painting and masking session saw the lower surfaces finished. When I for some reason (intuition maybe?) checked the instructions (afterwards of course) I realised that it really should be silver/NM below with only the control surfaces in my carefully mixed underside colour. With the risk of offending the real Japanese aircraft enthusiasts I have decided to leave it as it is anyway! I have to admit that if it had been RAF or German I probably would have repainted...


    I'll go for masked hinomarus on the fuselage sides as well, this time they have an offending white border though!

    I started by cutting the big circle out of tape using a compass cutter. I then added another layer of tape on top of the finished first one and cut the smaller circle, carefully aiming for the previous center hole with the cutter. I then used a pair of scissors to cut the masks (with big and small circles still stuck together) into suitable sizes, finally separating them and attaching them to a plastic bag. I hope that I will be able to use the edges from the scissor cuts for centering.


    Big masks (yes, I have double-checked πŸ™‚ ) attached and waiting for a sealing layer of green around the edges, then some white.

    Regards

    Magnus

  • Profile Photo
    Magnus Fridsell said 9 years, 8 months ago:

    And this is how it all ended, fuselage hinomarus and yellow leading edges finished tonight. A few more fuselage stripes to paint and then on to a few decals!

    Regards

    Magnus

  • Profile Photo
    Magnus Fridsell said 9 years, 8 months ago:

    I will continue to experiment with salt. I will probably try using crushed flake salt next time to get more of the irregular effect that I am after. I looked in the flake salt jar at first and just thought "nah, too big", it never occurred to me that it is perfectly allowed to crush the flakes for modelling use πŸ™‚ !

    Now on to the model with all the painted-on markings finally done!


    It didn't end with the hinomarus, it had of course to have a few ribbons around the rear fuselage as well... The lighter tape is Jammydog masking tape that I put as a ruler where I want the ribbon, the yellow is Aizu Micron Masking Tape. Jammydog is a bit stiffer and less sticky so it has a tendency to go "spoing" on curved surfaces.


    I've weeded away the "ruler tape" and this is the actual masking...


    ...filled in using Parafilm (non-sticky and paint safe, I use a lot of that stuff!) followed by a quick run over using the background paint and then on to the white...


    ...and the final result with the masking tape used in the foreground!

    Regards

    Magnus

  • Profile Photo
    Bernd MΓΌller said 9 years, 8 months ago:

    A stunning build, with lot s of great ideas. The amount of details you put in this little kit is enormous, the self made exhaust stacks are still my personal highlight

    Best
    Bernd

  • Profile Photo
    AL HOFFMAN said 9 years, 8 months ago:

    This looks great Magnus. Thanks for the comprehensive explanations & pictures.