Dinah Part Deux, 1/48th Tamiya Ki-46 Fighter

Started by Chuck A. Villanueva · 38 · 4 years ago
  • Profile Photo
    Chuck A. Villanueva said 4 years, 9 months ago:

    A common theme this year on the workbench has been WWII Japanese aircraft projects. The Louis Gardner color scheme thread was a motivational factor in trying some of those researched color schemes. Next up after the Betty and Zeke, is my 2nd Dinah. This one is the fighter version. Or B-29 killer. So lets see what is in the box before we start building. Though not as sleek looking as the Recon variant. Still looks fast parked on the ramp.

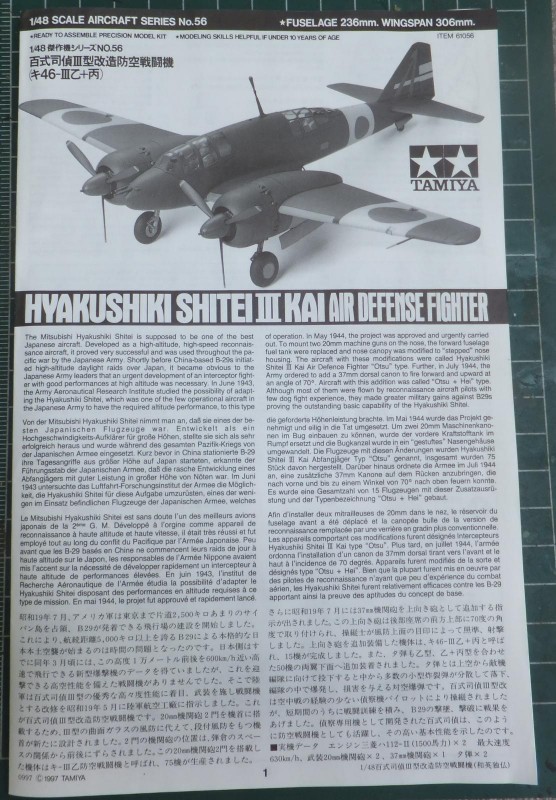
    As my Tamiya journey continues, next up is kit 61056, the Ki-46 III Kai, air defense version of the Dinah. Having built the recon version about a year and half ago, the kit at first glance is very familiar as most of the kit is the Recon kit with some different parts to make this the fighter version.

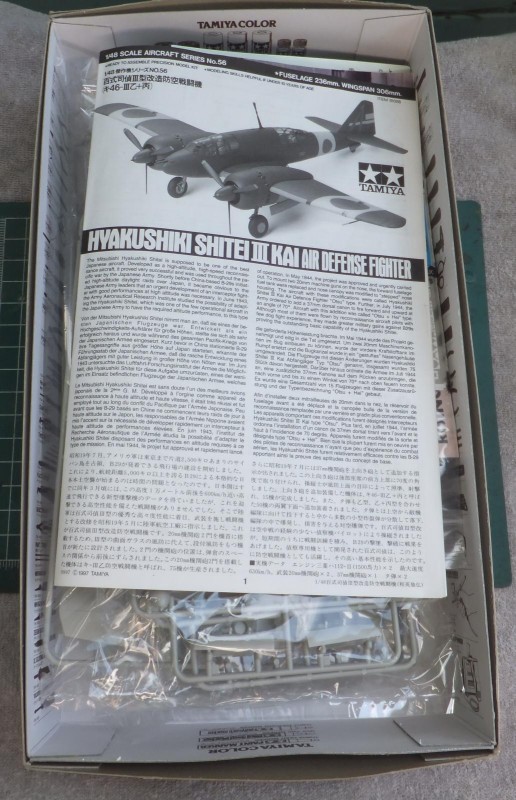
    Popping the lid the instructions on top, all the parts wrapped and sealed in bags. Decals are loose on the bottom of the box. The only issue I find as these kits can sit in a stash for a few years, in the meant time the decals due to heat and humidity over the years may deteriorate or break up when they hit the water. Most of the Tamiya kits in my stash were bought in the late 90's. What I should've done if I had any foresight was to place and seal them in a baggie. The decals are for 3 schemes that served in the defense of the Japanese mainland.

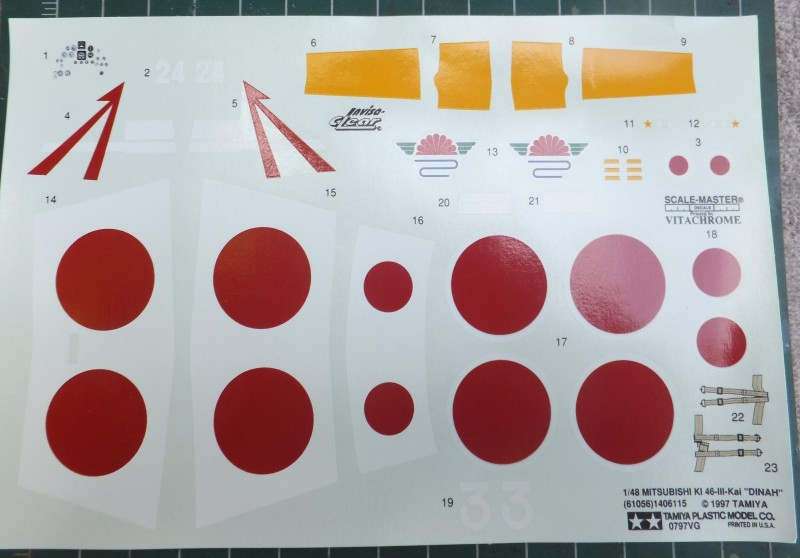
    There isn't much for the Dinah's when it comes to looking for decals. Not that the schemes in the kits are not worthy, it is that the decals are unusable by the time I start the project. So as the time approached to start the Dinah, I had been searching off and on for decals for the fighter version. And finally found a set from Rising Decals, an outfit out of the Czech Republic, which only had one choice for the Defense fighter. I'll take it! Decals looked good and will be the first time using these.

    1st sprue of of the bag is the fuselage, interior components, bulkheads, landing gear, flight deck and rear compartment pieces. The familiar Tamiya light grey plastic. For some reason I like the darker grey plastic. Like on the recent Corsair and D520 builds.
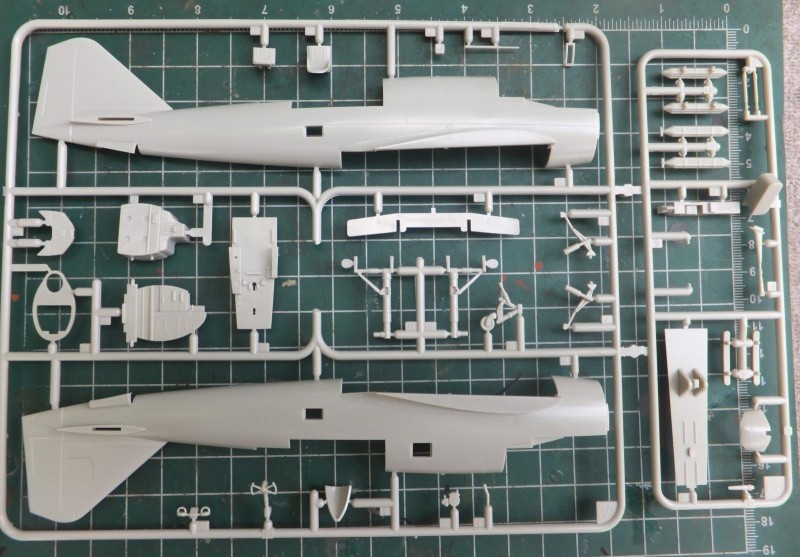
    Tamiya as I notice on a lot their kits, they build very well, great detail, but unlike let say Hobby Boss, Trumpeter and Kitty Hawk and even Revell tend to have more parts. Tamiya provides just enough detail and pieces to build an excellent model out of the base kit. And on the Dinah with all that glass, it does show a bit the lack of detail especially this version with out the camera equipment in the rear compartment.
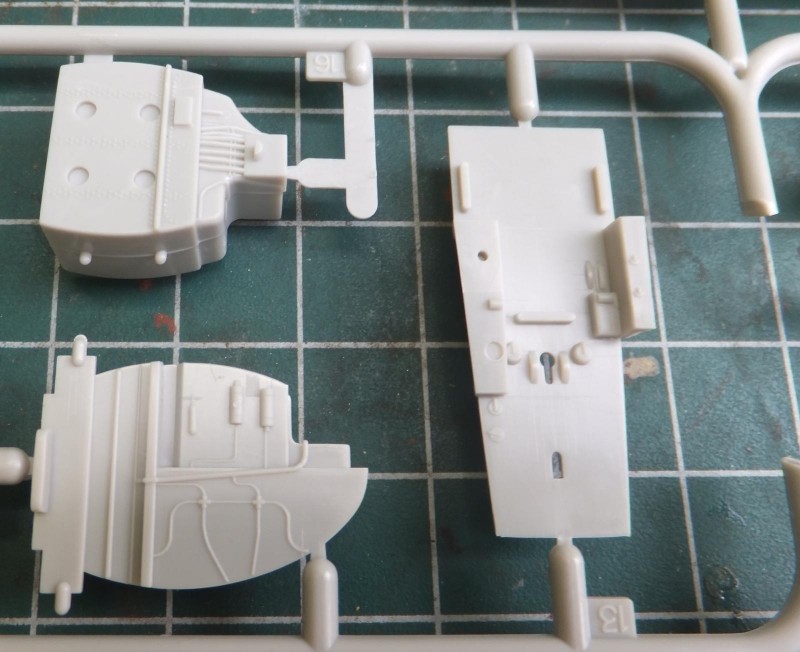
    The wing spar and landing gear struts are sturdy thought the plane is not heavy after completion, but nice details.
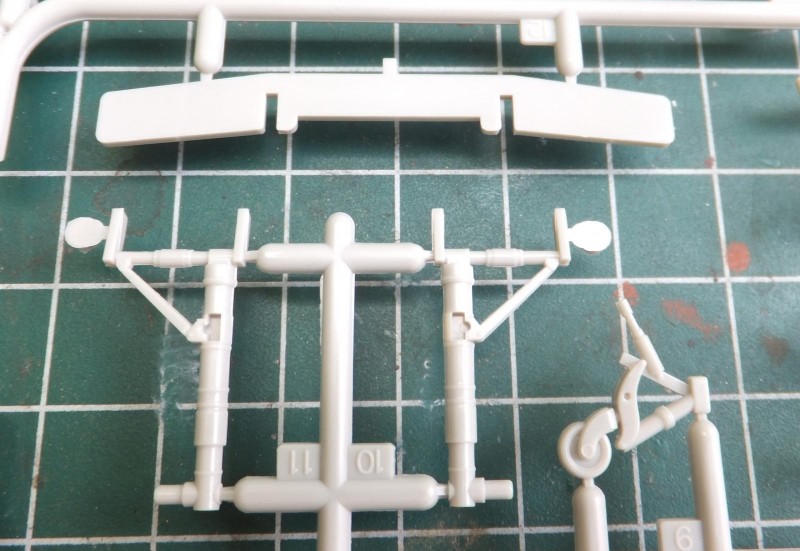
    Interior stringers and sidewall details are nice in the front and rear compartments of the inner fuselage.

    The nose is the main difference of the fighter variant being more typical and also contains the cannons.
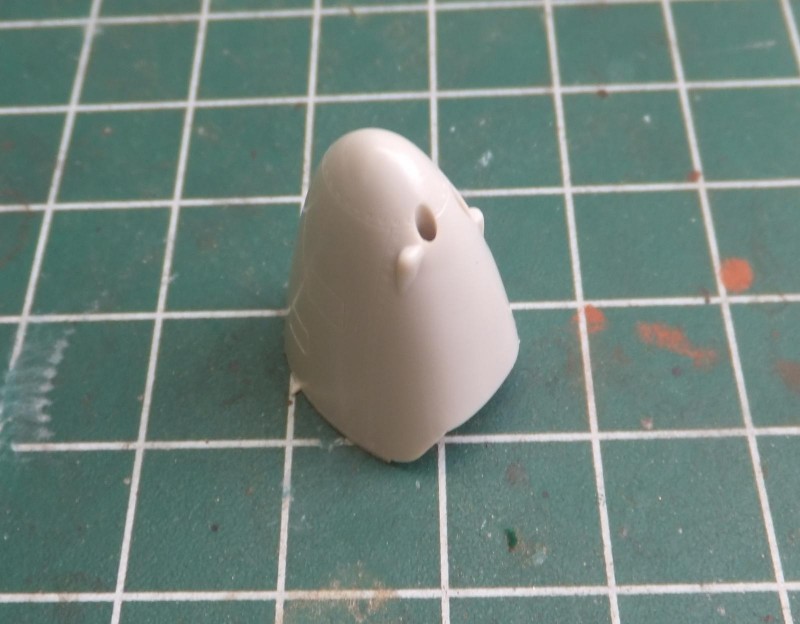
    The next sprue are the wings and horizontal stabs. Exhaust stacks and engine bases.

    Now another minor difference is this Dinah does run a different power plant compared to the Recon, so the exhausts collectors are a bit different in appearance. Good on Tamiya in catching this detail and

    not run the same exhausts as the recon version.

    The next sprue contains, the props, cowlings, gear bay wells and main wheels.

    2 style of props are provided. With 2 style of prop spinners.

    The excellent detailed engine. Well done for styrene, sharp crisp details.

    Wheels are ok, plain, as they really were. Will use resin wheels from True Details.

    And the only gripe other than lacking details interior wise is the LH/RH halves on the wheel bays. A nasty seam dead center. But I will leave it as it is.

    The poly caps for the props, always loved this nice touch not only by Tamiya, but Hasegawa does this at times as well.

    And finally the clear parts. Not only crystal clear, but they fit very well on the kit.

    The Eduards Zoom set will help to enhance the interior of the Dinah

    Next some pre painting... more to follow.

  • Profile Photo
    George R Blair Jr said 4 years, 9 months ago:

    Looking forward to this one, Chuck. With all of that glass I think some Eduard inside will really be noticeable. I used some Rising Decals for a 1/72 Oscar and liked them. They are thin and the colors are dense. The only problem I had was that they tend to stick where they land if you use MicroSet first. I found that if I used only water to wet the surface, the decals would still move into position. Then I used MicroSet/Sol after.

  • Profile Photo
    Chuck A. Villanueva said 4 years, 9 months ago:

    Thanks George, for the heads up on the decals. Not much out there in regard to them. They do look good. I will keep that in mind when it comes time to decal.

  • Profile Photo
    Louis Gardner said 4 years, 9 months ago:

    Wow Chuck !

    You know how to pick them... This is going to be good ! I have a certain Hasegawa Ki-45 Nick in 1/48 scale that keeps calling my name. But then again, so does the Tamiya Ki-46 Dinah's that are in the stash, and the Uhu... so many kits, so little time.

    Maybe I just need my head examined by Dr. David LS. Lately I have not had any bench time, hopefully that will change soon. I need to finish up what I have started before I jump on something else.

    Meanwhile I will be looking for more excellent updates on this build journal. This looks to be another nice Tamiya offering. The Eduard PE you are adding to this one will be like icing on the cake. These are very cool planes. Sadly there are not too many decal options for this type, just as you said.

    Thanks for the compliments on the Japanese color article. When things settle down around here on the home front, and get back to "somewhat" normal, I'll continue on with it. That article drew a lot of attention, that's for sure. Japanese WW2 colors and how they were developed and used is a fascinating subject.

    So is your Ki-46 Dinah.

    I hope to see more of it again soon. Thanks for posting.

  • Profile Photo
    Chuck A. Villanueva said 4 years, 8 months ago:

    Thanks Louis, the 2nd time around with this one will probably be a bit quicker as the 1st one really did go together rather quickly despite being a bit larger aircraft.

  • Profile Photo
    Chuck A. Villanueva said 4 years, 8 months ago:

    As per my way of doing things when building planes. I do a bit of pre-painting of the interior components. The first Dinah, I used Tamiya Deep green. I was out of it, so on this variant I will be using Vallejo Deep Green. This color used in the interior, cockpit, wheel wells, doors and rear compartment.
    Next to start some actual building. More to follow.

    10 attached images. Click to enlarge.

  • Profile Photo
    Chuck A. Villanueva said 4 years, 8 months ago:

    Once some of the pre painting is done. Time to work starting with step 1. The cockpit.

    Starting with the seat. The frame is Deep Green, the cushion I painted Nato Black.

    Next to add the PE bits which are attached to the cushion portion of the seat bottom. Made up of 3 pieces. This is then set off to the side to set. As they get knocked easily with too much handling at this point.

    Working on the flight deck. First sanding the RH side console for the PE piece to be added. Then the RH side console panel is attached with white glue.

    Back to the seat. The Lap belts are attached. The Dinah at this time did not have shoulder harnesses.

    While the seat sets, I work on the RH side of the cockpit wall. Sand down some details to allow me to attach the PE bits to enhance that side of the cockpit.

    The new bits are attached to that side.

    Back to the cockpit floor. The floor brace around the base of the control column is placed on the floor. The the rudder pedals are removed from the sprue and attached to the floor.

    Finally the rear bulkhead is attached to the cockpit floor. Then the seat as well is also attached. The upper avionics section of the bulkhead is painted black.

    Next work on the rear compartment. More to follow.

  • Profile Photo
    George R Blair Jr said 4 years, 8 months ago:

    Cockpit looks great and will be a centerpiece on a plane with this much glass.

  • Profile Photo
    Chuck A. Villanueva said 4 years, 8 months ago:

    Yes it will be. But the rear compartment is lacking on this version. The recon has all kinds camera equipment and storage racks. So it gets a bit busy. No so on the fighter version. This scheme does not use the upward firing cannon so that part of the floor is quite empty. So on this I will build with the windows closed. Still you can see the interior quite well.

  • Profile Photo
    Chuck A. Villanueva said 4 years, 7 months ago:

    With much of the flight deck finished, time to work on the rear interior compartment. And then get everything placed inside and button up the fuselage.


    What comes across on this version of the Dinah is how empty the rear compartment will be once you get the bits and pieces rounded up. Unlike the recon version where you had camera equipment and racks that took some space in the back. The fighter version is glaringly empty. The compartment floor is a bit narrow and will not touch the side of the fuselage. The seat is ok, and with some help with PE and belts will enhance it.

    The forward bulkhead at least has good details but does need more interior components to help it out and besides it sits will into the interior once the fuselage halves are mated.

    The floor and the bulkhead are attached to each other. This version I am building will not have the upward firing cannon installed so there will be one big empty space where it have been mounted.

    The rear bulkhead and storage shelf is attached to the back section of the rear compartment floor.

    Then the rear compartment floor is placed into the LH fuselage half. Here is one point of criticizm is that the floor has a gap between the floor and fuselage side around the wing spar area.


    Let the rear set for a bit and work on the forward section a bit and add the rest of the PE bits in the cockpit.

    Then I add some PE enhancements on the rear compartment. Attach the seat and get ready to mate the fuselage halves.

    Finally the front cockpit is installed, alignment checked before attaching the LH fuselage half to the RH side.

    Next up is to install the nose and build the instrument panel.

    The gun nose gives the Dinah a more conventional stepped look compared to the sleek canopy of the recon variant.

    The instrument panel details are good enough to paint. But those days of my youth are gone unfortunately for that kind of detail painting. So the panel is sanded smooth to allow to attach the Pe bits to enhance it. The dial panel is then applied to the IP. Let is set and then the instrument panel face is then placed over that. Some adjustment to align the dials and gauges.

    Put that aside before I install it into the nose. More to follow.

  • Profile Photo
    Chuck A. Villanueva said 4 years, 6 months ago:

    Once the Ip is set, attach it to the coaming panel and place into the cockpit.

    Next up the landing gear.

    The gear bay wells are made up in LH/RH halves, too bad Tamiya didn't come up with a different approach, like how the Betty's gear bays were done, as the layout is similar. Which on the Dinah when assembled leaves a nasty seam dead center within the bay.

    A bit of a brown wash and silver pencil highlight the good details with in each wheel bay.

    The main gear struts are nice but lack any brakes lines and fittings. Otherwise well done and assemble nicely. Struts are painted Vallejo steel and oleos are highlighted with Molotow chrome marker. love this stuff, and after a year of use time to get a new one.

    Next the strut assy's are inserted into the wheel bays, very good contact points with in the well assures years of display on the shelf. Sturdy well done process, attach the strut retract actuators as well and the main gear bays are ready to install into the wings when they are assembled.

    more to follow.

  • Profile Photo
    Erik Gjørup said 4 years, 6 months ago:

    Now, there is that awsome chrome again!

    I am sorry to tell you at this late stage as I only just noticed it now - but the rudderpedals seems to be the wrong way around. I probably should have kept it to myself as noone are likely to notice when it is closed up. That aside - it looks great!

  • Profile Photo
    George R Blair Jr said 4 years, 6 months ago:

    You're right, I don't think anyone would notice the rudder pedals. Besides you probably won't be able to see them once the cockpit is closed up. Cockpit and instruments look great.

  • Profile Photo
    Chuck A. Villanueva said 4 years, 6 months ago:

    Good eye Eric, they are facing the wrong direction. The chrome pen is awesome, and will finally need to get another one. It ran out or dried up, Had it about a year, so not bad,
    George: 2nd time around for the Dinah, coming along a bit quicker this time. built the recon version about a year and a half ago. Time flies!

  • Profile Photo
    Chuck A. Villanueva said 4 years, 5 months ago:

    Back to the Dinah after a month hiatus. And with several Japanese aircraft builds now in progress, now with that motivation, it's back to work. Install the wheel wells into the nacelles and build the wings.

    Using Vallejo Deep Green for the interior color.

    Install the wheel wells into the nacelles. The fit is very good here and don't have to worry about any fit issues down the road with a secure landing gear that will last years if not the life of the model.

    The center brace is installed between the wheel wells

    ]

    Deep Green is airbrushed in the areas that can be viewed through the windows. Also into the wheel wells and nacelles.

    The lower wing panel is placed into fuselage, the upper wing panels are then placed on the lower for alignment and then glued into place.

    This way is to minimize the wing to fuselage join is as smooth as possible. So far looks good to minimize seam clean up around the rear wing root.

    More to follow.