Hasegawa 1/48 P-38J Lightning

Started by Chuck A. Villanueva · 76 · 3 years ago
  • Profile Photo
    Erik Gjørup said 4 years, 1 month ago:

    All in all it looks like a good base kit - thanks Chuck.

  • Profile Photo
    George R Blair Jr said 4 years, 1 month ago:

    The booms look great, Churck (@uscusn). Bringing the booms together on the fuselage is always the part that I worry about, but it looks like you will have that well in hand.

  • Profile Photo
    Walt said 4 years, 1 month ago:

    Nice work so far, I built the Academy kit boxed by Eduard and know how finicky these pre-Tamiya kits are. Patience is a virtue when you join the booms, good luck with them.

  • Profile Photo
    Chuck A. Villanueva said 4 years, 1 month ago:

    Yes Erik the kit seems to be similar in approach to the Academy kit, building a couple of them prior is a big help in tackling this one.
    George, I will carefully test fit the booms, but being familiar in building the Academy kit will be a big help when it comes time to attach them to the main airframe.
    Walt, agreed, the P-38 actually builds a bit quickly once the cockpit is finished, but patience is definitely is a factor when time to attach the booms.

  • Profile Photo
    Chuck A. Villanueva said 4 years, 1 month ago:

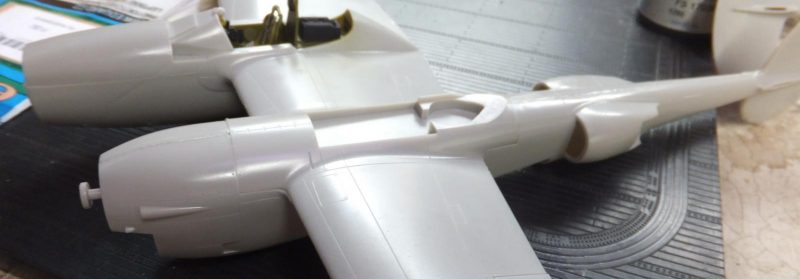
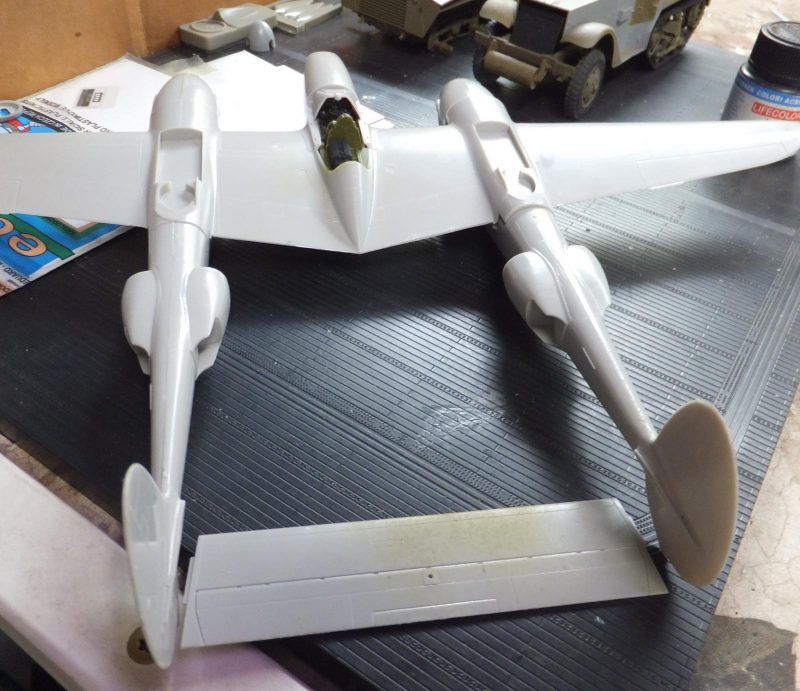
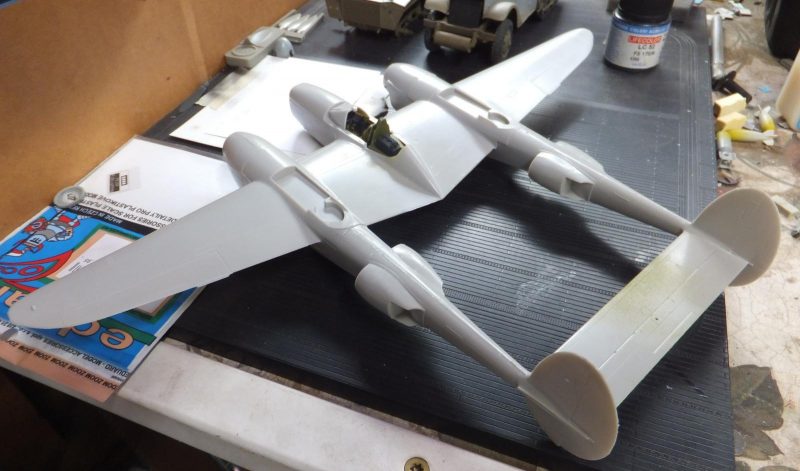
    Now that moment in installing the booms on the P-38.

    The center mounted horizontal stab.

    Before assembling the nose, a pair of lead sinkers were placed in the nose.

    Most of the details are left off the boom for now, no gear, intake scoops and side scoop doors. The LH boom is loosely placed on the wing.

    Next to set the RH boom in place, not glued in yet, the center horizontal stab is then placed between the tails but not inserted as yet.

    Now I glue the center stab in place in both tail booms.

    Some nasty gaps first appear before the booms are cemented in place on the wings. Especially around the rear attachment join to wing. Some adjustments for better fit is made before final glue application.

    The outer lower wing panels fit very well to the outer join to the boom.

    Next is to drill out the landing lights on the lower wing panel.

    Not very careful being that I ended with a bit of a chunk of plastic breaking off at the edge. More cleanup time on my part. Any added the clear lens after apply some Chrome on the back side.

    Finally the outer horizontal stab panels are attached to the tail booms.

    Next up add the details to booms.

    More to follow.

    1 additional image. Click to enlarge.

  • Profile Photo
    Erik Gjørup said 4 years, 1 month ago:

    Those major parts just make the bulid look like it is leaping forward in a huge jump. Alas you are in for a lot of filling and sanding it would seem. Great jump Chuck (@uscusn)!

  • Profile Photo
    Spiros Pendedekas said 4 years, 1 month ago:

    That's a great progress, Chuck @uscusn!
    Some gaps to fill, as expected from the Hase P-38!
    Waiting for your boom details!

  • Profile Photo
    John vd Biggelaar said 4 years, 1 month ago:

    Way to go, Chuck. @uscusn
    Some correction to be done, but they seem to be able to solve.

  • Profile Photo
    George R Blair Jr said 4 years, 1 month ago:

    Booms can be a real problem sometimes, Chuck (@uscusn). Any fit problems along the way seem to double because of the extra boom. Hopefully your dry-fitting will solve most of the problems.

  • Profile Photo
    Chuck A. Villanueva said 4 years ago:

    To all of the above, despite being careful in apply cement along each contact point around the wings and nacelles. Still have a lot of seam work that will need to be cleaned up. I guess there is no way around that on this kit. But then that is part of the fun in building isn't it? Being that this will be a bare metal finish to really seal all the scratches that will be in abundance!

  • Profile Photo
    Spiros Pendedekas said 4 years ago:

    Cleaning up is definitely a fun part of modeling, Chuck @uscusn!
    Sometimes it becomes too much, sometimes almost diminishes (did I mention modern Tamiyas?), but fun it is!

  • Profile Photo
    Chuck A. Villanueva said 4 years ago:

    Yes Spiros it can be just as annoying as well. But in the end is having it ready for a finish that has been achieved with some careful sanding and final prep before painting. Especially a bare metal finish which the scratches will show very easily.

  • Profile Photo
    Chuck A. Villanueva said 4 years ago:

    Here I will add some of the detail parts to the booms. Starting with the intake lip panels. Now the only deal with this is not having any screens that are at the back edge of these panels. The interior has no details so will have to paint the interior of the intakes black. Which I didn't do here but will do so later on as I progress.


    The intake lip panels fit very well to the intakes, attaching all 4, 2 to each boom.

    Next the movable intake ramp doors will be in the standard neutral position. These didn't fit as well and some minor adjusting before the cement sets to ensure a good fit. Still in the end I'm not really satisfied with the result.

    The intakes on each boom are assembled.

    Now the engine intake radiators are next.

    These will have a PE mesh grille attached to the rear intake openings. Much better look under the spinners.

    Once the PE mesh are attached. They are then attached in front of each engine nacelle. The fit here is good.

    Now to attach each turbo housing atop of each boom. The fit is not the greatest here.

    So about ready to do some seam work in and around the air frame. Quite a bit actually. Each boom, wing roots and boom to wing join area.

    More to follow.

  • Profile Photo
    Erik Gjørup said 4 years ago:

    She is giving you a fight it seems. Luckily you will have a few tricks up the sleeve, ending up with a nice result I'm sure.

  • Profile Photo
    George R Blair Jr said 4 years ago:

    Great work, Chuck (@uscusn), despite the issues. That is the problem with a plane that has two booms: double the fun or double the trouble. It looks like the photoetch will take care of part of the open areas.