Me 109 E-3a 1, Bulgaria 1946, Tamiya 1/48

Started by Erik Gjørup · 13 · 1 week ago · 1/48, 109E-3, 109E-3a, airbum, Bulgaria, me109, Tamiya
  • Profile Photo
    Erik Gjørup said 1 year ago:

    Another Emil excapes the 109werke

    Again it is one of the Tamiya kits that now has a identity

    This time it is something as unusual as a 109E in service after the war, namely Bulgarian Me109E-3a “Strela” number 1/7047.

    According to some sources Bulgaria received 10 109E-4´s and later 9 109E-7´s. However, it would appear that at least the first ones were standard export E-3a versions, and that is what I stick with!

    As the basic cockpits have all been assembled in 109werke, it is just a few mods to prepare them for individual use.
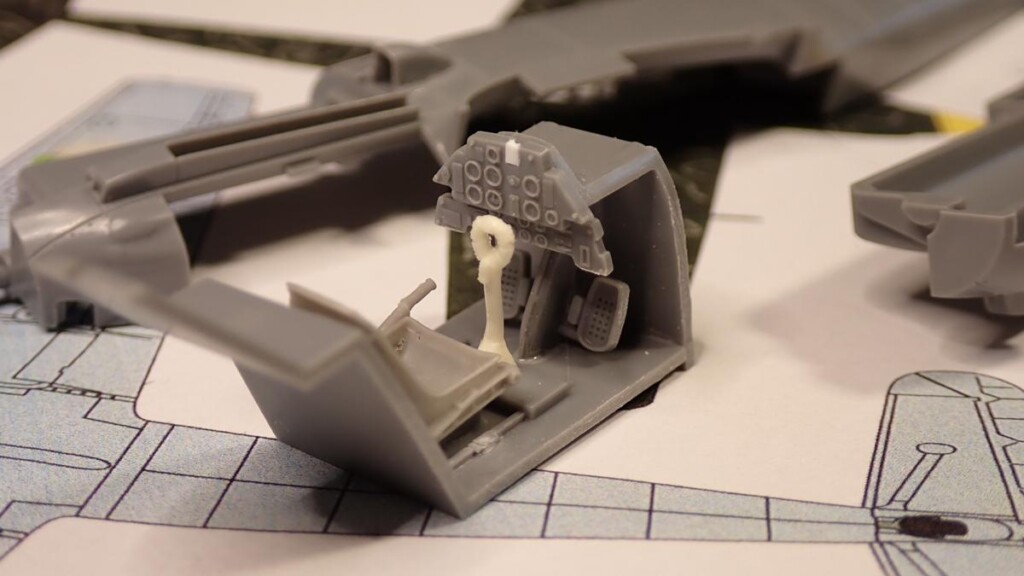

    As this machine is from 45/46, it is most likely to have been unarmed, so the “revi” is removed, and the resulting hole in the IP blanked over.

    The hinges for the canopy are also blanked out, and the mounting plate for the IP is cut down to enable the vent to be opened.
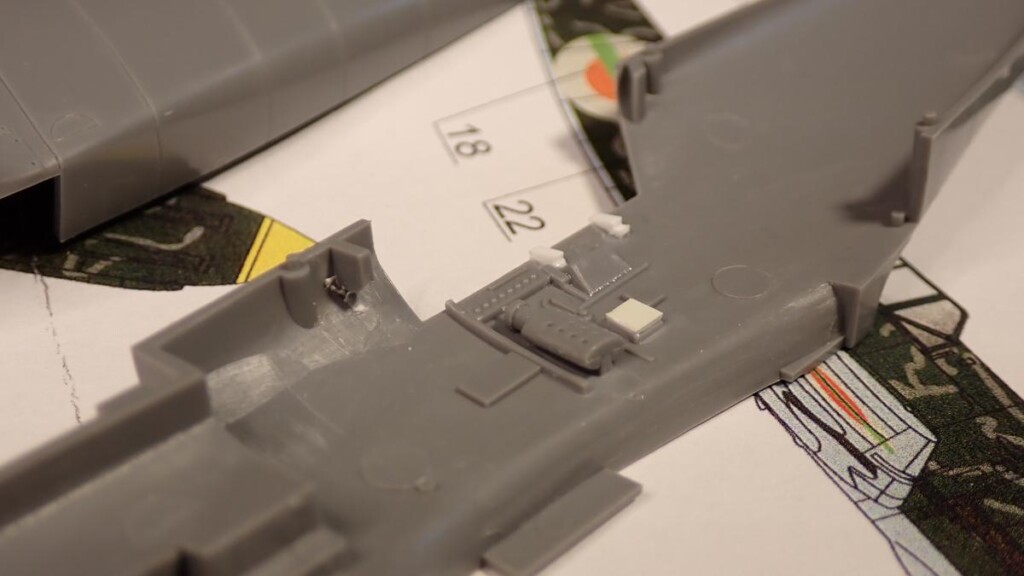

    Also the fuelprimer is enlarged.

    The airintake is one of those already prepared earlier.


    Now all it needs is the rest.

    next up perhaps a few shots after opening some vents and stuff – tune in and check, and if you leave a comment I shall mention you when the next update is available so you won’t miss a thing!

  • Profile Photo
    John vd Biggelaar said 1 year ago:

    Some great preperations, Erik @airbum
    Opening those vents makes it look a lot more realistic in the end.

  • Profile Photo
    George R Blair Jr said 1 year ago:

    Nice work on another conversion, Erik (@airbum). It is nice to see some of the more obscure export planes.

  • Profile Photo
    Spiros Pendedekas said 1 year ago:

    Excellent job, my friend @airbum!

  • Profile Photo
    Erik Gjørup said 11 months, 2 weeks ago:

    Thank you gents. @johnb, open vents it is! @gblair, and one that flew for some years after WWII! @fiveten, thanks.

    Vents!

    I feel like I am getting better each time. . .

    One of the joys of this hobby is the feeling you get whenever you are improving the work.

    I have to say I am rather pleased with the vents this time!


    They were opened with a sharpened blade (Yes, I sharpen my blades instead of getting a new blade every so often) and got a drop of Tamiya Thin afterwards.

    next up it may be time for some PE in the cockpit?

  • Profile Photo
    Spiros Pendedekas said 11 months, 2 weeks ago:

    Those vents look wonderful, my friend @airbum!
    How do you sharpen your blades?

  • Profile Photo
    Erik Gjørup said 11 months, 2 weeks ago:

    Hi Spiros @fiveten. It is a simple matter of using a fine sanding stick, followed by a superfine stick to polish it. All that is needed is 10-20 strokes each side, pulling the blade at a shallow angle. I shall take a picture next time I get to sharpening. It is the same as keeping the kitchen knives and woodworking tools sharp 🙂

  • Profile Photo
    Spiros Pendedekas said 11 months, 2 weeks ago:

    Thanks s much, my friend @airbum!

  • Profile Photo
    John vd Biggelaar said 11 months, 2 weeks ago:

    Nice work on the vents, Erik @airbum
    I fully agree, it gives you so much pleasure each time you improve your build and techniques.

  • Profile Photo
    Erik Gjørup said 1 week, 6 days ago:

    In one week it will be 12 months since my last update on this one @fiveten and @johnb! Sadly I have not taken a picture of the sharpening of my knife – must remember that.

    Interior and IP

    I have started detailing of the interior with a few PE items – more on that later

    The holes fir hinges faired over


    they are rather obvious on these old kits.

    I added a resin stick to the cockpit


    the export versions usually gad a spade grip instead of the usual LW stick

    For the IP I opted for decals!


    detailpainting to follow

    next up the fuselage is assembled – I hope!

  • Profile Photo
    Spiros Pendedekas said 1 week, 6 days ago:

    Almost a year has passed, my friend @airbum! Solid progress and excellent looks!

  • Profile Photo
    George R Blair Jr said 1 week, 6 days ago:

    Instrument panel looks really good, Erik (@airbum). Did you use a punch to separate the individual instrument decals, or did they come that way?

  • Profile Photo
    John vd Biggelaar said 1 week, 5 days ago:

    A lot of tiny work, looks great, Erik @airbum
    I'm also wondering how you got those seperated.