Tamiya Heinkel HE-219 UHU 1/48

Started by Chuck A. Villanueva · 94 · 3 years ago
  • Profile Photo
    Chuck A. Villanueva said 4 years, 1 month ago:

    With Japanese GB launching this week, wanted get this planned long term project off the ground as I get a couple of Japanese aircraft down to start on as well. But first as this was already committed to work on is this gem from Tamiya. Will follow up with some more images of whats in the box shortly.

    1 attached image. Click to enlarge.

  • Profile Photo
    George R Blair Jr said 4 years, 1 month ago:

    Should be an interesting model. Looking forward to the build.

  • Profile Photo
    Walt said 4 years ago:

    I have built this kit and it really is a very good kit right out of the box. With a little bit of effort and good construction practices you really end up with a beautiful model when done.

  • Profile Photo
    Spiros Pendedekas said 4 years ago:

    Have this kit in my SoD. It really is a gem. If I recall well, the whole cockpit tub was made of made of metal for weight balance. Cannot get more Tamiya than this! What a great choice, Chuck!

  • Profile Photo
    Chuck A. Villanueva said 4 years ago:

    Thanks George, this is one I have looked forward too, as I got closer getting to her and the opportunity to finally being able to start work on this one impressive night fighter. There is nothing like it.

    Walt, I would love to check yours out, this one will have the black under surfaces. What I am primed for is the camo job on top, hope to pull it off.

    Spiros, yes the cockpit tub is weighted white metal, and is an excellent way that Tamiya engineered this kit to have it incorporated in the nose with sufficient weight on a tail sitter.

  • Profile Photo
    Chuck A. Villanueva said 4 years ago:

    Popping the lid of Tam's Uhu, let see what is in the box.

    Starting with Tamiya's excellent instruction booklet and camo scheme sheet insert they put in every aircraft kit.

    Next the decal sheet for 2 HE-219's

    Then the weighted cockpit tub that is metal, which also serves as the roof of the nose wheel bay. An item Spiros mentioned and an excellent engineering aspect of this kit.

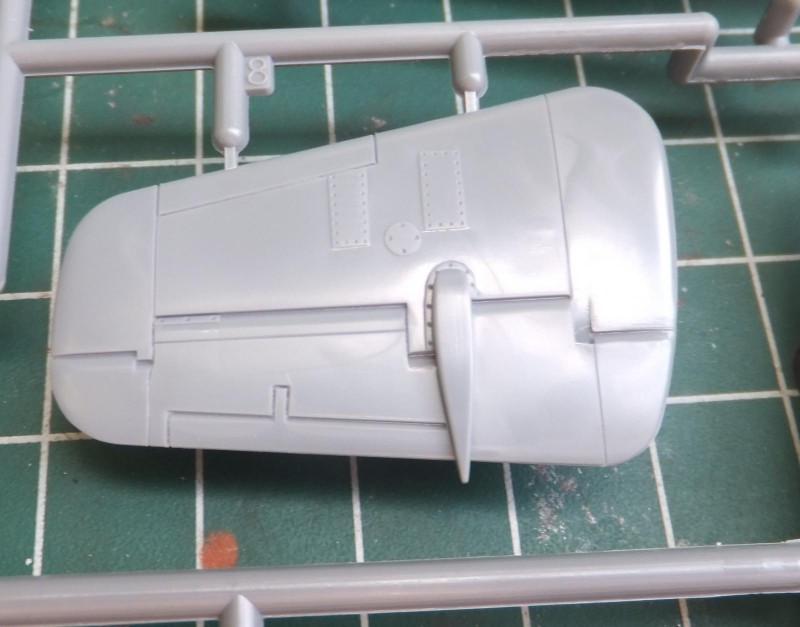
    The plastic is in the Tamiya medium grey, which I tend to like a bit better than the light grey plastic such as in the Skyraider kit I have just started as well. The first sprue is one of which contains, the one of the propellers, main wheels, engine cowls and cowl rings round wing spars, rear gun deck, exhaust dampers.

    The main wheels and hubs. Still pondering a resin set of wheels.
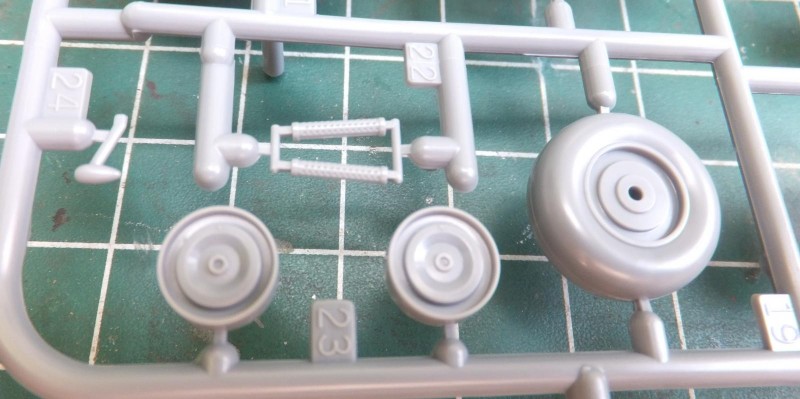
    The engine cowl ring with the exhaust heat exchangers molded in. I don't thing you will be able to see this detail once the engine is assembled.
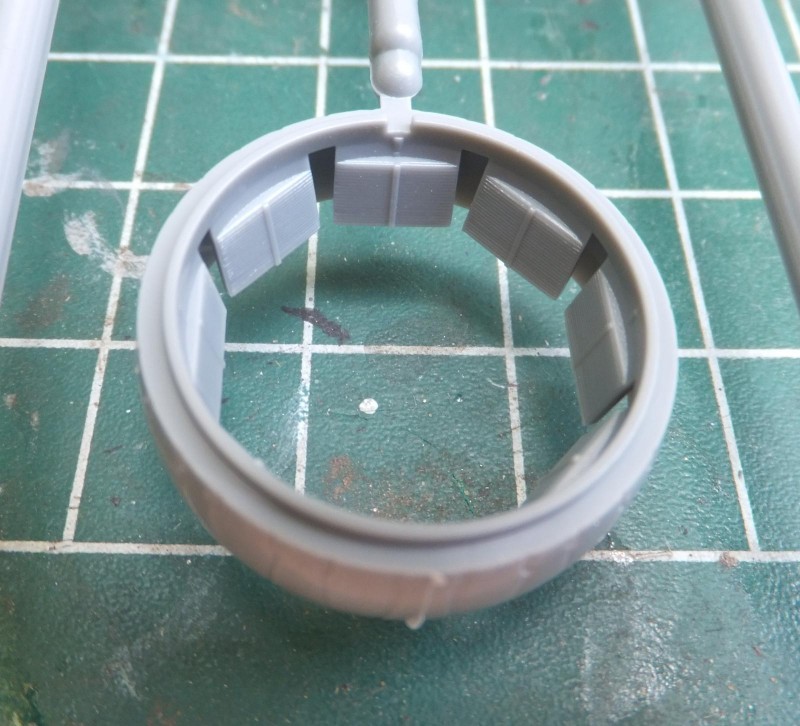
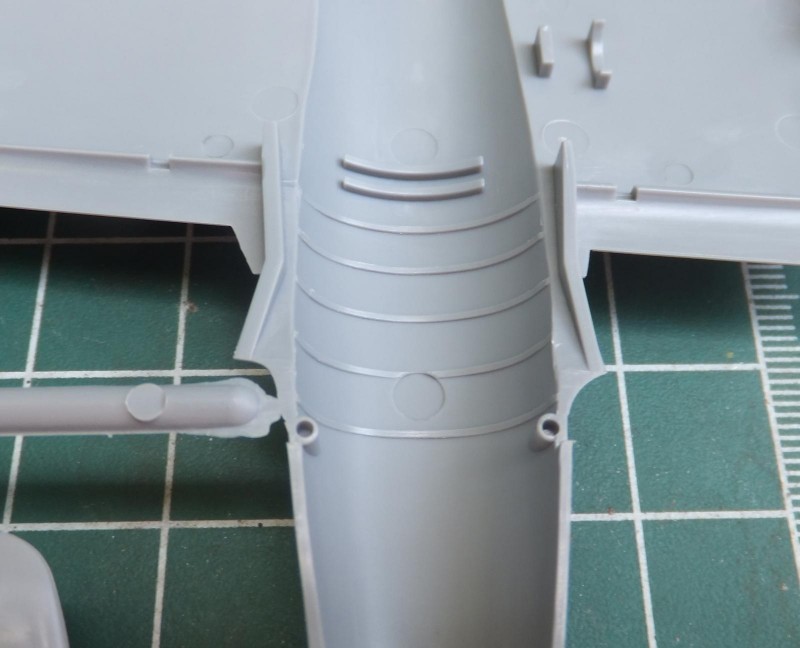
    The nose gear strut looks fragile to support the weighted nose. Nice details on the molded part.

    The radar array nodes are very fine in detail and fragile for this version of the Uhu. Will have to be careful when removing these off the sprue tree.

    The prop, spinner and backing plate.

    Next sprue is the wings, flaps and one of the vertical twin rudders. There are 2 of these for each wing.

    The upper and lower wing halves have nice details, some riveting on each part. The wings are designed to allow for lowered flaps.

    The vertical rudder is molded in one piece.

    The main gear bay roof has some detail molded into the upper wing in some structural ribbing detail. And the lower wing as well in the wheel bay/engine nacelle.

    The clear sprue is crystal, typical Tamiya on this.

    9 additional images. Click to enlarge.

  • Profile Photo
    George R Blair Jr said 4 years ago:

    The parts look great, and having the nose weight really simplifies trying to figure out where to put the weight in an open cockpit like this. The paint scheme looks scary.

  • Profile Photo
    Chuck A. Villanueva said 4 years ago:

    Good morning George, yes it does, but with a few Luftwaffe, an Italian Veltro in a smoke ring scheme under my belt. This will still be a challenge. Hopefully I remember to breath when I get to that paint process.

  • Profile Photo
    Erik Gjørup said 4 years ago:

    Great to see that Tamiya has supplied a noseweight as they do for their vehicles and tanks. Looking forward to the journey here, I'm strapped in!

  • Profile Photo
    Chuck A. Villanueva said 4 years ago:

    Eric, yes great idea, as there is very little space in the nose to place weights into.

  • Profile Photo
    Chuck A. Villanueva said 4 years ago:

    After pre painting the cockpit and interior components Polly Scale RLM66. Eduards zoom set and a more comprehensive PE set will be utilized as well.


    The cockpit tub has good side console detail that with a steady hand can pick out the details with brush and pencils. I will use the PE bits to enhance the details visually.

    The pilots seat looks correct in shape and size. The PE belts will help here as well.

    After sanding off the details on the RH side console panel, The base plate is first attached with cyano cement. Next piece to overlay the base contains the gauges. Then the top cover is placed over the gauses with Testors white/clear cement which will dry clear and will also serve as the glass lenses.

    The rear brace is attached to the cockpit in place right behind the pilots compartment.

    Next to start work on the seatbelts, starting with the pilots seat. The shoulder harnesses are attached and put aside.

    While that is setting, next to work on the radar and communications operator seat, 2 pieces are assembled.

    With the shoulder harnesses set, now to attach the headrest to the seat.

    Then the lap belts are attached and put aside. PE work can be tedious. A step at a time and patience.

    Next is to add the belts on the Comm operators seat.

    Now with the belt work finished on the seats, now to work on both fuselage sides and add some details starting with the RH side.

    After removing some detail, I then attach some of the PE bits on the inside wall of the cockpit.

    There is not that much to add on the LH side as a bit of black and silver will work here.

    Going back to the RH side more detail bits are added along the inside cockpit wall.

    The pedals are cleaned up and installed into the cockpit tub.

    And of course the most unique part of this very unique night fighter the nose weight. And how Tamiya engineered to fit perfectly and out of sight in the kit is incredible.

    more to follow...

  • Profile Photo
    Spiros Pendedekas said 4 years ago:

    That's a wonderful progress Chuck @uscusn! Astonishing attention to detail!

  • Profile Photo
    Walt said 4 years ago:

    I think the photo etch to the side panels really make a nice addition. I think the seat belts really dress up the seats. It is the one thing that continues to amaze me about Tamiya, with all their abilities, they don't mold in seat belts, or provide something better than a decal. I have found that well molded seat belts, properly painted and with a wash really look good. Your set of Colored Photo Etch looks good.

    Even when I do use photo etch seat belts I try to get them to lay flush and do a wash after. It helps to add more depth. That's what I did in the Bf-110 cockpit below.

    1 attached image. Click to enlarge.

  • Profile Photo
    Chuck A. Villanueva said 4 years ago:

    Spiros, thanks there is quite a bit to go.
    Walt B. thanks and that is a great point. A rather annoying oversight despite all the good things Tamiya is otherwise. But that is an excellent cockpit shot of your BF-110 interior. Don't recognize the kit, Doesn't look like the Revell/Monogram BF-110, Eduards? or Fujimi maybe? The wash really makes the details pop.

  • Profile Photo
    Walt said 4 years ago:

    The Bf-110 kit is from CyberHobby. It in general was a really enjoyable build. You can see the build here. https://imodeler.com/2012/11/148th-cyber-hobby-bf-110d3/ I have the Edward kit and have built the Monogram one and still have more. I plan on putting them on my to do list.