Tamiya Heinkel HE-219 UHU 1/48

Started by Chuck A. Villanueva · 94 · 3 years ago
  • Profile Photo
    Chuck A. Villanueva said 3 years, 9 months ago:

    Thanks Eric, you will be right at home doing the scheme on the 219. With your experience on the 109 patterns which too me are bit more difficult. Which is a great learning experience for me as well, over time I have become a much better painter building several Luftwaffe aircraft over the years to take on such a major project as the 219. This is right up your alley Erik, I have seen your work, you will do very well.

    Thanks Spiros, step by step as there is still so much to do to get it wrapped up.

  • Profile Photo
    George R Blair Jr said 3 years, 9 months ago:

    This beast has turned out great, Chuck (@uscusn). I have never even been tempted to build this kit because of the complexity of the camouflage. You have mastered the beast, and I am still not tempted to try this one.

  • Profile Photo
    Chuck A. Villanueva said 3 years, 9 months ago:

    George, thanks, it is just a matter of painting more complex Luftwaffe schemes prior to building this gave me enough experience to attempt it. Your choice of the Special Hobby Maryland is no easy kit just building, but there you are. I admire that feat. Tough kit, yet your getting it together and can't wait as you progress with it.
    Now to airbrush the final coats. Using Micro Scale Clear Satin Finish for the black. And Vallejo Matt for the upper tutone Grey scheme.


    Once the coats are nice and dry. Time to remove the masks over the glazings.

    Don't forget to remove the mask over the clear rear upper radar set.

    Then to install the exhaust Flame dampers, 2 per side.

    These just simpler slip over the exhaust stacks, excellent fit.

    Next get this baby up on her feet.
    More to follow

  • Profile Photo
    Spiros Pendedekas said 3 years, 9 months ago:

    Hi Chuck @uscusn! Nice progress. I like the exhausts painting and weathering.

  • Profile Photo
    Chuck A. Villanueva said 3 years, 9 months ago:

    Hi Spiros, thanks, something that was kind've a let's try this and see how it looks trial. It worked out much better than expected. Using burnt metal as a base. Then a Mig wash of rust thinned. And then rubbing it with White Spirits, then a wash of dirty thinner over the raised lines. And thats how they turned out. Not bad.

  • Profile Photo
    Erik Gjørup said 3 years, 9 months ago:

    Oh yeah - very nice flamedampers indeed. Thanks for the how-to explanation. The sheen on that black is looking great!

  • Profile Photo
    George R Blair Jr said 3 years, 9 months ago:

    I really like the finish on the flamedampers, Chuck (@uscusn). Getting the feet on the plane is a great milestone. Looking forward to the rest of the build.

  • Profile Photo
    Chuck A. Villanueva said 3 years, 8 months ago:

    Time to get the 219 to stand on her own. Starting with the nose gear.


    The nose strut is pretty sturdy and remember that it attaches to a metal bay. The retracting actuator arm is attached.

    The wheel is then attached to the nose strut.

    Then the strut is inserted into metal roof of the bay, good tight fit held with Super Glue.

    The main and rear nose gear doors are attached. Good points of contact for a good fit.

    Now to work on the main gear. At first glance it looks rather complicated and fiddly. Tamiya approach alleviates any fear of being weak and difficult to assemble. It goes together very well.

    Starting with the main strut. Again sturdy and should withstand years parked on a shelf.

    The spring loaded strut shocks are attached to the strut. These will be painted RLM02

    The main upper strut assy are quite strong and this what makes contact with in the wheel bays.
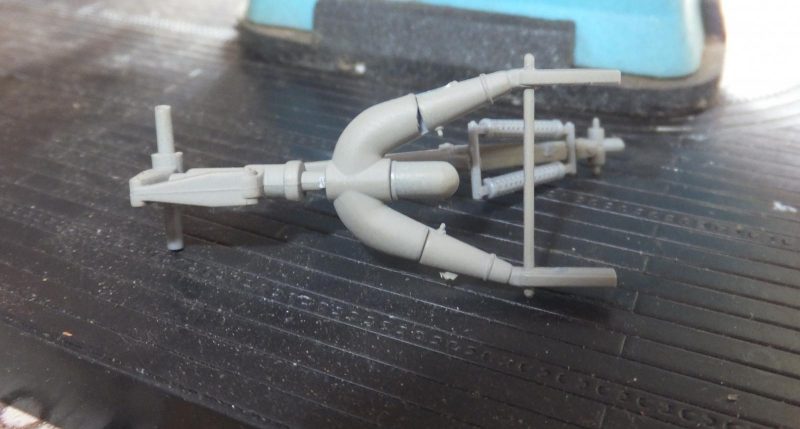
    The retractor arm is attached outboard on each main strut and then the door guard stops as well.

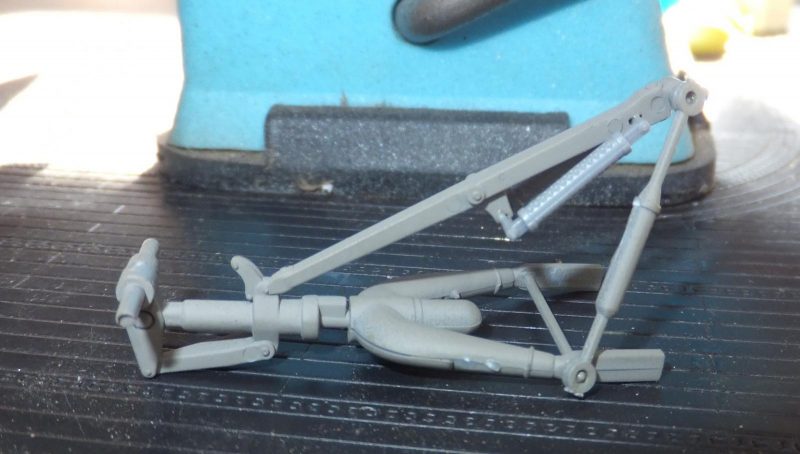
    With the strut assemblies completed. They are placed in each wheel well bay. Again excellent tight fit. On quite a large place and not very light.

    The main gear bay doors are attached. Doors on multi engine bombers can be fussy at times with weak attachment points. Not in this case. All 4 doors no muss no fuss.

    Before assembling the wheels, I went ahead and attached a pair of counter weights on the lower ailerons.

    4 main wheel assemblies are assembled. The wheels are satin black and the tires are painted NATO Black.
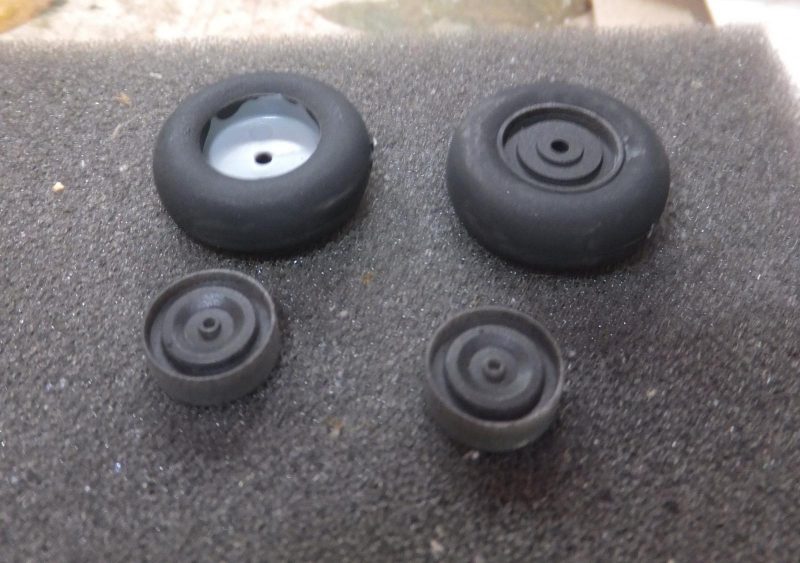
    A pair of attached to the struts.

    Then the other pair are installed. Perfect fit, alignment is excellent. All 4 of the main wheels touch the ground.

    The He-219 now on her wheels, nose down just as it should be.

    Now that this endeavor is completed next to get the props built up and attached and those daunting antennas..

    More to follow.

  • Profile Photo
    Spiros Pendedekas said 3 years, 8 months ago:

    Standing on her feet and with a great posture, Chuck @uscusn!
    Waiting for those antennas...
    Your tutorial is superb!

  • Profile Photo
    Erik Gjørup said 3 years, 8 months ago:

    Beefy! What a nice set of legs you have @uscusn. Looking great - that nosegear oleo is looking like it is up to the job.

  • Profile Photo
    Chuck A. Villanueva said 3 years, 8 months ago:

    Spiros, the gear assembly was pretty much straight forward. Some kits this step can be rather challenging, not so the Uhu.
    Eric, you know I am actually a leg man, good way to put it. lol

  • Profile Photo
    George R Blair Jr said 3 years, 8 months ago:

    Great job, Chuck (@uscusn). Seeing the plane on its landing gear, with its nose-high stance, reminds me how much weight it takes to keep it on its feet. Seeing how well your 219 is coming out makes me want to go build one...but the camouflage gives me second thoughts.

  • Profile Photo
    John vd Biggelaar said 3 years, 8 months ago:

    Starting to follow this impressive tutorial, Chuck. @uscusn
    Thanks for sharing all the details.
    Great progress so far, for sure will become a beauty.

  • Profile Photo
    Chuck A. Villanueva said 3 years, 8 months ago:

    Thanks George, really if you have a couple of WWII Luftwaffe aircraft already built up with their mottling, then you can paint the He-219.
    John thanks, hope you did enjoy the build. It is one of those that you really take your time building, though I am not a quick builder in any way. More of a methodical step by step builder as I usually have several going in different stages.

  • Profile Photo
    John Healy said 3 years, 8 months ago:

    Great work, Chuck! It looks just like the one at Udvar-Hazy.