Tamiya's 1/48th P-38F/G Lightning,WWII

Started by Chuck A. Villanueva · 123 · 2 years ago
  • Profile Photo
    Chuck A. Villanueva said 3 years, 6 months ago:

    George, you will love the results, very easy to use. But then this was just one kit. I am sure results may be different for other models. So just give it a shot in the end the results are quite amazing.

  • Profile Photo
    Chuck A. Villanueva said 3 years, 6 months ago:

    Next up is to insert the cockpit to the upper wing section.

    First is to clean up the nubs off the sprue that are on the attaching surfaces. What is cool on Tamiya's instructions to clearly point this out in the directions. Make sure the contact surfaces are free of the sprue nubs.

    Now install the cockpit into the upper half fuselage pod. Excellent fit, snaps into place.

    Next to drill the holes for the pylons

    Now to assemble the rear radio set and electronic shelf. Though this step appears later in the build, I decided to do it now.

    Aluminum and Nato Black are painted over the pieces.

    The rear set are also painted Aluminum and Nato black as well.

    The rear set faces are sanded off for the Quinta replacement sets.

    The rear set is placed on the shelf. The details are sanded off and the Quinta sets are applied.

    Now for the front set. The Quinta radio faces are applied here as well. Just like applying decals.

    The decals from Hannant's arrived.

    more to follow

  • Profile Photo
    Spiros Pendedekas said 3 years, 6 months ago:

    Nice and solid progress, Chuck @uscusn!
    Quinta decals are the stars of the show.
    Excellent job so far!

  • Profile Photo
    Erik Gjørup said 3 years, 6 months ago:

    I've probably said it before; those Quinta decals are so nice!

  • Profile Photo
    Chuck A. Villanueva said 3 years, 6 months ago:

    Thanks Spiros and Erik, they are the bomb diggity!

  • Profile Photo
    John vd Biggelaar said 3 years, 6 months ago:

    Fantastic work, Chuck @uscusn
    This interior looks so realistic.

  • Profile Photo
    George R Blair Jr said 3 years, 6 months ago:

    Interior looks great, Chuck (@uscusn). The Quinta is awesome.

  • Profile Photo
    Chuck A. Villanueva said 3 years, 5 months ago:

    Thanks John and George, The base interior from the kit is already on it's own without any mods is excellent. I do like the busy look of the interior. it also helps with a wash and some silver pencils to show some wear also makes the details pop a bit. Especially if you plan to display with the canopy open

  • Profile Photo
    Chuck A. Villanueva said 3 years, 5 months ago:

    Step 5 is to work on the nose gear bay. You think the cockpit is nice. The nose gear bay is not to shabby either.


    The roof of the nose gear bay also has the wing spar molded as one piece. Another nice piece of Tamiya engineering.

    The side walls of the nose gear well. Again well defined details.

    The side walls lock into place when attached into the roof of the gear bay.
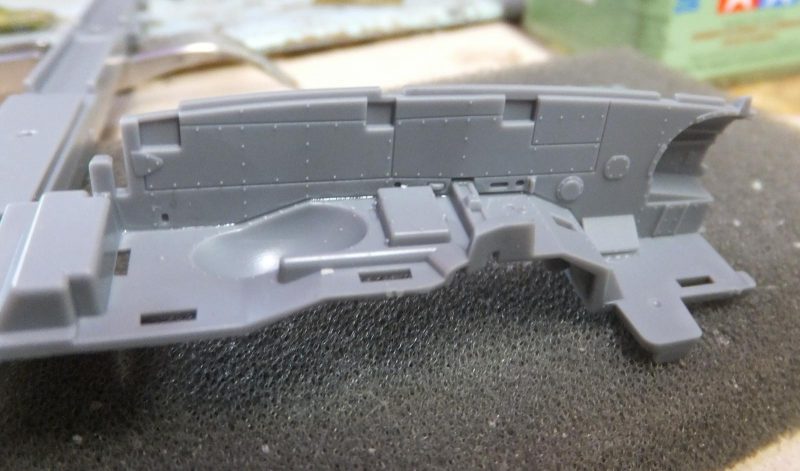
    The rear deck radio set is installed.

    Step 6 is to complete the rest of the nose gear bay.

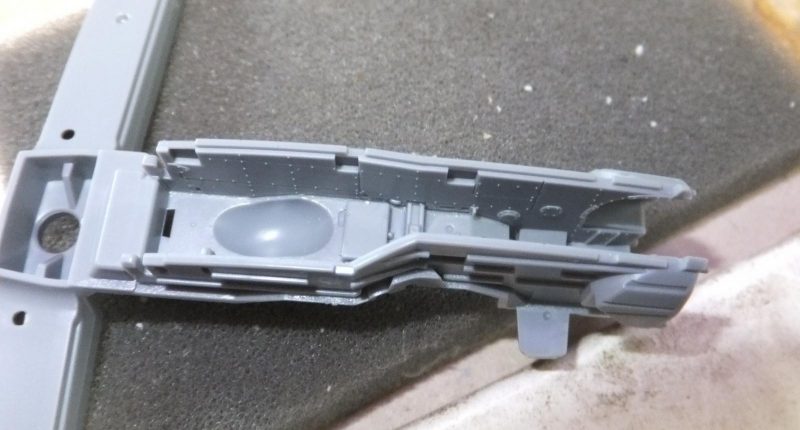
    Forward wall is Aluminum and the nose strut support is also installed to the front wall.

    Next to attach the strut housing cover.
    [p11]
    Front wall is installed into forward section of the gear bay. Backside view in how all the parts interlock in place.

    The rear wall is Aluminum and with a tan canvas service cover.
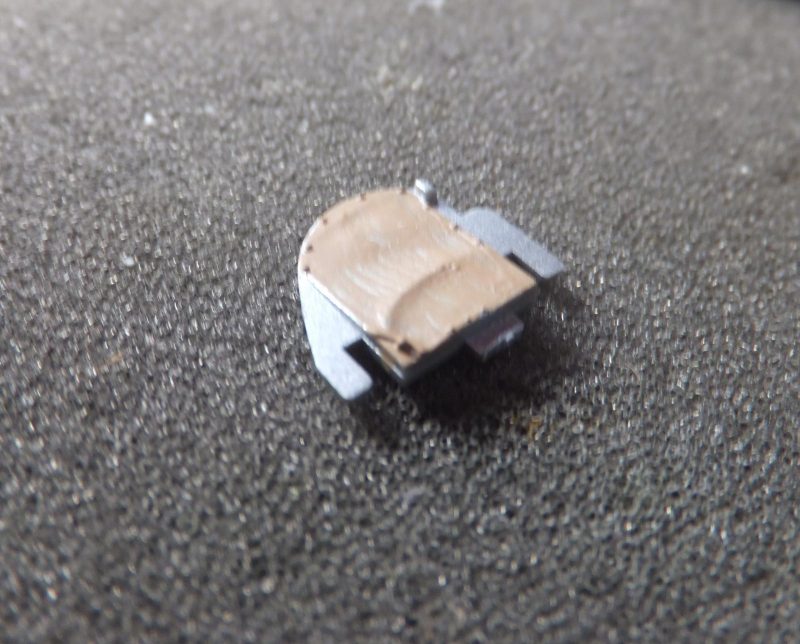
    The rear wall is installed to the rear of the gear bay. Over the top the wheel bulge which actually protrudes into the floor of the cockpit is painted Zinc Chromate Green.

    Next up to install the sub assembly into the nose.

    More to follow

    1 additional image. Click to enlarge.

  • Profile Photo
    Erik Gjørup said 3 years, 5 months ago:

    Great progress on this really well designed kit. I suppose there is no way around adding one to the stash now we've seen your build Chuck.

  • Profile Photo
    Spiros Pendedekas said 3 years, 5 months ago:

    I agree wit Erik, Chuck @uscusn! This is a great progress and I am really amazed by the Tamiya quality.

  • Profile Photo
    Greg Fabian said 3 years, 5 months ago:

    I bought one of these kits several weeks ago and have been working on it since. It's mostly assembled now and I'm working on exterior painting. I'm using everything straight OOTB, but now I wish I could have talked my wife into letting me purchase the Quinta Studios cockpit enhancements, they look fantastic! Oh well, guess my bird will have the closed canopy. I'm doing the F version because there just something about a shark mouth on a P-38. I'm looking forward to seeing how your build turns out.

    I was on the National Mall in Washington DC and saw the Arsenal of Democracy flyby celebrating VE day in 2015. You can see a video of the P-38 flyby that I took here: https://youtu.be/4TQY36EPjM0

  • Profile Photo
    John vd Biggelaar said 3 years, 5 months ago:

    Progress is great, Chuck @uscusn
    Also bought this kit a week ago.
    Following this thread really wants me to start with it, but I am still occupied with building a Petlyakov Pe2 from HiPM.
    Your build will be for sure a reference when I start building it.

  • Profile Photo
    Chuck A. Villanueva said 3 years, 5 months ago:

    Thanks Eric, a great companion and adversary to your Bf's on your shelf in a ETO scheme.

    Spiro's, though I bear no ill will to any of the Hase or Academy kits which are good as they get, but do have their limitations, the Tam kit just is that much better and yes a bit more pricey, but then you really don't need any AM goodies except maybe seatbelts and resin wheels but builders choice. while with the others and the enhancements will then pretty much be equal to the price of the Tam kit.

    Greg, welcome, thanks for the feedback I appreciate that, I am building the F variant as well but with different markings from Xtra decals, though the shark mouth scheme is quite tempting, so I am looking forward to see yours when completed. Love the video, I am blessed to live near the Chino airport where the Planes of Fame Museum is located and where a couple of P-38's reside that are maintained as flying examples. Among the other WWII and Korean War era aircraft as well. Though we didn't get a show this year as you know why.

    John, thanks and you will enjoy the build, looking forward to your example when completed. It is really a great kit. You know I have been looking for a Pe-2 for a future build, I just missed out on the Eduards kit. I believe that is the HiPM plastic if I am not mistaken.

  • Profile Photo
    Christopher C Tew said 3 years, 5 months ago:

    Quinta is a Russian company, so they have several sets for the La-5 series, Su-2, and Pe-2 from Zvezda, ICMs I-16s, and the Hasegawa P-39, with more to follow. All I have or have seen look as good as the P-38s. Thanks, Chuck, for showing us how good they look off the sheet and on some plastic!