The Fata Morgana G

Started by Martin · 32 · 4 months ago · dassault, Mirage, Mirage G, Swing Wing
  • Profile Photo
    Martin said 5 months, 1 week ago:

    So this will be my next victim

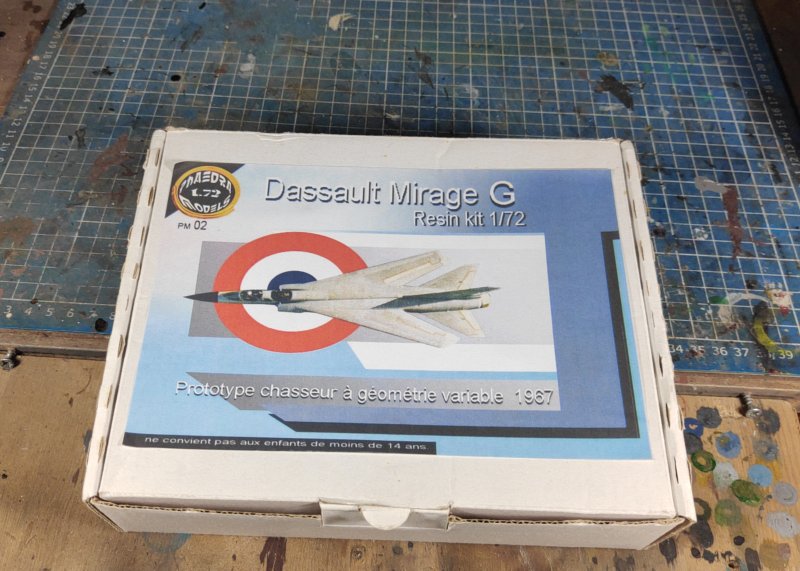
    From what I know the Phaedra kit is the only Mirage G kit ever made. The kit showed up quite a while ago in 2011 and having some scale modeling friends in France did help to get one with a reasonable price tag. Nowadays the prices for those are rediciolous high.

    As the box tells, it was first flown 1967; only one of the G was build and it crashed 1971. After the G followed the G-4 with already 2 engines but this was only a quick in between version. Very soon after the G-4 the G-8 followed from which 2 were built. The G-8 with 2 engines is available from Anigrand or Planet Models and Modelsvit said that they will do one too. From the G-8 the G8A with fixed wings was designed, but only a mockup was built. The G8A was available from Shakrkit but it looks like Sharkit is history - well at least for now.
    From The G there was also a Mockup done for a swing wing plane with two engines which was thought to be a British-French Swing Winger, but that also never got very far.

    For me all Mirage always were my biggest interest and I did collect books and kits but with my big stash sale 6 or 7 years ago, a lot of them were sold. I only kept some of the very seldom ones, so I also have the Phaedra Mirage III F2 in stash and some others.

    OK enough about that.

    That is what's in the box

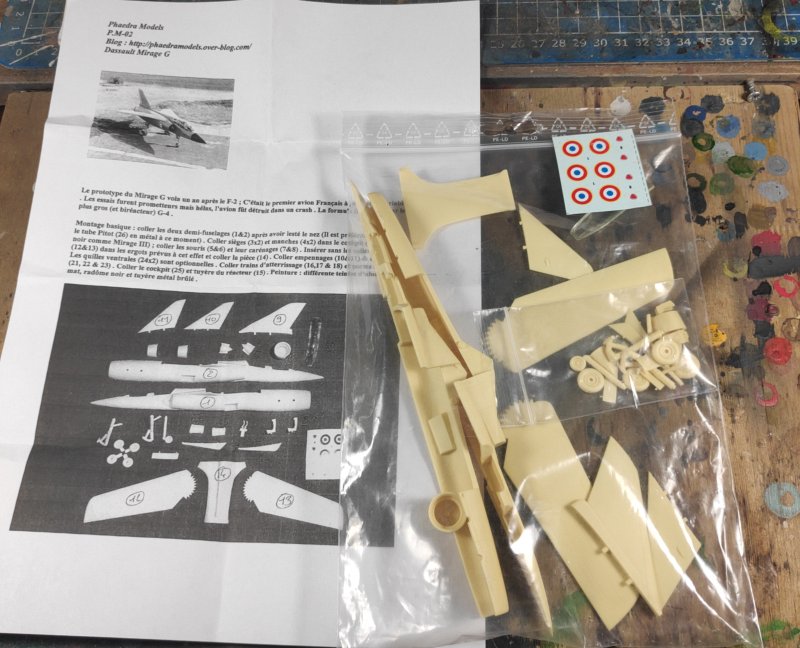
    That's all. So downside is only some French textual written instructions and some missing decals, upside is you dont have to cut the pieces from big castings

  • Profile Photo
    Martin said 5 months, 1 week ago:

    and here is the explanation for my complaining about the missing decals:

    on the rudder on top of the blue-white-red there is written "AVIONS MARCEL DASSAULT MIRAGE G".
    Next to the also missing "Mirage G" near the radom there is written "AVION EXPERIMENTAL A GEOMETRIE VARIABLE".
    The Text between the warning signs below the canopies i don't know. I could not find a image where the text would be readable. It is the little rescue window for opening the canopies from extern

    The last is not that essential, some "dots" would be enough in 1/72, but the other three are a must have for that

    And, yes all of them are on both sides.

    So, if I cannot find some decals, I would have to print some.

  • Profile Photo
    Martin said 5 months, 1 week ago:

    and, yes, I already started the decals.

    So far it looks usable. All I have to do now is to print them, which isn't a problem at all. But, years ago I sold all my enamel paints because of the smell, and now I need some clear varnish to fix the decals - well, then I'll probably go and buy a pot of paint.

    For the Mirage not much has happened so far, a few repairs of some very tiny holes, some sanding of mold errors but not much and the two fuselage halves are glued together

    Thanks for looking in

  • Profile Photo
    Spiros Pendedekas said 5 months, 1 week ago:

    Awesome entry, my friend @impisi! A challenging kit, let alone without decals. You are doing a superb job so far and I look forward to your progress!

  • Profile Photo
    John vd Biggelaar said 5 months, 1 week ago:

    An amazing entry, Martin @impisi
    The decals do already look great, I'm sorry but I have no clue on what is written on the sides of the aircraft.
    Looking forward to see this beautiful Mirage taking shape.

  • Profile Photo
    George R Blair Jr said 5 months, 1 week ago:

    Very interesting kit, Martin @impisi. I have never seen this plane before, so I will enjoy your build of this kit. Resin kits are always expensive when they first come out, and then quickly get more expensive as time goes by.

  • Profile Photo
    Martin said 5 months, 1 week ago:

    Thanks a lot Gentlemen!

    it is quite a simple build so far. Sure some filling and sanding, but that is to be expected with an all resin kit. So it is taking up shape


    So up for the details inside the pit, not that much, but a little more than only some seats

    Thanks for looking in

  • Profile Photo
    John vd Biggelaar said 5 months, 1 week ago:

    Very nice progress, Martin @impisi
    Those instrument panels look great.

  • Profile Photo
    Spiros Pendedekas said 5 months, 1 week ago:

    Excellent progress, my friend @impisi! Still trying to find what the black letters at front right fuselage side wrote, no luck yet, I even "Google Lens" -ed the pic!
    Should have written something like "Avion Experimentál" or so 🤔

  • Profile Photo
    Martin said 5 months, 1 week ago:

    Thanks a lot Gentlemen!

    @fiveten, this is clear, there is written Avion Experimental a geometrie variable", you can see it on my decals

  • Profile Photo
    Spiros Pendedekas said 5 months, 1 week ago:

    Awesome, my friend @impisi! Did not see your post with the decals printed, sorry.

  • Profile Photo
    George R Blair Jr said 5 months, 1 week ago:

    Looks great, Martin (@impisi). My experience with resin is limited to added a few resin parts to a plastic model, so this is an interesting experience for me. Building the cockpit should be fun.

  • Profile Photo
    Martin said 5 months, 1 week ago:

    Thanks again @fiveten, @gblair and @johnb for all the interest!

    And on it goes - some detail for the seats

    and some for the front wheel

    ah and yes, the first paint even it is just some primer

    Thanks for looking in

  • Profile Photo
    Marc Spoor said 5 months, 1 week ago:

    Hello, Martin - Like you, I have always been interested in the development of the Mirage family. Watching this build with interest.

    A thought occurred to me regarding the text between the canopies: If it has to do with operation of the emergency handle, perhaps it is more or less generic wording and other Mirage pictures might reveal what it says? Anyway, just an idea...

  • Profile Photo
    John vd Biggelaar said 5 months ago:

    Very nice detailing, Martin @impisi
    Is it aluminum foil that you used for the seatbelts? Looks very good.