Three Me 262s

Started by Michael Turner · 132 · 3 years ago · 1/48, Dragon, Hobby Boss, Me-262, Tamiya
  • Profile Photo
    Michael Turner said 4 years, 5 months ago:

    A bit more progress:

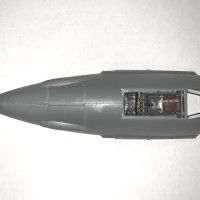
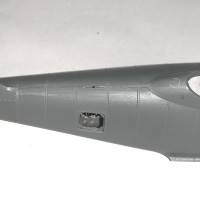
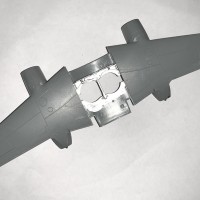
    Dragon:
    As mentioned above, the fuselage has been glued together and the fin aligned and the leading edge reshaped.
    On the underside I filled the seams with super glue and sanded them smooth.
    I did the same with two sink marks under the nose and a fairly large warped section of the lower aft fuselage.
    The engine to wing fit is probably the worst part of this kit. The lower cowling seam needs to be eliminated, the fit of the rear cowling needs some attention and the fit of the engines to the forward wing is poor and needs some reshaping.

    3 attached images. Click to enlarge.

  • Profile Photo
    Michael Turner said 4 years, 5 months ago:

    Tamiya:

    The fit of the fuselage halves is very good, but not perfect.

    When I dry fitted them they were fine, but when it came to gluing them I was left with a gap on the upper nose.

    Then, when I added the gun port piece I had to clamp it down so that it spread slightly at the base to get a good fit. I also had to cut away part of the internal web on the forward face of this part because it was causing it to sit too high. After I glued and clamped the piece in place I noticed that it had cracked on the rear edge, so I filled that with super glue and sanded it down.

    On the other hand, the wings and engine nacelles went together nearly flawlessly. I only had to eliminate the seam under the engine nacelles.

    5 attached images. Click to enlarge.

  • Profile Photo
    Michael Turner said 4 years, 5 months ago:

    Hobby Boss:
    I haven't glued the fuselage together yet. I'm deciding if I need to better clean up the area in the wheel well where I removed the slots that were to accept the cockpit tub tabs.

    I've only attached the engines to the lower wing so far and the fit was good.
    Dry-fitting the upper wings indicated that these will attach to the engines nicely too.

    2 attached images. Click to enlarge.

  • Profile Photo
    Erik Gjørup said 4 years, 5 months ago:

    Thank you for this thorough comparison-build. Having two of them in the stash this will be kept bookmarked for future reference! I do like the silver/alu interiors a lot.

  • Profile Photo
    George R Blair Jr said 4 years, 5 months ago:

    All are looking good. You will probably be burned out on 262's for a while.

  • Profile Photo
    Spiros Pendedekas said 4 years, 5 months ago:

    Look great, Michael. I see you use super glue as filler. I like this technique and would love to implement it at my builds, but cannot do it properly. Do you use thick cyano?
    All the best!

  • Profile Photo
    Michael Turner said 4 years, 5 months ago:

    G'day Spiros,
    I used Roket Odourless Cyanoacrylate which bonds in 10-20 sec.
    I lay it on fairly thick, depending upon the size of the crack or sink mark and let it dry.
    Then I use a metal file to remove the glue down to the surface level and then sand to finish.
    I do tend to take a bit of plastic off as well when I use the file.
    I still need to re-scribe lost panel lines on the Dragon kit.
    Using the file limits this technique to convex or flat surfaces though.
    The advantage is that you can ge a very hard and smooth surface.

    I did fill gaps in the aft engine cowl with super glue as well, but quickly wiped off the excess and cleaned it up with a scrape of a knife blade when nearly dry.

    Best of luck trying it yourself.

  • Profile Photo
    Spiros Pendedekas said 4 years, 5 months ago:

    Thanks Michael @michaelt! I appreciate it, my friend!

  • Profile Photo
    George R Blair Jr said 4 years, 5 months ago:

    I have tried filling with super glue, but don't tend to use it much. The trick is not to wait long after applying it to sand it down. I usually wait about 30 minutes. If you wait too long, the super glue will cure harder than the plastic, which makes it tough to sand without marring the surrounding surface. I tend to use regular filler which stays softer than the plastic. I think with practice you can get great results using super glue as a filler, as your work attests. Modelers that I know who use it regularly swear by it.

  • Profile Photo
    Spiros Pendedekas said 4 years, 5 months ago:

    Thanks George @gblair for the info. Off to my expanding modelling skills now!

  • Profile Photo
    Michael Turner said 4 years, 5 months ago:

    I haven't made a lot of progress this week because I was working on another build...
    It is a RAAF Hornet painted with an Indigenous theme "Worimi".

    2 attached images. Click to enlarge.

  • Profile Photo
    Michael Turner said 4 years, 5 months ago:

    I have done some work on the Hobby Boss jet though.

    A dry-fit of the windscreen part with the cockpit in place indicated that the rear of the instrument panel would be visible. I added some yellow painted wires to the rear of the instruments to make it look busy.

    I glued the fuselage halves together. The fit was not as good as I expected, with a bit of misalignment and some fine gaps.

    I also glued the upper wing parts and added the rear of the engine nacelles. Fit of the latter was good but with some slight misalignment and gaps that I filled with super glue and immediately wiped the excess off. A bit of scraping and sanding and things looked good.

    The front nacelle/wing join has some gaps but I used putty here.

    Hobby Boss mould 2mm of the wing trailing edge with the lower wing part in order to get a sharp trailing edge. Unfortunately this left a gap to be delt with, particularly on the right wing where the alignment was just a little off.

    4 attached images. Click to enlarge.

  • Profile Photo
    Spiros Pendedekas said 4 years, 5 months ago:

    That's a great scheme, Michael.
    The artwork looks complex.
    Is it a decal? Looks painted...

  • Profile Photo
    Michael Turner said 4 years, 5 months ago:

    It is a decal. Unfortunately the tail decal is about 15% too big so I had to move it around a bit which caused a tear in the lower left. I also had to trim the blue bits to the bottom right and reposition them.

    Once dry I had to cut it to free the rudder, which will be repositioned slightly.

    I haven't done the other fin yet.

    The other problem is that the blue is a little dark on the navy background. (It is darker than it looks in the photos).

    I'm thinking of hand painting the blue parts (on the fin and ahead of the cockpit).

  • Profile Photo
    Erik Gjørup said 4 years, 5 months ago:

    One of the beauties of taking pictures is that you sometimes notice details that you missed by eye. Hope the carpetmonster will be willing to let go the seatbelt! No matter how small, the posts are seen so keep them flowin' - thanx for sharing.