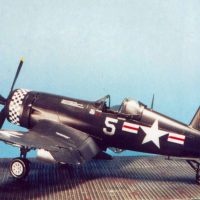
F6F-5 Hellcat (Eduard ProfiPack 1/72)

Hi there!
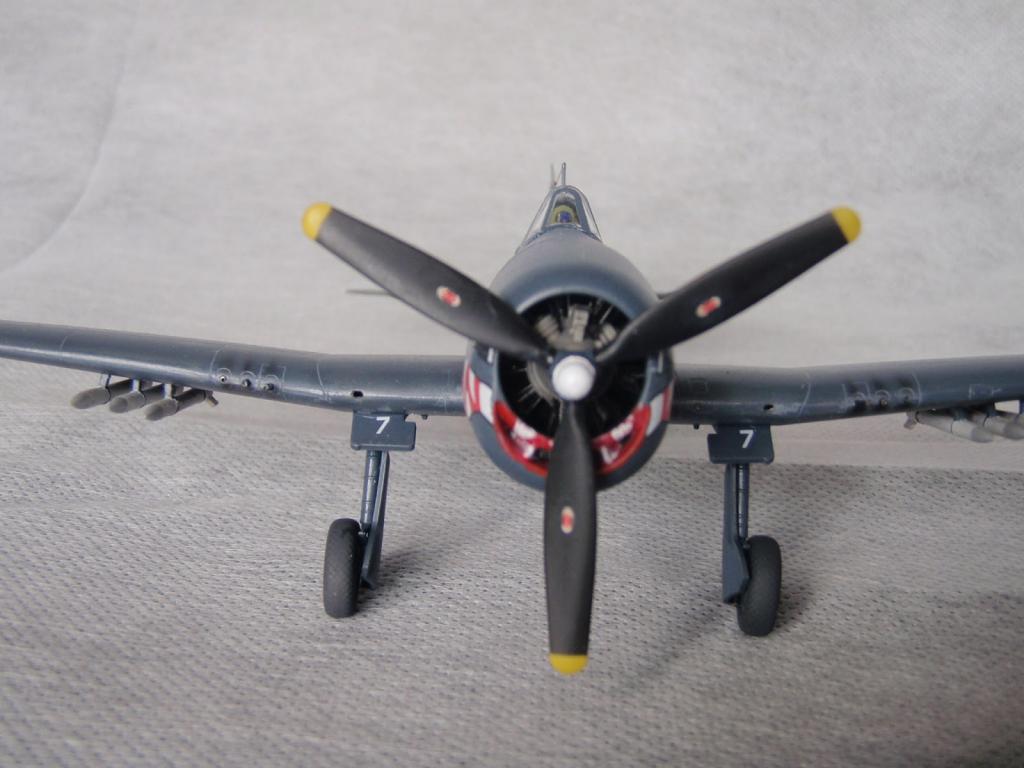
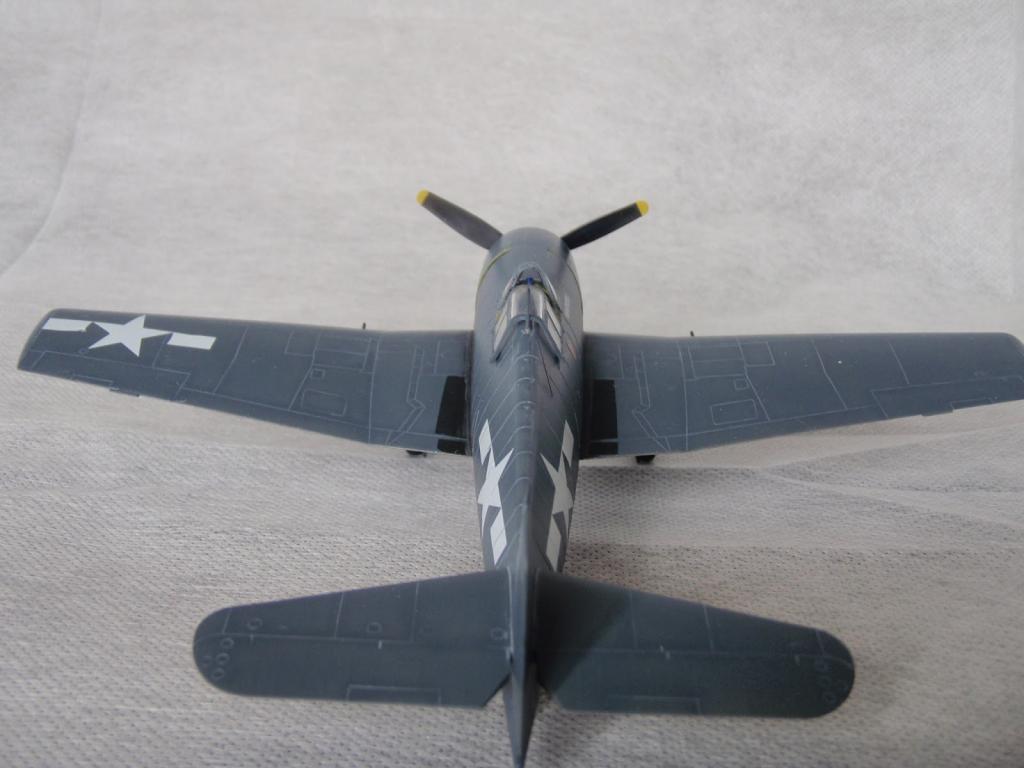
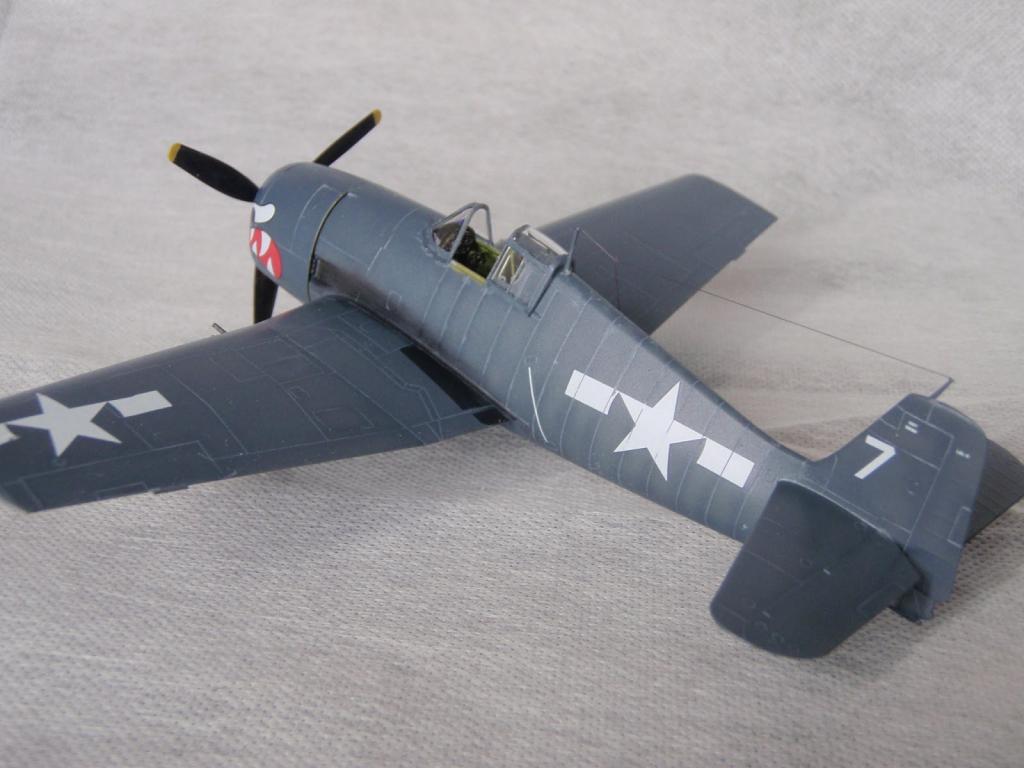
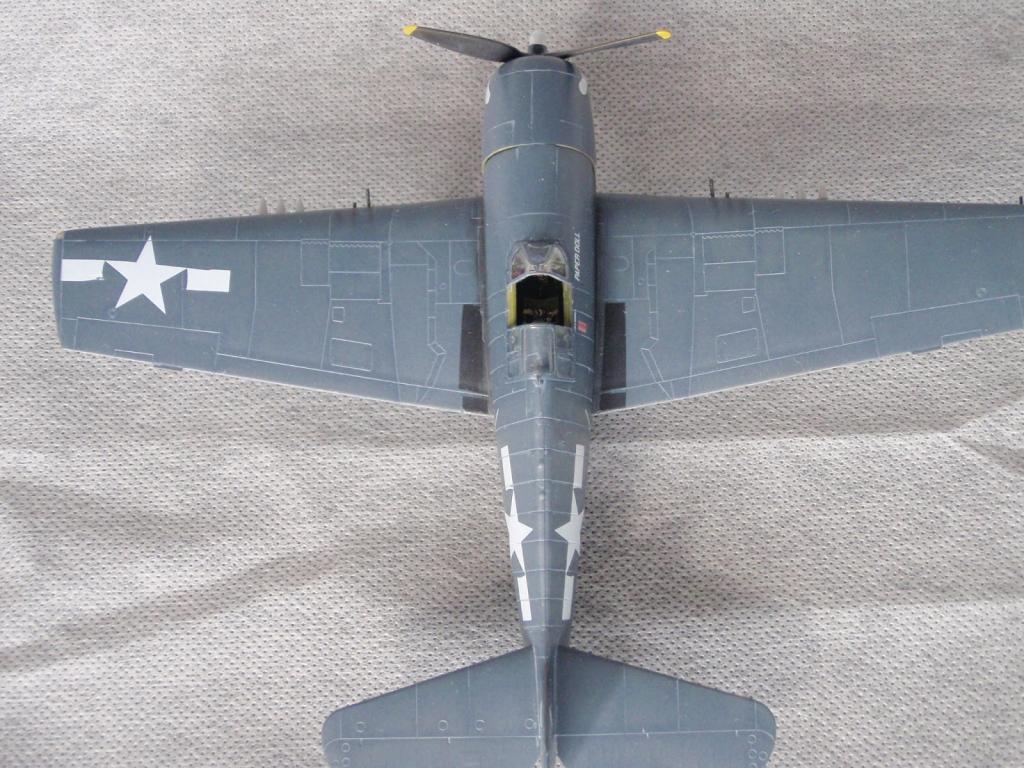
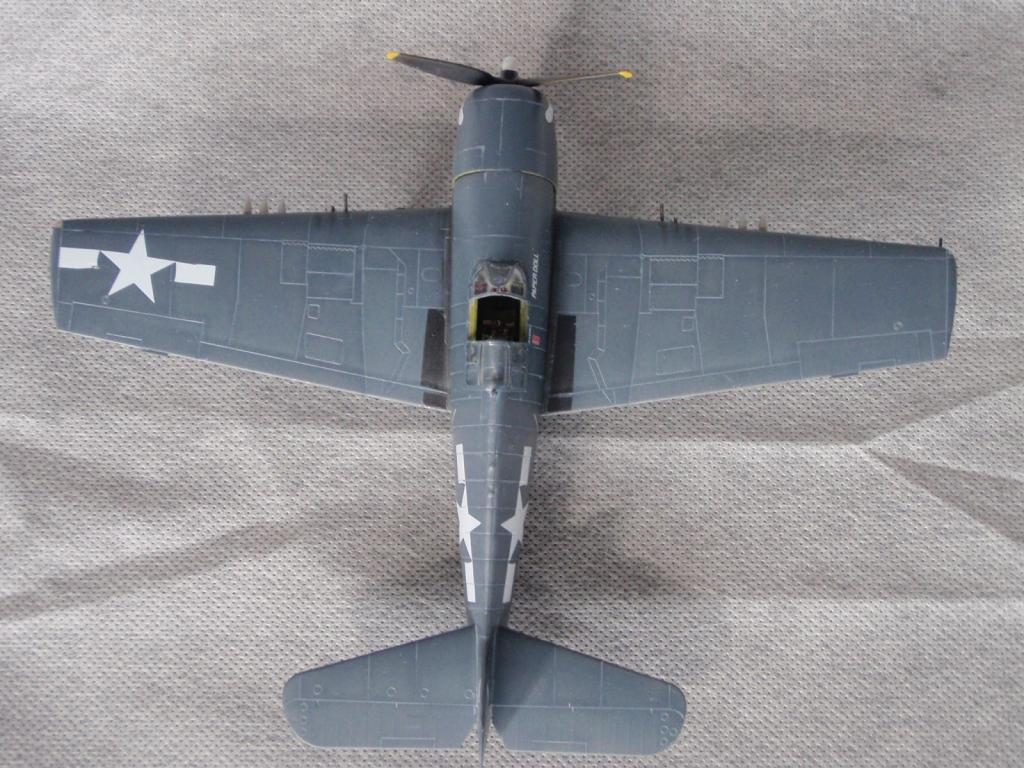
This is my F6F-5 Hellcat "Paperdoll"
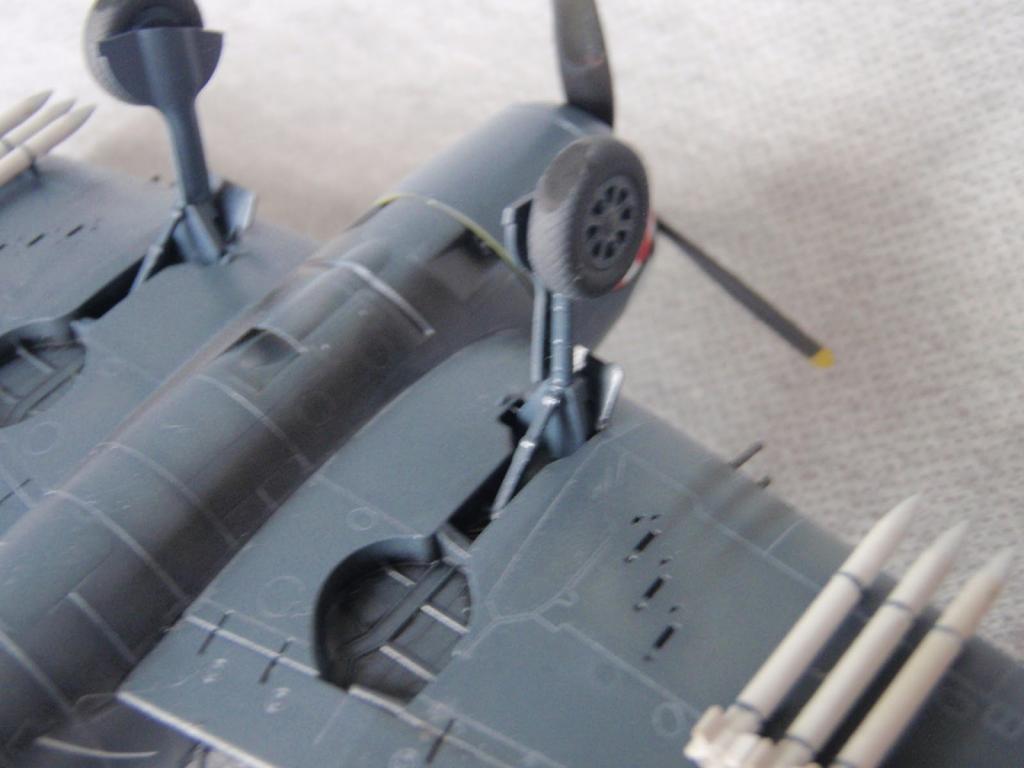
This kit was built straight from the box, it comes with a comprehensive set of photoetched and it really improves the plane, especially the cockpit.
Finished with Gunze colours. Decals was very thin and I had to be very patient when placing them. Just watch this out if you are going to build one.
Hope you like it!
Cheers


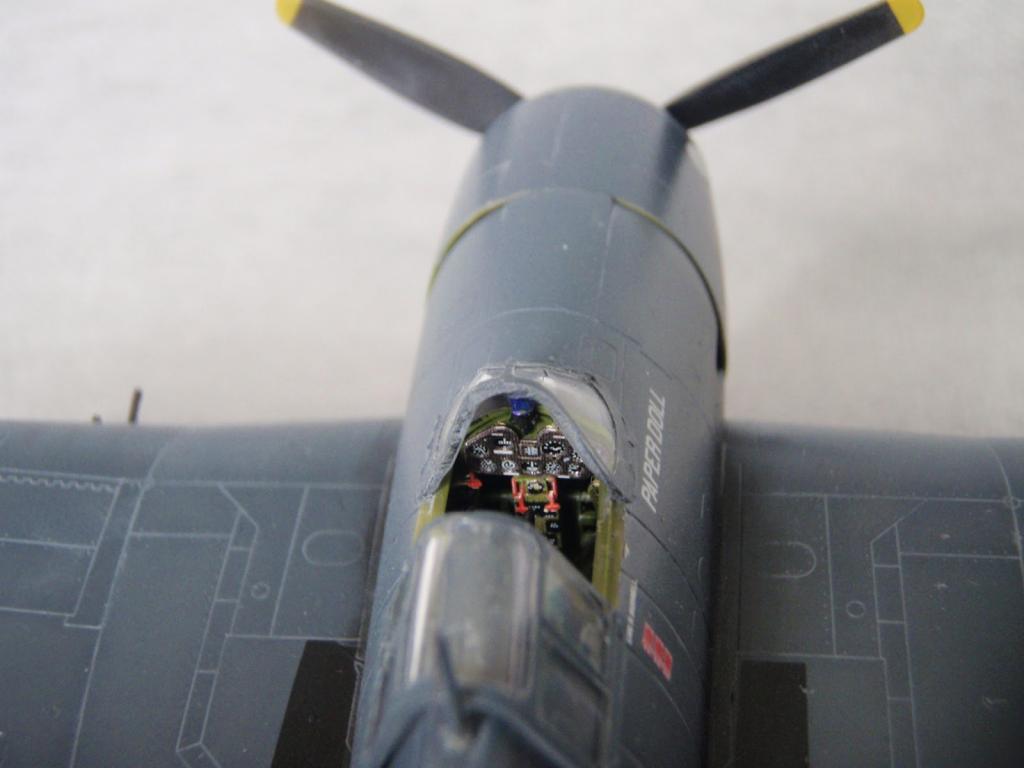


Nice work on the Hellcat Paulo….light touch on the weathering and I really liked the instrument panel, what I could see of it.
Thanks! The instrument panel is the included painted photoetch.
I have never been much for aircraft of the PTO but Hellcats with "Sharkmouths" are mad cool looking. Excellent work!
I have to agree with you mate!
Nice clean build, I like the sharkmouths too!
Cheers mate1
Pablo: A trick to give yourself maximum opportunity to get thin decals into place with harming them is to be sure the water in the bowl is hot, then let the decal just start to float off the backing sheet. Be sure to have plenty of hot water applied to the area where the decal is to go. Float it off the sheet onto the model, then use a dull-tipped #11 blade to carefully get it into position, then use a kleenex tissue to suck the water away from the surfaceas the decal is carefully "pinned" in position with the blade tip. Let it set a minute, then apply decal setting solution. Once it is set, there may be silvering. Slice the decal with a new sharp #11 and then slather in setting solution and let it set up again, which should solve all problems. Really thin decals like this are a real pain to work with and figuring them out usually requires one to mess things up a couple times. If you follow this trick, you'll mess it up less frequently. HTH
Nice model.
Excuse me, Paulo.
No worries mate!
Nice tips! I'll try these next time.
Cheers mate!
Beautiful work. I have the same kit in the final stages of completion and I was contemplating the same scheme. Is the nose art (the mouth) only decal, or did you have to resort to pain touch-ups?
The mouth is mainly decal but off course it required a few (not really many) touch ups!
Love it Paulo. Having just finished the standard weekend one, you have done a great build.
Well done Paulo.
Thank Simon!
Hello Paulo...That's a fine Hellcat model quite nicely done. Good job !
Thanks Jim!
You make it look so neat, Paulo, excellent work.
Thank you for your kind words George.
Paulo,
What you have done with this kit in this small scale is indeed very impressive. I really like it.
Thanks Frank
My problem is inconsistency. Sometimes I rush to finish a model and make a messy at the end. This model in particular is very good!
Very nice build so far!
The 72nd scale Eduard Hellcats are really impressive.
Thanks Anders!
The Eduard kits are very good, a little bit pricy though!