Hasegawa 1/32nd Bf 109 G-6/R3
Subject Background:
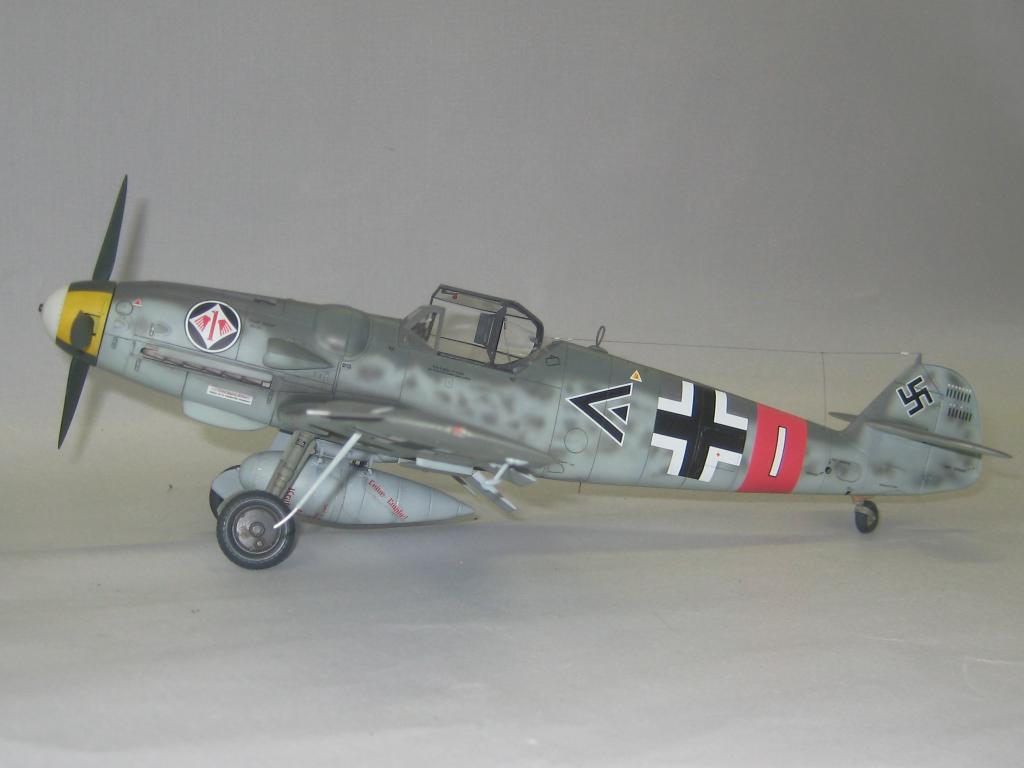
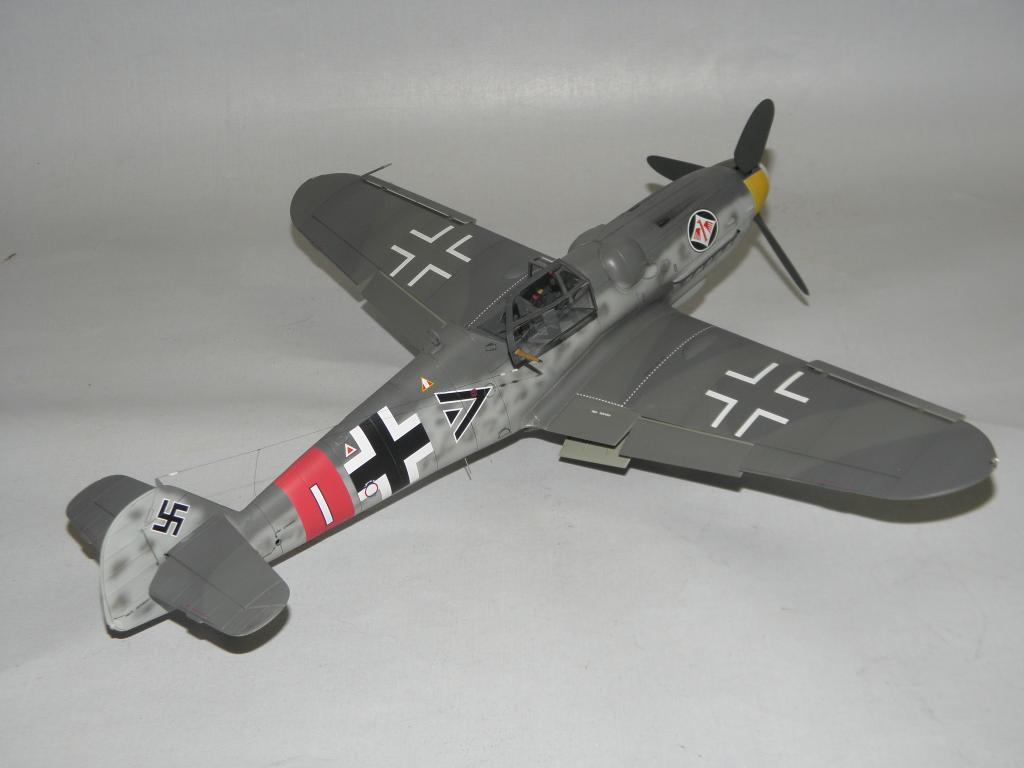
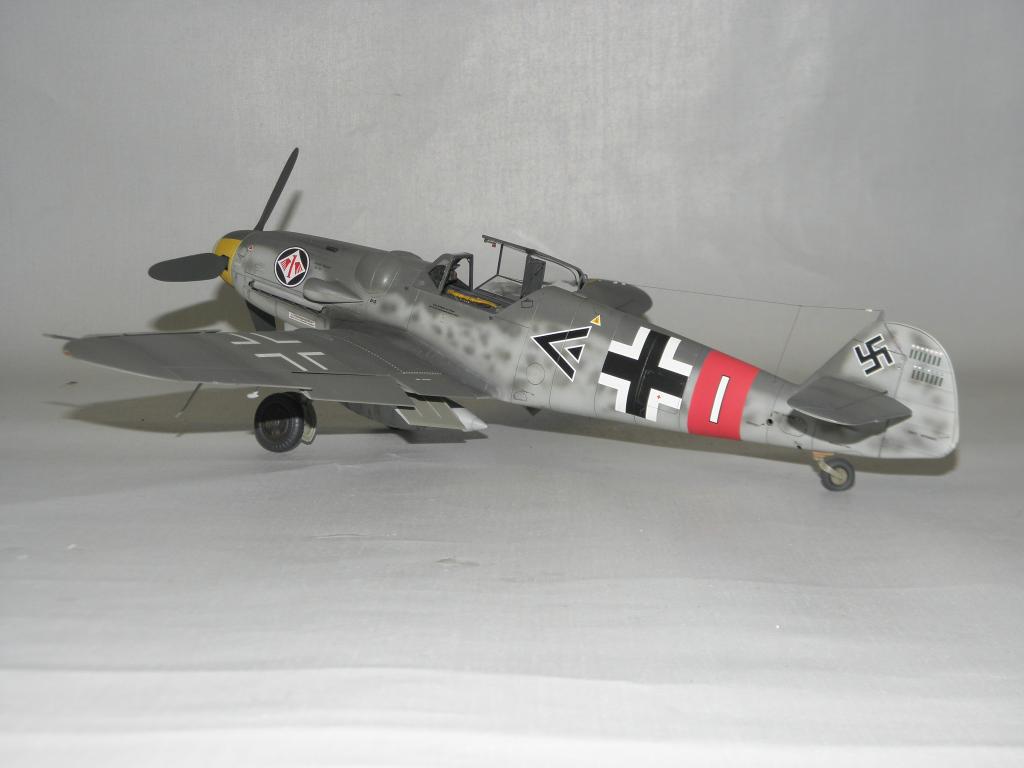
At the end of 1943, Obstlt. Walter Oesau introduced a new emblem for JG1- a red winged ‘1’ in a white diamond, which was enclosed in a red circle. My model represents a speculative interpretation of the Gruppe Kommodeurs machine from 7./JG 1 (the vertical bar indicating a machine of the III. Gruppe) stationed at Leewarden, Holland late 1943.
Assembly:
I finished this model a few years back. It was built with the additions of MDC instrument decal dials and resin exhausts stacks, Eduard PE seat belts and some basic scratch building.
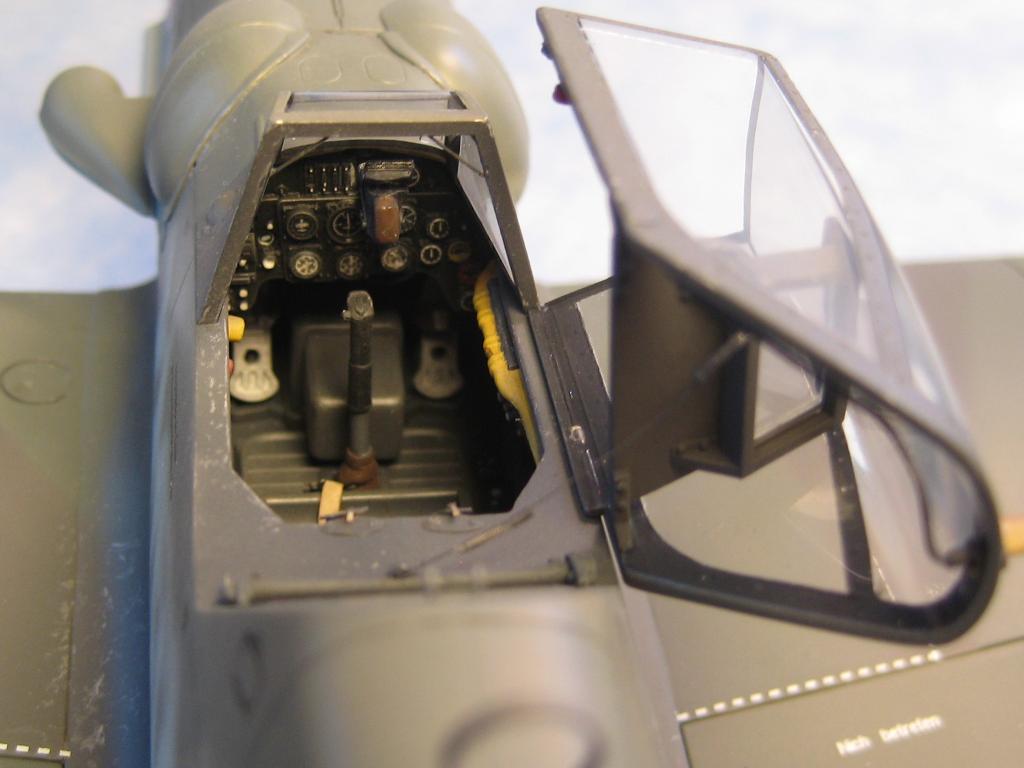
Interior:
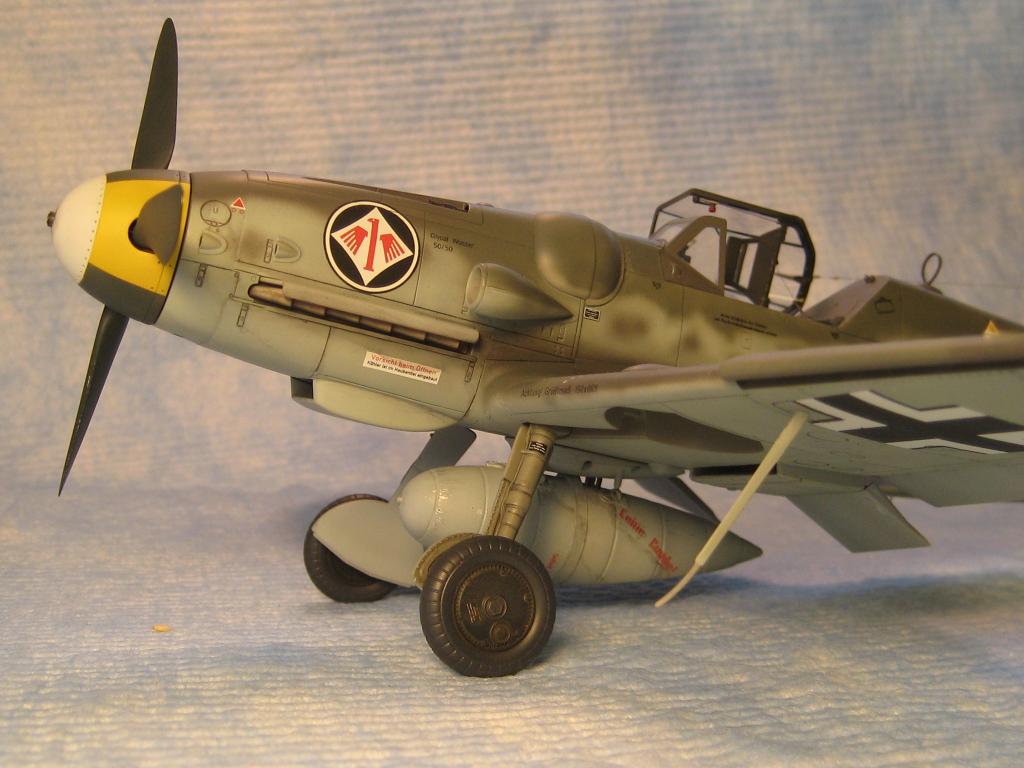
The canopy detailing was done with fine lead wire; sheet plastic and photo etch pieces from the spares box. I added some extra interior details such as instrument dials (MDC), spare PE lever parts. The Erla Haube was from a donor G-14 Kit.
Exterior:
The kit exhaust stacks were replaced with MDC resin stacks. The aerials were made from pantyhose nylon and the insulators from white glue. I had to live with the kit spinner; sanded, re-worked the gun tube with metal tubing, re-drilled the rivets and deepened the panel lined-it still doesn’t look really right and one of these days I’ll replace it with an aftermarket resin replacement.
Painting/Weathering:
I used Model Master Enamels for the enterior parts, landing gear and RLM 76 undersides and (for the first time) Humbrol paints for the RLM 74/75 upper camo. The Jury is still out with me on Humbrol paints…I’m not sure if I screwed the pooch with my lightening of the colors, but on final observation, there doesn’t seem to be a good color discrepancy between the RLM 74 and 75. To my eye the grey violet isn’t right. Chipping was done with a sliver PrimsaColor pencil.
Decals/Final Details:
The Decals were pieced together from EagleCals and AeroMaster and went down well with a little setting solution. A final dull coat was applied using a mix of PolyScale Acrylic Flat with a few drops of Dust. I then added some oil staining on the fuselage, wings and landing gear using an oil base burnt umber wash. The panel lines were highlighted with a finely sharpened 0.5mm soft lead drafting pencil. Finally, using a soft blush brush, I gently brushed the entire model to soften the penciled in panel lines.
Over all, this was a fun project for me as I’m a s****r for a 109! Thanks to my friend Frank for the photos
Happy Modeling,
Erich


Lovely job Erich, refined but not over stated.
The finish came out great...nice-lookin' build, sir.
Like the details in the cockpit, which in this scale can be quite prominent when the canopy is open. Well done Erich, the finish is subtle. Great images as well. Thanks for sharing.
Chuck
Nice work, Erich.
Thats A Really Nice Job You Made of That Erich
1st Class
Mark
Erich, superb build, I'm really impressed with the interior framework of the Erla Haube, great attention to detail.
Thanks all for the kind comments on the 109-much appreciated. Now back to that D-Day Build!
Cheers, Erich
Beautiful work, Erich.
Erich,
This definitely deserves some "Blue". As with all your work this is excellent.
Thanks Frank-"Blue Fingers" it is!
Nice clean build, excellent job on the cockpit (perfect amount of wear) and canopy looks great!
Thanks Mike
Very nicely finished 109, Erich, and thanks for explaining all the work you have put into this model.
Erich, beautiful job on the Gustav. And I really like your description of the build process, and the various paints, materials and tools you used, pretty good recollection from "a few years back", did you keep a record? Well done! ... and thanks for showing.