Airfix 1/48 Mosquito PR XVI
David Thomas has lamented that there are no PR Mosquitos here at iModeler. I thought to correct him, and then realized I hadn't posted this article about doing the Airfix PR XVI.
So now there is a PR Mosquito at iModeler!
History:
The one role everyone was agreed on for the D.H.98 Mosquito when it was first proposed was as a high-speed high-altitude long-range photo-reconnaissance aircraft. Indeed, the first Mosquito P.R.IV srs I was dispatched to 541Squadron of the Photo Reconnaissance Unit within a week of its acceptance, and it flew its first mission over Bordeaux two days after arrival in the squadron on September 17, 1941, during which it evaded three Bf-109s at 23,000 feet. A total of ten Mosquito P.R.Is were built and delivered, four of them with a 151 gallon tank in the bomb bay. All had the original short engine nacelles and the short-span horizontal stabilizers of the prototype. Top speed was 382 mph, ceiling was 35,000 feet and range was 2,180 miles. Over 30 Mosquito B Mk IV bombers were converted into the PR Mk IV photo- reconnaissance aircraft, with the first mission by PR Mk IV made by DK284 in April 1942. Manufacture of the PR IV was proposed in the US, where the USAAF adopted the type as the F-8. While a limited few were produced and a couple saw operational service, overall this did not happen.
In an attempt to improve high altitude performance, five Mosquito PR Mk VIII were converted from B Mk IVs and became the first Mosquito version powered by two-stage, two-speed supercharged engines, using 1,565 hp Merlin 61 engines in place of Merlin 21/22s. The first PR Mk VIII, DK324 flew on October 20, 1942. These were followed by 90 PR IXs based on the B Mk IX bomber, powered by two 1,680 hp Merlin 72/73 or 76/77 engines. The aircraft could carry either two 50-gallon slipper tanks, two 100- gallon slipper tanks or two 200-gallon drop tanks. The 435 PR XVIs were based on the B Mk XVI, and differed from the Mk IX in having a pressurized cockpit. Top speed of 415 mph at 38,500 feet made it nearly impossible to intercept this plane until the Me-262 showed up and even then it was difficult.
Colonel Roy M. Stanley II, USAF (Ret) who flew the PR XVI with the 8th Air Force 25th Photo Recon Squadron of the 7th Photo Group for weather reconnaissance over the continent wrote: "I consider the Mosquito the best photo-reconnaissance aircraft of the war".
THE KIT
Airfix first released a 1/48 FB VI Mosquito in the early 1980s. It was at the time the best Mosquito kit in this scale, and was only bettered by the Tamiya kit first released in 1998. The kit was updated in 2003 with the longer high-altitude engines as an N.F. 30, with a B. Mk.XVI/PR XVI released in 2004. The kit was re-released as strictly a PR XVI in 2008 with different box art, and re-released in 2014 in markings of 541 Squadron during D-Day for the D-Day 70th Anniversary, which was when I got this kit. The
kit is currently out of production, but is available at eBay for prices between $34-$40.
CONSTRUCTION
The high-altitude Mosquito kits are from the “bad Airfix” days of the 1990s and early 2000s. The additional parts to the original FB VI (which is mostly available in the box with its parts) include new upper wings with heavy engraved (like trenches) panel lines and the new engine nacelles. The nacelles need work to bring them up to standard. I found it was better to use the original FB VI upper wing parts, cutting off the upper engine cowling and substituting the parts for the longer cowlings.
The bomber/photo recon version fuselage looks very much like Airfix had their hands on a Tamiya B.Mk. IV kit when they designed these parts. One good thing is that the Airfix Mosquito is the only Mosquito kit in 1/48 with a correct shape and size vertical fin and rudder, which is quite noticeable if the Airfix model sits next to a Tamiya Mosquito model.
Overall, the parts are not as nice as you find in the Tamiya kit, and lack some detail. However, parts fit is good if you take your time, and once the model is finished and is sitting on its gear, it looks just fine sitting next to the Tamiya models. The clear parts are thick and there is distortion, but that's fine since it hides the fact the cockpit detail isn't as good as in the Tamiya kit.
I first opened up the intakes of the engine cowlings so they looked right, then after painting and assembling the main landing gear with the wheels, I assembled the engine cowlings with the gear inside, and then attached these to the wings after assembly. I only needed to use putty to fill the trenches in the upper engine cowling parts to make them look like the original upper wing.
I assembled the cockpit and then painted it RAF interior green before assembling it in the fuselage. I had a Mosquito instrument panel decal in the spares box, which I used for this kit. I also used the decal seat belts, since these would not be so apparent through the thick canopy parts. I only needed to sand down the centerline seam when I assembled the fuselage. I had attached each wing to its respective fuselage half before further assembly so I could work the attachment from inside and out and get a good fit. An application of cyanoacrylate glue filled in the gaps in the attachment of wings to fuselage.
COLORS & MARKINGS
Having used up the last of my Xtracryulix PRU Blue, I mixed my own which is “close enough” though not fully correct. Masking the canopy was very involved, and was perhaps the most time-consuming and difficult part of the whole project. I opted for full D-Day stripes to relieve the monochrome of a single overall color for the airframe. These were painted and masked off, then the PRU blue was applied. When done, the D-Day stripes were unmasked and the model given an overall coat of clear gloss.
I used national insignia decals from the decal dungeon, and the kit decals for the serial numbers. I finished off with a couple coats of satin clear, since these airplanes were kept in very good shape to maximize performance with the paint on the original being a semi-gloss.
I then unmasked the clear parts and attached the propellers.
CONCLUSIONS
It's not the Tamiya Mosquito, but it's not a bad kit if you take your time in assembly. There's nothing difficult, and the final result looks nice sitting next to my Tamiya Mosquitos. I'll probably do an NF 30 if I can find one at a decent price. Recommended for Mosquito Mavens.
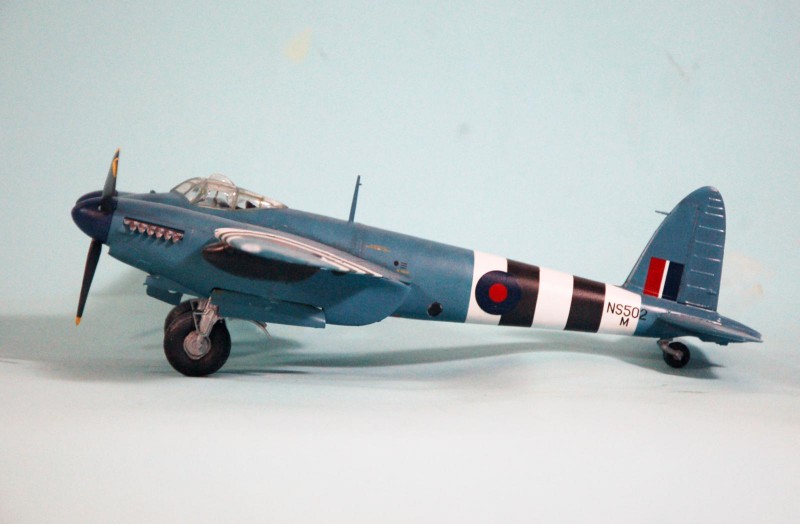
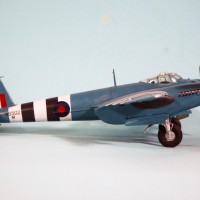
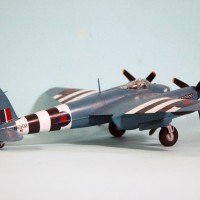
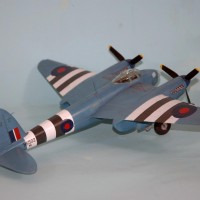
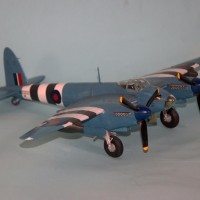
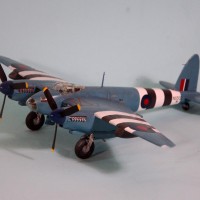
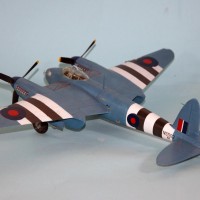
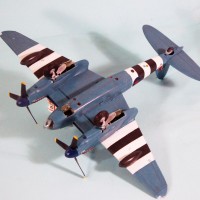

PR Blue is my favorite when it comes to monotone camouflages, and this Mossie is one of the prettiest wearing it. Don’t think I would buy the Airfix kit, but wonder if there is a conversion using Tamiya kit as a base?
Pretty sure there is a Paragon conversion. Not sure of the part number or availability.
I really like the silver spitfires. The design is nice to paint, easy too. You can even polish it, though I havent been able too successfully. It's my favorite monotone scheme
Sweet blue Mossie Tom
Nice work, Tom. You definitely like Mosquitoes. Do you know if there was a difference in sheen on WW2 and postwar PRU blue?
Very attractive scheme and I agree, the stripes only add to the overall effect
Nice job TC.
Very sharp looking "Mossie" Tom!
The only plane that looks better in this color combination is a Spitfire. I remember seeing and reading this article over at Modeling Madness a few months ago.
Looks good Tom. Thanks for posting this version which happens to be my favorite all time Mosquito.
I’ll be watching David Thomas as he goes through the steps building up his Mossie in our wonderful Imodeler at the Movies GB.
I agree with your use of stripes to add more interest, and it's a great-looking Mossie! Well done.
LOVE that...a genuine stunner
Beautiful plane! Mosquito is good in this color!
Turned out great. The color scheme and the invasion stripes make for an attractive display. Motivates me to dig out my Monogram kit.
Very nice!, Tom.