1/72 Anigrand A2D SkyShark
The A2D Sky Shark was originally designed to be a turboprop powered contra rotating propeller equipped reply to the short range and low thrust of early jets based on a requirement for an attack plane able to fly off escort carriers. Originating from the design of the much more successful Skyraider, the Sky Shark was supposed to have greater power, range and carrying capacity of the piston engined Skyraider. However, the Sky Shark's Allison engines proved to be more complex and problematic as it suffered major engineering setbacks and crashes over five years of painful development.
In the end, the Sky Shark was scrapped as Douglas focused its resources on the design and development on a jet powered single seat attack plane for the Navy that would become the A4D Skyhawk aka Heinmann's Hotrod. The Skyhawk would prove to be one of the most successful attack aircraft in history while the Sky Shark became an aeronautic dead end and historical curiosity.
CONSTRUCTION
I wet sanded down the edges of the fuselage and then noticed that the starboard fuselage piece was warped. I remembered what a lot of folks suggested to do with warped pieces. I ran it under several minutes of hot water to soften it a bit then attempted to bend it into shape. The piece did bend after a fashion, but not before I cracked the cockpit aft wall a little. My efforts made the fuselage straighter, but it still had a slight gap in the front, cockpit and bottom seams which I could live with. My thinking was that it was easier to deal with those gaps than any gap issues with the tail.
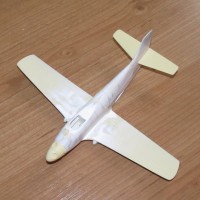
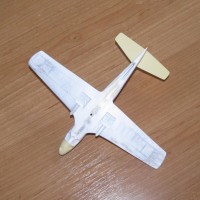
The fuselage halves were glued together using gap filling CA glue and held together with as many clamps as I could fit. Next the wings and ailerons were added, but the mounting pegs needed to be clipped and the holes/round surfaces of the mounting pegs had to sanded a little to allow them to fit smoothly before gluing. The one piece tail was added in but there were some pretty obvious gaps and steps that needed to be fixed. Lastly I glued on the prop hubs in position (as much as I would have liked to make them spin.)
The fuselage and tail gaps were first filled with CA glue then I used Tamiya Surface primer (their version of Mr Surfacer) on top. I wet sanded carefully with various grades of sandpaper to remove the gaps or so I thought. The gaps between the wings/ailerons and fuselage were handled using a couple of applications of Vallejo plastic putty (excess putty was removed with damp Q-Tips.)
To deal with the gaps in the cockpit I added some plastic card to cover them up. I didn't bother to add any detail after I took a good look through the clear resin canopy and realized that no one was going to see anything except maybe the top of the ejection seat.
At this point I primed the model using Tamiya white laquer primer from the spray can. After it dried, the primer coat showed that I didn't deal with the gaps as well as I thought. There were some quite noticeable gaps and divots than had to be fixed. I added Vallejo plastic putty and let it dry before sanding. Once I thought I had finished with the sanding then I polished up the surface of the model using various grades of polishing cloth. It turns out it wasn't any better than the previous attempt and I needed to repeat this a couple of times. I don't know what happened, but the seam on the bottom wouldn't go away. I used CA glue instead of surface primer, but the remains of the seam still showed up in the primer coat. At this point I was getting rather annoyed and decided to cover up the gap with the centerline fuel tank.
I used a small Hasegawa hobby saw to replace any panel lines I removed during the filling/sanding process.
The canopy was masked and then glued into place with white glue so now the model was ready for painting.
COLORS AND MARKINGS
Painting
I primed the model one more time using Badger black Stynylrez primer which is now my go to paint primer coat. When it was fully dry I polished the primer coat with a 3200 grit polishing cloth and wiped it down with a damp cloth to remove any primer dust.
The prototype was painted glossy sea blue so I used Xtracrlyix's version of the paint. I needed couple of coats to ensure good coverage as I didn't want to “post” shade the paint. The landing gear, tail wheel and other parts were also painted at this time. The wheels were brush painted German Grey and the oleos painted silver. Lastly, the propeller blades were primed with black primer and the tips were masked off, painted flat white and finally painted gloss yellow.
After a day or two letting the paint cure, it was gently polished using a 4000 grit polishing cloth to smooth out the paint and remove any dust marks. It was then ready to be decaled.
Decals
The Anigrand decals weren't as good as I hoped. They came off the paper backing all right and had no issues being placed on the surface, but I had to deal with a lot of bubbles/silvering even with liberal use of MicroSet to get them to settle down onto the surface. I ended up slashing the silvered areas with a knife and using several applications of the more reactive Solvaset before the silvering disappeared enough for my satisfaction.
I had better luck using the prop stencils from a used Aeromaster B-17 sheet on the props to give the plane some more detail.
I didn't bother weathering as prototypes are generally very clean machines.
The model was wiped down again to remove decal solution before I sprayed on two light coats of Xtracrylix Satin coat for the final coat.
FINAL CONSTRUCTION
The wing and centerline fuel tanks were glued in with small dots of CA glue. The landing gear was glued in place. Next the six prop blades were glued into the hubs.
I removed the canopy and added the flat featureless instrument panel which I had painted flat black with badly painted flat white dials using my less than mediocre detail brush painting skills. I should consider myself fortunate that no one can see into the tiny canopy. Finally I added a tiny control stick (the one that came with my kit was broken) and a plastic ejection seat (from the Airfix Swift I built a couple of years back) that came from my spares box. Both items were painted flat black (the ejection seat headrest was painted red) and only the seat can be seen thru the canopy.
The canopy was glued back on and it was then I noticed the gaps between said canopy and fuselage. I opted to fill the gap with plastic putty, remove the excess with Q-tips and then mask off the area with post-its before carefully spraying on Glossy Sea Blue and the Satin coat.
Lastly, I added the tailhook and landing gear well doors
CONCLUSION
The Anigrand A2D Skyshark is a good choice kit for a first time resin model builder. It is simple enough to build and paint while providing good experience with resin (which is perfect for someone like me who has built only two resin kits including this one.) Those who like more detail won't be happy with the simple details and will have to look at using whatever few 1/72 Skyraider aftermarket parts there are to improve areas.
Definitely recommended for the modeller who wants to try a resin kit for the first time or someone who likes the A2D Sky Shark.

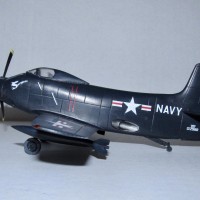
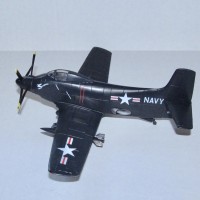
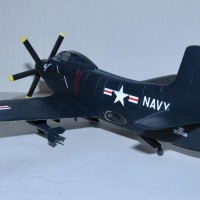
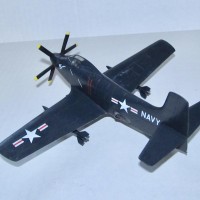
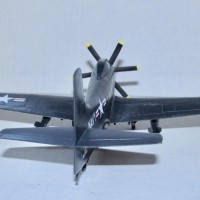
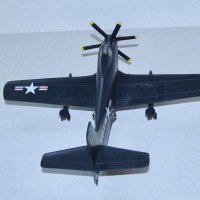
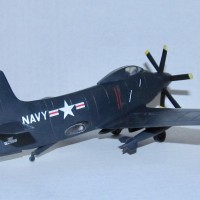
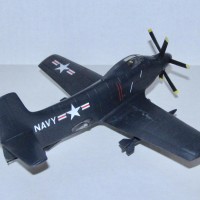
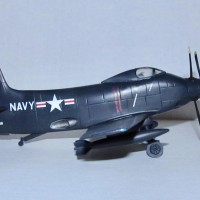
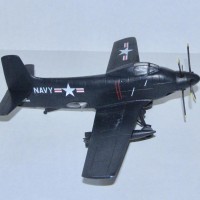
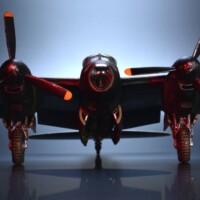
The designers ruining the perfect good looking lines of the Skyraider were duely punished by the gods for doing so. The Skyraider was a perfect design right from the start and wouldn't have any of it. Cool model, though. Congrats on going through with a build like that.
Pretty model of a very ugly-duckling aircraft! You wrestled into shape quite nicely.
Hello Dan and congratulations on a fine build of a challenging kit.
Looks great!
Great work, Dan.
Having seen the surviving one (which used to be out at Chino), let me tell you it's biiiiig - if I stood in front of the wing, the leading edge was just above eye level and I am 6 feet. Seeing something that big operate off a CVE (it makes a TBM seem small) would have really been something.
You made a great looking representation of this rare aircraft.
Well done.
This is a quality work, Dan.
You turned a very challenging kit into a beauty.
"It's so ugly it's beautiful"! Love it!
Thanks everyone! I'm glad you guys enjoyed it.