Dragon 1/48 Ju-188E-1
HISTORY
The Junkers Ju 188 was a high-performance medium bomber built during World War II, the planned follow-up to the Ju 88 with better performance and payload. It was produced only in limited numbers, due both to the presence of improved versions of the Ju 88, as well as the increasingly effective Allied strategic bombing campaign against German industry and the resulting focus on fighter production.
The Ju-188 is another example of failure of the German aviation industry to successfully produce and introduce into operations follow-on designs to the original aircraft designs with which the Nazis first went to war. At the time the Ju-88 was introduced to service in 1939, the Reichluftfartsministerium (RLM) was already in the process of looking for the replacement for the Schnellbomber, which would be a new design that would be faster, fly higher, and have a larger warload. This emerged as the "Bomber B" program, but this was delayed due to the failure of the large 2,470 hp-class engines, like Junkers' Jumo 222. The Ju-288 was leading the contest, but there was no delivery date on the engines.
To address the immediate need, the Ju 88B project was re-submitted as a stop-gap. For this version, they used the latest short-wing Ju-88 A-1 airframe as a baseline with the Ju-88B's new stepless cockpit design, using the new Jumo 213 engine, which had recently started bench testing and was expected to deliver 1,480 hp. The RLM also stipulated that the aircraft should also be able to accept the BMW 801 radial engine in a Kraftei (power-egg) unitized installation, with no modification to the engine nacelles. When the design finally flew, the RLM was not impressed with it, as it offered only small improvements over the Ju-88A model in service but suggested that Junkers continue with the prototype work anyway.
By 1942, it was becoming clear the Ju-288, was not going to be ready soon, while the Ju-88A was increasingly at the mercy of RAF and VVS fighters. The RLM finally decided that the Ju 88B was worth considering even with only the small gains in performance in and asked Junkers for an improved aircraft as the Ju 188.
The sole Ju-188 E-0 was modified with another 13 mm MG 131 firing rearward just below the turret, one firing forward through the nose and twin 7.92 mm MG 81Z machine guns in the integrated ventral gondola firing rearward. It was planned to use the Ju 188 against British shipping. A second Ju 188 test airframe was built from another Ju-88 A-4, this one including a larger, more trapezoidal vertical tail surface set to provide more directional control at higher altitudes, a feature also used on future Ju-88 models. Originally known as Ju-88 V44, this airframe was later named Ju-188 V1.
The Ju-188 was chosen for production in October 1942. The RLM then asked for another change, allowing the aircraft to mount either the BMW 801 or Jumo 213 engines as a complete Kraftei or "power egg" common engine installation. Concerns about the Jumo 213, now years overdue, were offset by this engine's better altitude performance. The second Ju-188 prototype was flown in at Rechlin between September and November 1943.
The Ju-188 was designed to be fitted with either the 1,730 hp Jumo 213A or 1,680 hp BMW 801 G-2 engines without any changes to the airframe, while using similar broad-chord three-blade propellers. It was intended both would be known as A models but the naming was later changed: the Ju-188A model powered by the 213 and the Ju-188E by the 801.
Delivery problems with the Jumo 213 were never entirely solved and the only model to be built in large numbers were the E series with the BMW 801. Even then, so few were available that they were generally given out to Ju-88 units, who flew them on "special" missions where the longer range or better performance would be helpful. Some 500 Ju-188A and E variants were produced before production ceased in the summer of 1944.
The Ju-188 was perhaps the perfect example of “too little, too late, too poor in performance” to keep the Luftwaffe competitive with its many enemies. The famed German “competence” in technical development failed the country at exactly the right time - for its enemies.
THE KIT
DML released the Ju-188 as part of its Ju-88 series of kits in the late 1980s. Like the others, it was one of the first kits to introduce “modular” design, so that most of the parts would be used in all the kits, with various sprues of type-specific parts included. This contributed to a reputation as a “difficult kit” regarding fit. The kit features 182 parts including 27 photo-etched parts in steel, but only 138 parts are dedicated to the E-1 version. The other parts are for the A version or for the Ju-88. The transparent parts are excellent. All the control surfaces are separated except for the flaps.
The small decal sheet suggests three options: one marking for a KG 6 aircraft, one marking for a reconnaissance unit and one marking for a KG 66 aircraft based in France.
CONSTRUCTION
For those interested in bringing a lot of detail to the wide-open cockpit, there is an Eduard detail set available, which I did not opt for.
The kit is designed to be built in modules: fuselage/tail, wings, and cockpit/forward fuselage. These kits are famed for poor fit, but with careful test fitting and modification where necessary, the wings came together, followed by the fuselage. I only used filler along the centerline of the fuselage and the engine cowlings.
I did use Eduard seat belts for the cockpit, relying for detail on running a white pencil over the raised instrument detail, then brush painting some clear flat over that to fix the pencil.
Many people have commented about the poor fit of the clear canopy to the forward fuselage, which is a bit narrow. I bent the fuselage sides out till they matched, then attached the rear canopy with cyanoacrylate (after painting it with Future)to get a good fit and bracing it inside while the glue set up with a piece of sprue cut to the proper dimension. When that was set up, I attached the forward canopy section, which fit perfectly. With a little fiddling, the forward fuselage fit the rest of the airframe without a problem.
COLORS & MARKINGS
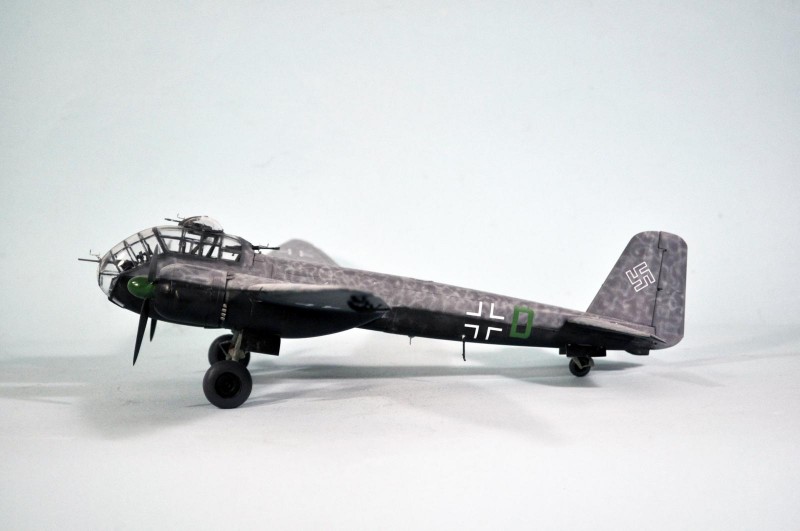
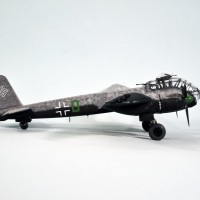
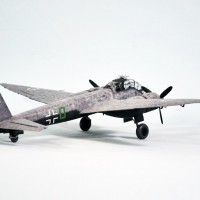
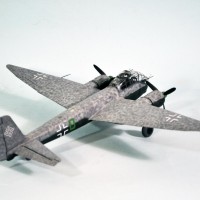
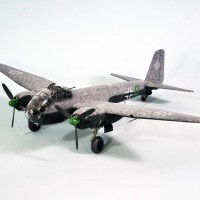
I wanted to do the night time “cloud” camouflage used by airplanes flown in "Operation Steinbok,” the “Little Blitz” in early 1944 that was Hitler's “answer” to the massive Allied day and night bombing of Germany. The best thing that can be said of the operation was that it got a lot of German bombers shot down that might have been of use after D-Day, for little return in damage to Britain.
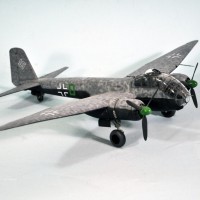
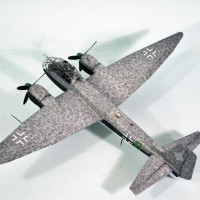
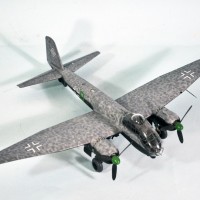
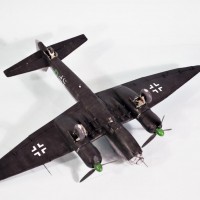
I painted the upper surfaces overall RLM74, then “scribbled” RLM76 over it. One does not have to worry about neatness. I pretended to be two Luftwaffe Feldwebels with sprayguns, told to “paint that thing.” It's very random overall. When that was finished, I painted the lower surfaces with Tamiya “NATO Black.”
The kit decals are worthless. I was able to find the old Aeromaster Ju-188 sheet at the LHS estate sale, and used that, which was far superior. The result is an airplane of Stab/KG 66, used in Operation Steinbok.
I unmasked the canopy and fitted the guns and upper turret, and glued the lower hatch closed. After attaching the wheels and props, I declared it done.
CONCLUSIONS
It's pretty certain no one else will do a Ju-188 (Hello, ICM, forgot about you), but for now, these kits are what you get. With a little effort, they look nice. With a little more effort and the Eduard p-e, they can look even better. The Ju-188 may have come too late to be a war-winner, but it's a good looking airplane. Recommended for modelers who have done limited-run kits.
Very nice build Tom,
The "scribbling" is really good, making the plane look larger than it already is.
Can imagine that you needed a lot of time to mask and unmask this large amount of glass.
Really appreciate the background of this plane. Thanks for sharing.
The glass was indeed a PITA!
It is interesting how Germany totally missed the concept of strategic bombing but went for a wide bunch of slow medium bombers to do the job. Praise the powers that c**p politics, politisized industry and over reaching made the 3rd Reich ineffective.
Great historical background as as always, Tom. Fab looking model. Must have been cramped up in the front section if there were, what, four persons on battle stations?
Guess a few of these got into Allied hands and marked accordingly? Might be a cool splash of colour with British roundels and fin flash.
Yeah, the French used some Ju-188s after the war operationally, and there are photos of them in US and RAF markings.
It’s a good coincidence that one of my current workbench projects is the Jumo variant of this kit, the 188 A-1/2.
The whole story behind its conception and poor use is, as your usual, very comprehensive Tom, a great background reading for the model presentation. I do not find this kit worse or better than the remaining family of DML Junkers. It’s like you say, with some work, double check fitting before glue and extra detailing it can be made into a very good replica of this versatile and good looking plane. At least I hope mine will turn as good as yours.
And thanks for the tip about the greenhouse fitting Tom!
Nice model, Tom. The camo turned out really well.
An excellent model in every respect and an equally great historical background, Tom.
Really a beautiful job. The camo paint job is superb...one of the best I've ever seen. I've thought of trying the "squiggly" designs like yours and those found on some Italian fighters, but my airbrush skills are not up to it. A fantastic build!
I just cracked the box on an Italeri Ju-188 (1/72) and finally received my Begemot decals (MONTHS in the mail)! Man - yours looks incredible! I'd love to use a similar scheme, but not sure of if fledgling AB skills and my .3 needle airbrush can pull it off...
Any tips you can provide on paint-to-thinner ratio (mention paint brand, of course), PSI, etc. to get the control needed for that squiggle work.
I shoot acrylics. For something like the squiggles, about a 45 thinner - 55 paint mix or even 50-50 is good. Tighten the airbrush down to where it is just putting out a thin spray that leaves a thin line. Remember, neatness doesn't count and the real guys were just spraying all over. I have seen closeup photos of the scheme that look really really bad, no modeler would approve.
I love the paint scheme on your build. Love all those squiggles, German camouflage is so much fun and often makes for an eye catching model when done. Good job, I like the Dragon Ju-88 family of kits, I think they offer a lot to the patient builder.
Another nice one! Great camo job.
A high quality work as usual Grat looking airplane with a stiking camo.
We all know they were the bad guys, but there’s something about the design and markings of german ww2 aircraft that stresses that, as to leave you no doubt about it. Perhaps there’s a form of “confirmation bias” into that assertion, but a remark made by Bruce Dickinson when comparing the Spitfire and the 109 comes to mind: something along the lines of “the Spitfire was beautiful, but the 109 looked like it wanted to kill you”. That is also the assessment of post-war pilots who flew both aircraft: the 109 being angrier and much less forgiving than the Spitfire. This mistique seems to apply here, too - not so much to handling qualities, but to the angry, menacing, evil look.
That is great camo, and a sweet build.
Excellent points. There is more to machinery than just parts.
Really inspirational work Tom! Planing to the Revell reboxed edition.