How to make a convincing looking fabric covered interior using tissue paper
This article is part of a series:
Most of you know that I have a soft spot in my heart for any aircraft that has two wings, and is mostly covered with fabric. Last night I had a good idea (at least I thought it was), and I wanted to share this with you all.
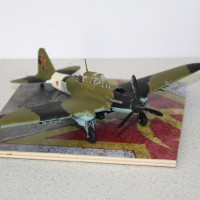
A while ago I wrote an article on how to get a streaky looking finish on World War One Fokker aircraft, using the 1/28 scale Fokker Dr-1 Triplane that I had backdated to the earlier F-103 prototype that Werner Voss was shot down in.
This is a follow up “how to” article with the idea that I came up with on how to get the inside of the cockpit to look like it was actually covered in fabric.
I recently picked up a sweet little 1/32 scale model of the Bucker Bu-131D.
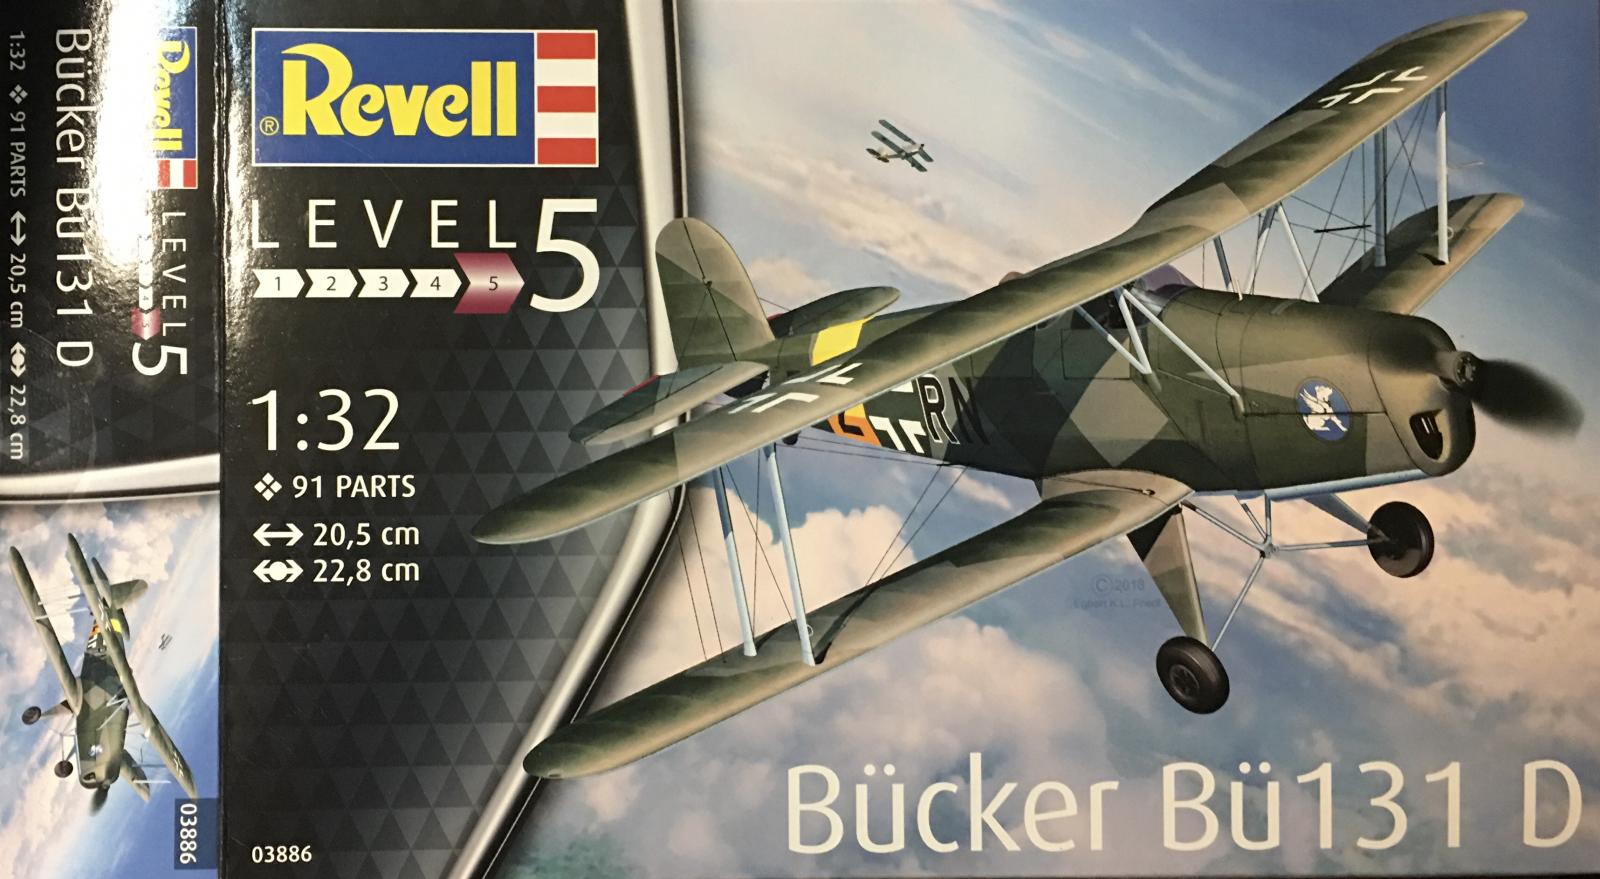
This is the Revell of Germany kit, and it is actually an ICM kit that has been re boxed by Revell. This has been a great model for me to get going on. Lately I've been on a biplane kick, and this build is a follow up on the Fine Molds Ki-10 Perry that I recently finished.
The cockpit of the Revell/ ICM Bu-131D is splendid as it comes from the box. It has a separate tubular framework that represents the basic cockpit structure very well. I have been wanting to get going on this kit every since it arrived in the mail. But one thing was keeping me from building it.
I wanted a way to show the fabric covered side walls and floor. Last night I had a brain storm and this is what I came up with. If any of you have build balsa wood flying models, it will look very familiar to you...
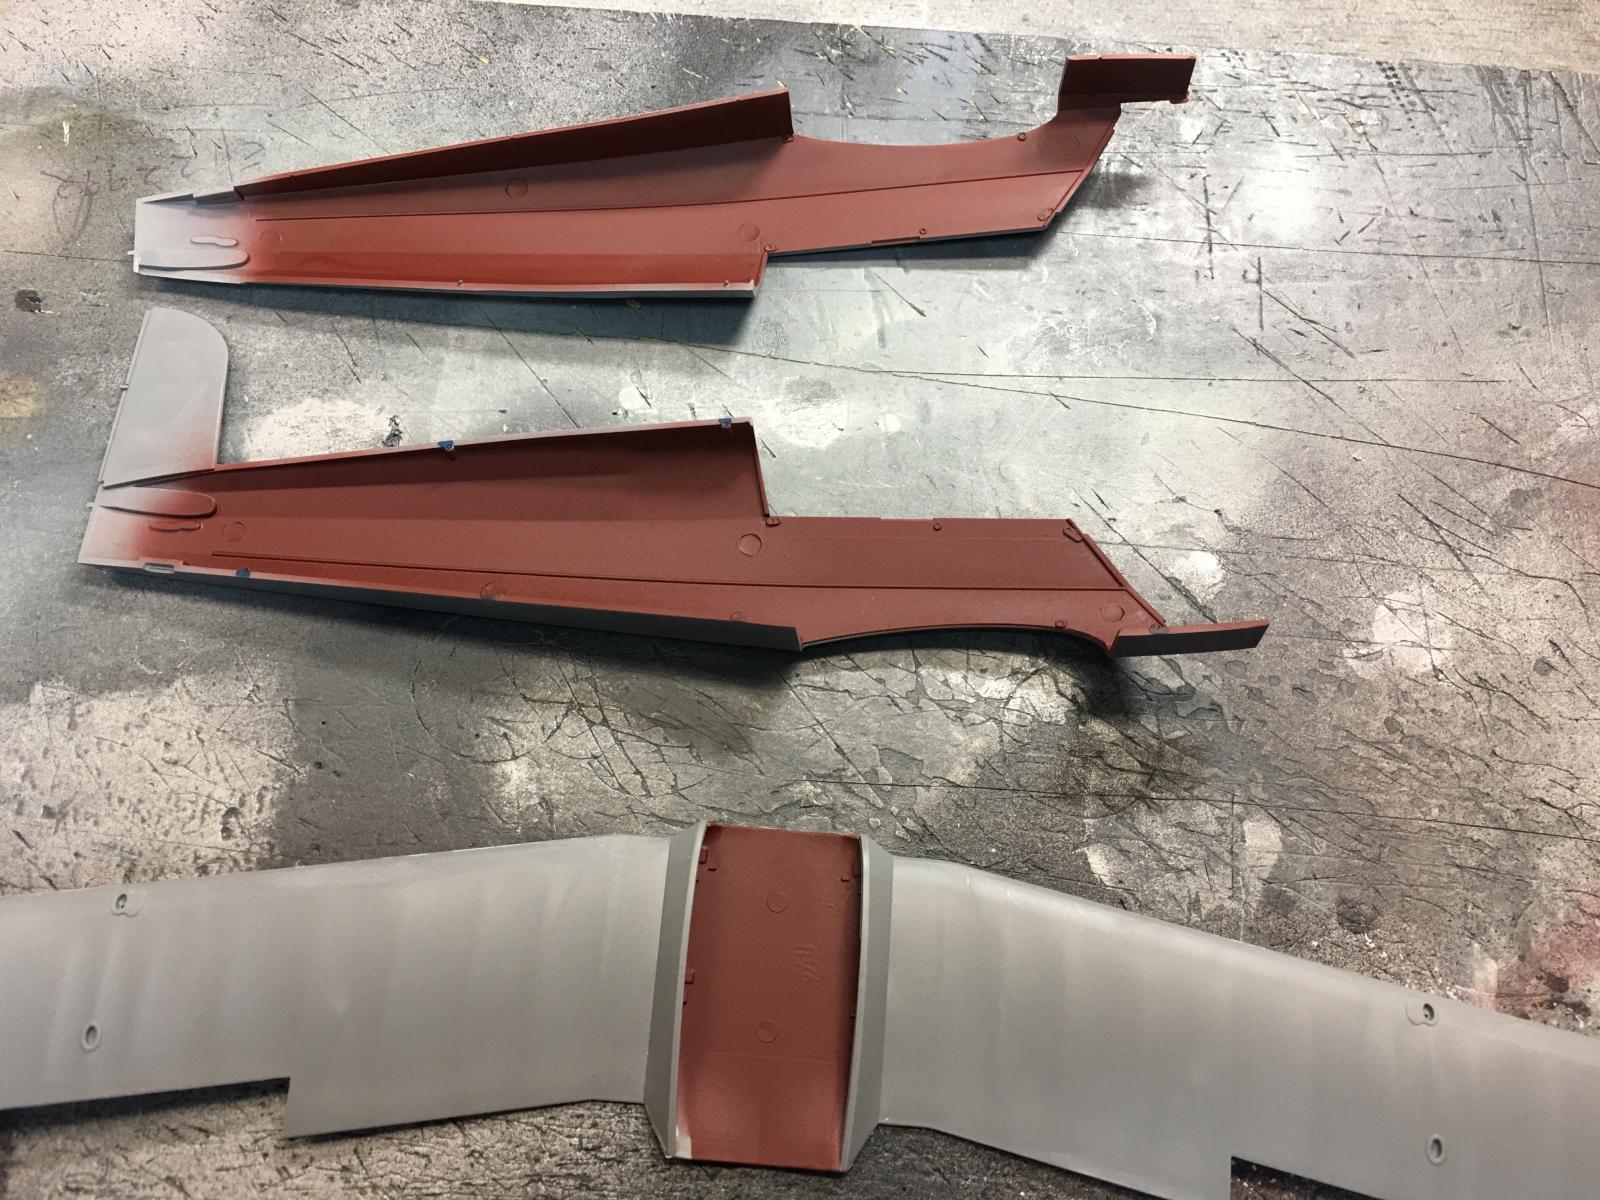
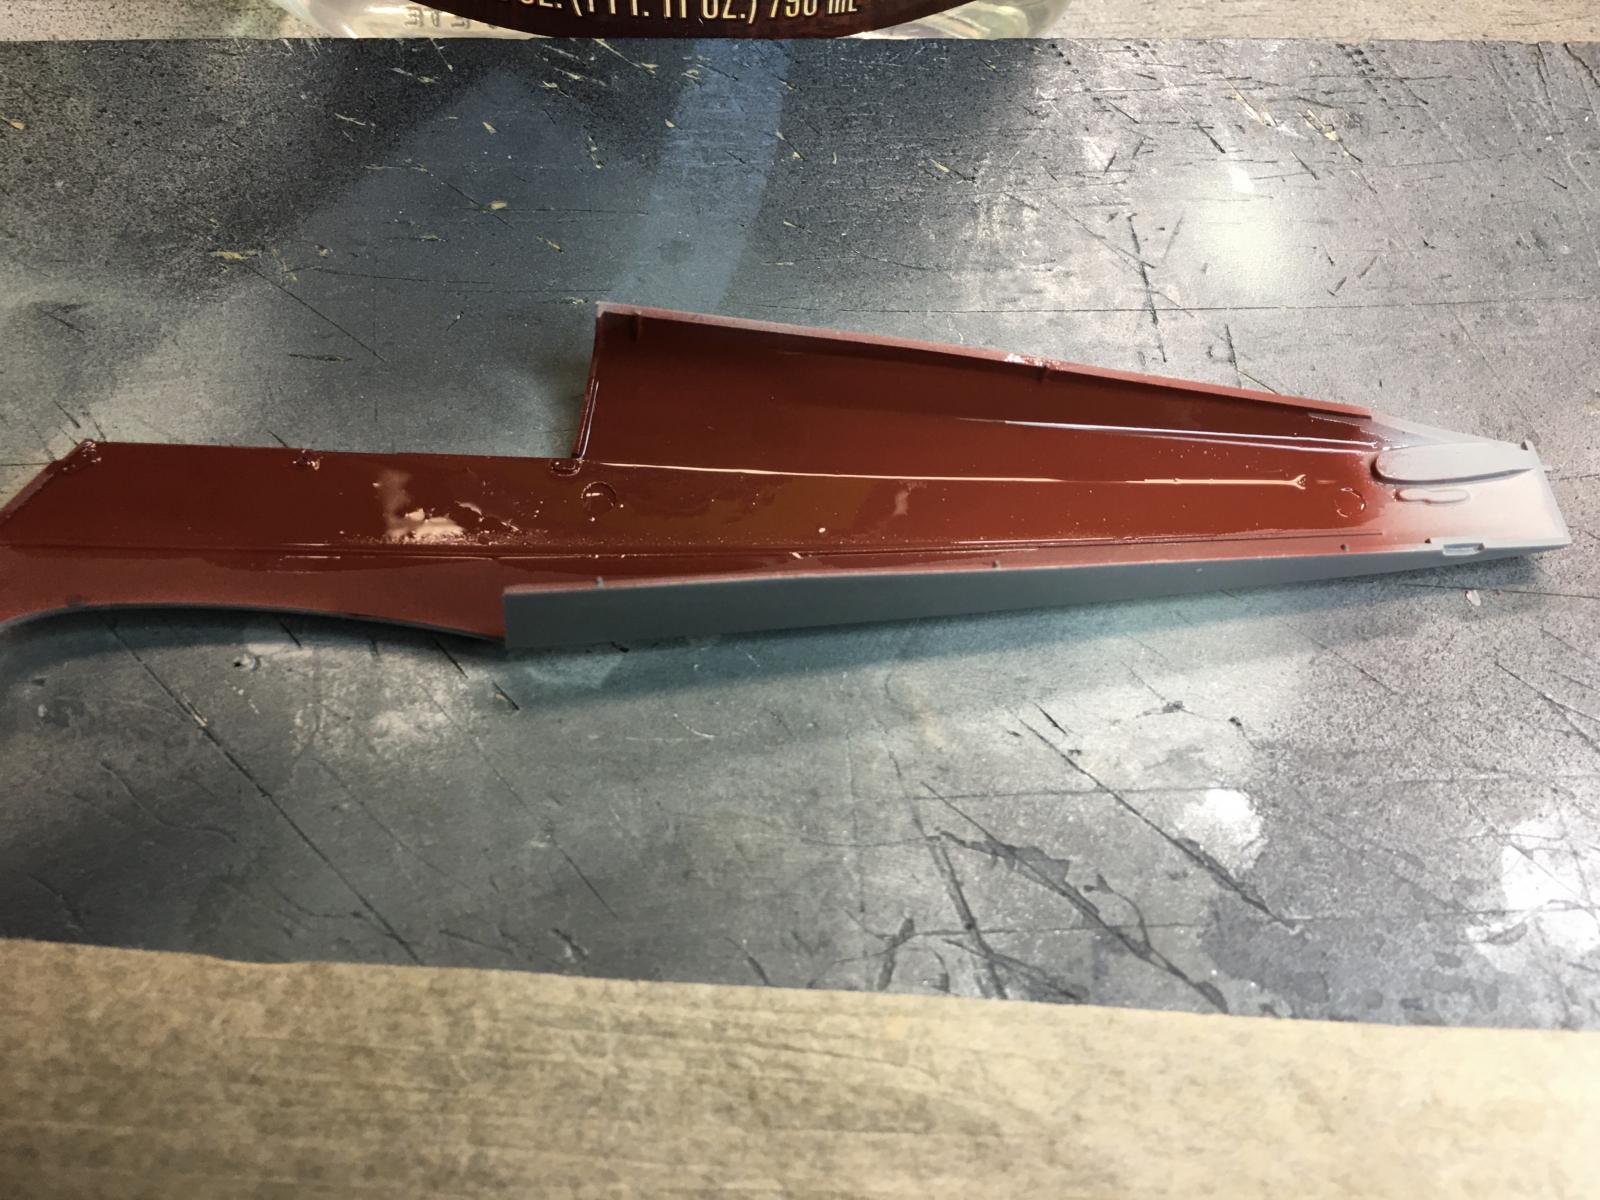
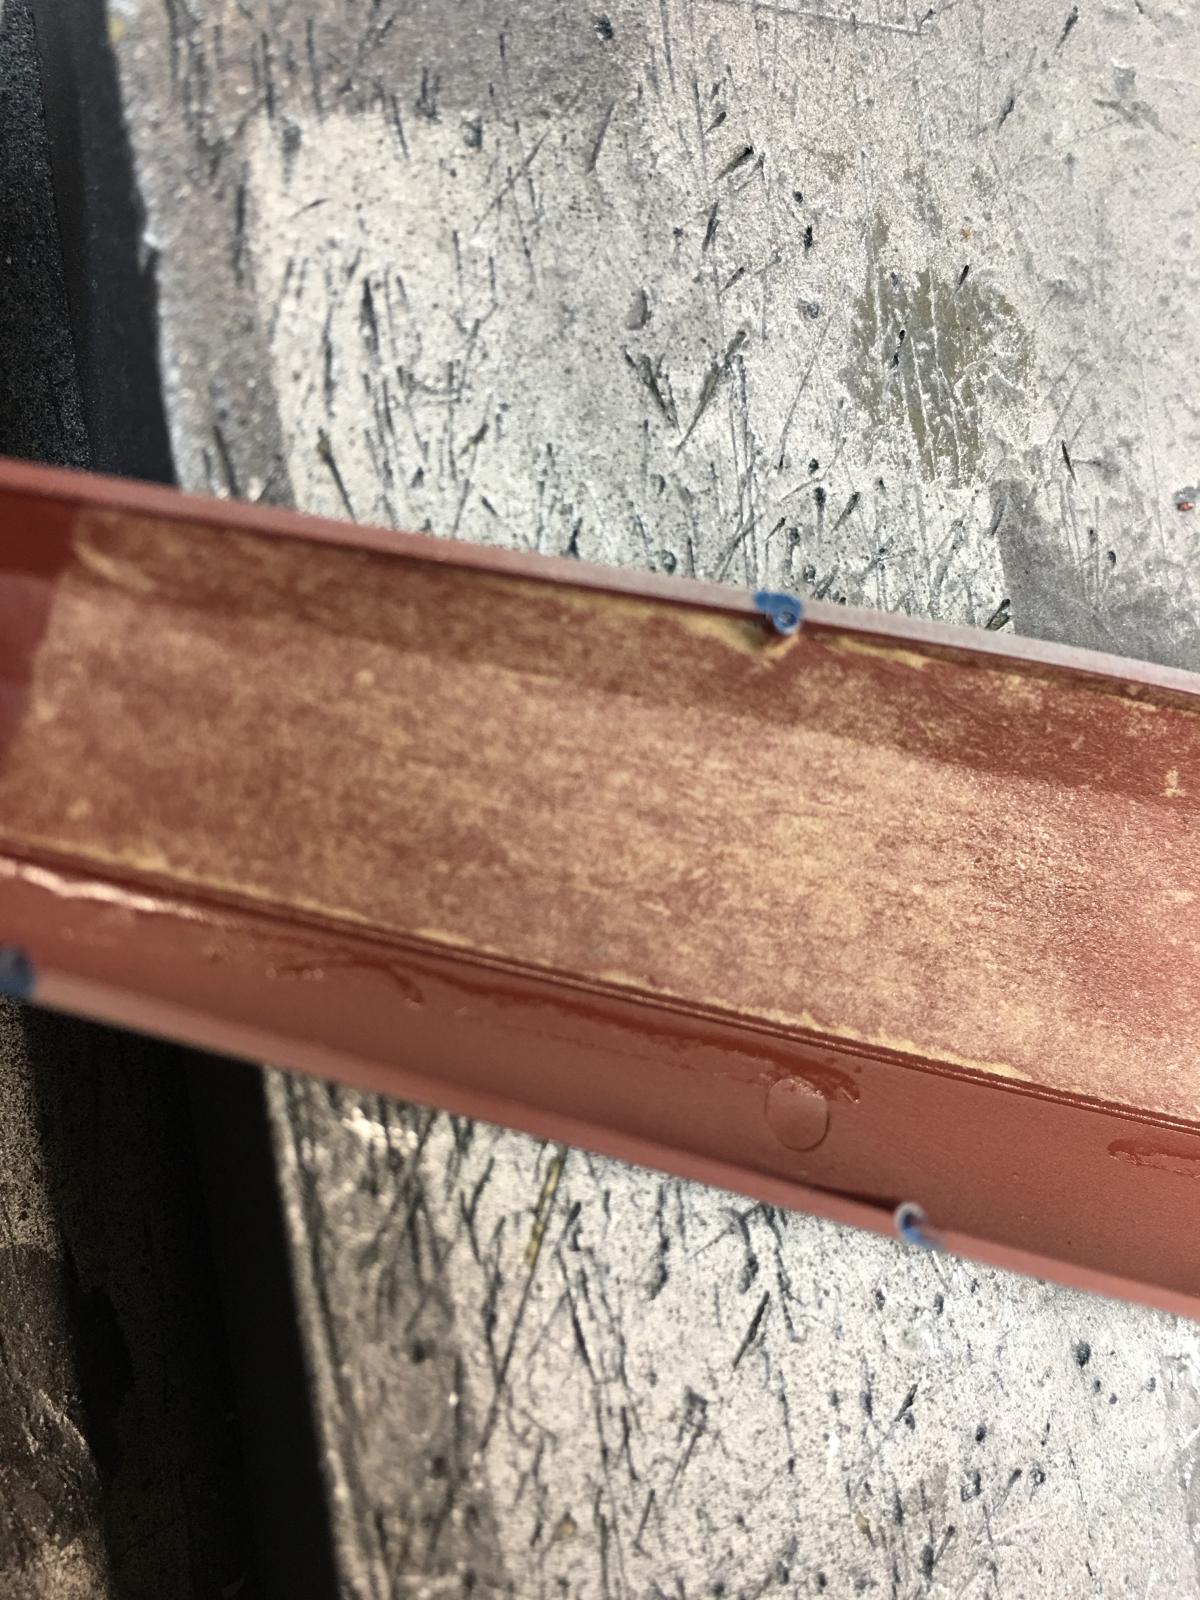
I started out by spraying on the red brown primer color on the interior of the fuselage and lower wing.
I used enamel paint for this. I don't know how acrylics would work here, since the clear liquid is also an acrylic paint. You could probably use acrylics for the base color, it's just that I have not attempted it myself. I would recommend trying it on a scrap piece of plastic first.
This red / brown color is an approximation of the first layer of dope that was used on various German aircraft in the mid 1930's era, and I believe it carried on throughout the remainder of WW2. This red brown primer would have sealed the fabric, protected the inner structure from the elements and moisture, plus it would have helped to shrink the fabric tightly and removed most of the wrinkles.
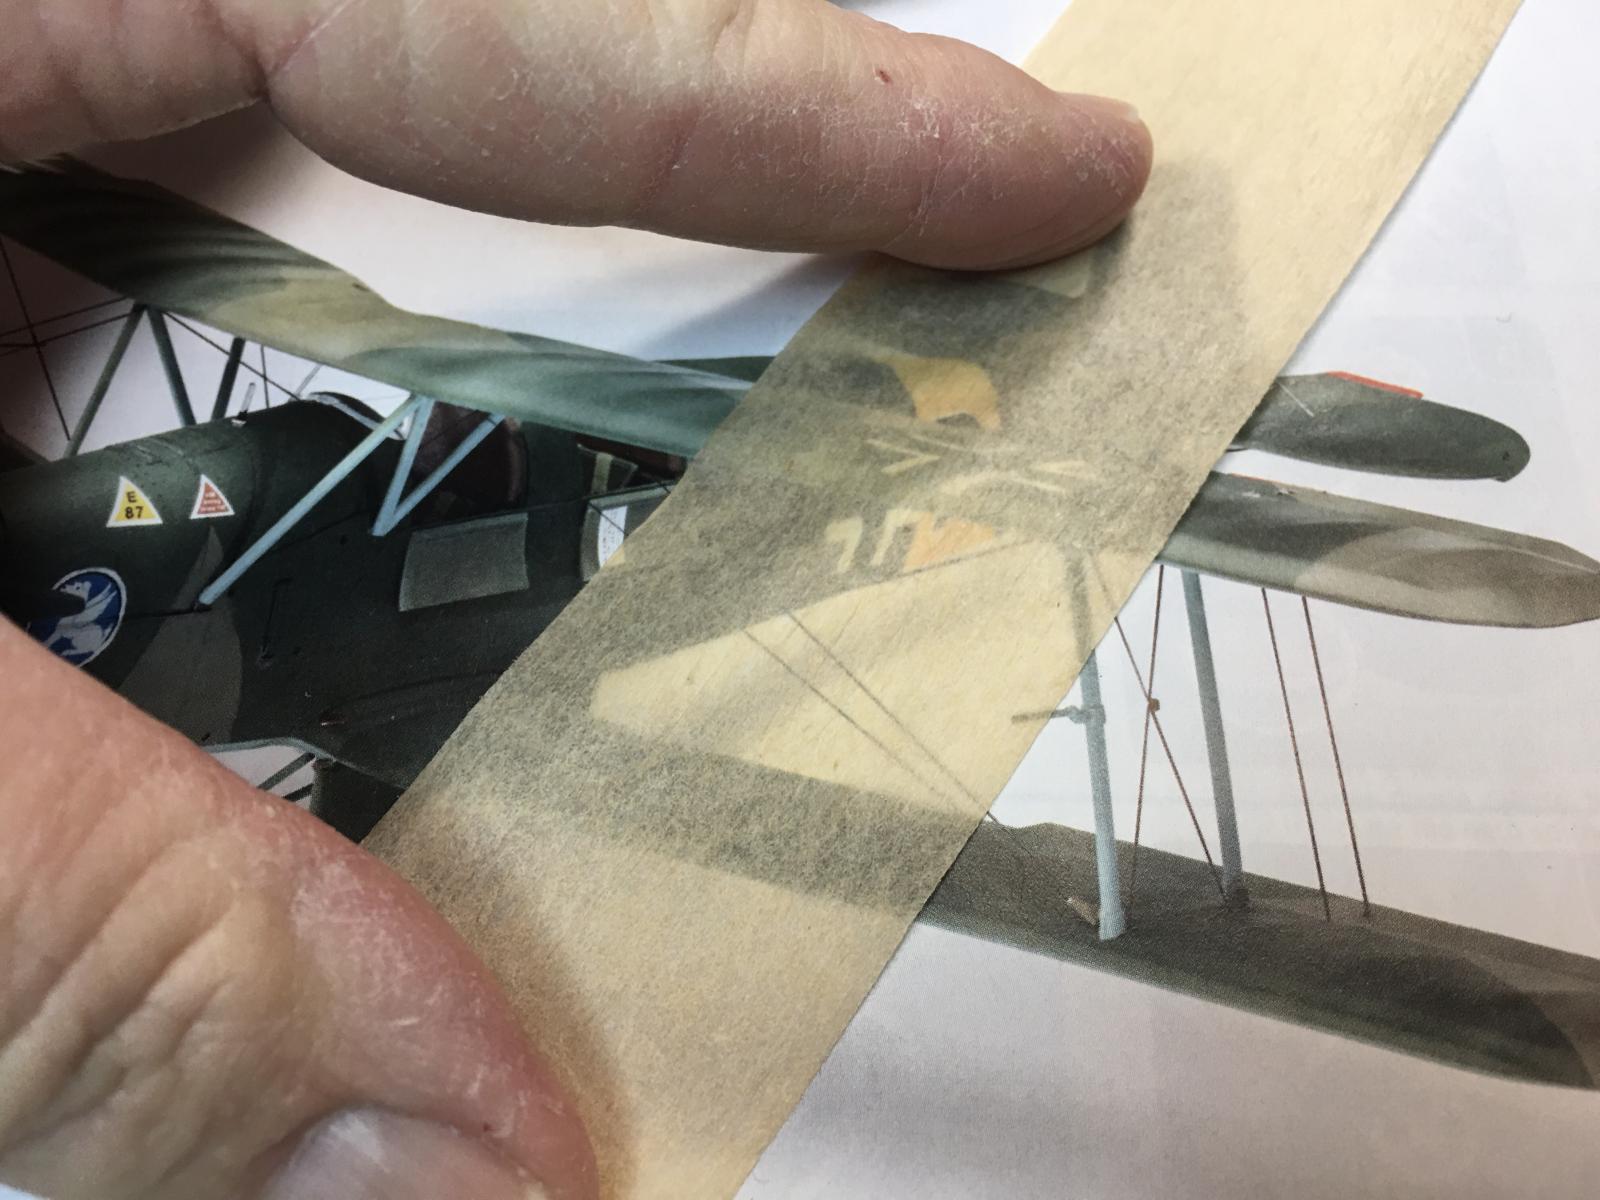
The next part of the process came from when I built balsa wood flying "stick and tissue" models when I was a boy... If any of you have done this type of building, it will look very familiar to you. I used some tissue paper I had that was off white in color, that looks almost like unbleached linen would. You could also use white tissue paper and probably get similar results.
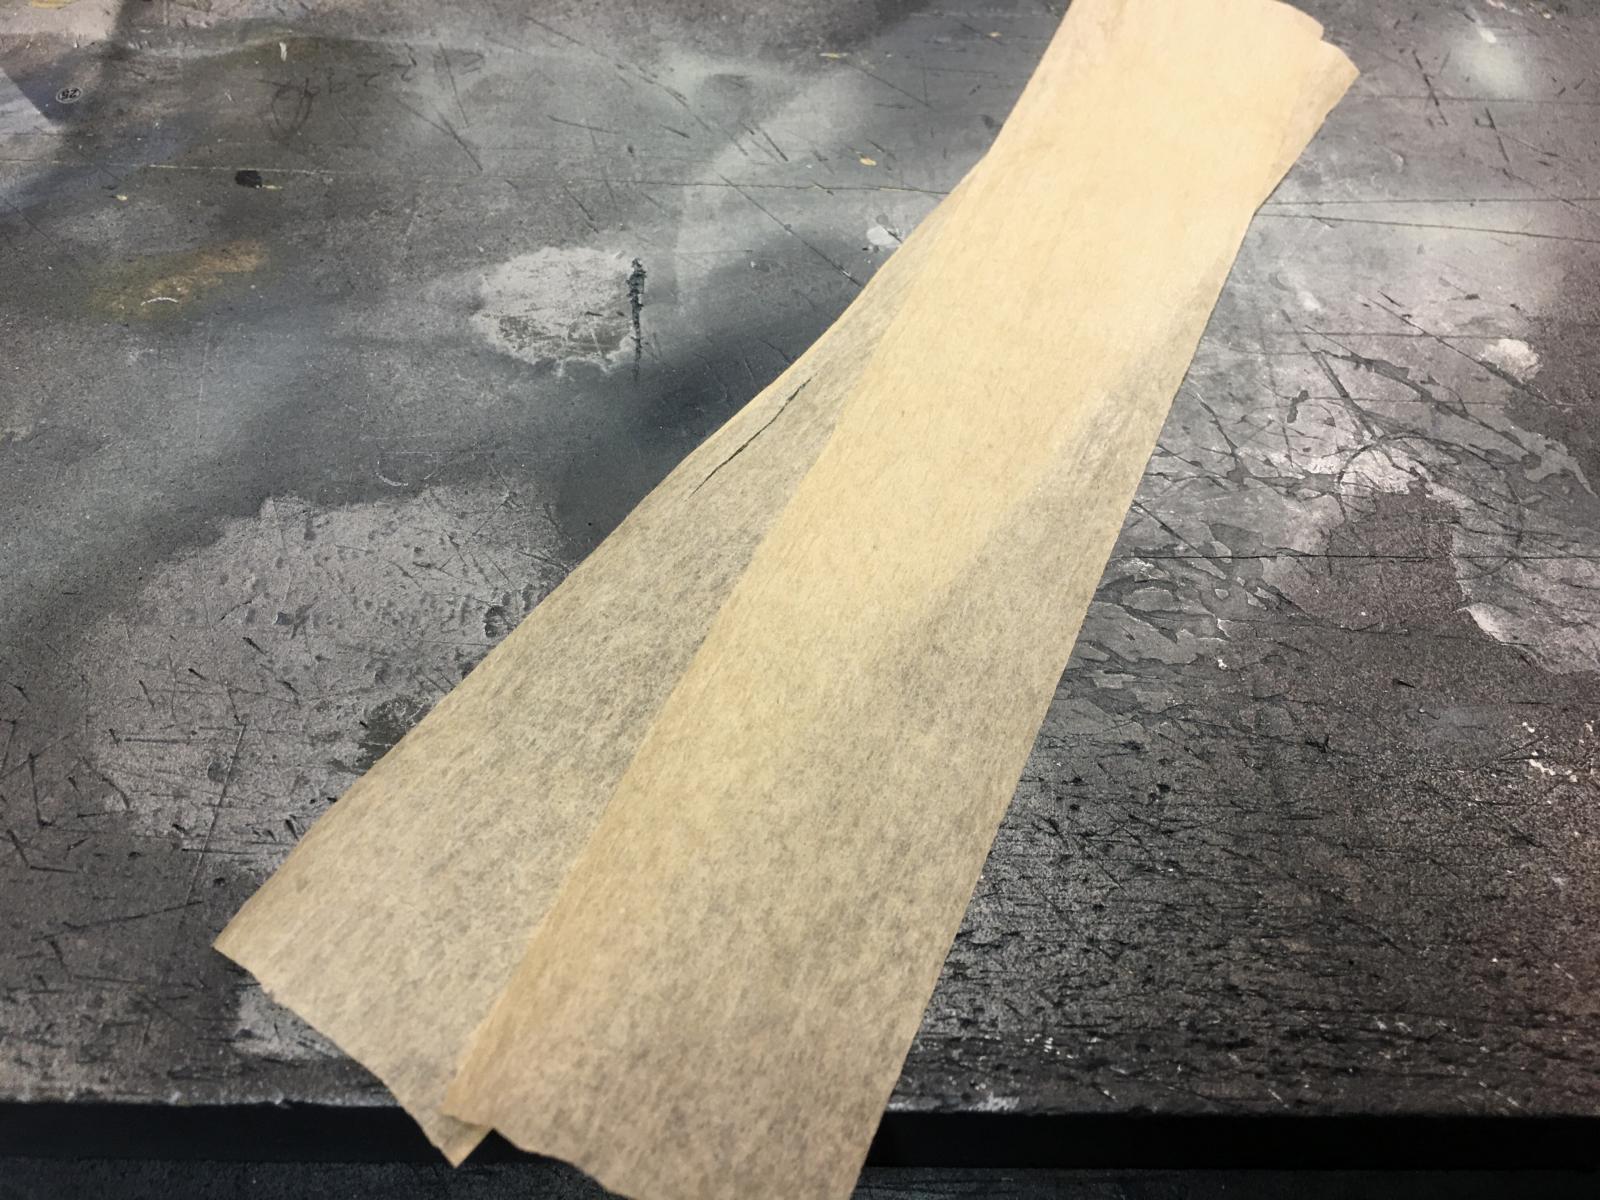
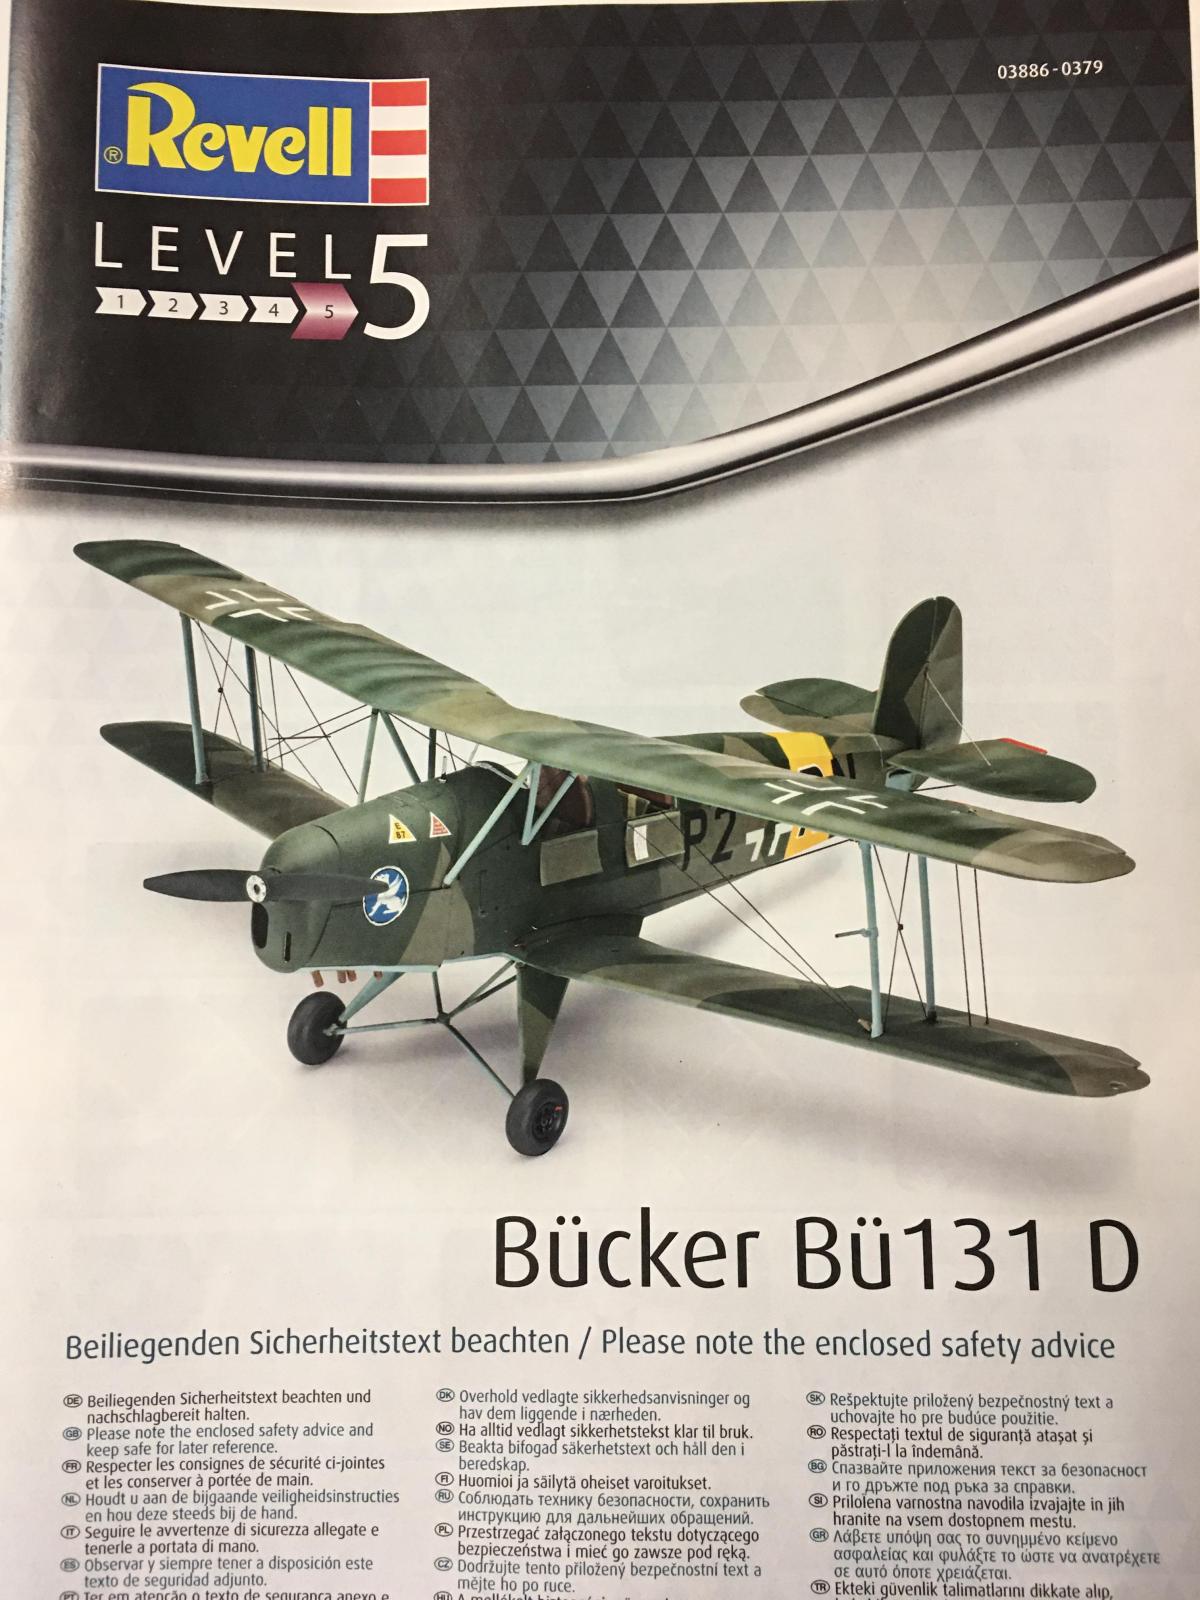
This stuff is very transparent. Here I am holding it against the instruction booklet. You can see right through it. My wife was kind enough to use her iron and she smoothed out the paper to where it was nice and flat.
The next step was I took a big paint brush and simply brushed on some clear floor acrylic. This stuff is called "Future", or "Pledge" depending on what country you purchase it in. It might even have a few other names...
Then I simply placed the tissue paper on the wet Future and started brushing it down tightly against the interior walls of the fuselage.
It dried fairy fast, and once it started sticking to the plastic, I began trimming off the excess. I should have waited longer, as the tissue paper does not cut very easy when it is wet. If you wait until it has dried completely, it will be much easier.
-

- 1. This section has been trimmed away
These next steps show how I simply brushed on more Future and used the brush to make it penetrate into the tissue. The brush was used to press the tissue tightly against the plastic. This removed any air bubbles and wrinkles.
This is a VERY important step.
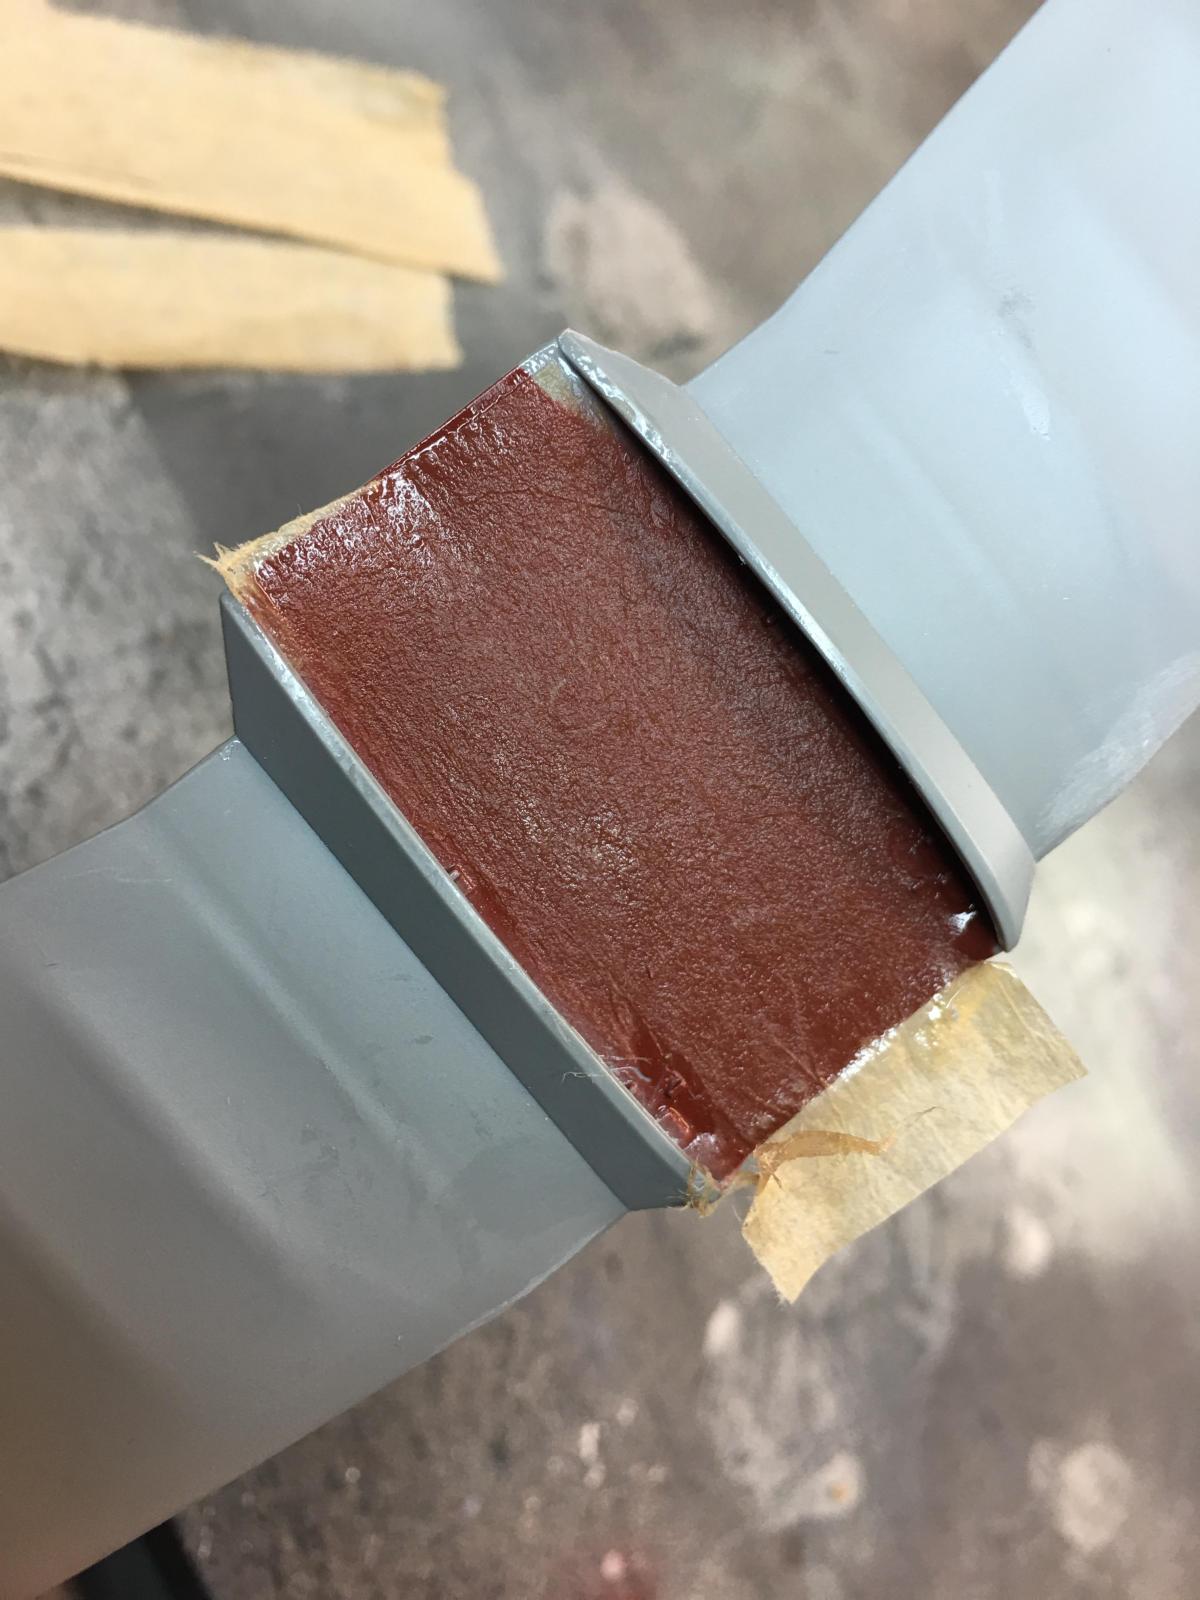
As the Future floor acrylic dries, it starts looking more like the tissue paper and becomes flat with no more shine to it. At this point, the fabric effects of the tissue paper begins to appear too.

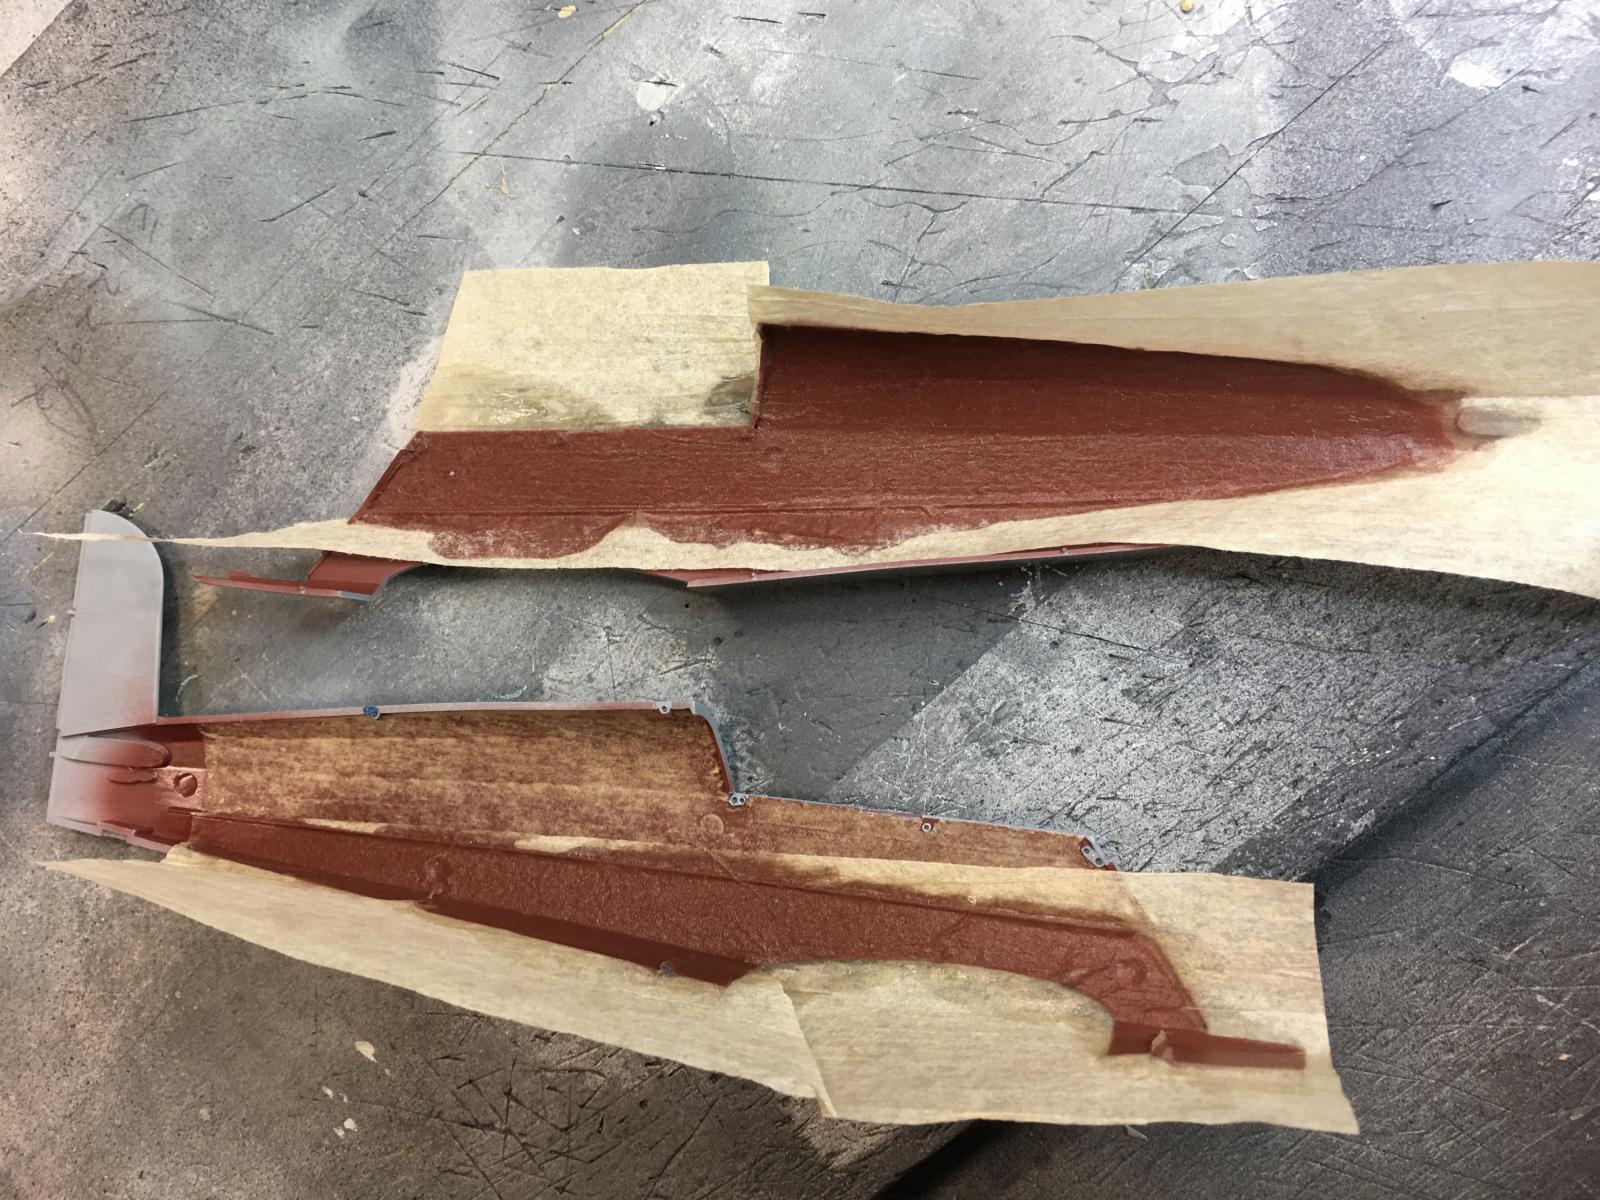
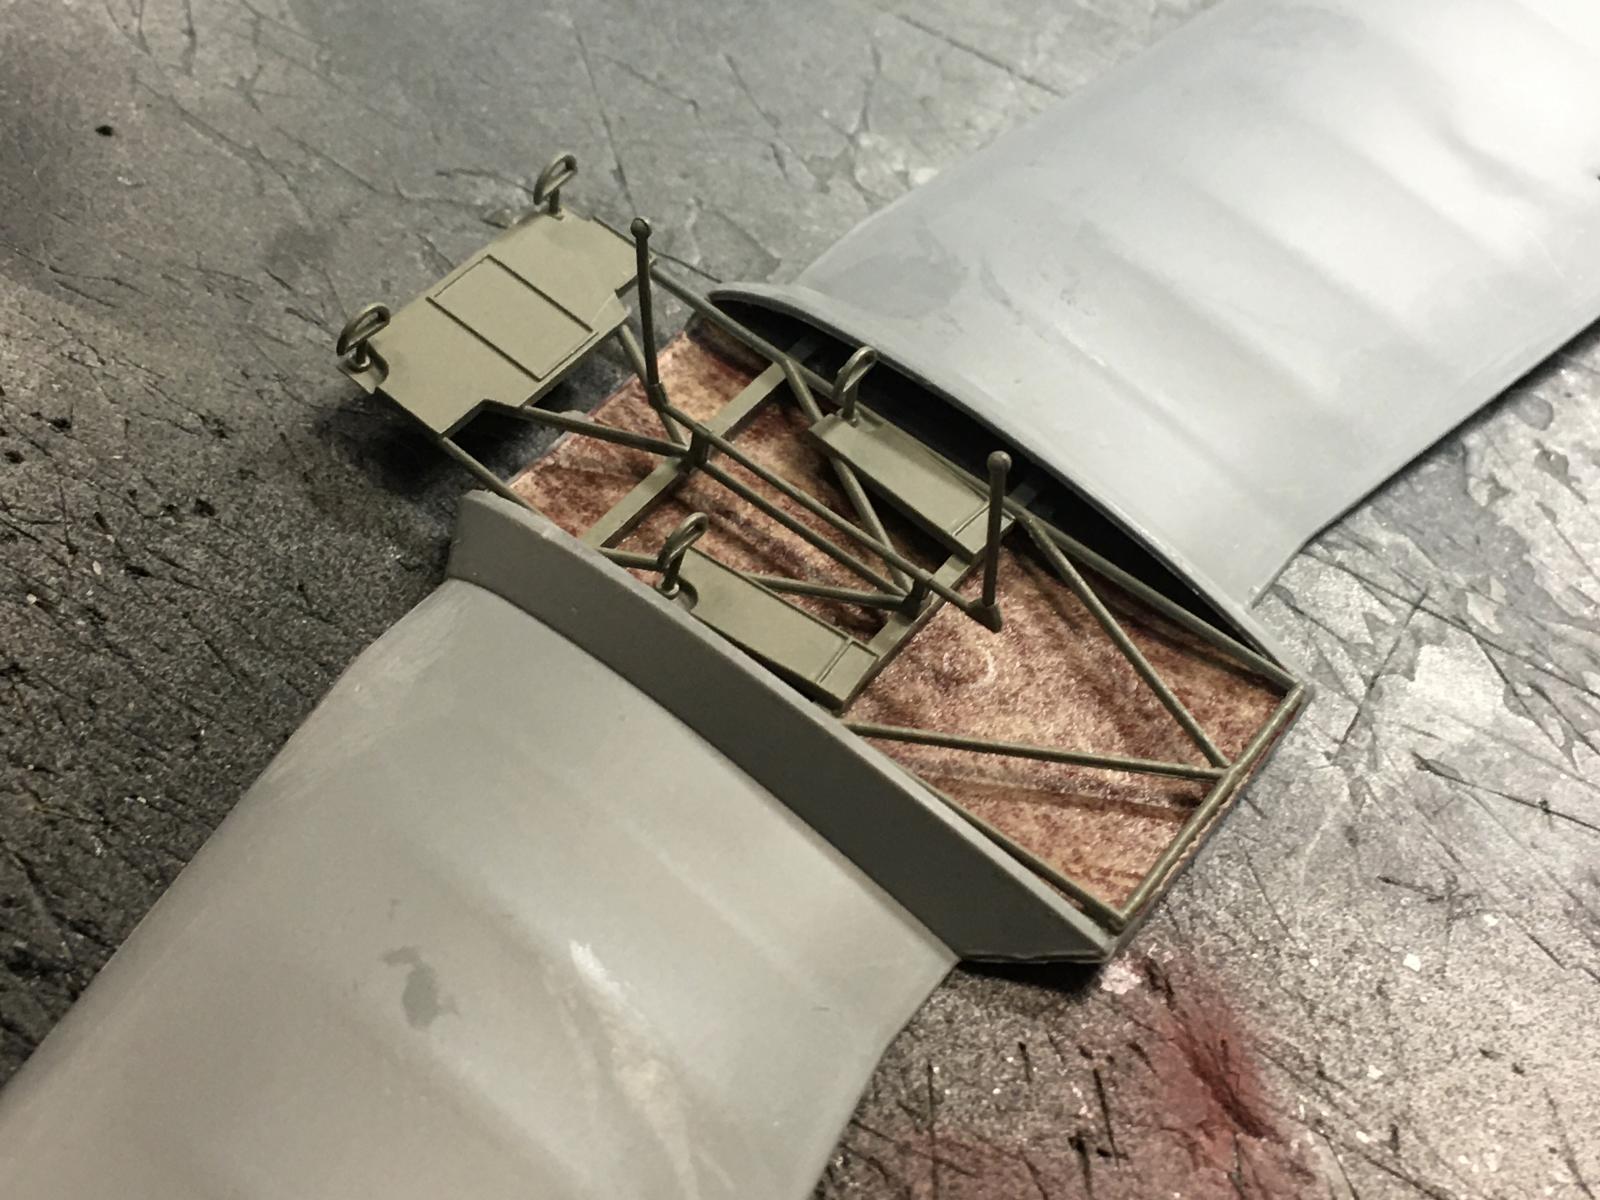
Here in this next picture, you can see how the tissue paper has almost completely dried. It is looking more like how the interior fabric covered walls of the cockpit would have looked on an original Bucker... The red brown primer dope is showing through to the inside of the fabric. This is the exact feature I was trying to duplicate.
Since the lower wing section is also covered in fabric, I gave the center section that will be visible a coat of tissue paper and Future too. Here it has been trimmed to size and is almost dry.
This next photo shows how the tissue looks when it's all said and done. It has a fabric effect, and also shows the red brown dope primer showing through it as it was on a real plane. This same technique can be used on any fabric covered aircraft. I would do a little research to determine what base color was used as a primer dope on the plane you are building.
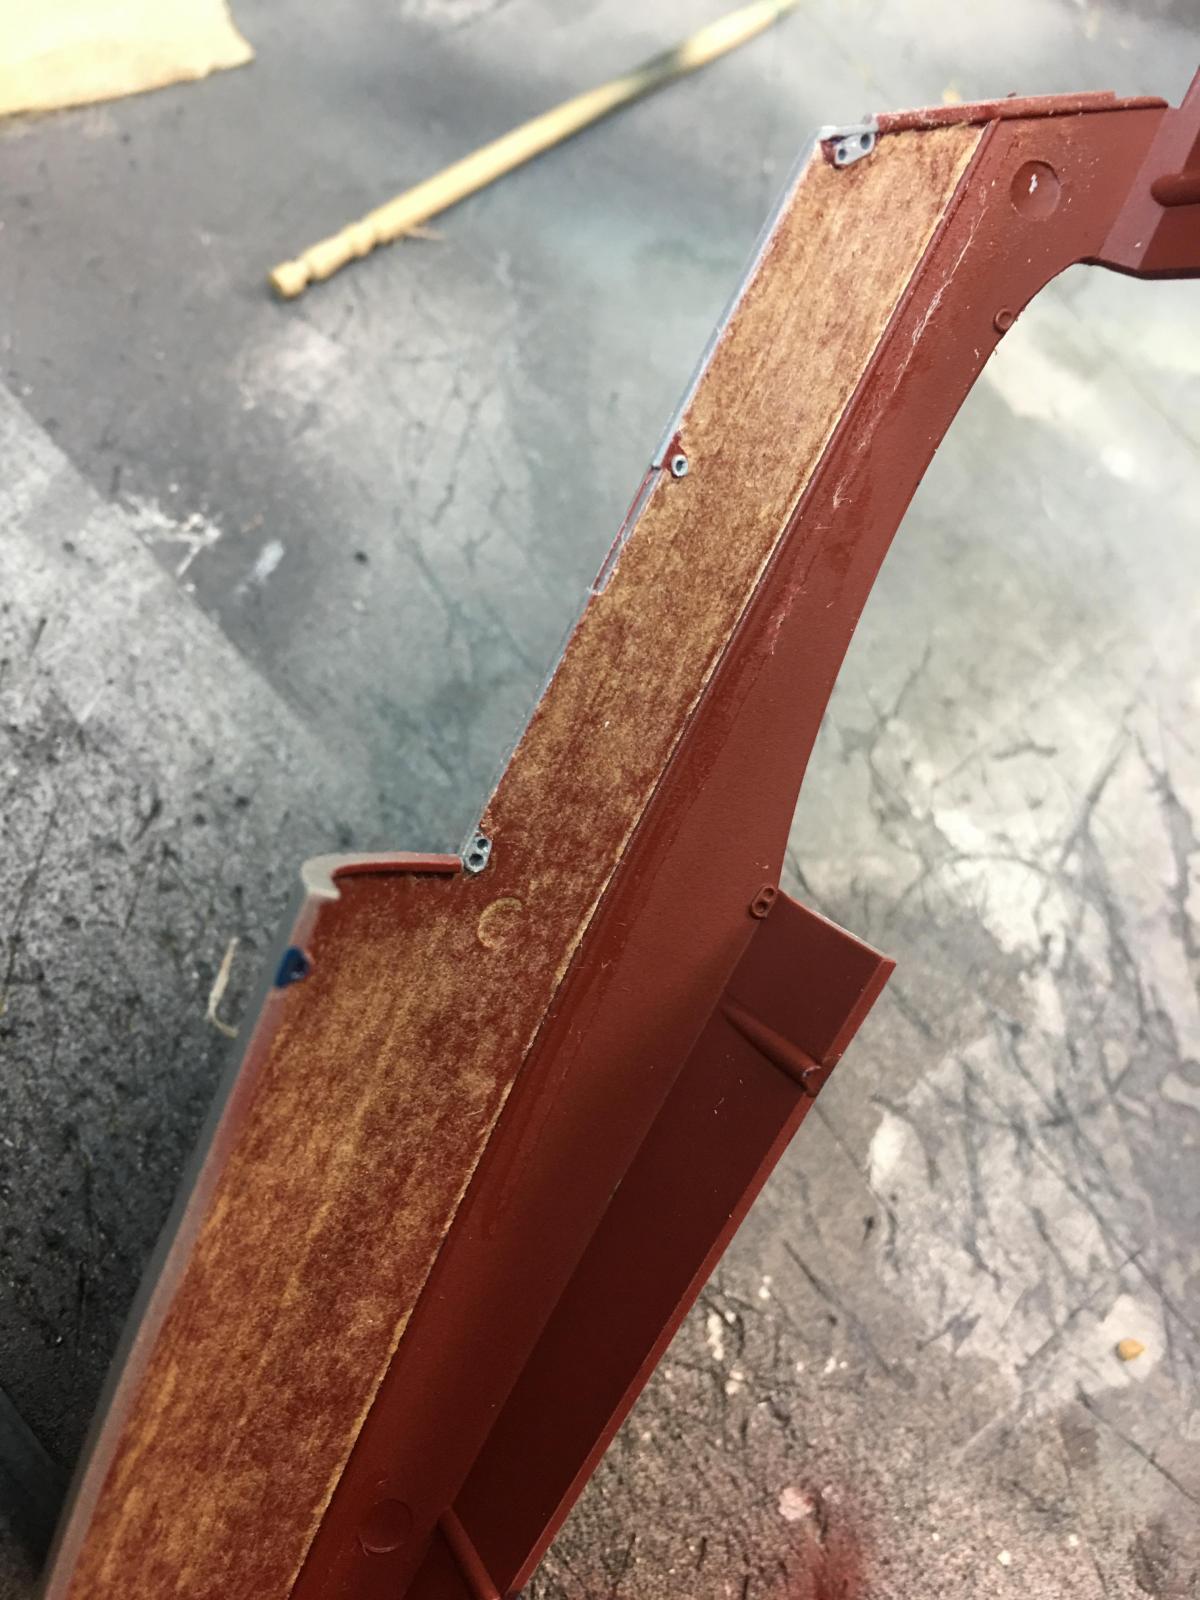
I only used red brown on this one because that's the color the Luftwaffe used during this era. You could paint it in an aluminum shade, or another color of your choice prior to applying the paper.
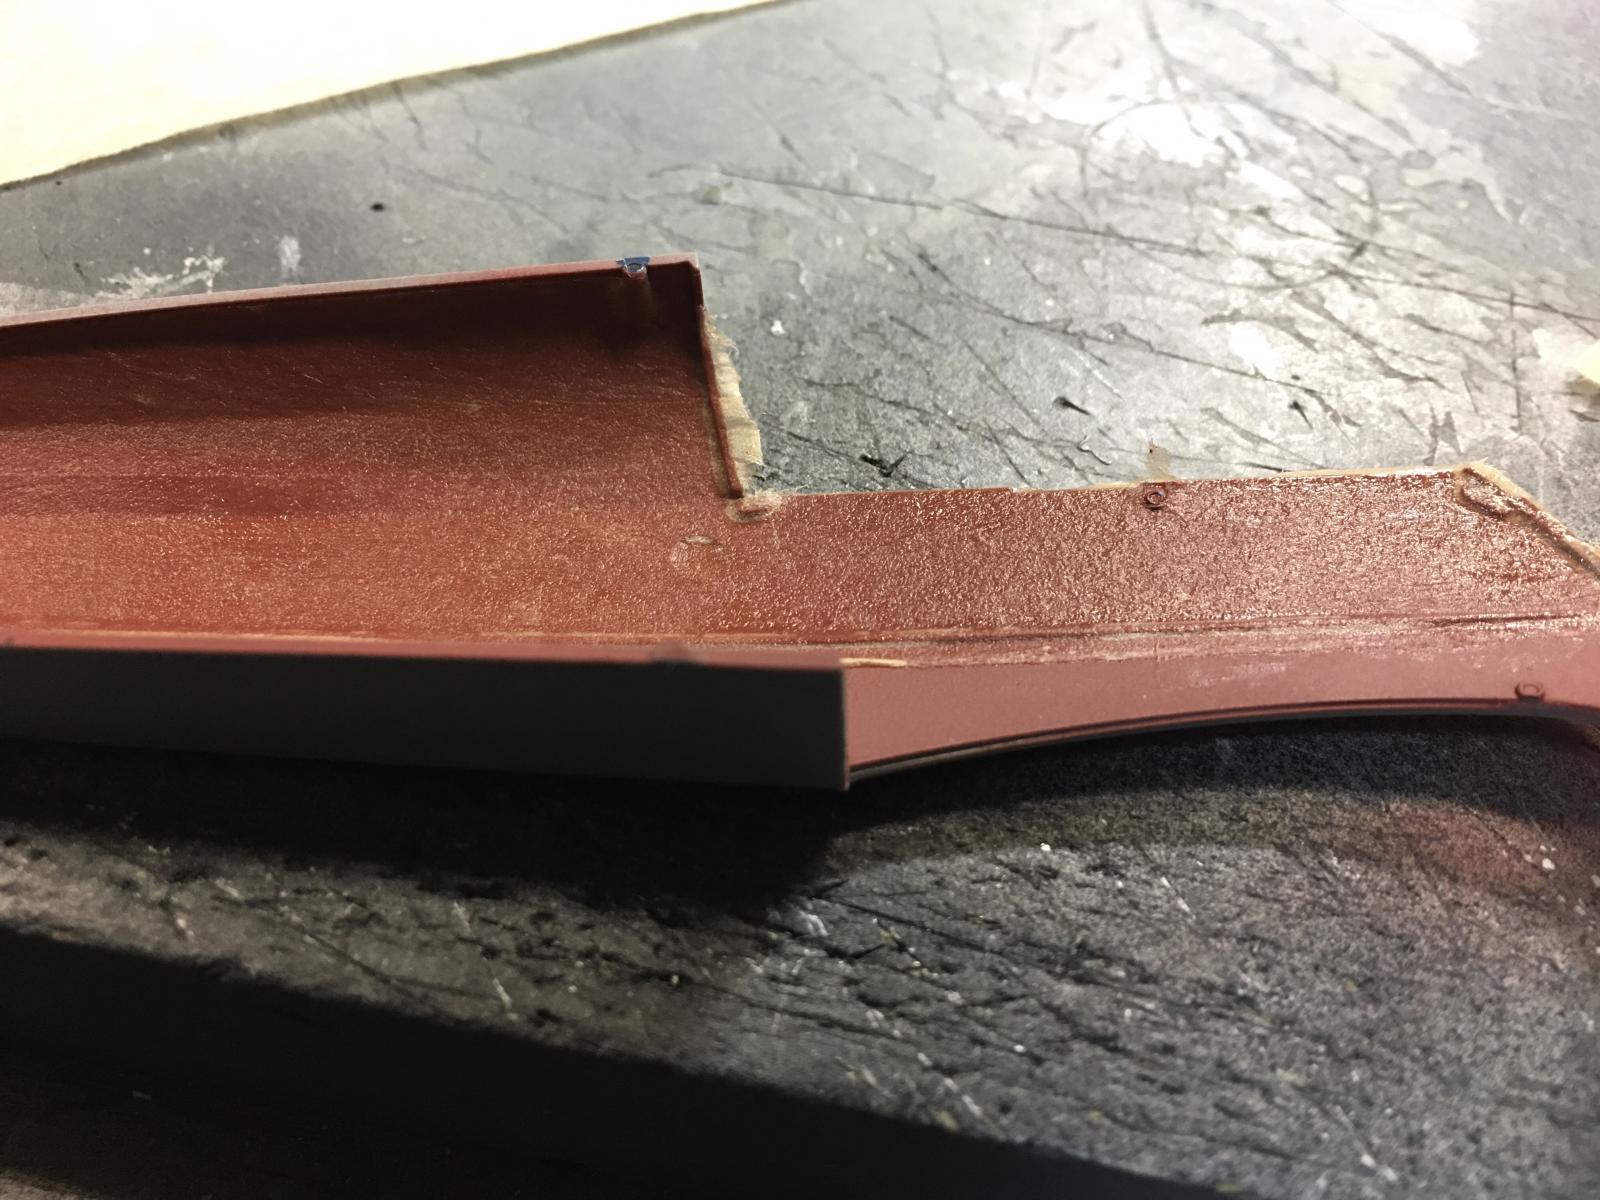
This picture shows the fabric effect very nicely... Notice the lower section of the fuselage has not been covered yet.
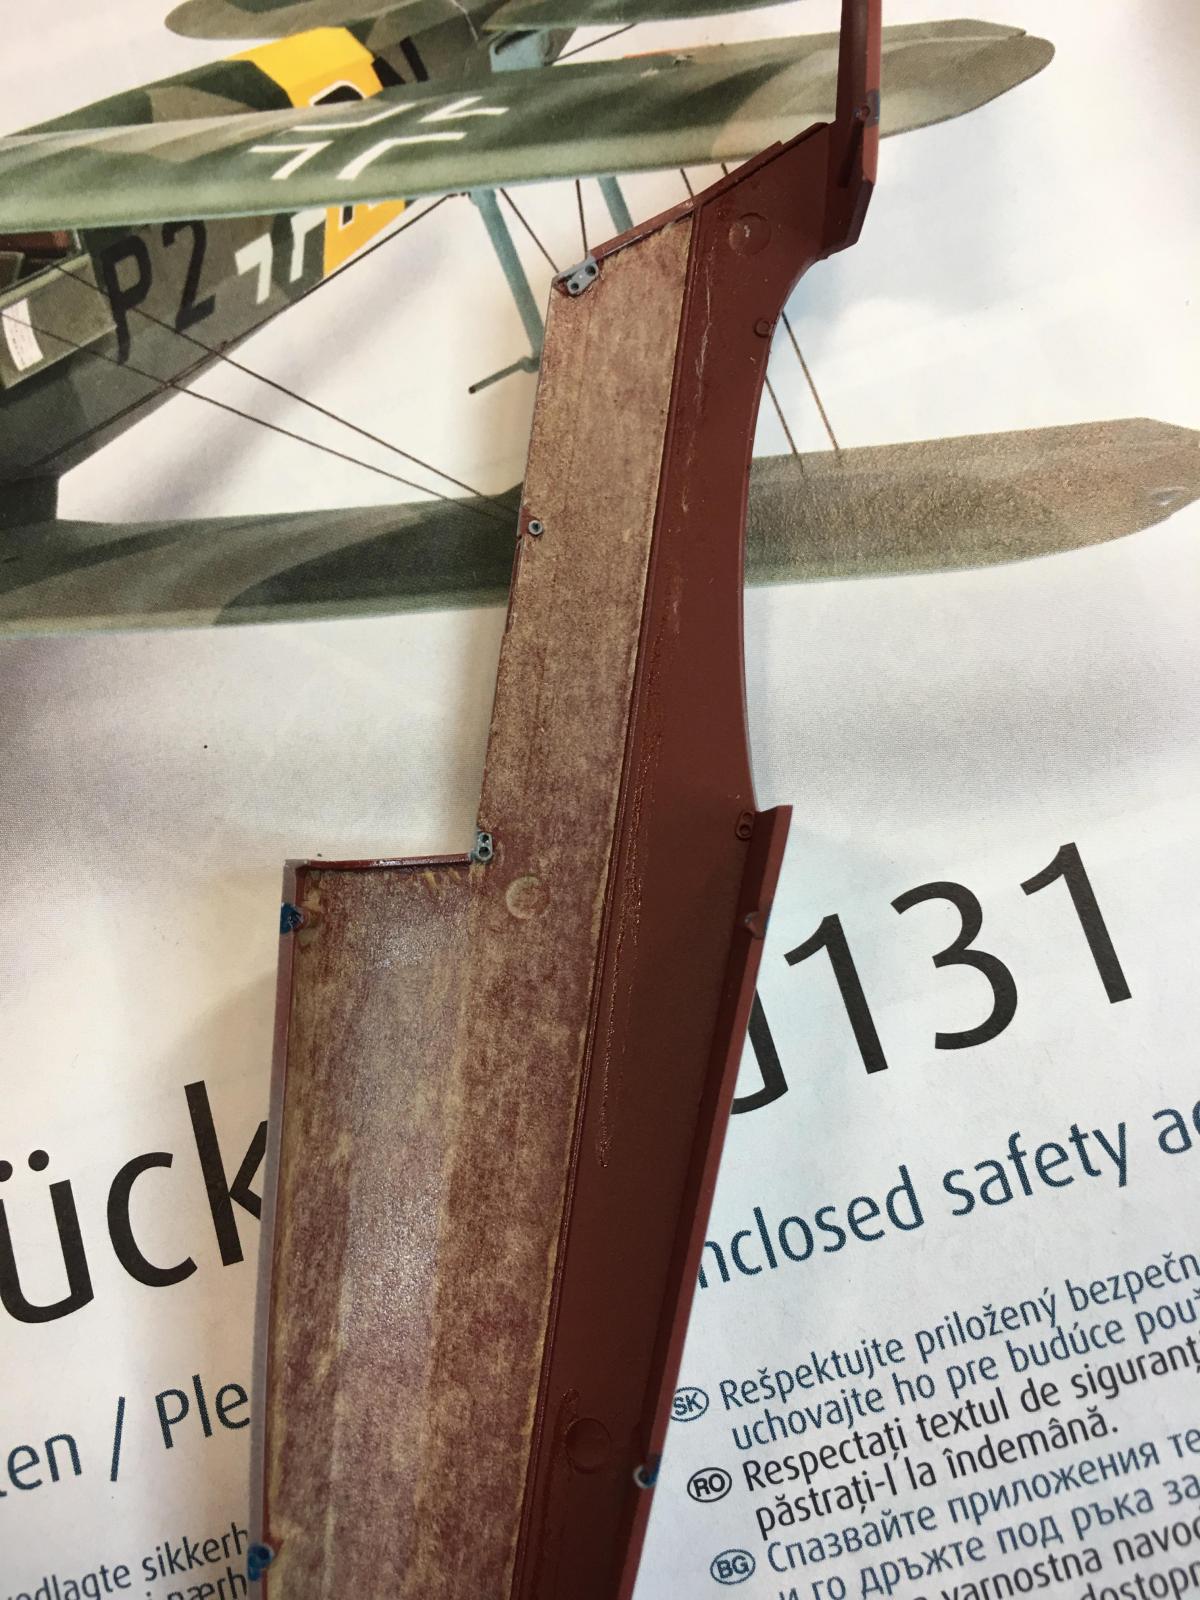
The following photo shows everything you need to do this process. It's very simple to do and will look great once the RLM 02 tubing framework is added and the fuselage halves are glued together. Also in this picture I have started the process that will complete the lower section. I'll come back after it's all dry and paint on the side stringer / longeron that is present and runs along the entire length of the fuselage. The stringer will get painted to represent a wooden part.
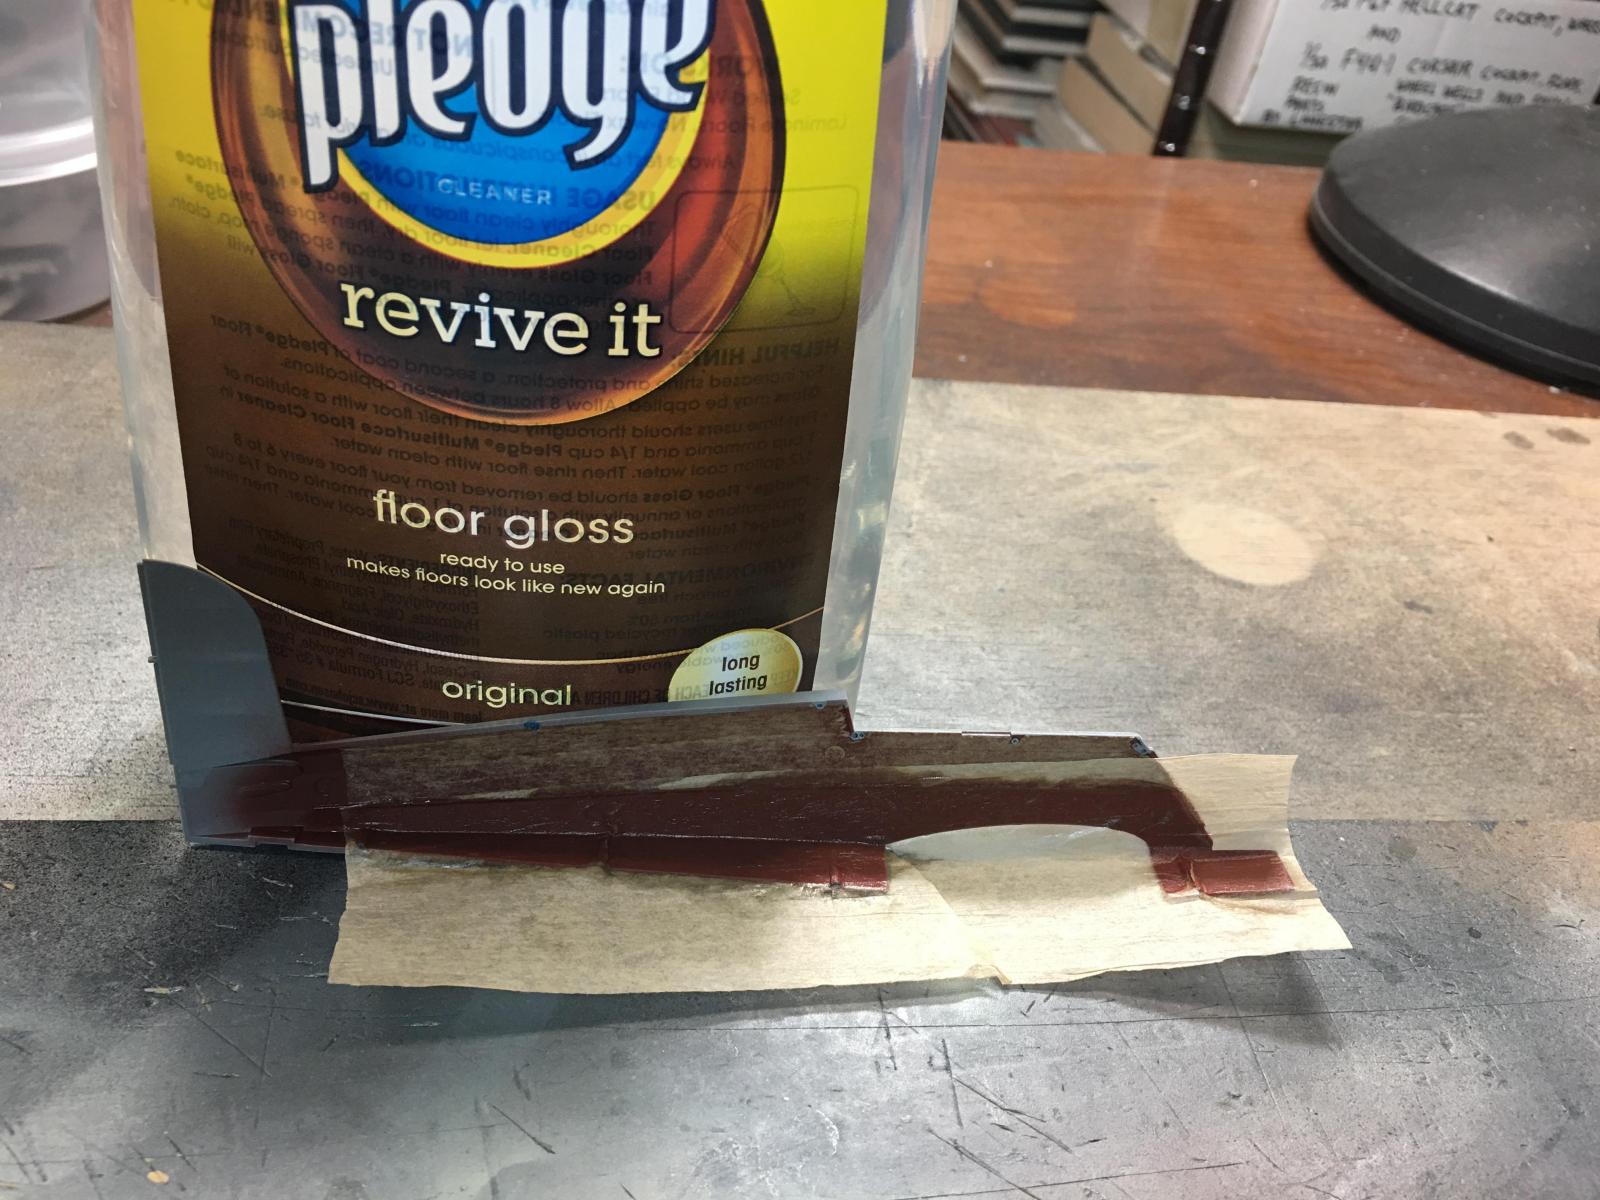
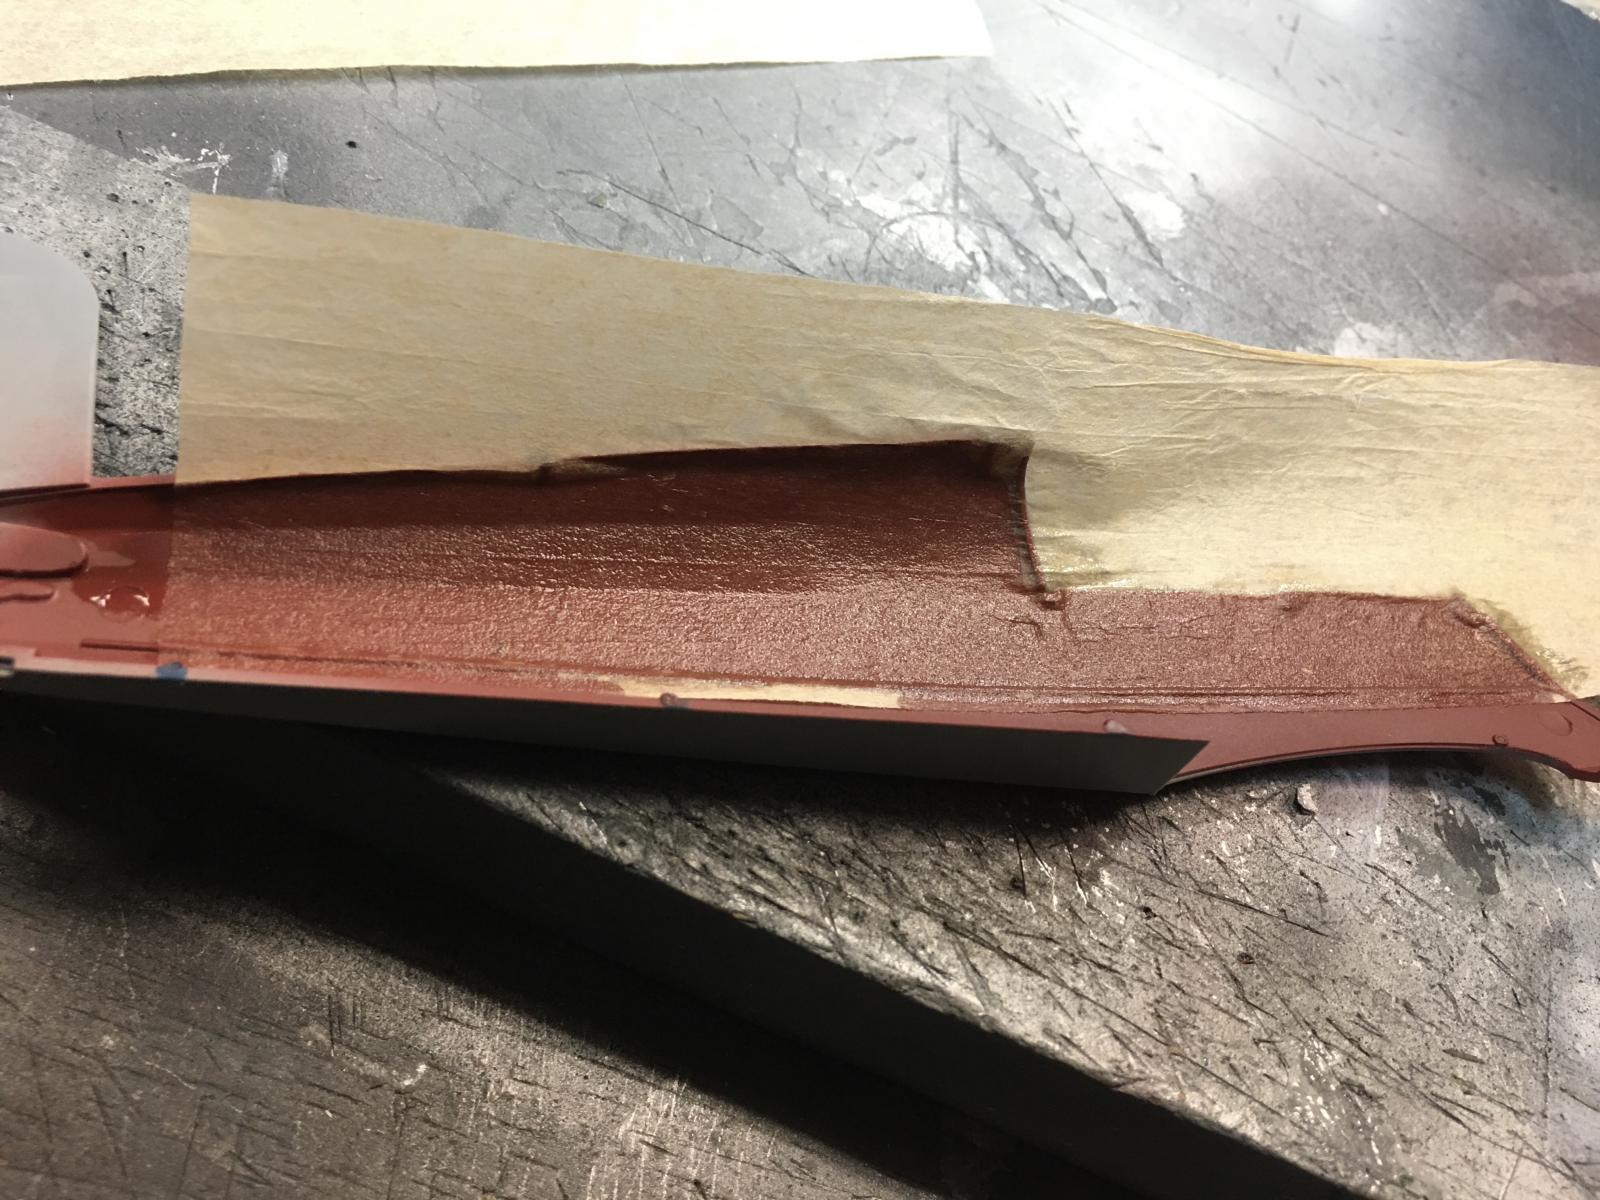
Since I was on a roll, I decided to cover the other half of the fuselage... Here's how it looks to start with. Notice it has already been painted using my home brewed red brown color. I will trim the excess tissue paper away after it dries this time. I expect this to work much better.

With one half completed now and drying, I started on the other side. I'm using the Future bottle as a prop to hold the completed side as it is drying. Here you can also see the large paint brush.

I brushed on a coat of Future...
and laid the tissue paper on the Future while it was still wet. I used the paint brush and more Future to garnish it down tight against the plastic side walls. I stopped at the fuselage stringer / longeron as the tissue was too thin to cover the entire half in one attempt.

This is how the Bucker looks at the moment... but now I have had time to post this article, I can probably get the last section of tissue paper installed.
The technique I came up with has lots of possibilities, and can be used on various large scale planes, such as a Hawker Hurricane, or any other plane that had a cockpit with fabric covered sides. I do think it will be most useful for the World War One and Golden Era types, such as Sopwith, Nieuport, De Havilland, Curtiss and other planes of this sort.
**** UPDATE *****
I have made more progress on the Bucker 131D. I used a balsa wood plank stripping tool and made two stringers / longerons for the sides of the cockpit.
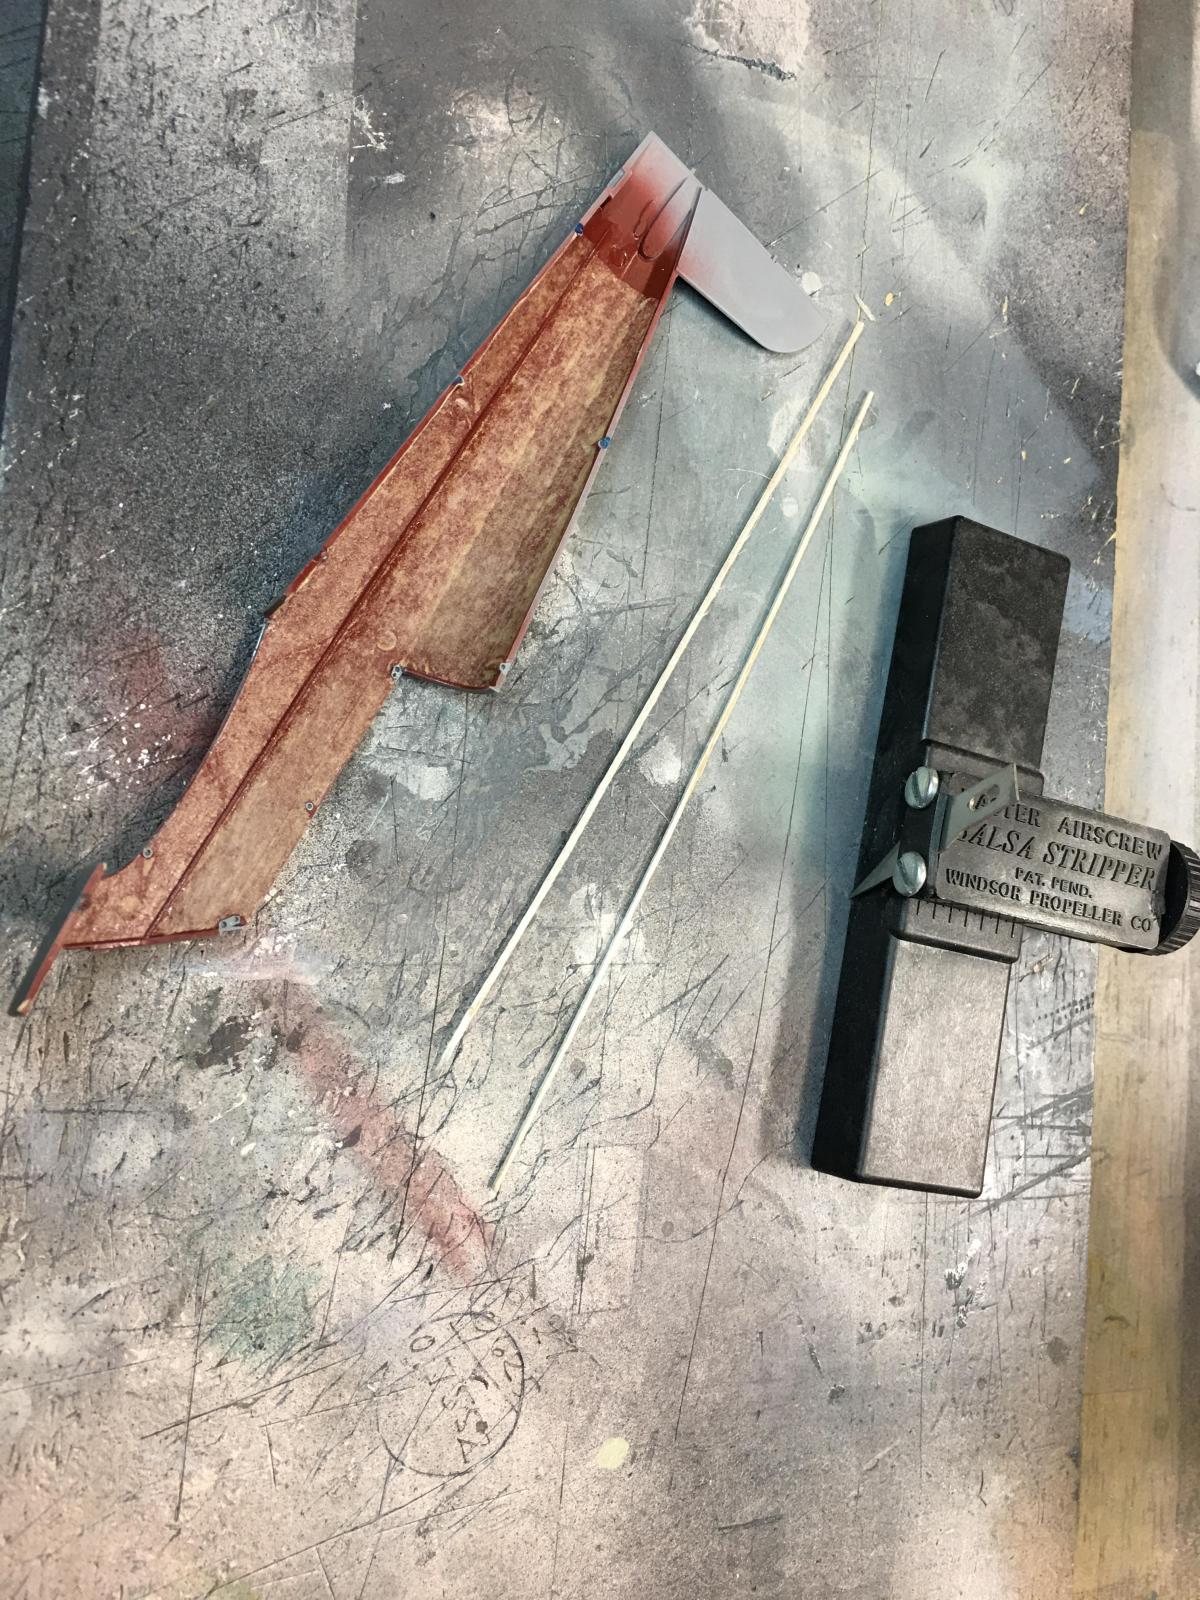
These wooden parts were glued in place using CA glue. Once the glue had fully cured, I installed the fuselage sidewall tubing and throttle quadrants.
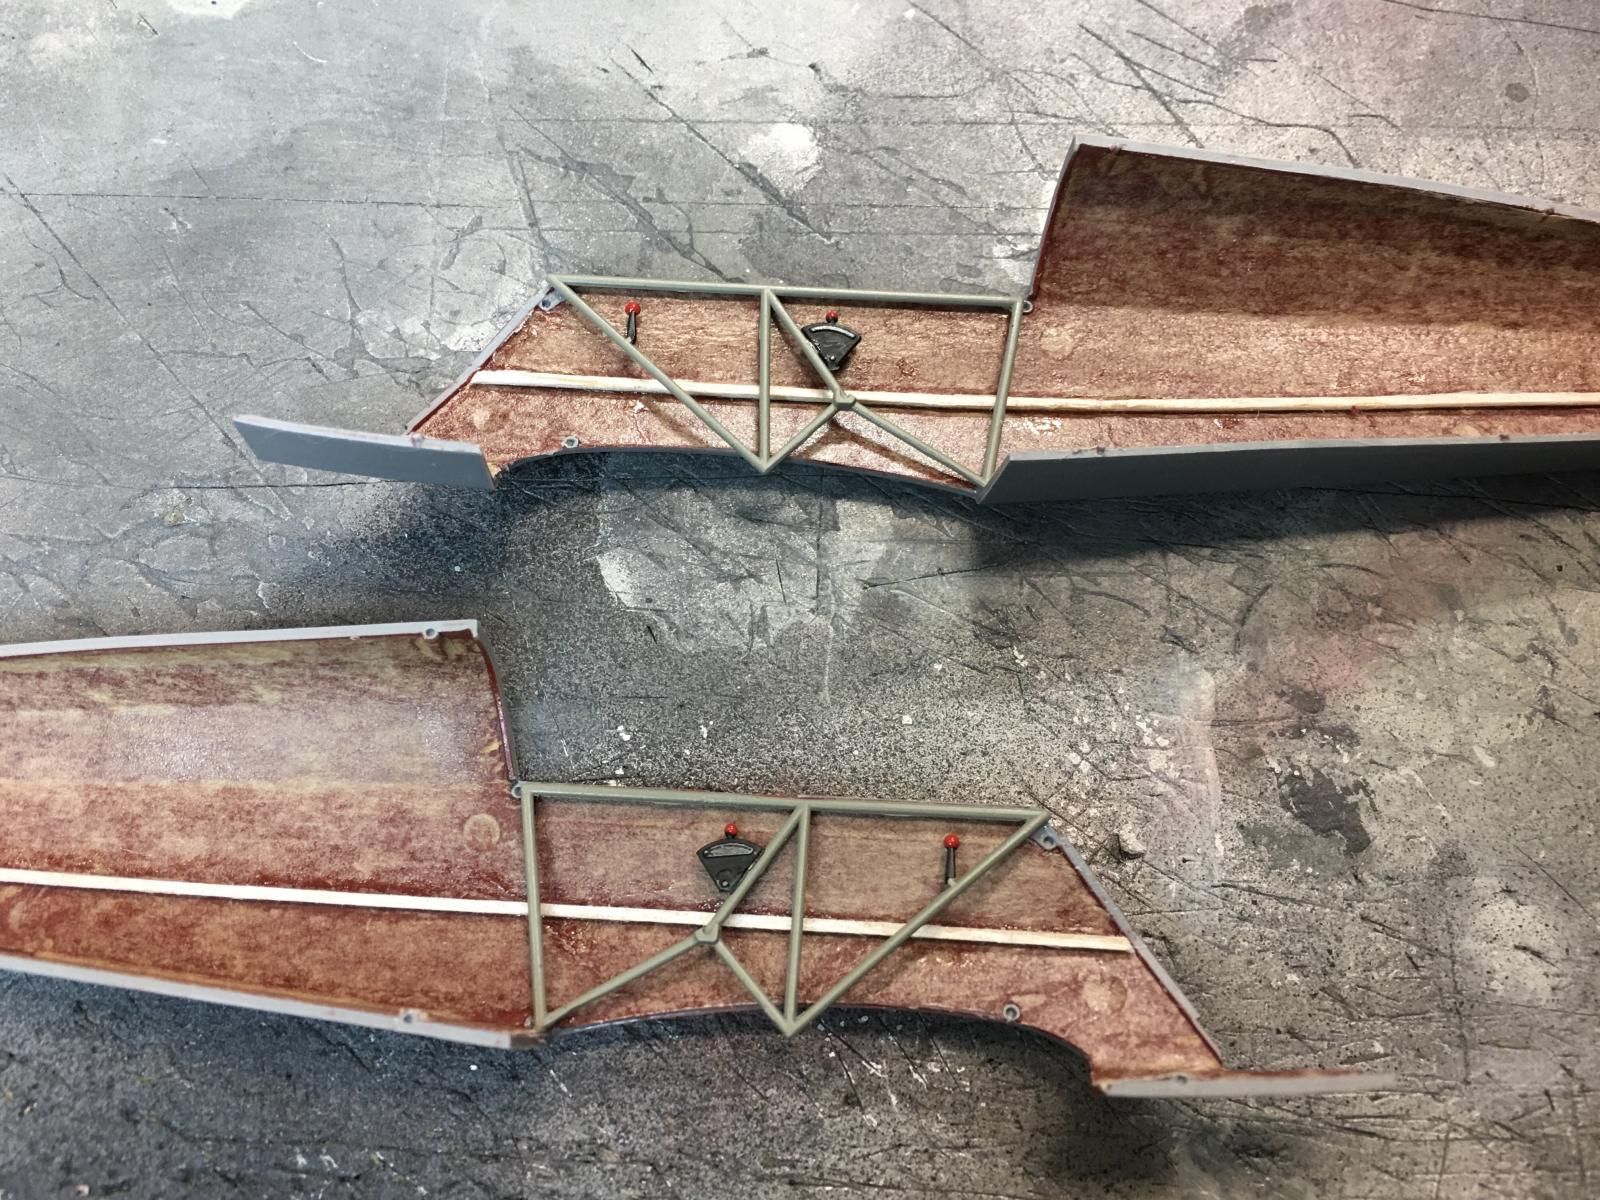
The completed cockpit floor was painted using RLM 02, and then glued to the lower wing center section as per the instructions.
The fuselage halves were glued together and following this the lower wing was installed too. Now it is starting to look as it should. You can see how much of the fabric surfaces are visible on this model. I do think it was a worthwhile effort, and now it looks even more realistic.

I hope that you can try this method out to make your own "pilot's offices" look a bit more authentic.
Please let me know what your thoughts are on this, and as always, "Comments are encouraged".

That looks pretty interesting, but one question comes up: once the fuselage is assembled and everything is in there, will you be able to see any of this? I know there are people who say "I don't care, I know it's there." Me, I'm "If you can't see it, I didn't do it." To each his own. 🙂
Tom, @tcinla
Yes on this particular model it is visible. I mocked up the fuselage halves together and since I will have both of the side entry doors dropped, it becomes even more visible. This was the primary reason why I have held off on building this kit. Now that I have come up with a way to get the fabric look I wanted, I decided to get busy with another biplane...This ICM / Revell model is a sweet building kit so far. I'm almost tempted to post a build journal on it.
This method will be of more value to someone who wants to super detail their Wingnut Wings biplane, as long as it doesn't have a lozenge printed fabric on it that is... 🙂
It is probably not going to be visible all the way back to the tail section, but I didn't want to take any chances and end up with a bare spot... so I covered it almost all the way back. Overkill ? Probably... but better safe than sorry later.
@lgardner - this seems an absolute "natural" for a build journal.
I love it, Louis @lgardner! It adds that extra touch and can be done quite easily.
Thanks for posting, my friend!
Spiros, @fiveten
Thank you for the kind words... and yes the joy about doing this trick is that it is so super easy to do. The hardest part is waiting for the Future to dry completely. Once it is dry, the excess tissue can easily be cut away. That is something I just learned this morning.
Thanks my friend for commenting.
It looks like a good idea for aircraft like this, @lgardner. I remember building balsa and tissue models and using cellulose dope which shrank the tissue, presumably the Future, being acrylic, won't have this effect and pull the plastic mouldings out of shape?
George, @chinesegeorge
Thank you for commenting. That is cool to know that you also build balsa wood models. I don't think as many people do it today which is sad. It's becoming a lost art I think.
Yes the nitro "dope" would shrink the paper, and it also made the model fuel proof, so you could fly it using a small two stroke glow fuel engine. Those were the days ! 🙂 I would spray the model lightly with water several times to help shrink the tissue paper. Once I got most of the wrinkles out, then I would brush on the dope.
Sometimes I would give the model several coats of clear and then switch over to color. I remember the nitro dope came in various colors too, besides the clear. Another thing was if you were not careful, as it dried the shrinking tissue paper could actually pull the parts and create a warp in them. So I started pinning these thin sections to the work board and allowed them to dry that way. This helped keep the parts straight... but not always.
The Future is itself an acrylic, and is very mild and gentle. It's very similar to the acrylic paints that many use nowadays. It doesn't have any negative effects on the plastic. I will be using this little trick more often now. I will probably try it using white colored tissue paper next to see what it looks like on my next fabric covered model. This lends itself nicely to the larger 1/32 scale kits. I have a pair of 1/32 Nieuport 17's in the stash. One is a Hobbycraft kit and the other is the same plastic, but it's in an Academy box. These two kits have been calling me for a while now. Maybe it will be the test mule for the white tissue paper.
Then I have a pair of Meng Dr-1's that would also benefit from this treatment, so it will not be the last time you see me doing this on my builds.
Thank you again for commenting. Stay safe.
This is a nice technique to create a realistic look, Louis.
Thanks for sharing it.
John, @johnb
I am glad that you enjoyed this tutorial article. It does look rather convincing, at least to my eyes. Thanks for commenting.
Your Tamiya P-38 looks incredible ! Thanks for posting it up too. 🙂
Thanks Louis. You have taught me something I did not know. Always nice when modelers share their trade secrets to expand our modeling skills and knowledge. It looks very convincing. I am one of those crazy modelers that will do it even if it's not visible because I know it's there.?
Morne, @mornem
I am glad that you learned something by reading this article. At first I thought I had wasted my time with it, based on the very first comment I received. All I was trying to do was simply pass something new to others that they might find helpful. I personally like to detail models. Sometimes I think I go overboard, and other times I probably don't do enough. It all depends on the modelling "mojo" I have at the time.
The old saying goes, "teach a man to fish"... 🙂
Thank you my friend. I sincerely appreciate the comments.
Very nice my friend - and very visible too. As for the innards of cockpits, they are always visible. Some more than others, and it really is sort of the same as installing a wrong instrumentpanel because "no one will see it". After all we make small replicas, and in this large scale it is very visible to anyone that bothers to have a proper look at the finished item.
Well done, and thank you for sharing this nice trick Louis (@lgardner)
Erik, @airbum
Thank you for the compliments. Yes this plane has a basic cockpit to begin with. The model captures the original look very well. I am thinking about cutting a very thin strip of balsa wood to use as the stringer that goes down the entire side of the fuselage. After all, nothing looks more like wood than real wood ! 🙂
But I will have to see if this will cause a fit problem with the tubular steel parts that are included in the kit. If it will fit, I will install it. Otherwise I will resort to simply painting it to look like wood.
I know that you would have understood why I wanted to come up with a proper way to make the cloth covered section look more realistic. The instrument panels and gun sights you have done with all of your various Bf-109's are a prime example of doing things correctly... even if no one else sees it. We know it is there and that is what counts.
These side panels are very visible on this model, and I am hoping this little trick will make it look even more realistic.
Thanks again !
Louis, count me in as one of the 'I know it is there' brigade!
I love doing interiors - even if they can't be seen. Some of the control cables in WNW builds (for example) are just beautiful. The clincher for me, as someone who hasn't been around planes as much as some others (love museums and airshows!) is the learning that happens from looking at those inside details and trying to replicate the key elements. It just helps me to get a feel of how the crew existed, and how different planes functioned. And I know that you can go through that learning without building it, but where's the fun in that!
So this tutorial is Godsend! Thanks so much for sharing!
Right! just like the interior of Monogram's B-29 or other big and medium bombers! Most of it you will never see again but it's so fun to paint the details. (I just take pictures before closing it up.)
Josh, @jpatt1000
I remember the pictures you sent me of your B-29 kit you sent me a while ago...and the bacon you sent us was out of this world ! Thank you. Yes you did pack a lot of details in your model. It seems that you are one of the "I know it's in there" brigade too.
I just received a cool set of decals for the 1/48 Revell B-1 bomber and now I have the resin parts to make it more correct too. So I might be reaching out to you one of these days for some help with how you built yours.
Thanks again buddy. 🙂
Sure thing Louis. The main thing on the B-1 is to continually dry fit. Remember, I used zero filler. It can be done! I'll have to get a picture of the Pitts S2A my Dad built RC. Great flyer!
Paul, @yellow10
I have seen the work you do on all of your builds, and I wish I could make my interiors look as realistic as you do ! I am still learning new tricks every day. This is often done by reading rather than by doing... By posting this article here for others to see, and showing how I do this, I hope to help someone make their plane look more authentic. I know this idea will not appeal to everyone. I don't think there was ever something like that done...
But it will work for those of us who fall into the "I know it's there" category. I often fit into this category, but not always. It depends on the plane I am building, and how I feel at the time. If the mojo is good, it will happen. You know what I mean.
I have been very fortunate to have been around some of these planes in real life. I saw the one that Kermit Weeks owns when we made the trip to his museum some years ago. This is one of the pictures I took of it.
I have been blessed and have actually flown in several planes that were fabric covered. I know how the fabric looks on the inside of the plane from first hand experience. I took this picture
many years ago, as we flew along the beach in a beautiful Stearman. You can see the Ponce Inlet light house here.
The one thing we need to remember is to keep it fun. I'm glad that you enjoyed the article, and have found it useful. Now one day we can build up some of our WW1 stash of Wingnut Wings kits.
I can feel a future group build coming on called "The Great War"... It might happen along with the Luftwaffe group build.
Take care my friend. Thanks for the compliments.
Excellent technique and tutorial. Where did you get the tissue paper?
Michael @spaceranger
Thanks for the compliments. I picked up a small roll of paper ribbon material at either Hobby Lobby or Michael’s craft store. It could have also been Jo Anne Fabrics... I really don't remember to be perfectly honest. It was a paper ribbon that was rolled up. So I unfolded the ribbon material out flat, and then my wife ironed it out on a piece of heavy card board paper, to get the remainder of the wrinkles out of it.
It looks like the exact same paper that we used for covering balsa wood airplane models and it probably is. You can possibly get it at a shop that carries balsa wood building supplies.
Thanks again.
Louis, thank you for sharing and creating this tutorial! Results looks really cool.
Dmitry, @starfar
You are quite welcome my friend. Check it out now that I have assembled most of the interior on the 1/32 scale Revell Bu-131D
I think it looks exceptionally realistic now. I sincerely appreciate the comments.
@lgardner That has a very natural worn effect.
Dmitry, @starfar
Thank you Sir. The fabric soaks up the layer of "dope" and absorbs it. Somewhere I have a photo showing the cockpit of a Fokker D-VII and how it looks with lozenge fabric applied. It is very similar in appearance, only it has the different colors of the lozenge visible. The look I was going for here has the same appearance, but in a solid color with the red brown leaking through the fabric weave.
Simply marvelous, Louis! @lgardner.
Robert, @roofrat
Thanks my friend... I appreciate the compliment. It's good to hear from you. Stay safe buddy.
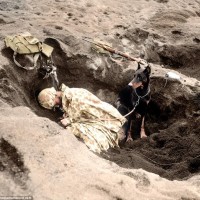
Well done Louis @lgardner. Funny thing, I did something very similar some 50+ years ago when I built a Jeep for a diorama. Used thinned white glue and tissue paper to cover the seats.
I too built balsa models as a kid. Love that time. Hopefully when I get a grandson I will teach him as well.
Great job on the presentation!
James, @jamesb
Thank you for the compliments... I still occasionally tinker around with balsa wood planes. I remember my first kit. It was a Comet Vultee Vengeance with a 20 inch wingspan. My second one was a Guillows Spitfire with a 16.5 inch wingspan. Then I started building up more of the kits that Comet made. Recently I picked up a set of plans for the Comet Taylorcraft with a 54 inch wingspan. I have thoughts about converting it to an electric powered flying scale model. I think it will work out very good, since it's such a light model to begin with, and it has a large wing area for it's size.
I don't know of too many people who still build these kits, but I'm very happy to hear you have plans to pass this on to your grandson. I have only used the white glue and tissue paper one time before and that was for a search light cover for a tank model I built.
Thanks again my friend. Stay safe.