Review: Revell 1/48 RAAF Beaufighter 21
History:
The Beaufighter originated in 1938. During the Munich Crisis, Bristol Aeroplane Company began private development of a long-range fighter capable of carrying heavy payloads under the leadership of Chief Designer Leslie Frise. Evaluation of the Beaufort torpedo bomber then entering production concluded the aircraft could developed further for greater speed and maneuverability. The prospective aircraft had to share the same jigs as the Beaufort so that production could easily be switched from one aircraft to the other. Bristol proceeded to suggest their concept for a fighter development of the Beaufort to the Air Ministry. The timing of the suggestion coincided with delays in the development and production of the Westland Whirlwind. While there was some skepticism that the proposed aircraft was too big for a fighter, the proposal was given a warm reception by the Air Staff. In October 1938, the project, which received the internal name Type 156, was outlined. In March 1939, the Type 156 was given the name Beaufighter.
The Air Ministry produced Specification F.11/37 in response to Bristol's suggestion for an "interim" aircraft, pending the proper introduction of the Whirlwind. On November 16, 1938, Bristol received formal authorization to commence the detailed design phase of the project and to proceed with the construction of four prototypes.
The Beaufort had modest performance. To achieve fighter-like performance desired for the Beaufighter, Bristol suggested that they power the new aircraft with a pair of their new Hercules engines, capable of around 1,500 hp, in place of the 1,000 hp Bristol Taurus engines on the Beaufort. The Hercules was a considerably larger and more powerful engine which required larger propellers. To obtain adequate ground clearance, the engines were mounted centrally on the wing, as opposed to the underslung position on the Beaufort.
Bristol took a partly-built Beaufort out of the production line to create the prototype Beaufighter. The designers expected that maximum re-use of Beaufort components would speed the process but the fuselage required more work than expected and had to be redesigned. A total of 2,100 drawings were produced during the transition from Beaufort to the prototype Beaufighter, more than twice as many were created during later development, between the prototype Beaufighter and the fully operational production models.
In general, with the exception of the powerplants used, the differences between the preceding Beaufort and Beaufighter were minor. The wings, control surfaces, retractable landing gear and aft section of the fuselage were identical to the Beaufort, while the wing center section was similar apart from certain fittings. The areas for the rear gunner and bomb-aimer were removed, leaving only the pilot in a fighter-type cockpit. The navigator-radar operator sat to the rear under a small Perspex bubble where the Beaufort's dorsal turret had been. Both crew members had their own hatch in the floor of the aircraft. The front hatch was behind the pilot's seat. As there was no room to climb around the seat-back, the back collapsed to allow the pilot to climb over and into the seat. In an emergency, the pilot could operate a lever that remotely released the hatch, grasp two steel overhead tubes and lift himself out of his seat, swing his legs over the open hatchway, then let go to drop through. Evacuating the aircraft was easier for the navigator, as the rear hatch was in front of him and without obstruction.
On July 17, 1939, R2052, the first prototype, first flew, a little more than eight months after development had formally started. Two weeks prior to the prototype's first flight, an initial production contract for 300 aircraft under Specification F.11/37 was issued by the Air Ministry, ordering the type "off the drawing board". During trials, R2052, powered by a pair of two-speed supercharged Hercules I-IS engines, achieved 335 mph (539 km/h) at 16,800 ft (5,120 m) in a clean configuration. The second prototype, R2053, which was furnished with Hercules I-M engines and was fully equipped with armament of four drum-fed Hispano 20mm cannon mounted in the lower fuselage, with six .303 machine guns in the wings - four in the right and two in the left - and other operational equipment, attained 309 mph at 15,000 ft. The performance of the second prototype was considered disappointing, particularly since the Hercules III engines of the initial production aircraft would likely provide little improvement, especially in light of additional operational equipment being installed.
On April 2, 1940, R2052 was delivered to the RAF, followed by R2053 two weeks later. On July 27, 1940, the first five production Beaufighters were delivered along with another five on August 3, 1940. These production aircraft incorporated aerodynamic improvements, reducing aerodynamic drag from the engine nacelles and tail wheel; the oil coolers were also relocated on the leading edge of the wing.
The Beaufighter in the RAAF:
The RAAF was impressed by the Beaufighter from the first time it was flown. An agreement between the Australian and British government in 1941 saw the export of Beaufighter IC fighter-bombers to Australia. The first Beaufighter IC arrived in Australia on April 20, 1942, and the first squadron to equip with the new aircraft at RAAF Forest Hill on June 2, 1942, was 30 Squadron, which took the airplane into combat over New Guinea.
The first major action the Beaufighters took part in was the Battle of the Bismarck Sea in April 1943, in which USAAF units of the Fifth Air Force, along with several 30 squadron Beaufighters in the flak-suppression role and two RAAF Beaufort-equipped torpedo bomber squadrons attacked a Japanese troop convoy, sinking eight transports and four destroyers for a loss of five attackers, including a Beaufort. The battle ended the threat to Port Moresby. The squadron went on to heavy service in the Rabaul Campaign, operating from Goodenough Island off the northern coast of New Guinea in the Bismarck Sea.
31 Squadron was the second RAAF Beaufighter unit, formed at RAAF Forest Hill on August 19, 1942. The squadron relocated to Darwin in October 1942 and conducted their first operational mission on November 17, 1942. Over the next 18 months the squadron operated in an around the Dutch East Indies, Timor and Borneo.
A famous mission to hit the Japanese held airbase at Penfoei in Timor on December 2, 1942. Saw 18 of 40 Japanese aircraft deastroyed with the rest heavily daqmaged, without loss of a Beaufighter.
Allegedly, the Japanese called the airplane “Whispering Death” as a result of the relative silence of the sleeve-valve Bristol Hercules engines. It is more likely the name was invented by an Australian war correspondent; in any case, the sobriquet survived to be used for all Australian Beaufighters.
31 Squadron, along with the third Beaufighter squadron, 22, joined 30 Squadron in 77 Wing based at Taqdji, New Guinea, in March 1944, from where they took part in the Wewak campaign and the ultimate expulsion of the Japanese from New Guinea following the invasion of Hollandia in April.
In November 1944, the First Australian Tactical Air Force relocated to the island of Morotai, north of New Guinea in the Celebes Sea, for operations in the southern Philippines, the Celebes Sea and Dutch East Indies. 22, 30, 31, 92 and 93 squadrons were now part of 77 Wing, equipped now with the new Beaufighter 21. The 1st ATAF supported the invasion of Borneo and Balikpapan.
The RAAF operated 72 Mk. IC, 63 Mk. VIC, and 21 TF.X Beaufighters, all of which were known in service as Beaufighter ICs, and the squadrons flew them intermixed. Once equipped with underwing rockets, Beaufighters became very successful in anti-shipping and fighter-bomber strikes.
In January 1943, an agreement was reached to produce the Beaufighter in Australia, following the successful Australian production of the Beaufort by the Department of Aircraft Production (DAP) at the Fisherman's Bend factory in Melbourne. The resulting Beaufighter 21 - based on the TF.X - differed from its British cousin in being armed with four .50-caliber machine guns in the wings, and being equipped with a Sperry autopilot housed just ahead of the pilot's cockpit, which was a necessary addition with the long-range missions flown in the Southwest Pacific. The first Beaufighter 21 was delivered May 26, 1944, and DAP produced 364 Beaufighter 21s by the time production ended in 1946.
The Kit:
Revell first brought out a TF X Beaufighter in 2018. This was the first new 1/48 Beaufighter kit since the appearance of the Tamiya Beaufighter series in the mid-1990s. The kit follows Revell-Germany's philosophy of doing things “at a price,” but it provides much more detail than does the Tamiya kit, including a detailed pilot's cockpit, separate control surfaces, and opening crew hatches. Decals are provided for an early and a late TF.X “Torbeau” operated in the Banff Strike Wing.
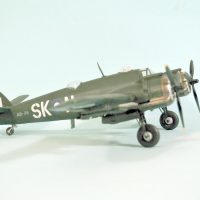
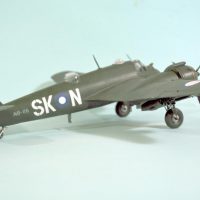
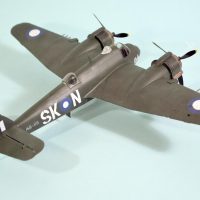
This model was built using the new Czech Master Beaufighter 21 conversion set, which includes a vaucofrmed Navigator's canopy with the “cur off” rear end of the RAAF airplane, along with a resin Sperry authopilot housing and Australian-style “hedgehog” exhausts. Decals are included for two Beaufighters, including “Pistol-Packin' Gremlin” of 93 Squadron, flown in the RAAF Beaufighter strike wing in 1945.
Construction:
This is a much more “fiddly” kit than the Tamiya Beaufighter. That said, as pointed out above, it is far more detailed and accurate than the Tamiya kit, providing options that have never before been available without use of aftermarket resin parts. As with many Revell kits, the instructions are frequently confusing and often wrong as regards instructing you in what to do.
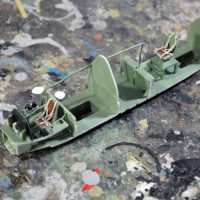
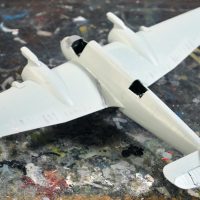
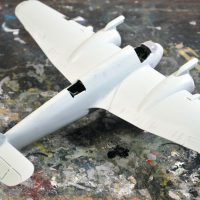
Assembly of the fuselage is not a problem, and is easily accomplished following the instructions. First off, one must cut the forward fuselage to fit the Sperry autopilot. This is easily done and the resin part fits without difficulty. I managed to break the kit-supplied cockpit canopy and was very happy to have a Squadron vacuformed canopy, which with a minimum of “fettling” fit well. I also used the Eduard ZOOM instrument panel and p-e seatbelts for both pilot and navigator cockpits.
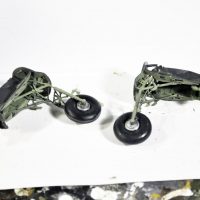
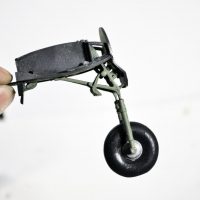
The main problem with the kit involves assembling and attaching the landing gear successfully. First and foremost; DO NOT FOLLOW THE KIT ASSEMBLY SEQUENCE. If you do, it will lead to disaster.
The following assembly instructions are the result of building one of these kits following the “instructions” which ended in disaster when the landing gear “exploded” out of the gear wells and self-destructed, followed by a lot of thought and a second more successful attempt made on the NF Mk. I kit, and a second time with this kit. If you follow these instructions, you will have no problem with the assembly of this model:
-
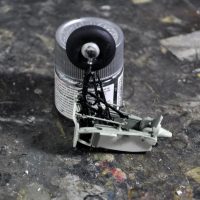
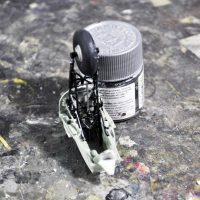
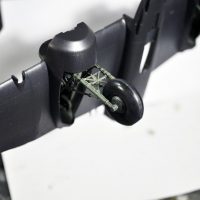
Assemble the entire gear well “box,” including part E-99, the front wall that the gear attaches to, into a box. Set this aside and allow it to set up. When this is set up, paint it British Interior Green. Also paint the insides of the gear wells in the lower wing part inside the nacelles. Also paint parts E-101 and 102, the gear door attachment parts (there are two sets). DO NOT attach Part F-35, the forward gear well bulkhead, at this point; it will go on last.
-
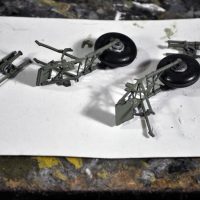
You have to pre-paint the gear before assembly. My research has found that the gear legs are painted semi-gloss black. I used Tamiya X-18, Semi-Gloss Black. You also need to assemble and paint the main wheels.
-
Assemble the main gear legs per the instructions, including the main wheel. The rear gear legs (part E-97) need to be scraped down on the outside of the area of the part that is inserted into the gear well. Test fit until you get it to where it can slide in easily (this is the part that is just slightly too big and screws up assembly if you don't do this).
-
Attach the gear to the gear wells. Before proceeding with putting in Part E-97, cut off the little tabs at the end that attach to the gear leg, since they were molded reversed. Then take E-97 with parts E-91 and 92 and F-90 assembled and attached to E-97, get this assembly in position and attach to the gear legs and then glue in position inside the gear well.
-
Attach part F-35 and glue it firmly to all parts of the main gear leg that touch it.
-
Attach parts E-101 and 102 in their position.
Now that you have the entire gear and well assembled, slip them into the lower wing and glue into position. Voila! Everything fits. Once you have assembled the wing, you can proceed to attaching the engines. There is difficulty assembling and attaching the engines due to the fact that it is easy to attach them out of alignment. Here is the assembly sequence for the engines I found to work successfully:
-
Prepaint the engine; paint the interior of the cowlings British Interior Green; paint the interior of the exhaust collector ring (I used Tamiya “Metallic Grey”). DO NOT ASSEMBLE THE ENGINE AT THIS POINT.
-
Choose the intake you want for the version you are doing (parts 73 and 74, or parts 75 and 76), assemble them and glue them to the engine nacelle.
-
Attach the cowling flaps (either part 69 for closed or part 70 for open) and glue them to the intake so they are properly positioned.
-
There are two sub-assemblies to the engines and cowlings. DO NOT FOLLOW THE KIT INSTRUCTIONS. The problem here is that the parts do not have real positive attachment guides, so that you cannot get them in proper alignment if you follow the instructions. Do this:
Attach the exhausts (part 57)to the assembled wing and be sure to get that “T” attachment right. 2) Attach the real half of the rear row of cylinders (part 58) to part 57 and again insure you have the position right regarding the position of the cylinders (one cylinder straight up. Then attach part 59, then part 60. BE SURE TO GET part 58 and Part 60 glued together tight (if you have the parts positioned right, this will be easy; difficulty means to re-check proper alignment).
Assemble the cowling separately. This is fiddly, so give the individual parts time to set up as you proceed through that. Assemble the cowling parts to the exhaust collector ring the way the instructions show. Set the assembled cowling aside to set up fully.
- Once the cowling is set up, slide it over the engine and glue it to the cowling flaps (part 69 or 70).
After you do this, the only thing left is to decide if you want the flaps up or down. Unlike most kits that have a lowered flaps option where the parts are happier open than closed, you can assemble them up without problem, as I did here.
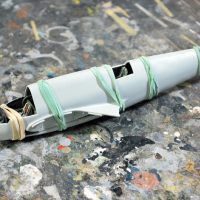
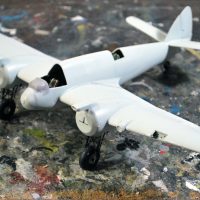
I found that when I attached the wings to the fuselage, it helped to use large rubber bands - one wrapped from engine to engine, and one from wingtip to wingtip, to get the wings to attach tightly to the fuselage.
The tail is straightforward. Choose whether you want to pose the control surfaces dynamically. I also attached the rocket attachment plates on the lower wing. At this point, it's time to proceed with painting.
Colors and Markings:
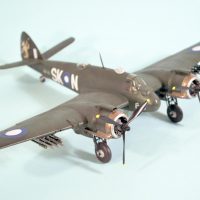
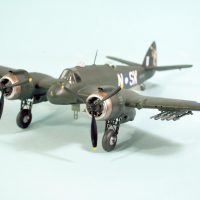
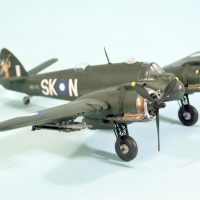
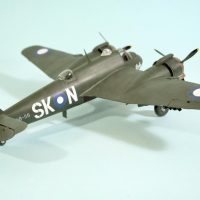
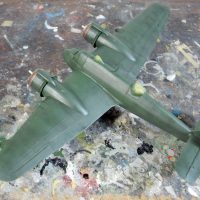
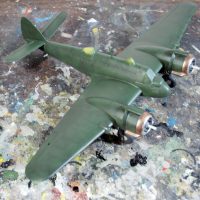
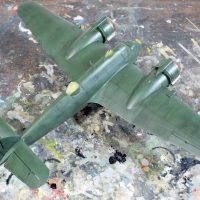
After pre-shading the model, I gave it an overall coat of Tamiya XF-27 Black Green, then went over it with XF-26 Deep Green, to get a “faded” look to the paint. The collector ring and exhaust were painted “bronze” by mixing Vallejo “Magnesium” with “Copper.”
The CMR decals went on without problem. I chose the more colorful option, the 93 Squadron “Pistol-Packin' Gremlin.” Once done, I washed off decal solvent residue and gave the model an overall coat of Clear Flat.
I unmasked the canopies. After cutting off the pivots, I slid the entry hatches into position in the lower fuselage. I then attached the eight RPs taken from an Eduard Tempest kit, attached the props, and called it finished.
Conclusions:
This is a kit that really makes you work for your progress; it is a definite battle, but when you finally win you have something nice. The Revell kit is far more detailed than the Tamiya kit – the opposite of the Mosquitos, where the Tamiya kits shine and the Revell kit qualifies as a Mosquito(ish).
Recommended for modelers with experience in successfully battling a model into submission who are Serious Beaufighter Fans.
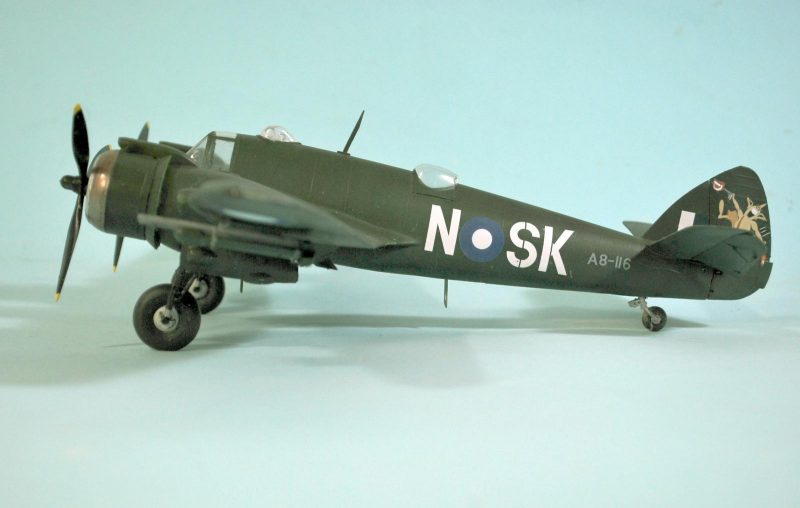
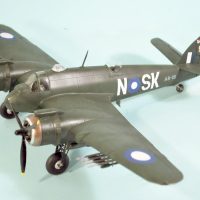
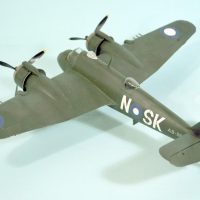
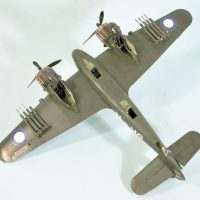
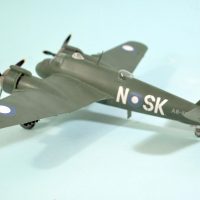

This is a wonderful Beau, Tom!
Loved everything, surely going to follow your instructions upon building it, though, admittedly, the "simpler" Tamiya kit is not that unappealing, especially as it is lately offered at very low prices...
Loved the accompanying article a lot, as well.
P.S. Oh, my, what an agonizing bailout for the pilot! Had no idea of it till now...
Congratulation Tom to these wonderful Beau! I really enjoyed looking at these pictures and reading your article!
That turned out great, Tom. I like pretty much anything in foliage green.
Nice looking Beau - the paint work looks great (shows up more in those last photos). Well done.
Looks great. Especially in RAAF painting.
Nice work Tom and I appreciate the assembly tips you've given us. Thanks for "blazing a trail"! 🙂
As I'm learning from my Tigercat build, the kit instructions can get ya in a storm if not careful. 😉
Beau-tiful build on this Beaufighter, Tom. You can 'revel' with this completion.
Looks great in the Aussie dressing.
That is one nice looking Beaufighter Tom. The building tips are appreciated as well. One point for future reference is that Oz built Beaus interiors were painted a shade of green similar to a green apple but darker. This applies to Oz built mustangs as well. Not sure if this also applies to Oz Beauforts. A pretty good match is Gunze Sangyo Aqueous Hobby Colour H26 bright green. This is probably too shiny out of the bottle and will need to be over coated with with a light dusting of clear matt coat. I have a couple of photos somewhere I will try and find and post.
Thanks for that info and I look forward to seeing the color.
The Beau is one of my favorite aircraft, and you have have done it proud with your build. Too bad Revell doesn’t upscale this to 1/32. The old 1/32 one is a brute to build it like it should to done.
I gave up on the 1/32 kit. A friend who's "in the know" told me that because of the poor reception of this kit (modelers going nuts trying to follow the instructions on the landing gear) that it's unlikely there will be further sub-types (or even a TF X with rockets). But you should go grab yourself a Beaufighter I kit because Special Hobby is releasing a resin conversion for the Merlin-powered Beaufighter II sometime this fall (before Xmas I am told).
There is a resin 3D-printed set out now for the 1/32 kit with a detailed interior, which can be found if you look at eBay.
It’s by 3 Monkeys. I have it , and it is very good. Ooh, if only the rest of the kit was to this standard.
Great looking Beau. I really like these in the Aussie markings.
Beautiful build, Tom @tcinla.
Great detailing and scheme.
Excellent work Tom and thanks for the background history.
Lovely build Tom!
The Beaufighter in my opinion was underrated and along with the Typhoon make up 2 of my favorite RAF aircraft.
Nice model. I wish I could see a beaufighter up close somewhere.
Quite an Animal. Thanks for all the great articles.
Lovely job. I love the Beau although it was overshadowed by the Mosquito. On my to do list. Is it my imagination or did Airfix produce a 1/24 Beaufighter at some point?
That's a pretty big imagination! That'd be bigger than H-K's 1/32 B-17 or Lancaster.
Very nice Beaufighter build. The Foilage Green camo and markings make the model for me.