1/48 Hawker Tempest MK.V Series 1 (Eduard)
Idealised as a response to the shortcomings of both the Typhoon and the Tornado, the Hawker Tempest made it to the drawing board circa 1941. Due to several shortcomings related to the Tempest planned powerplants, namely the Napier Sabre and the Bristol Centaurus, the full clearance to enter service was only received in the 8th of April 1944. It proved to be a fast, stable and easy to fly gun platform much loved by its pilots. Although the Tempest appeared too late to prove its real value in combat, without doubt, it will remain as one of the finest piston-engined fighters ever produced.
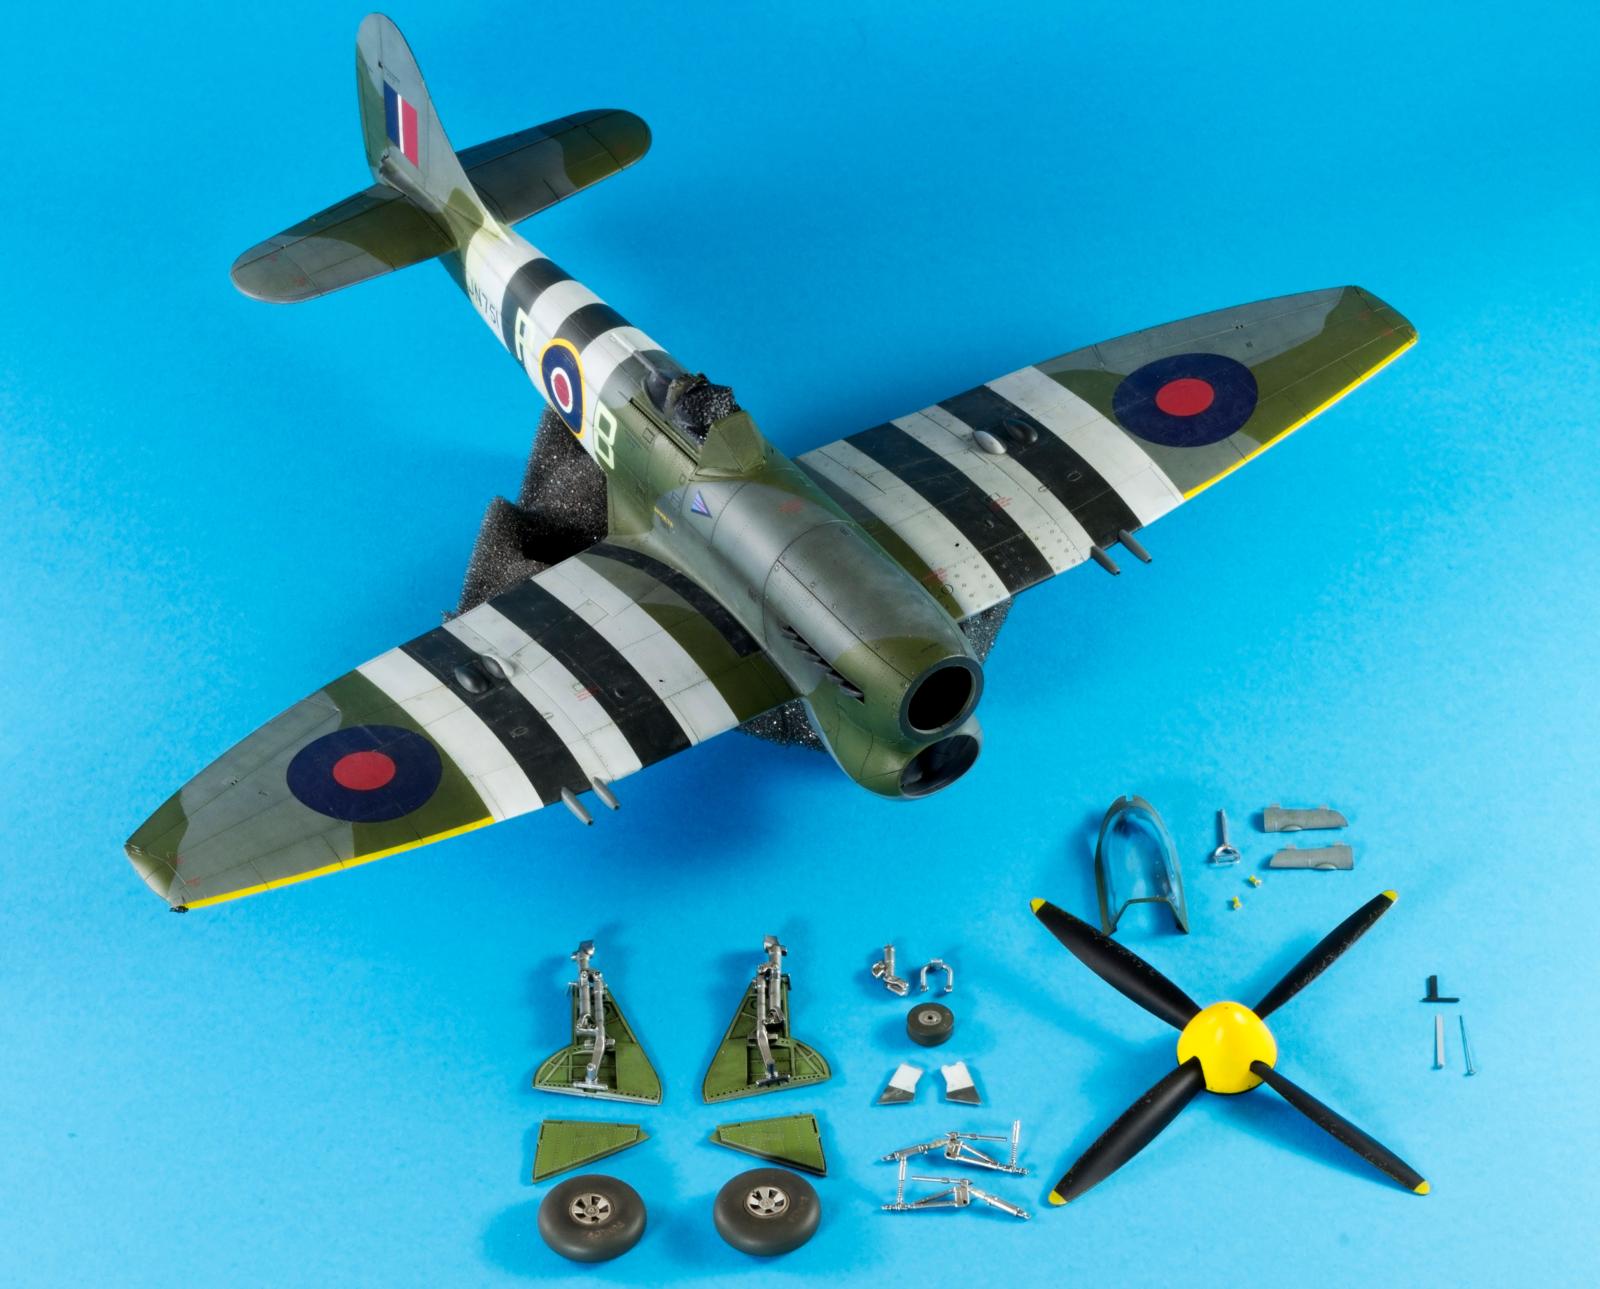
Well, inside the sturdy cardboard box there were 185 plastic parts, a coloured photo-etched fret and decals for six versions of the Tempest, half of them with black and white invasion stripes.
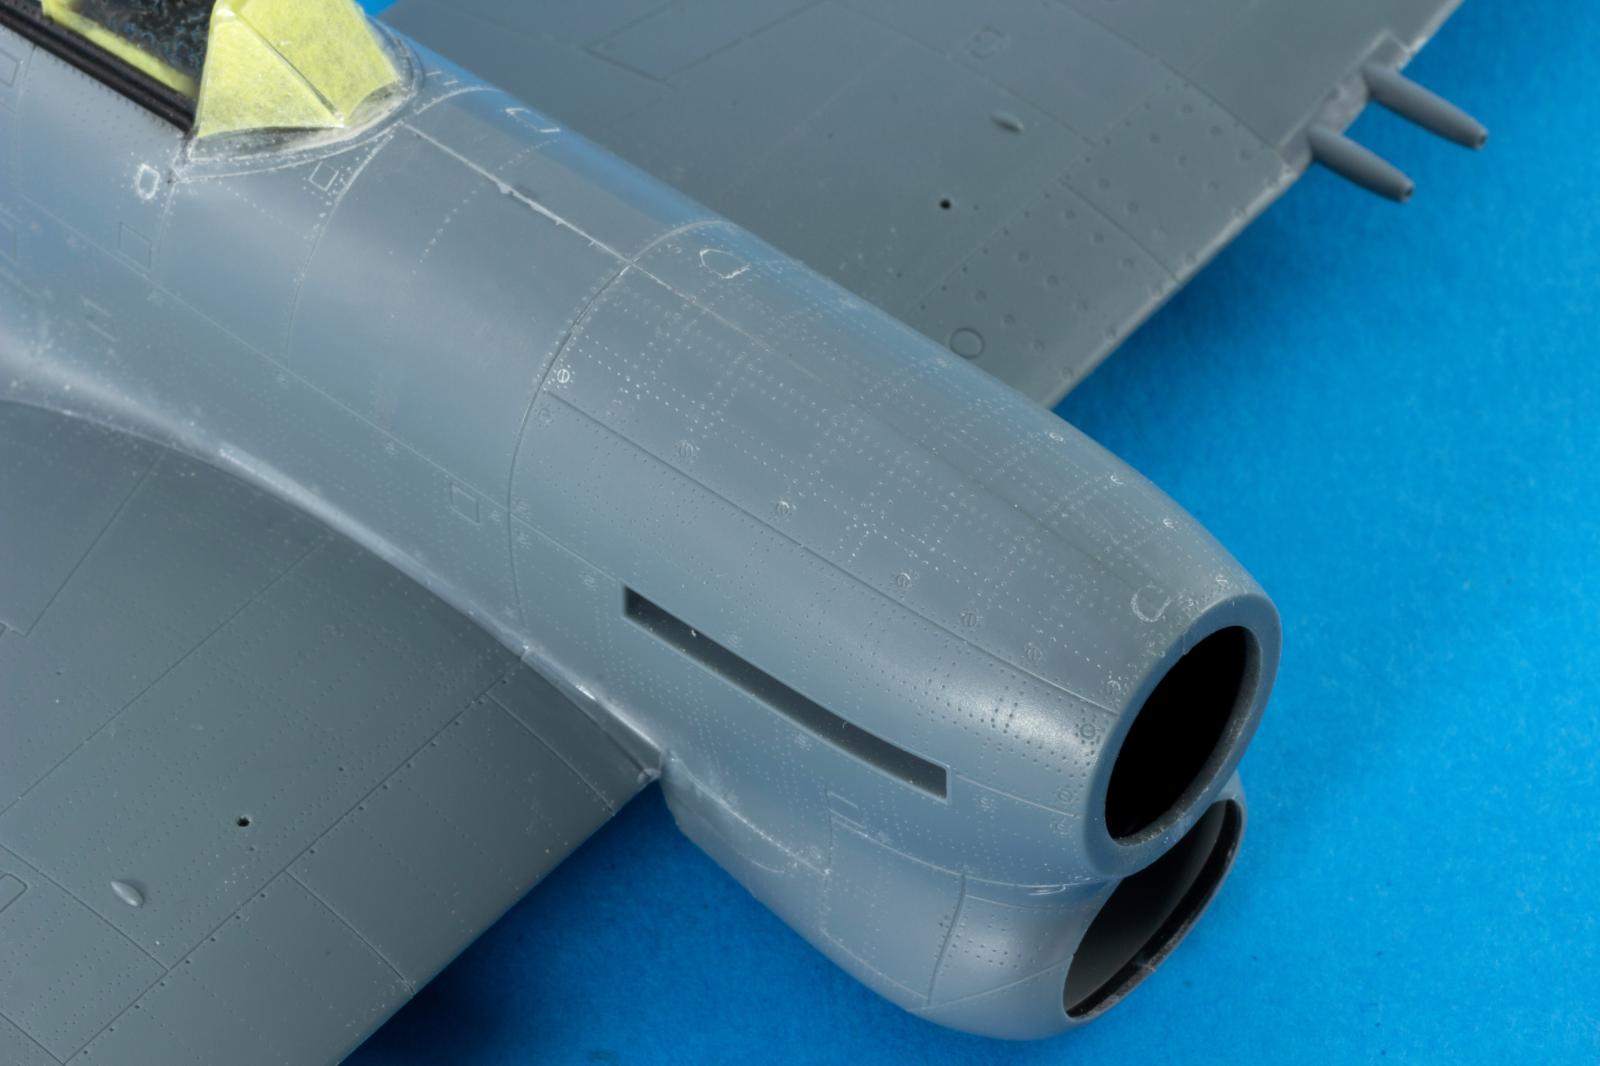
The plastic parts are gorgeously moulded, featuring exquisite surface detail in the form of extraordinary rivet detail, both raised and recessed, and panel lines with different widths. The edges are sharp and the clear plastic parts well moulded and distortion free.
As usual, the build started with the cockpit. In this Profipack version of the kit, the modeller can complement the exquisite plastic parts with photo etched details, specifically concerning the instrument panel and side consoles. In this modeller example, several delicate parts were broken and were repaired while still attached to the sprues.
The ejection gates were quite substantial when compared with the plastic parts, therefore a quality sprue cutter was paramount to detach these from the sprues. These allowed for clean cuts and minimised the occurrence of damage on the detailed surfaces.
The cockpit bulkheads were glued to the floor with the aid of the fuselage part as an alignment jig. Note the repaired frames on the cockpit side cage. These fractures were due to the extreme finesse of the parts.
The fuselage contact surfaces were rectified with a sanding stick and protected with masking tape. A 1mm drill bit was used to widen the alignment holes.
The cockpit was constructed with both the plastic parts and coloured photo etched parts supplied in the box.
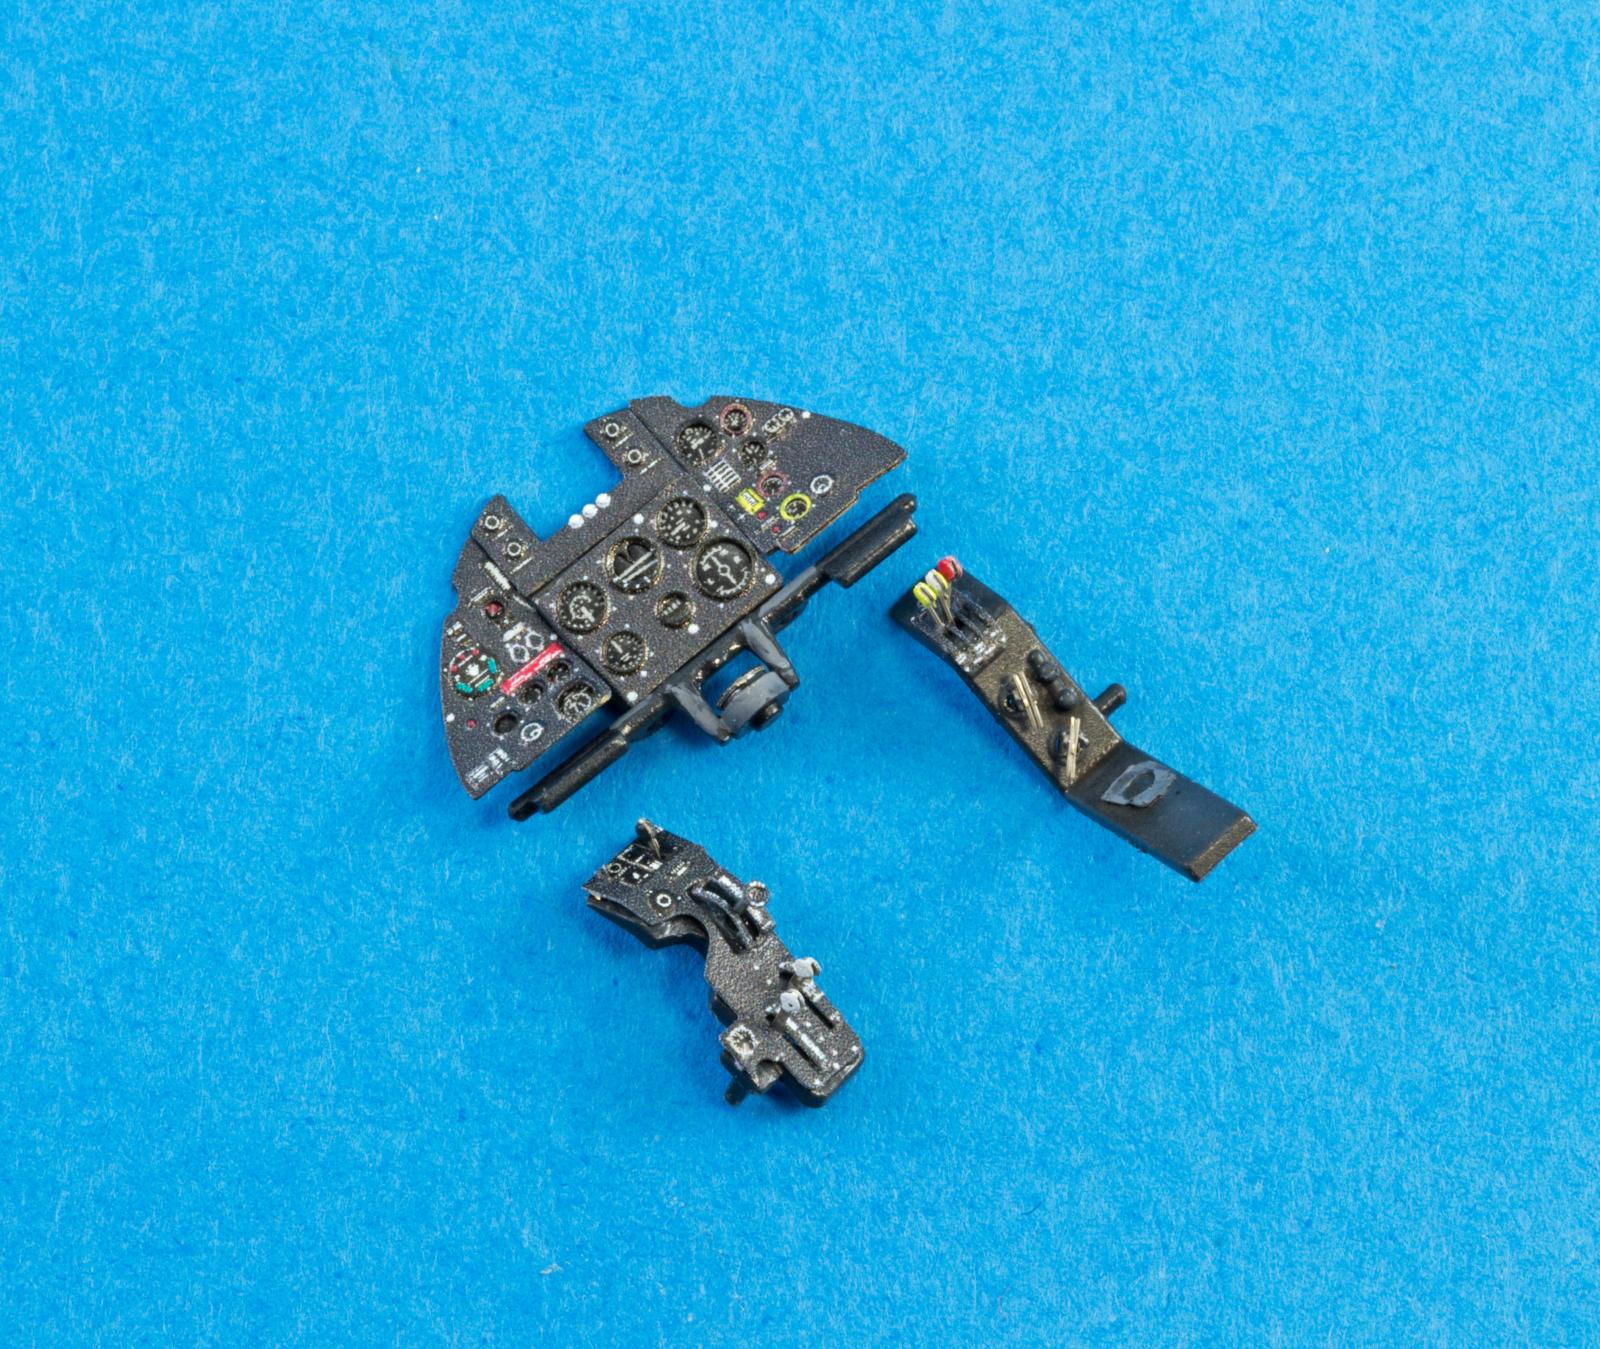
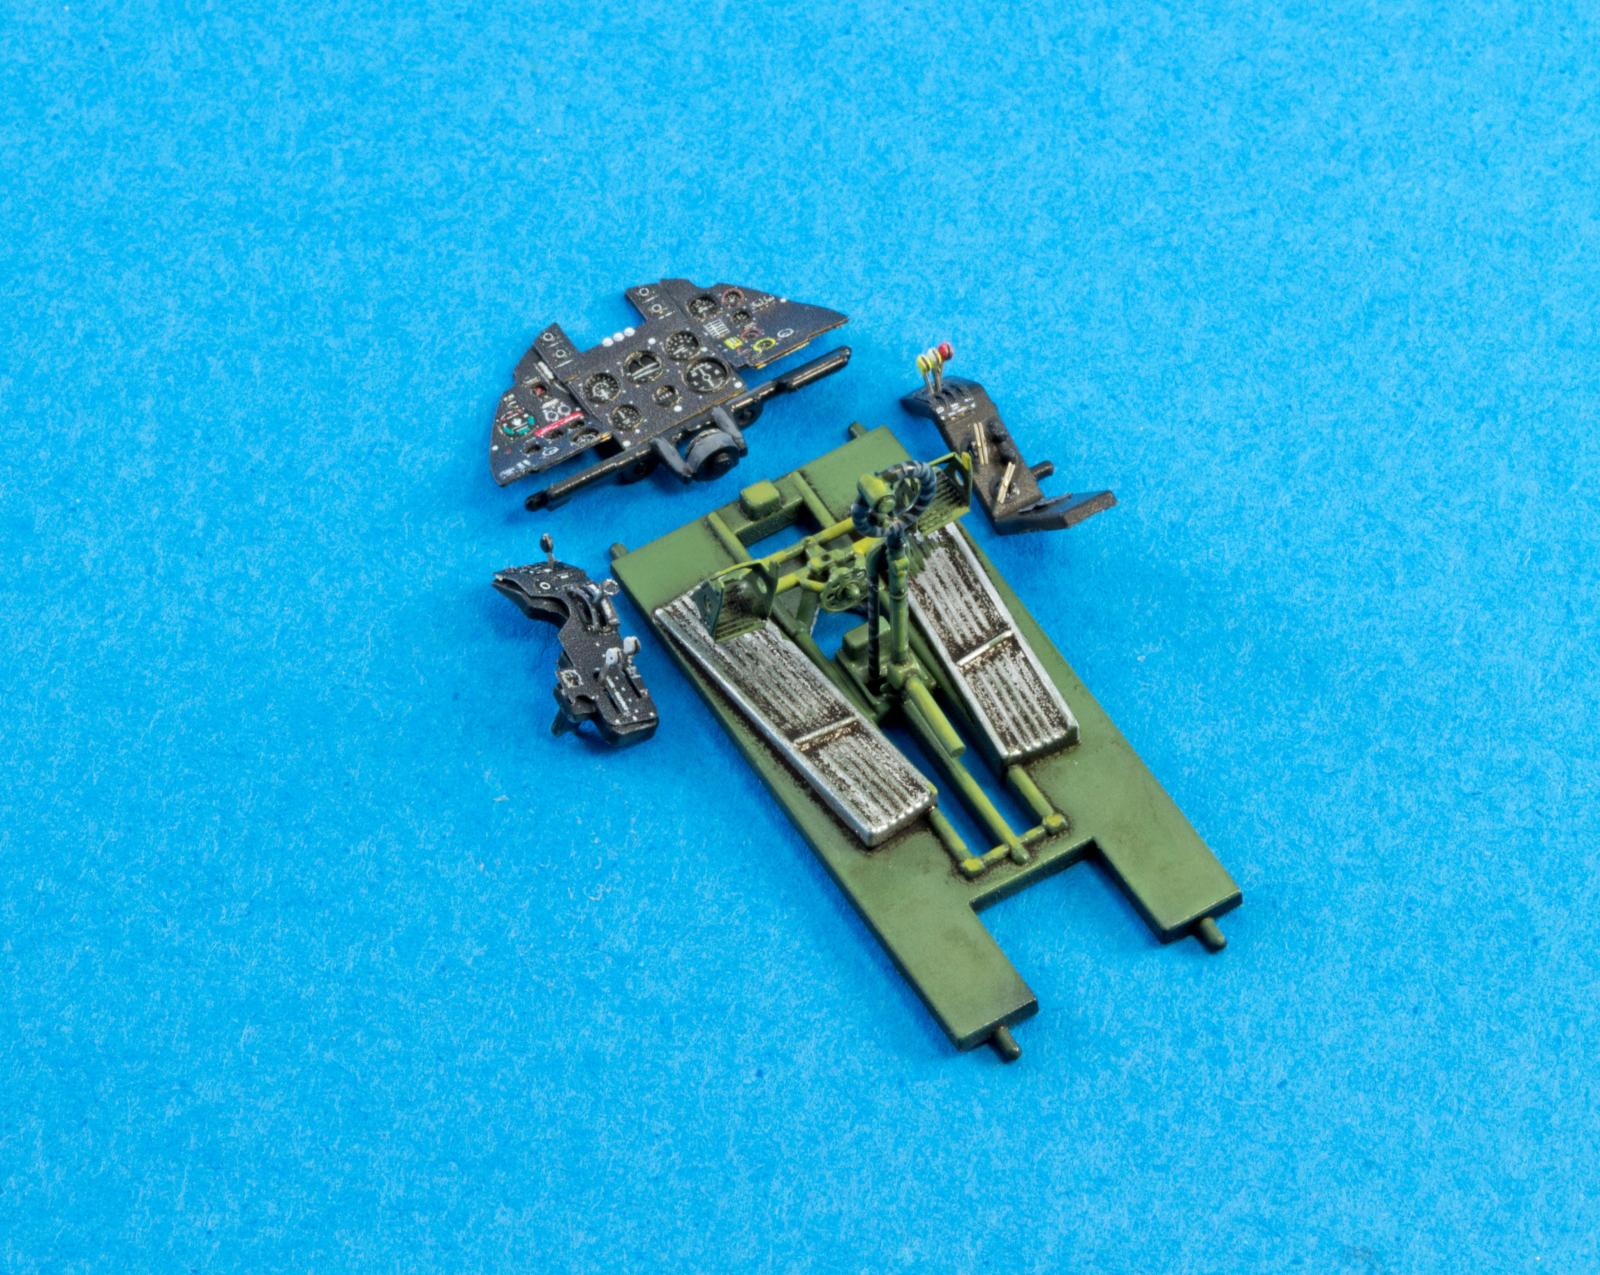

Tamiya XF-71 was employed as the interior green. This was airbrushed in light layers over a black primer layer, with the zenithal light concept as a loose reference. The same principle was used on the black areas of the cockpit. For this effect, Tamiya XF-69 Nato Black was later highlighted with Vallejo Model Air (VMA) 71052 German Grey.

Final aspect of the cockpit subassembly.

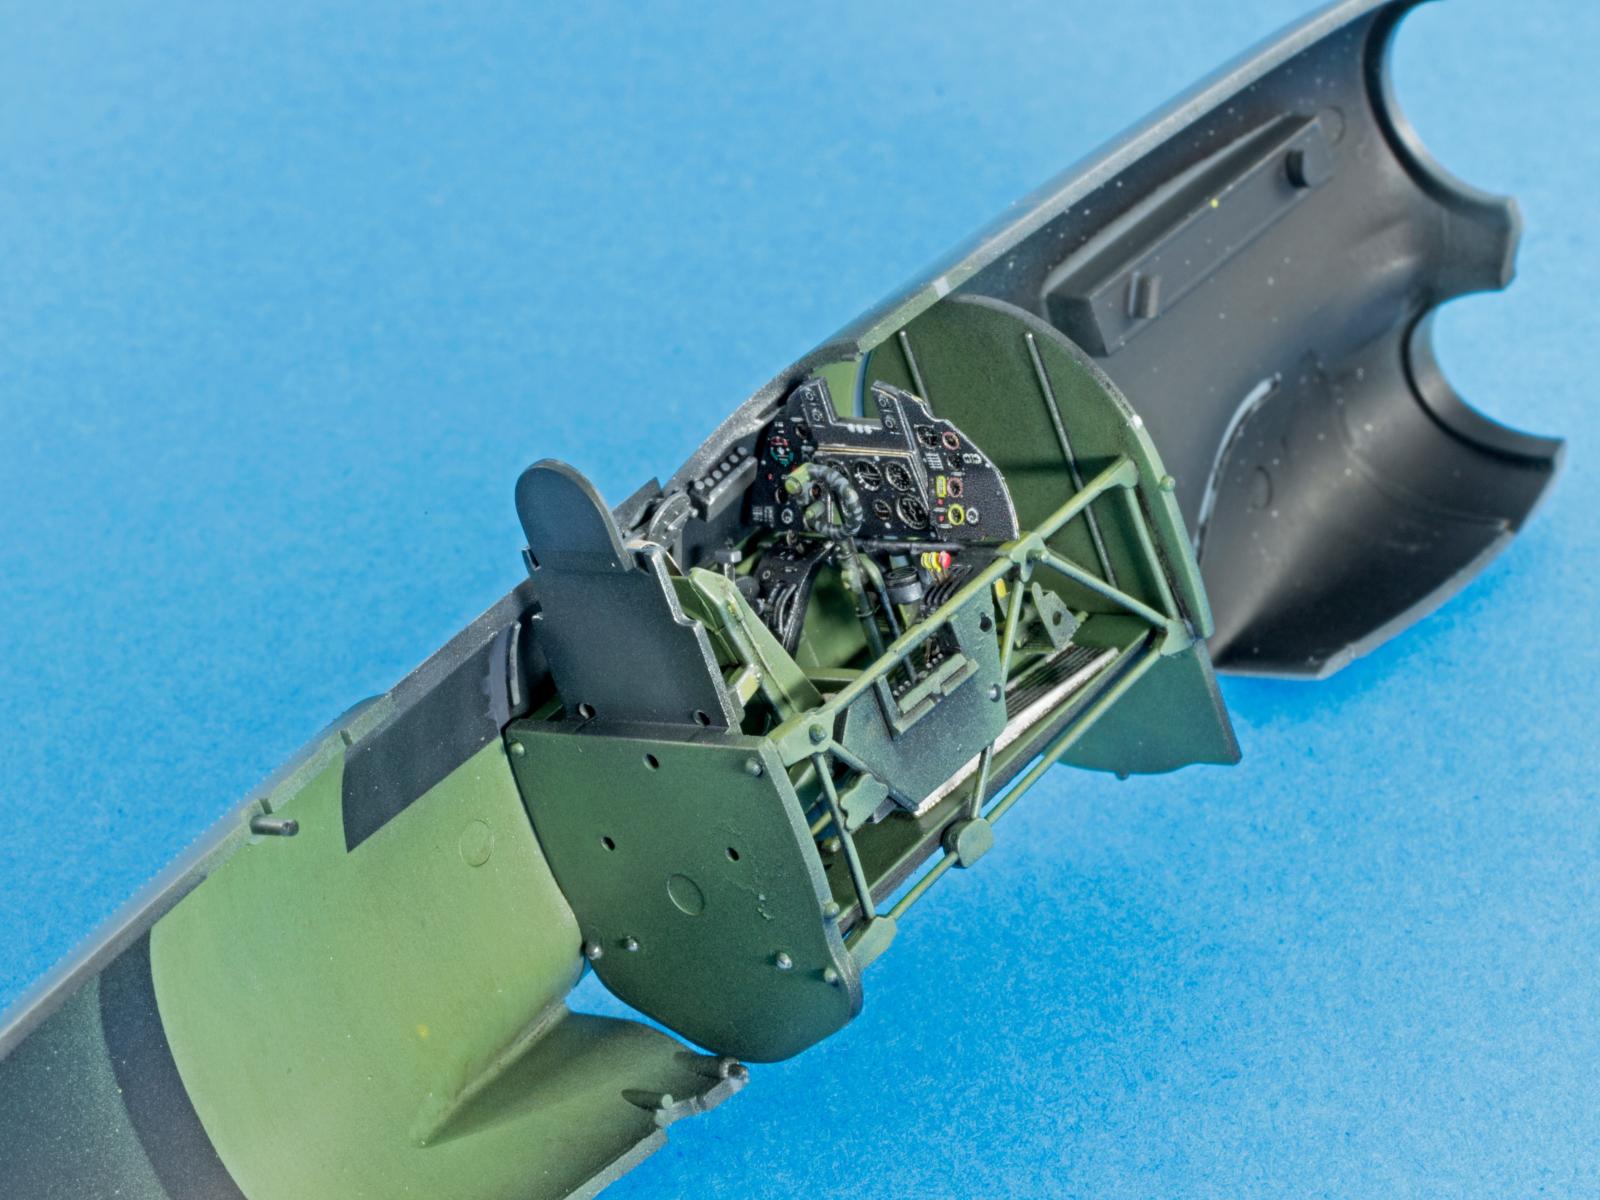
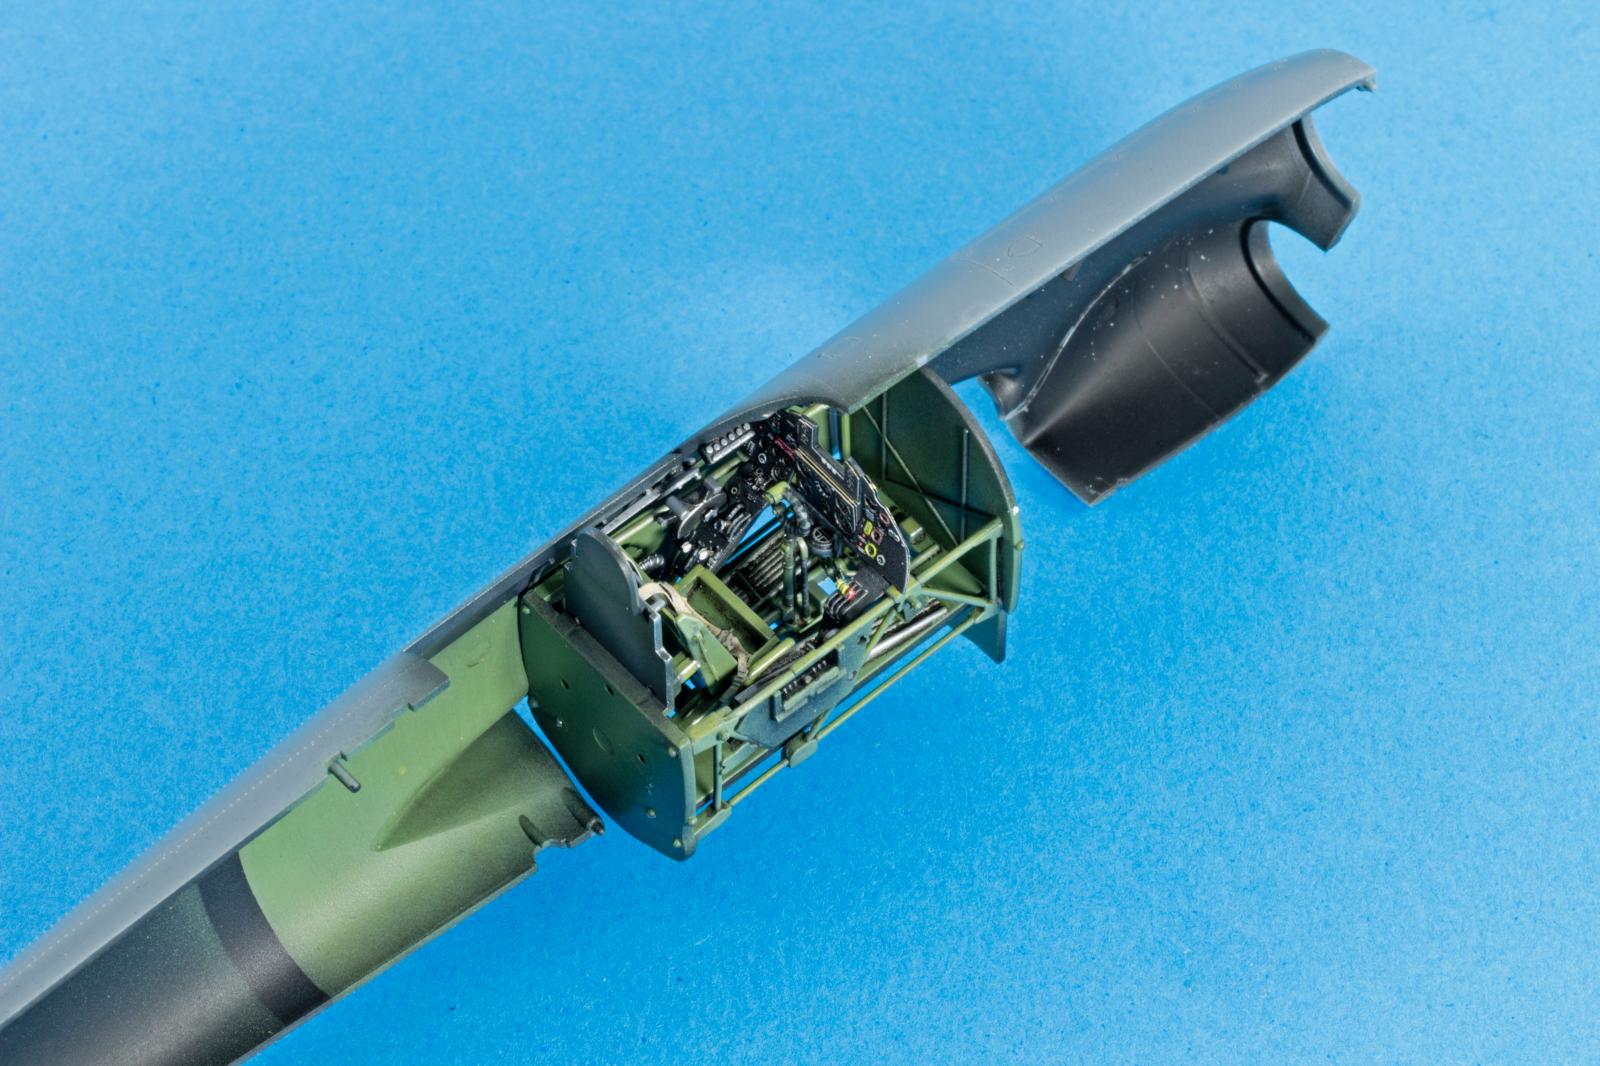
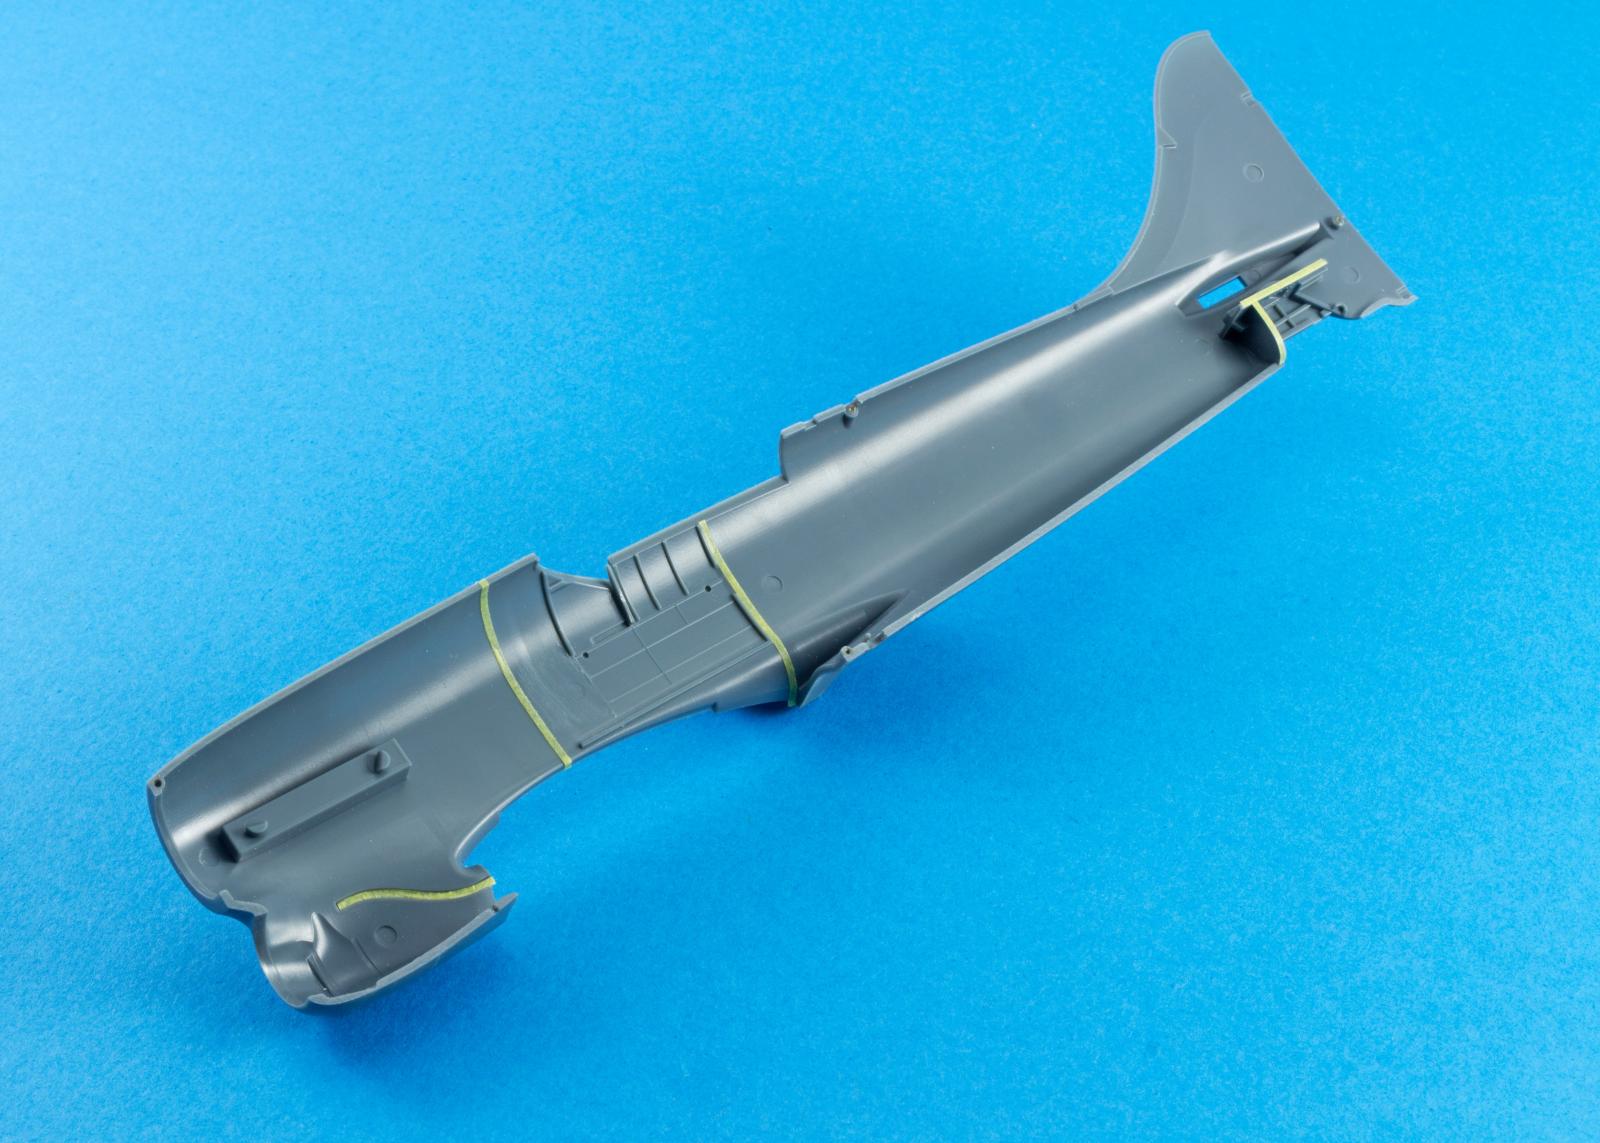
The radiator subassembly was painted with VMA 71061 Aluminium and glued up again with the use of the starboard fuselage halve as a guide,

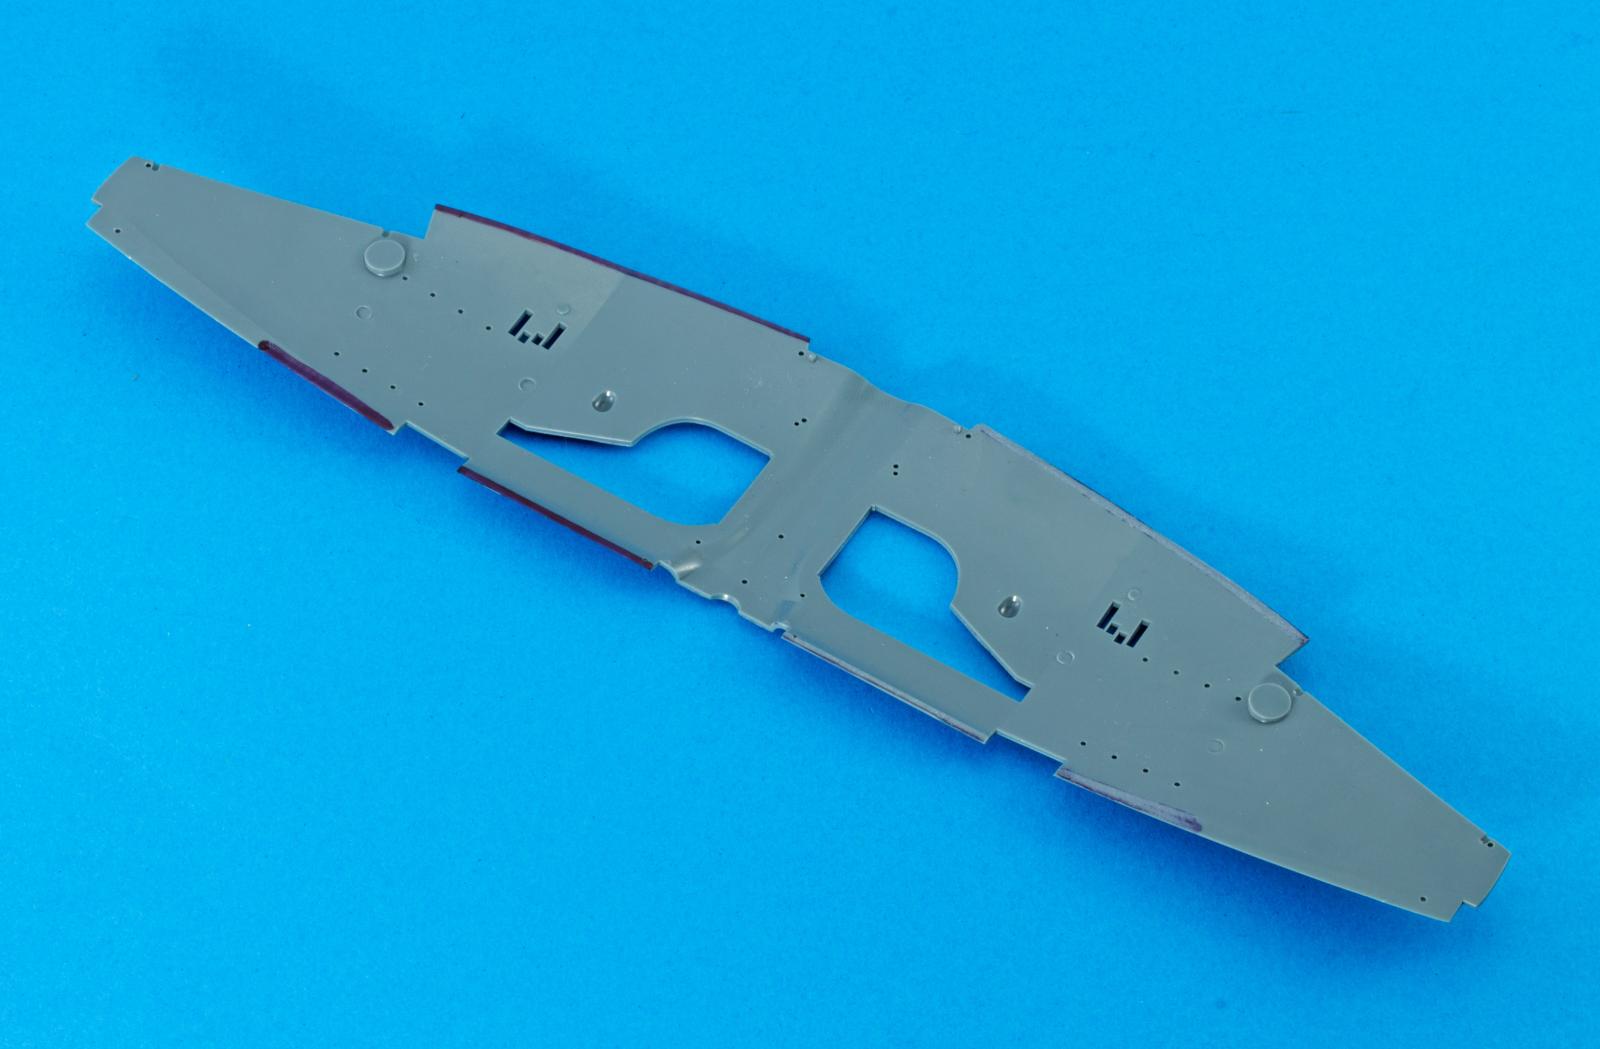
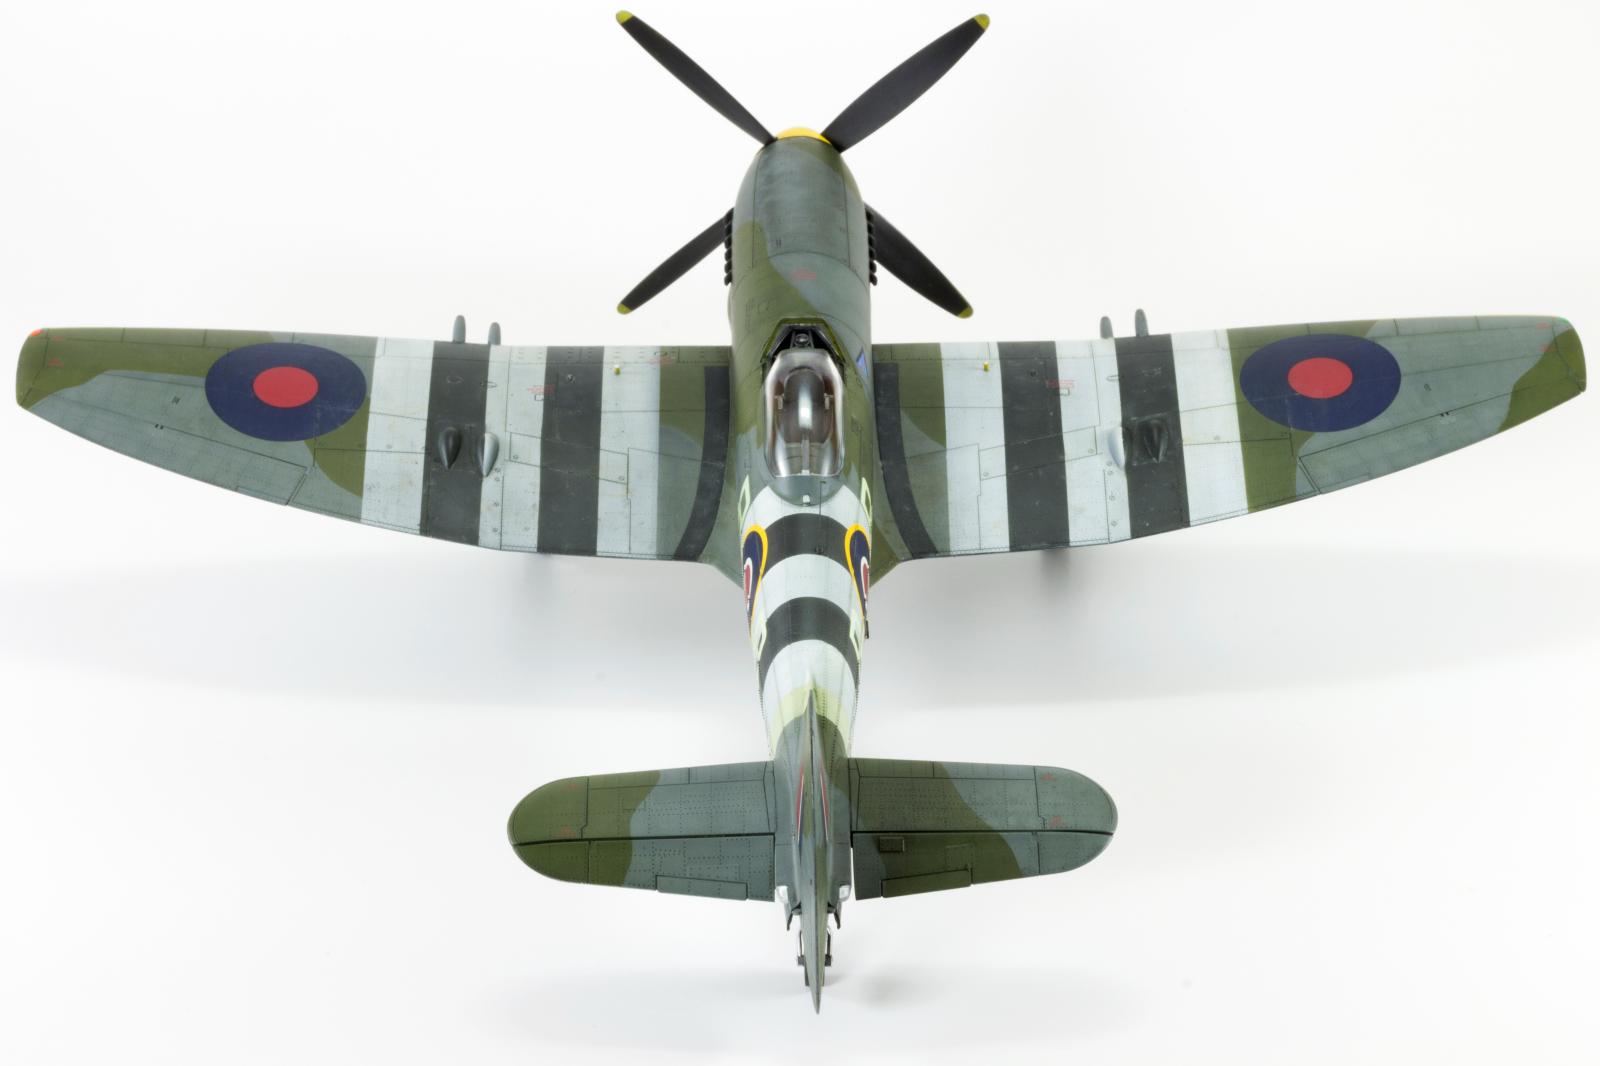
The Tempest wings are gorgeous! And elusive! Being a focal point on any aircraft build, the complex shape of the Tempest wings was well captured by Eduard. The solution found to keep the trailing knife sharp was also clever but demanded it`s fair share of work to look good.
A black marker was run along the trailing edges and the plastic lightly shaved with a scalpel blade. Plastic was removed from both the inner and outer lip of the edge, in order to square down the mating surfaces.
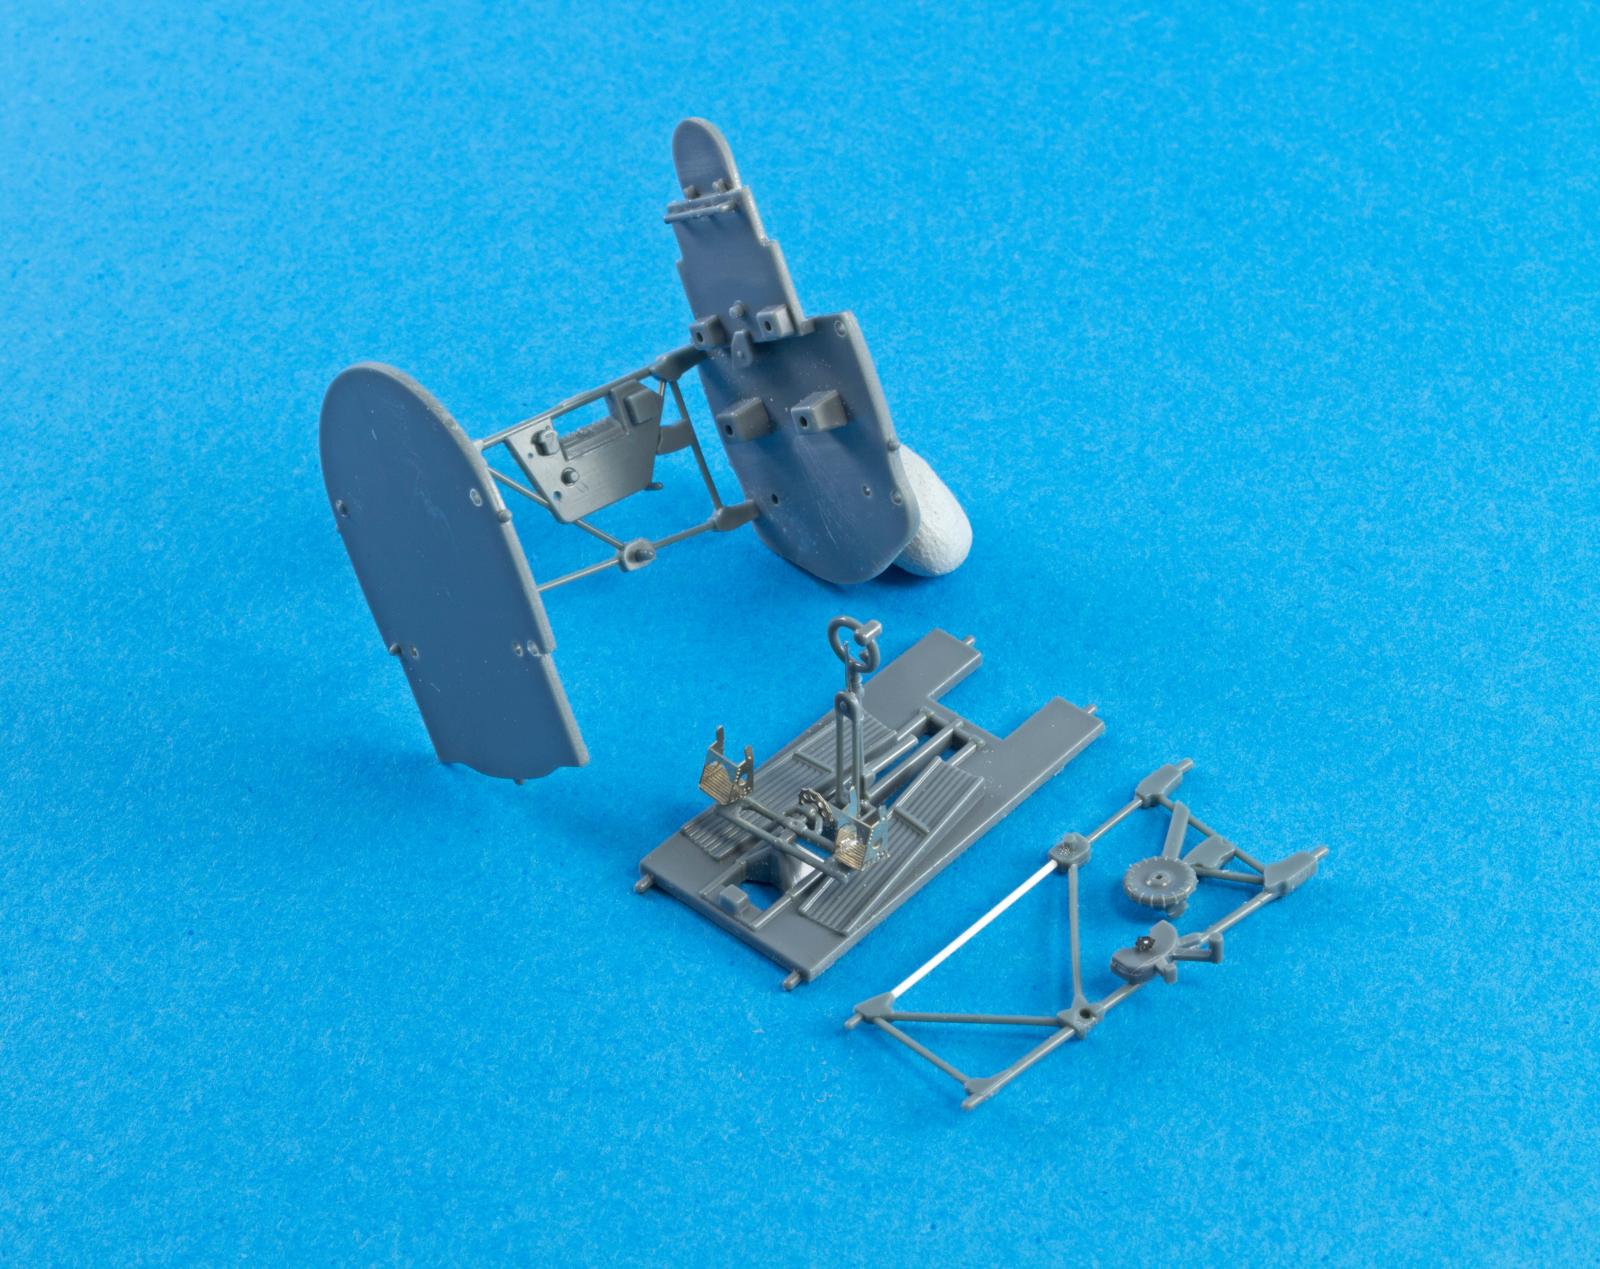
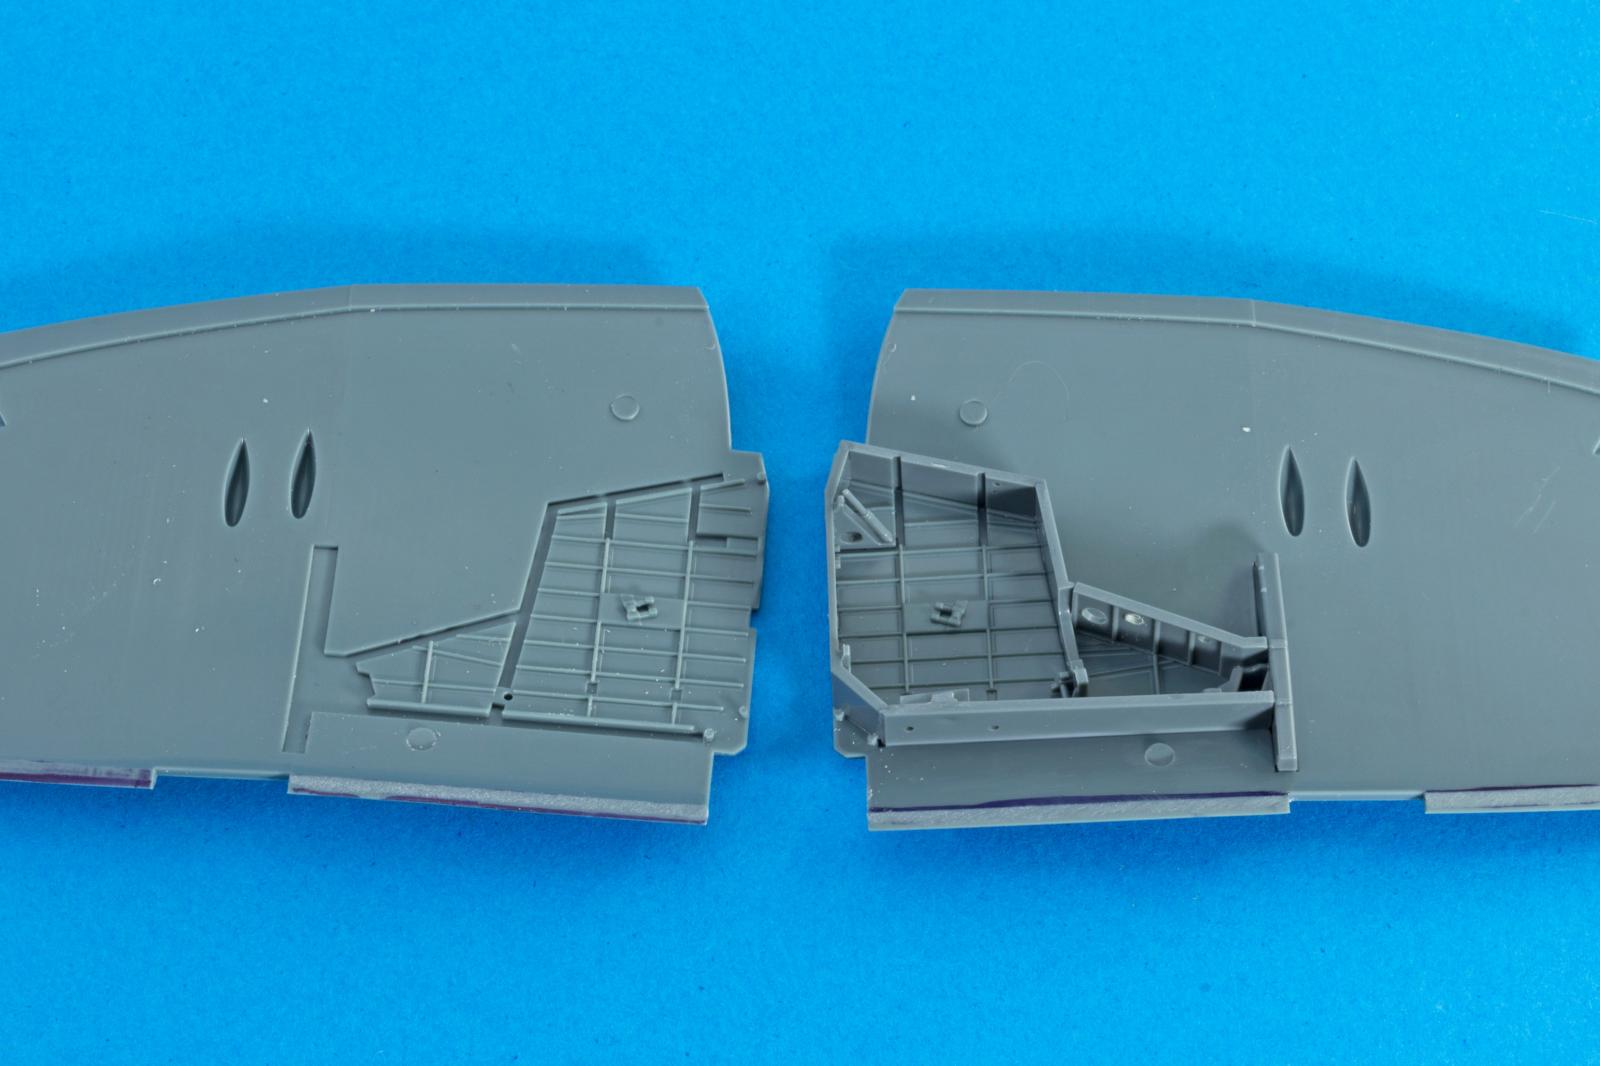
The landing gear pit was well detailed out of the box. It was built with 6 plastic pieces glued onto the upper wing halve. As a precaution measure, a sanding stick was run on the edges to ensure a good fit.
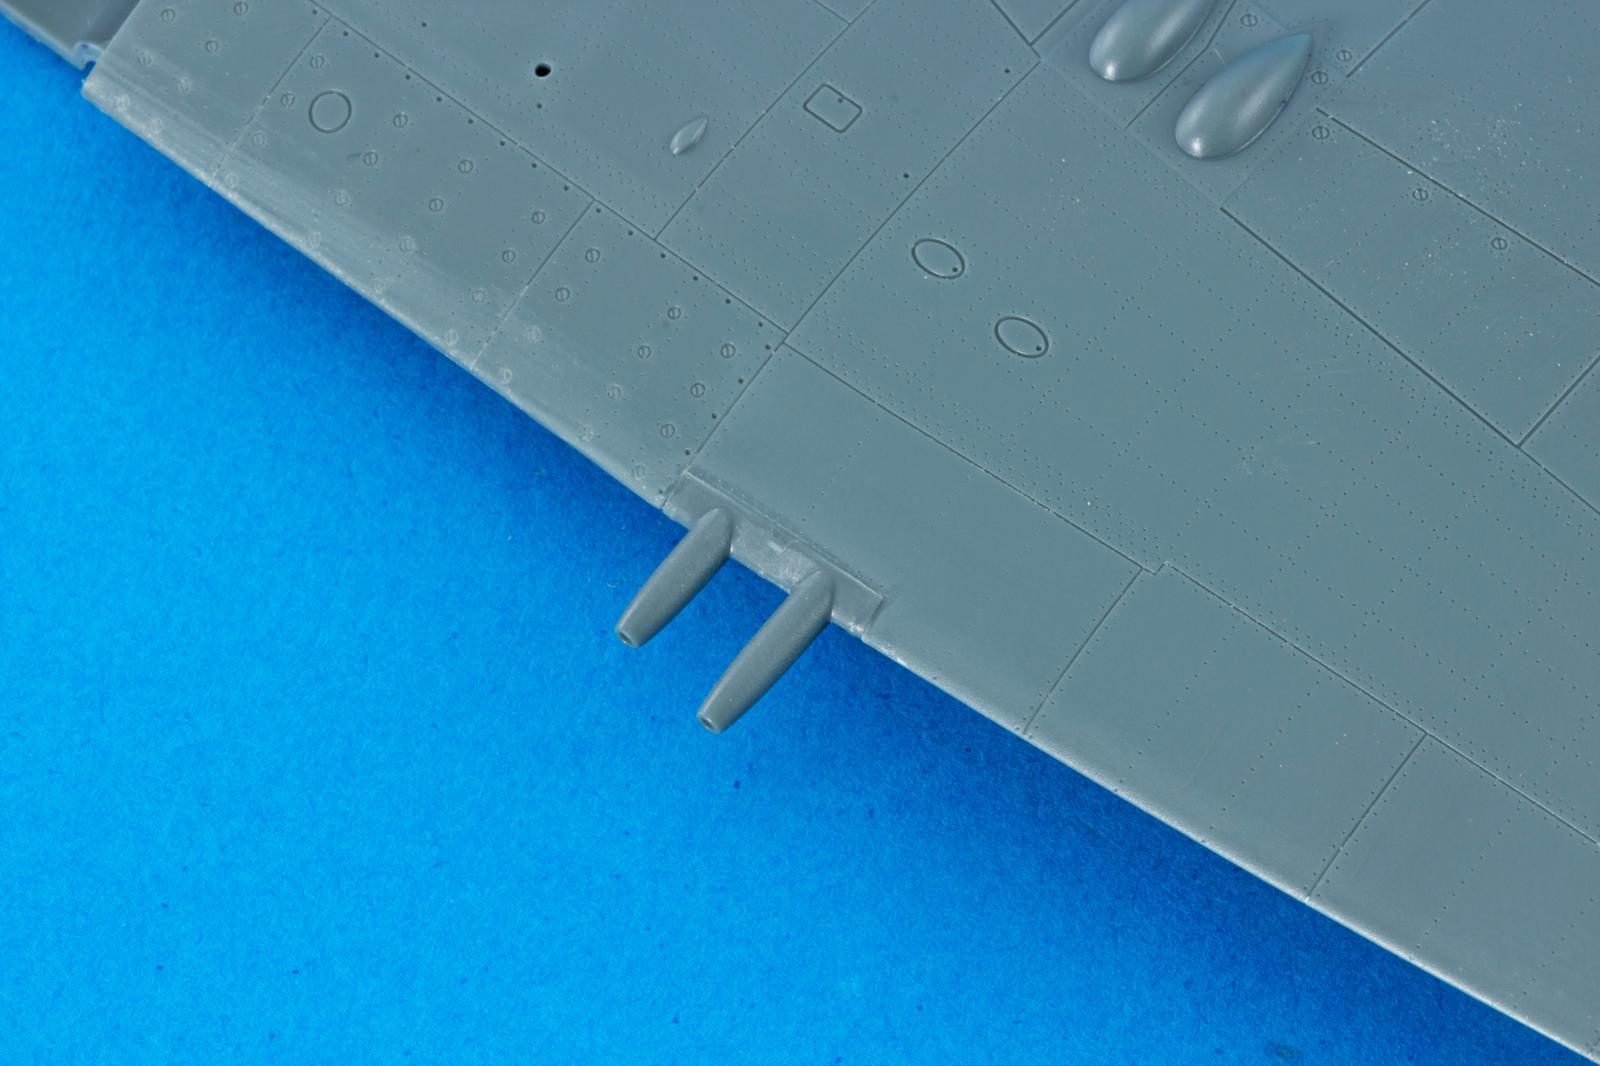
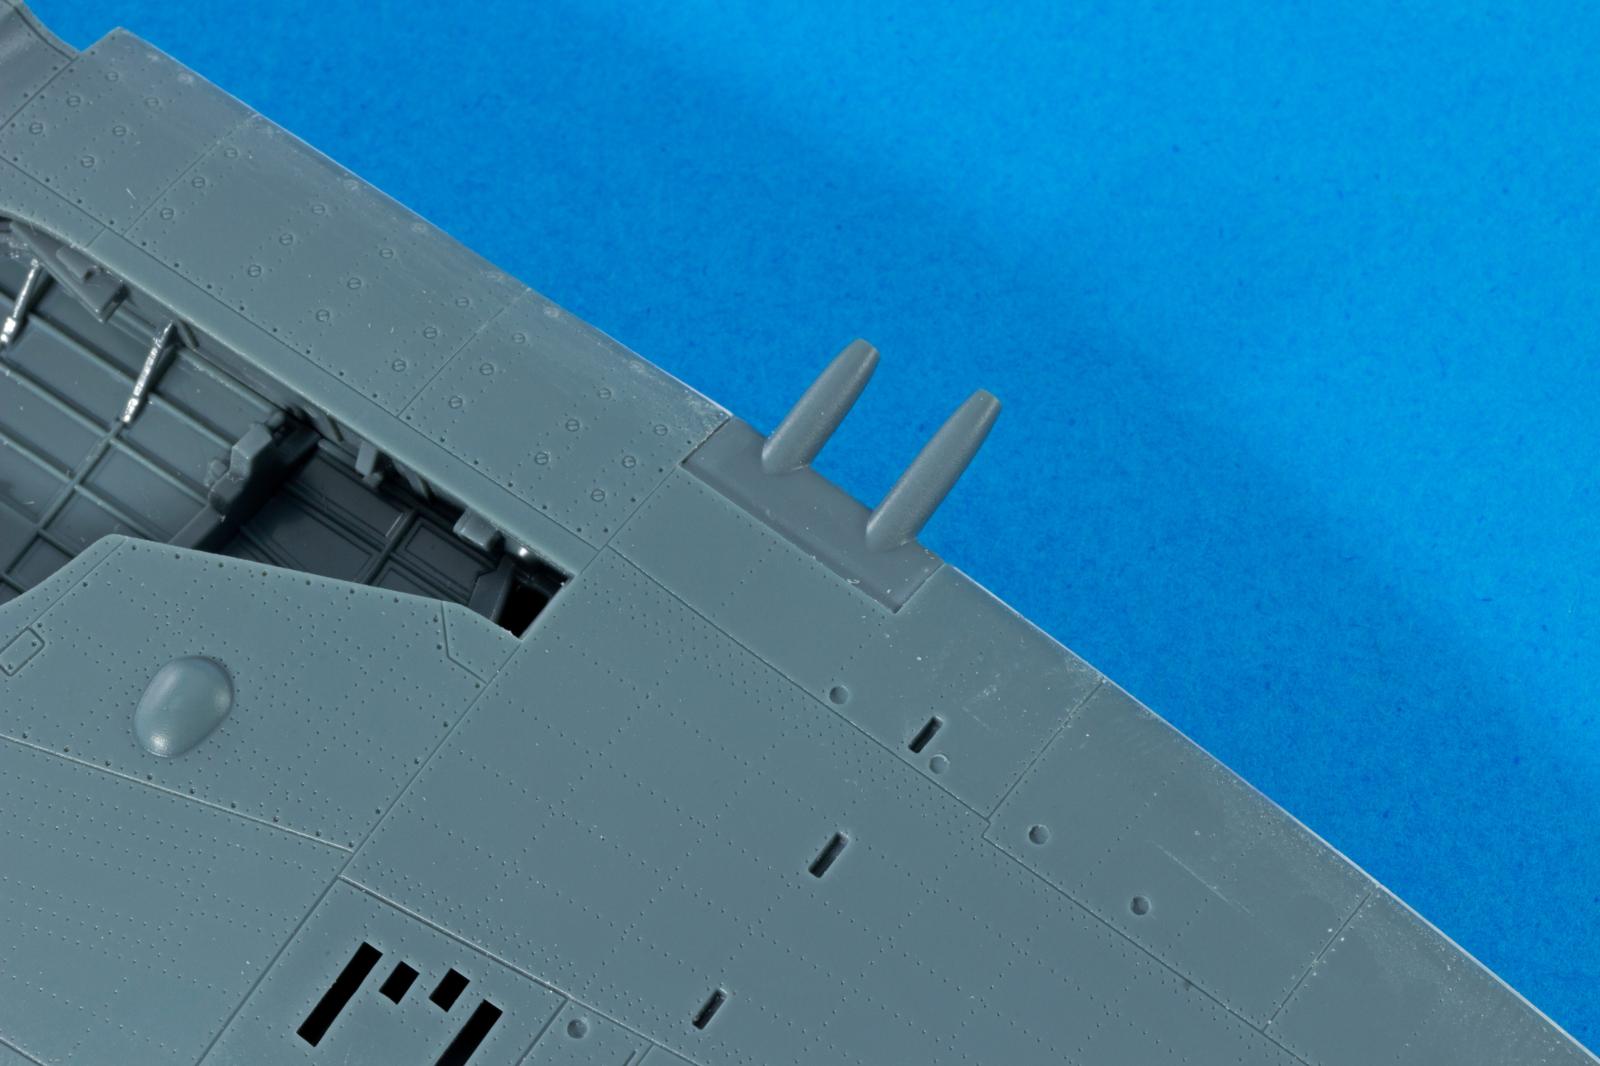
The cannon barrel sub assembly proved faulty. This modeller chose to align the upper seam and fill and blend the lower seam.


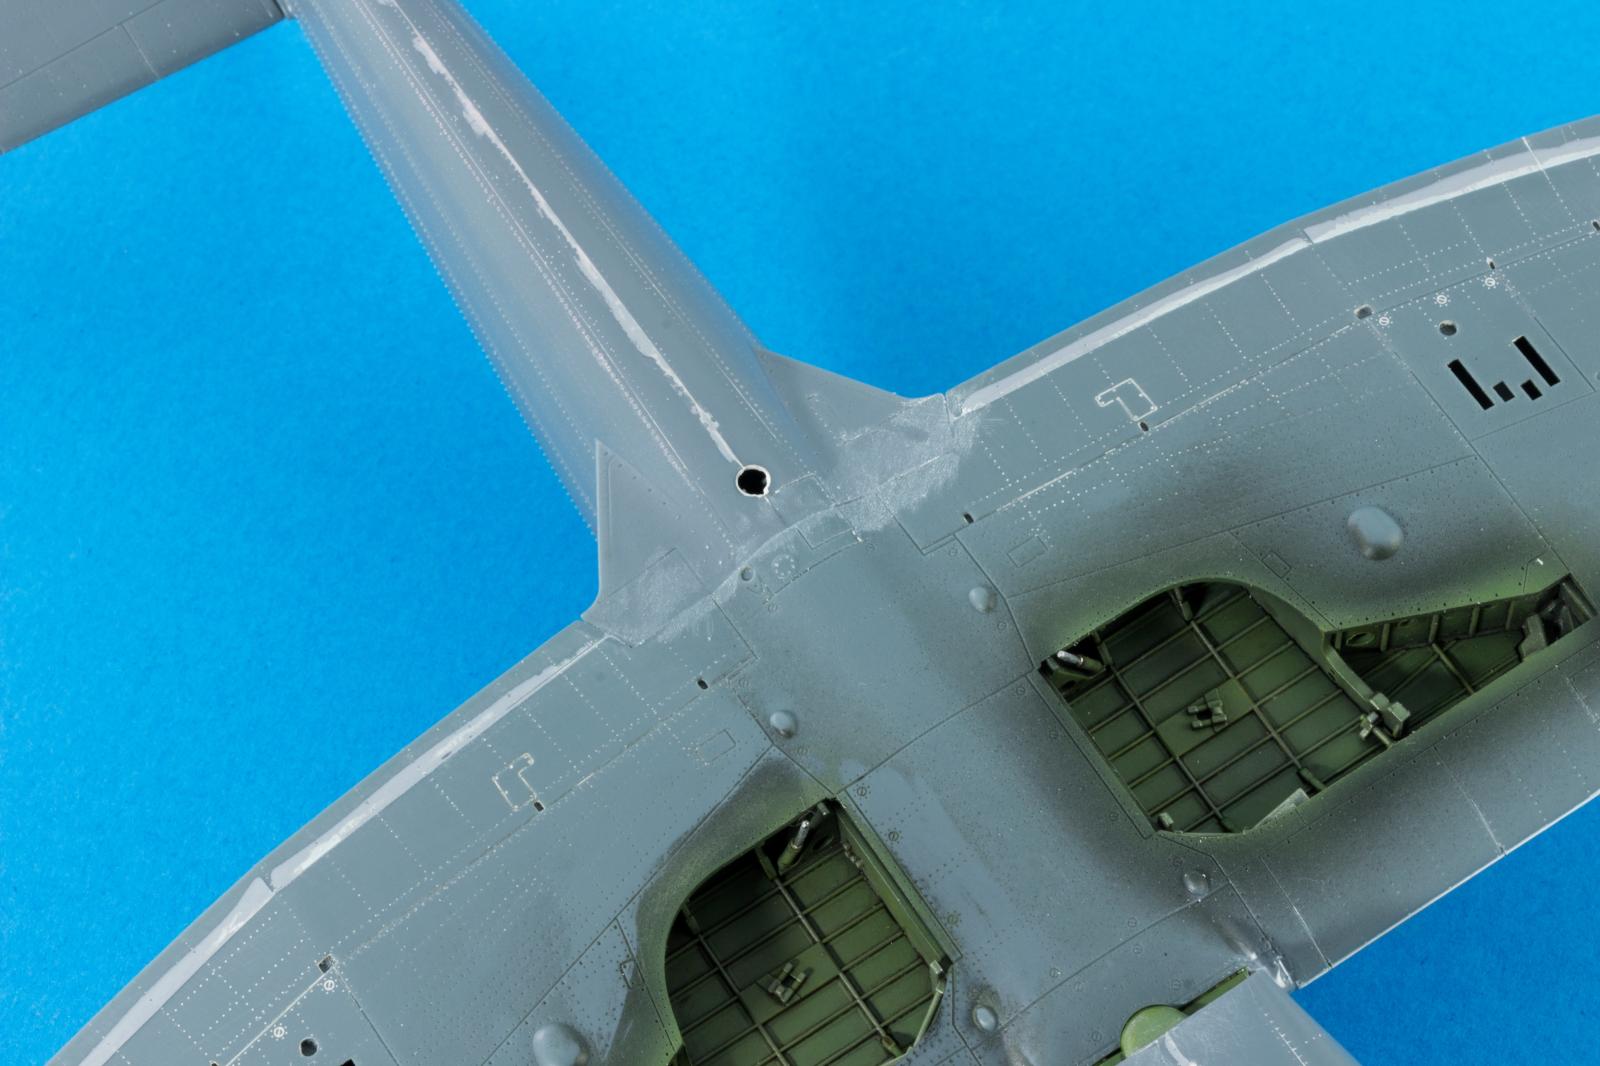
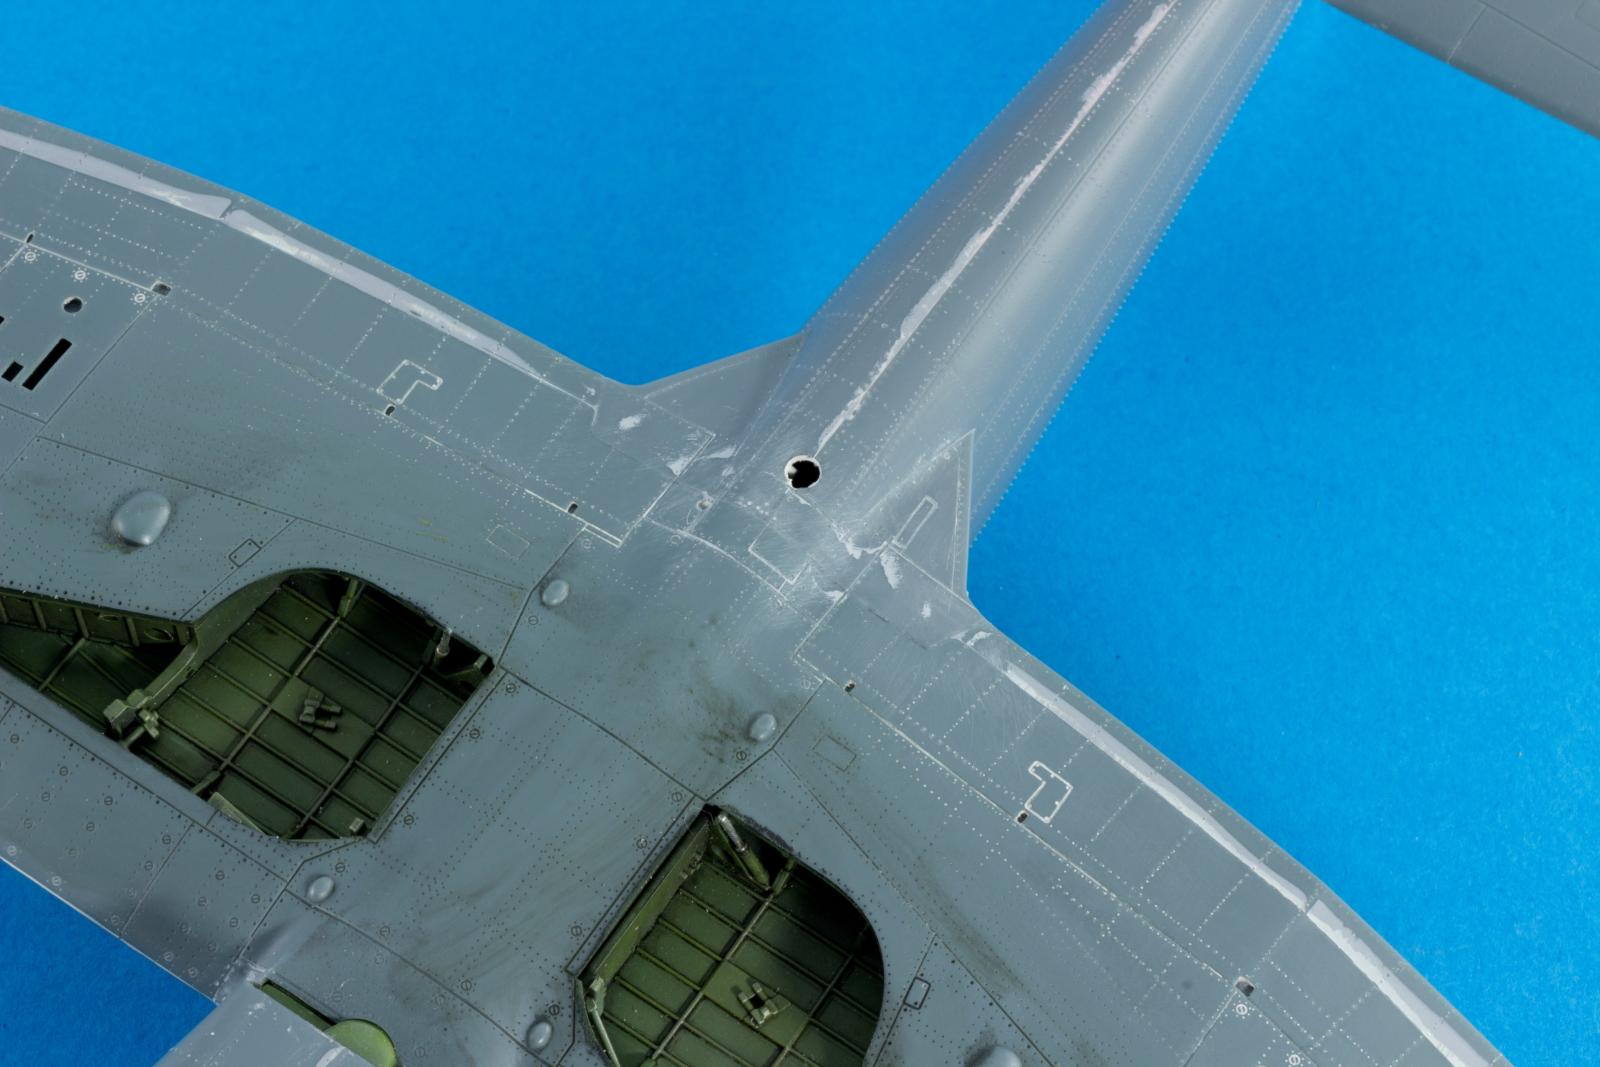
The solution provided by Eduard required the gluing seam to be filled. For this purpose, Vallejo Plastic Putty and Mr. Surfacer 500 were applied and polished to shape. Another area that required work was the wing to fuselage lower seam. A filing session and several rounds of filler and sandpaper eliminated the step present on the parts.
The landing gear doors were also painted XF-71 Interior Green and highlighted with a mix of equal parts of Vallejo Model Air 71126 IDF Green and 71107 US Interior Green.

A simple bead of Tamiya Extra Thin Cement was the necessary to ensure a perfect filler free wing to fuselage joint. The wing dihedral was ensured by masking tape fixed tip to tip.

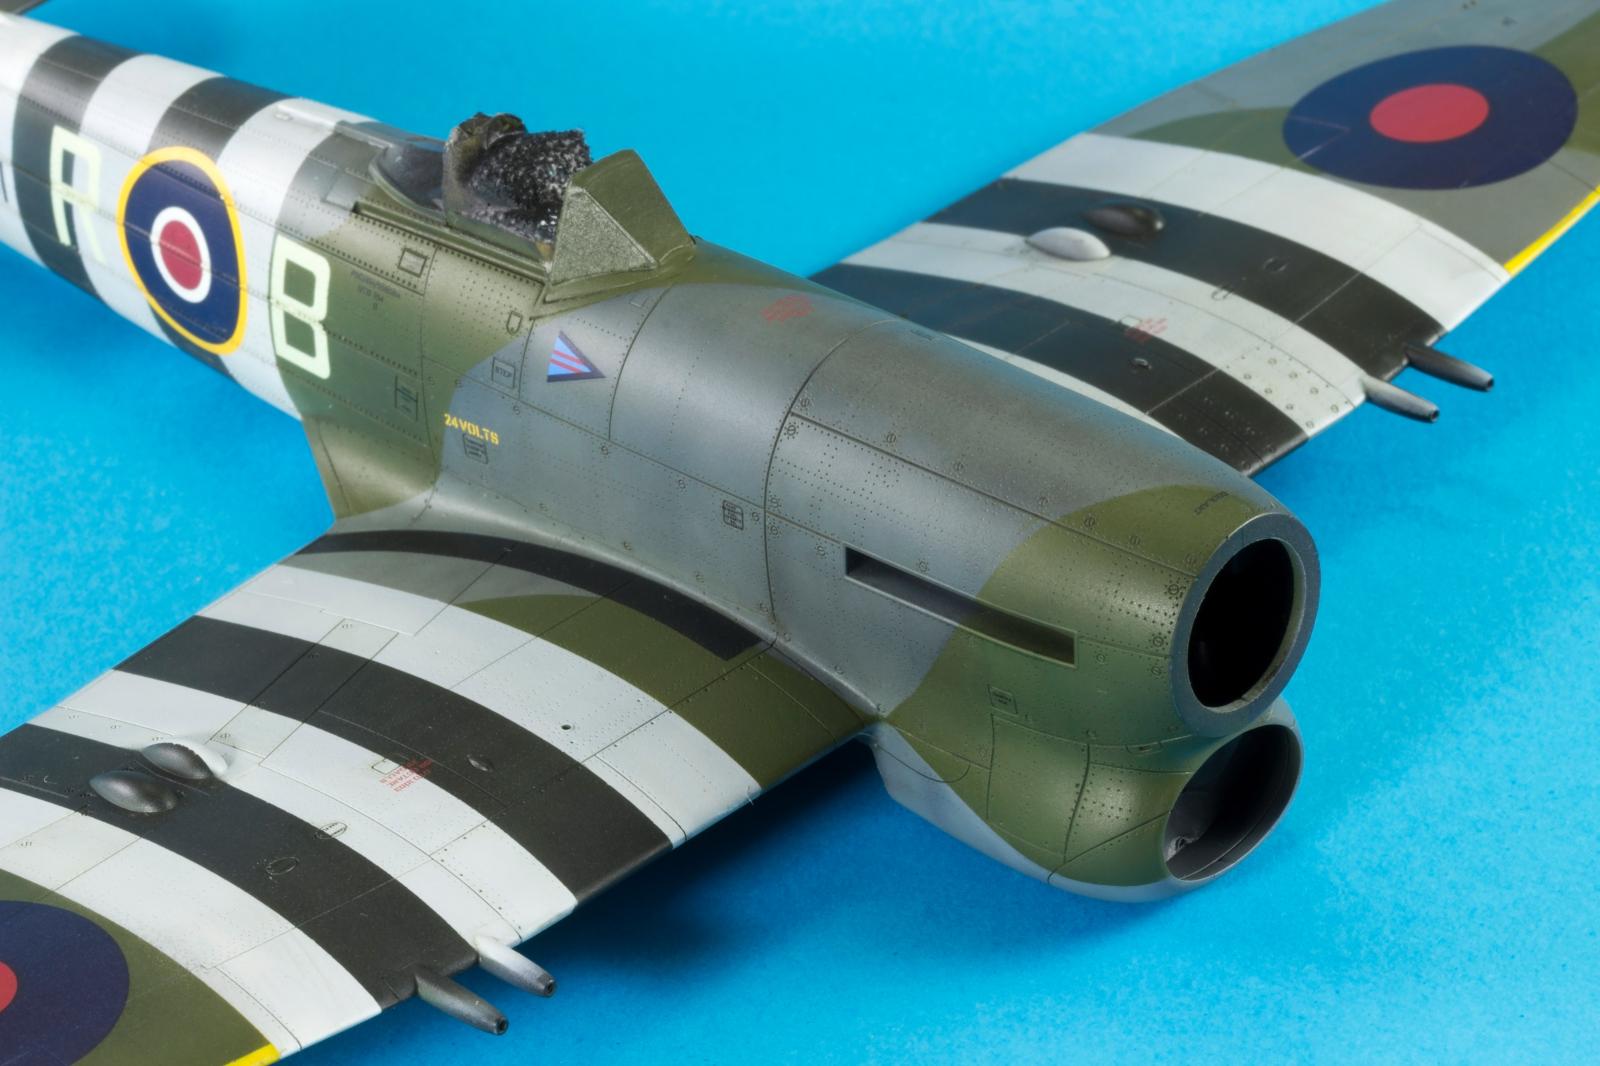
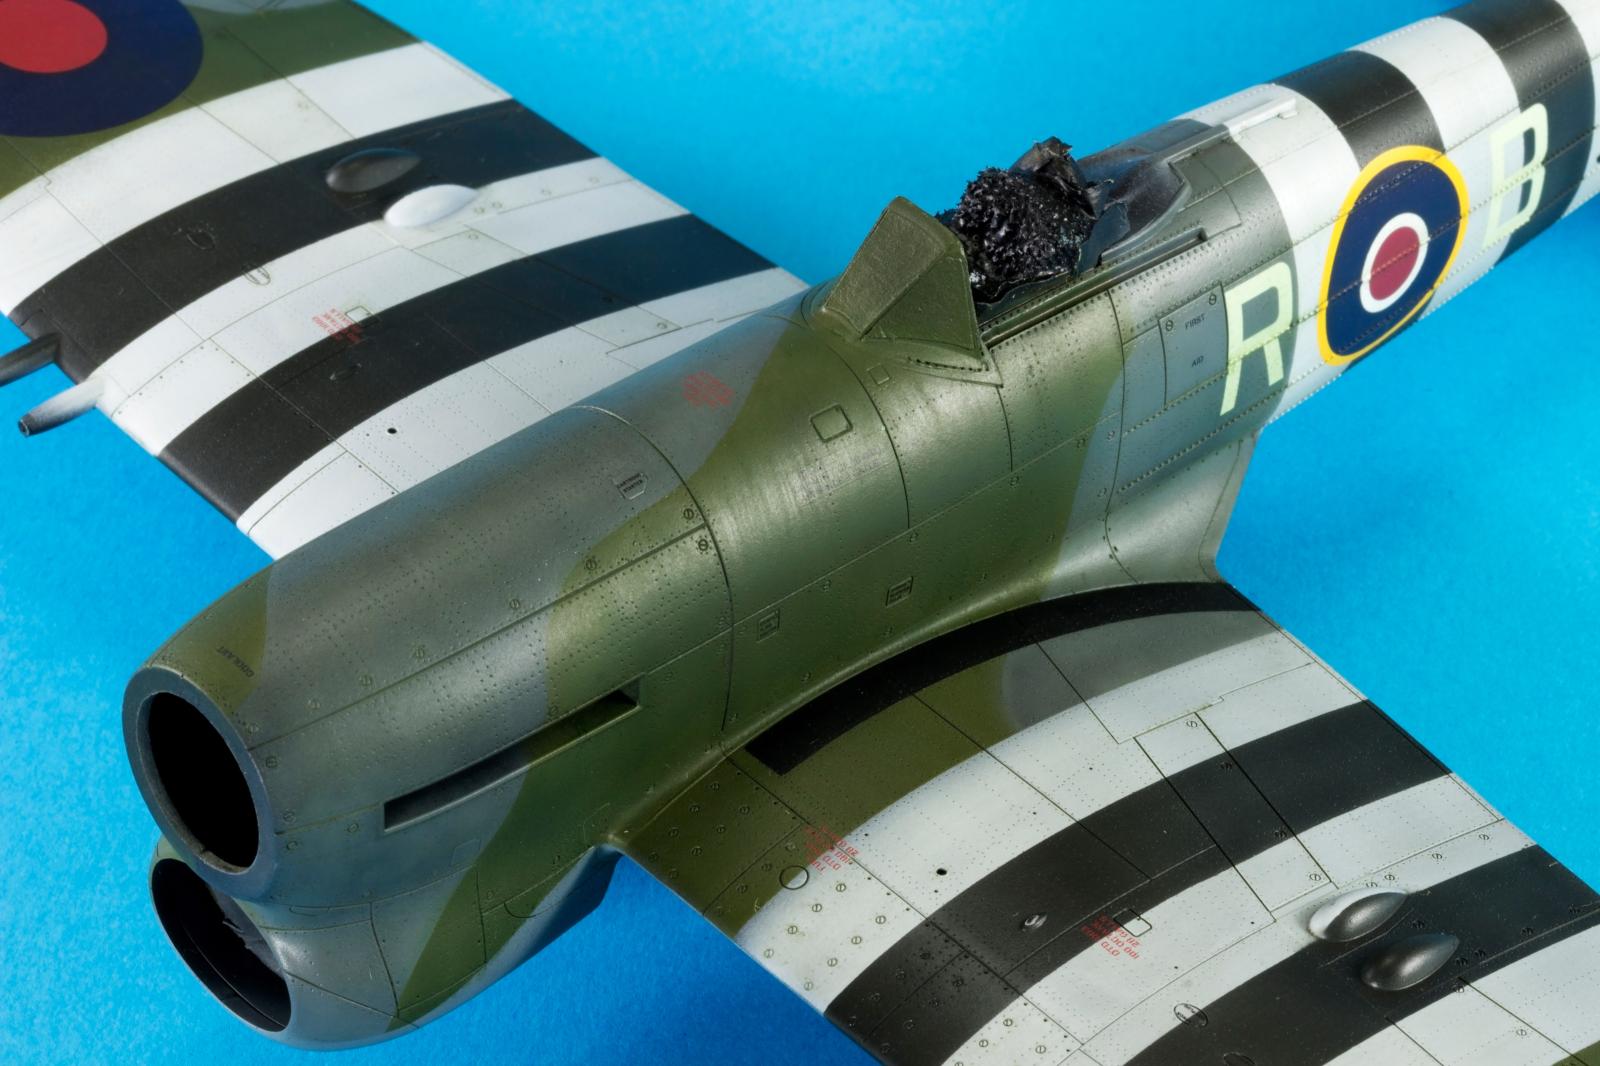
The windshield was masked with the pre-cut masks provided in the box. Note the blending work necessary to enhance the fit of the “collar” between the clear piece and fuselage.
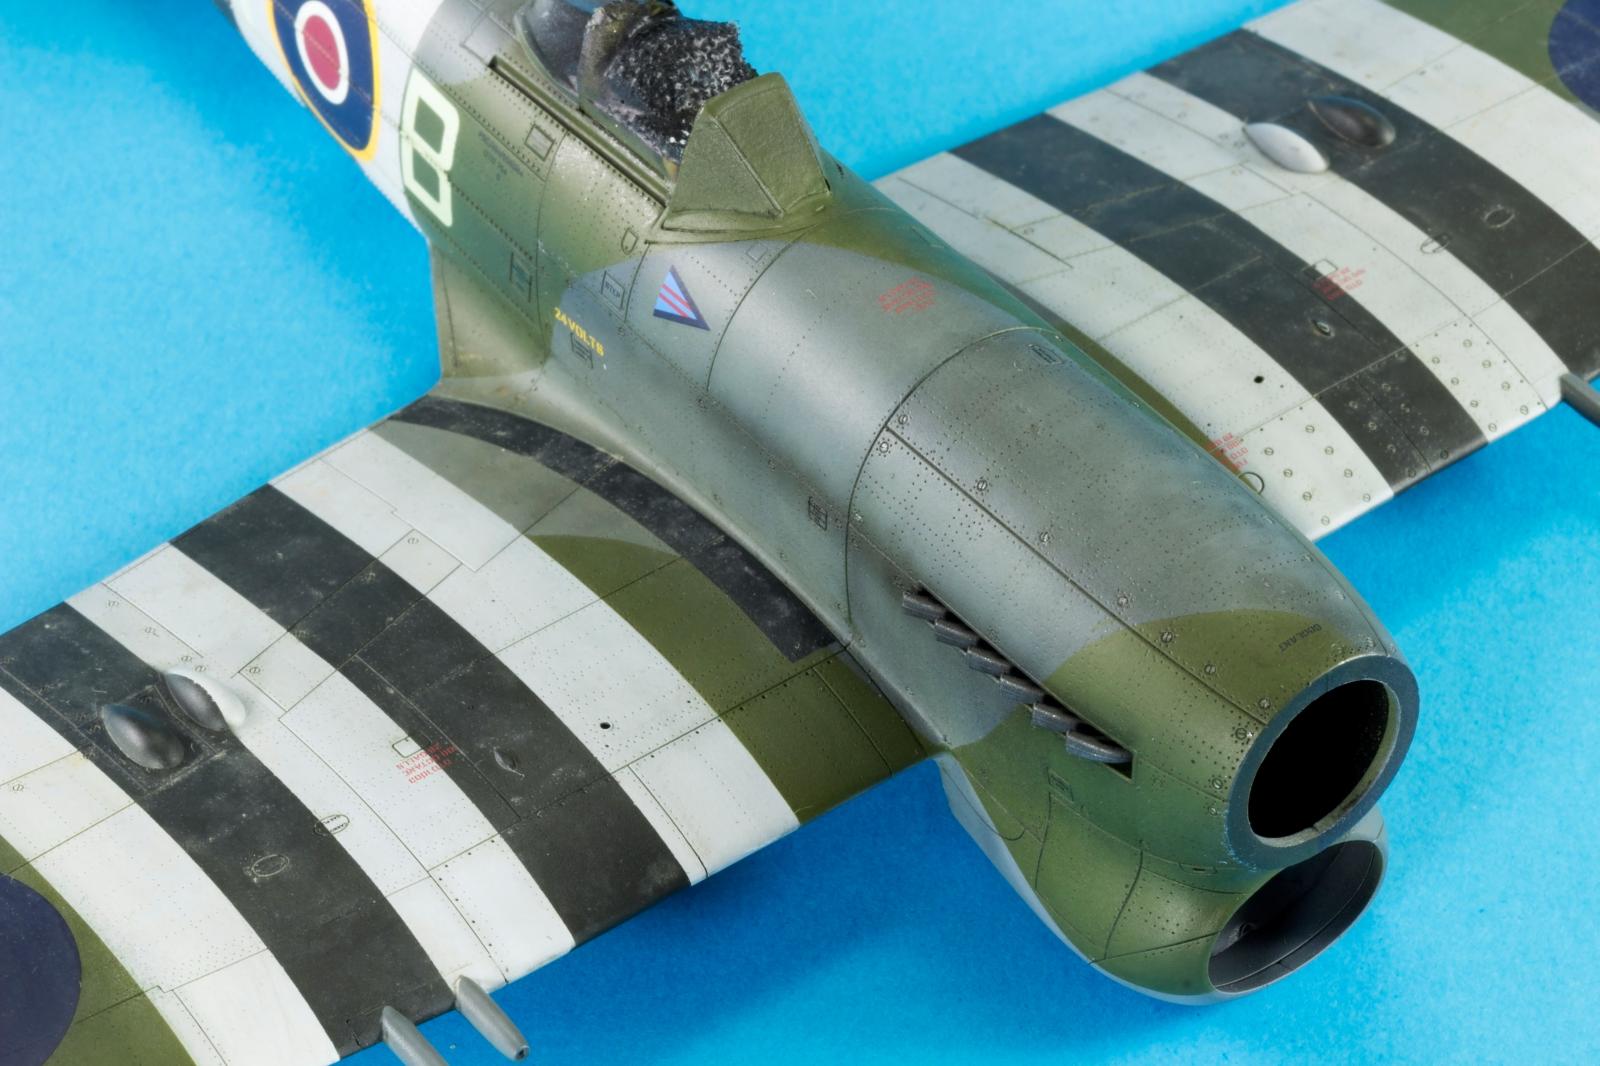
Were necessary the surface detail was reinstated with both a scriber and a riveting wheel.
The model was primed with black and t walkways masked with the use of Eduard`s masks provided in the kit.
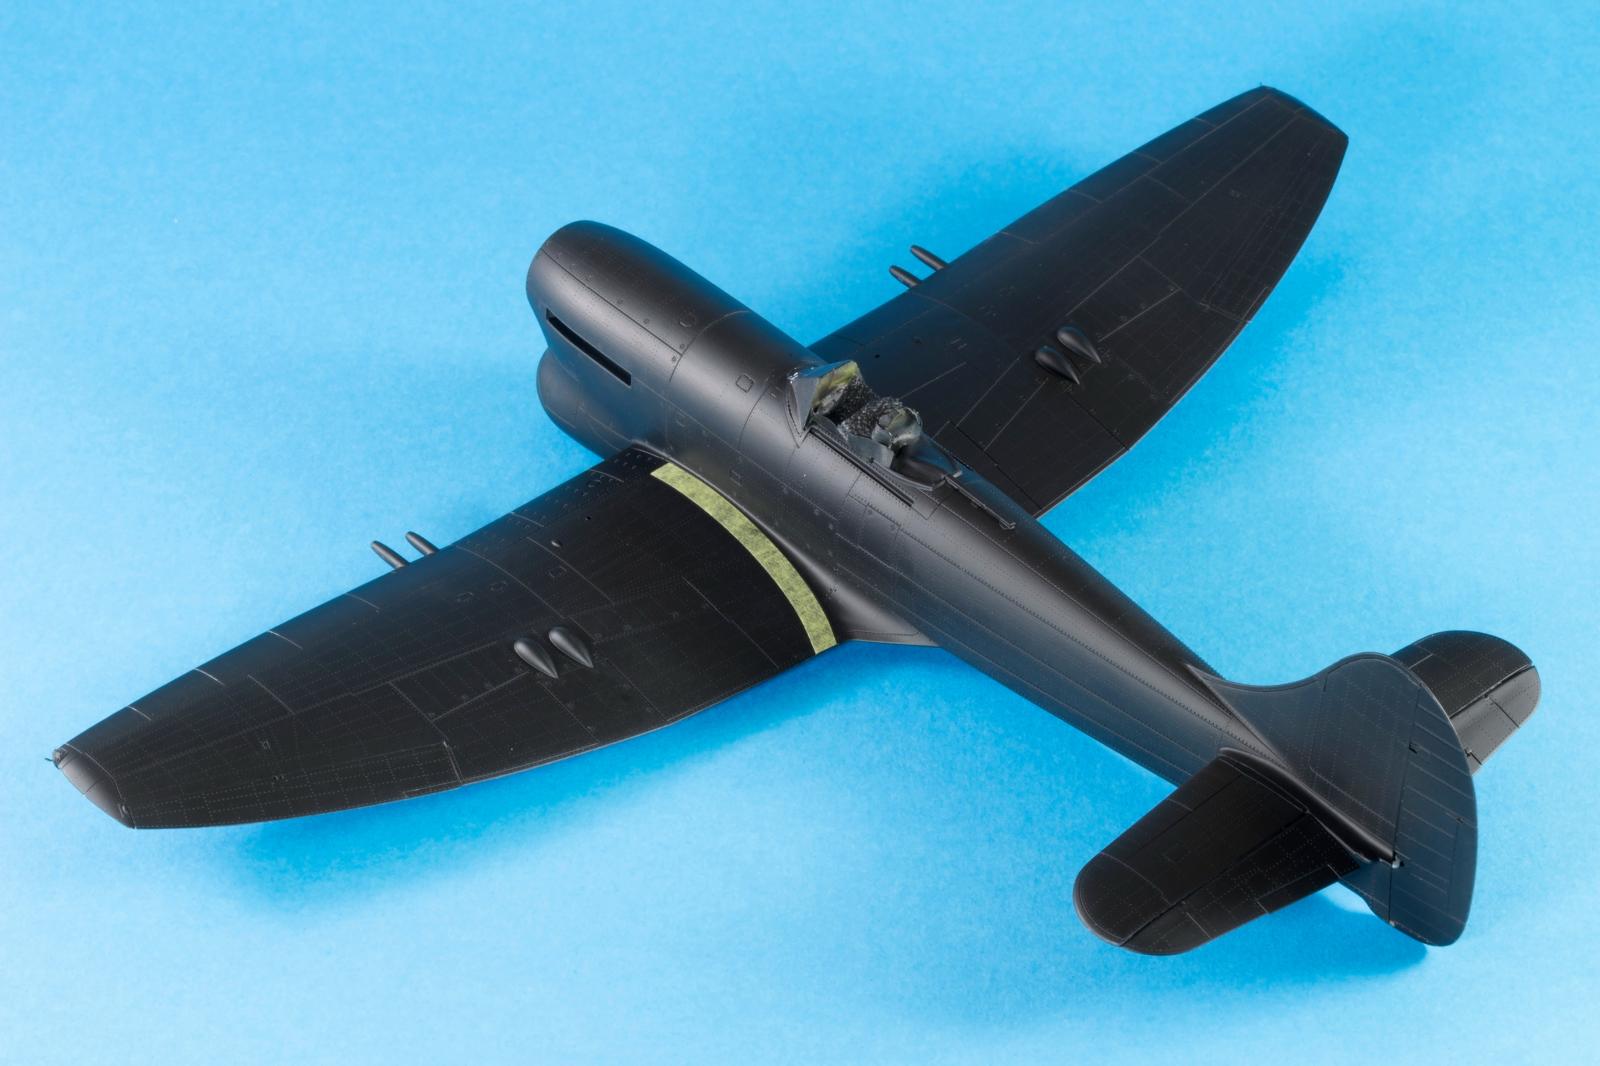
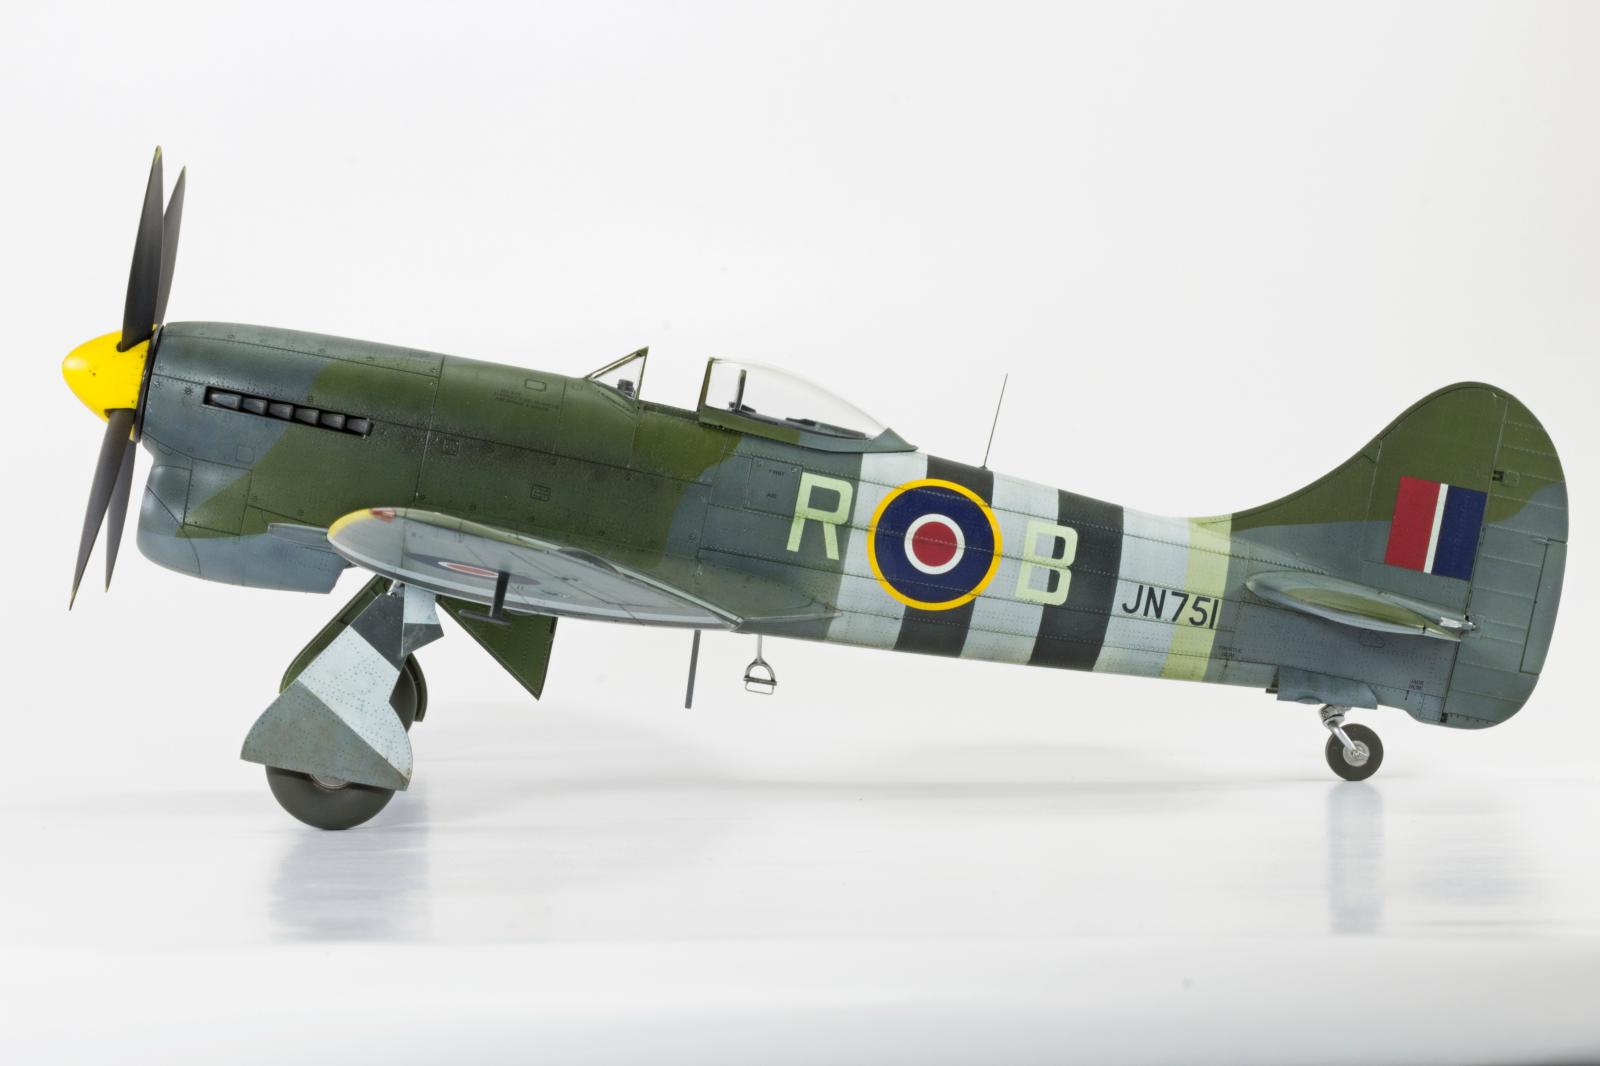
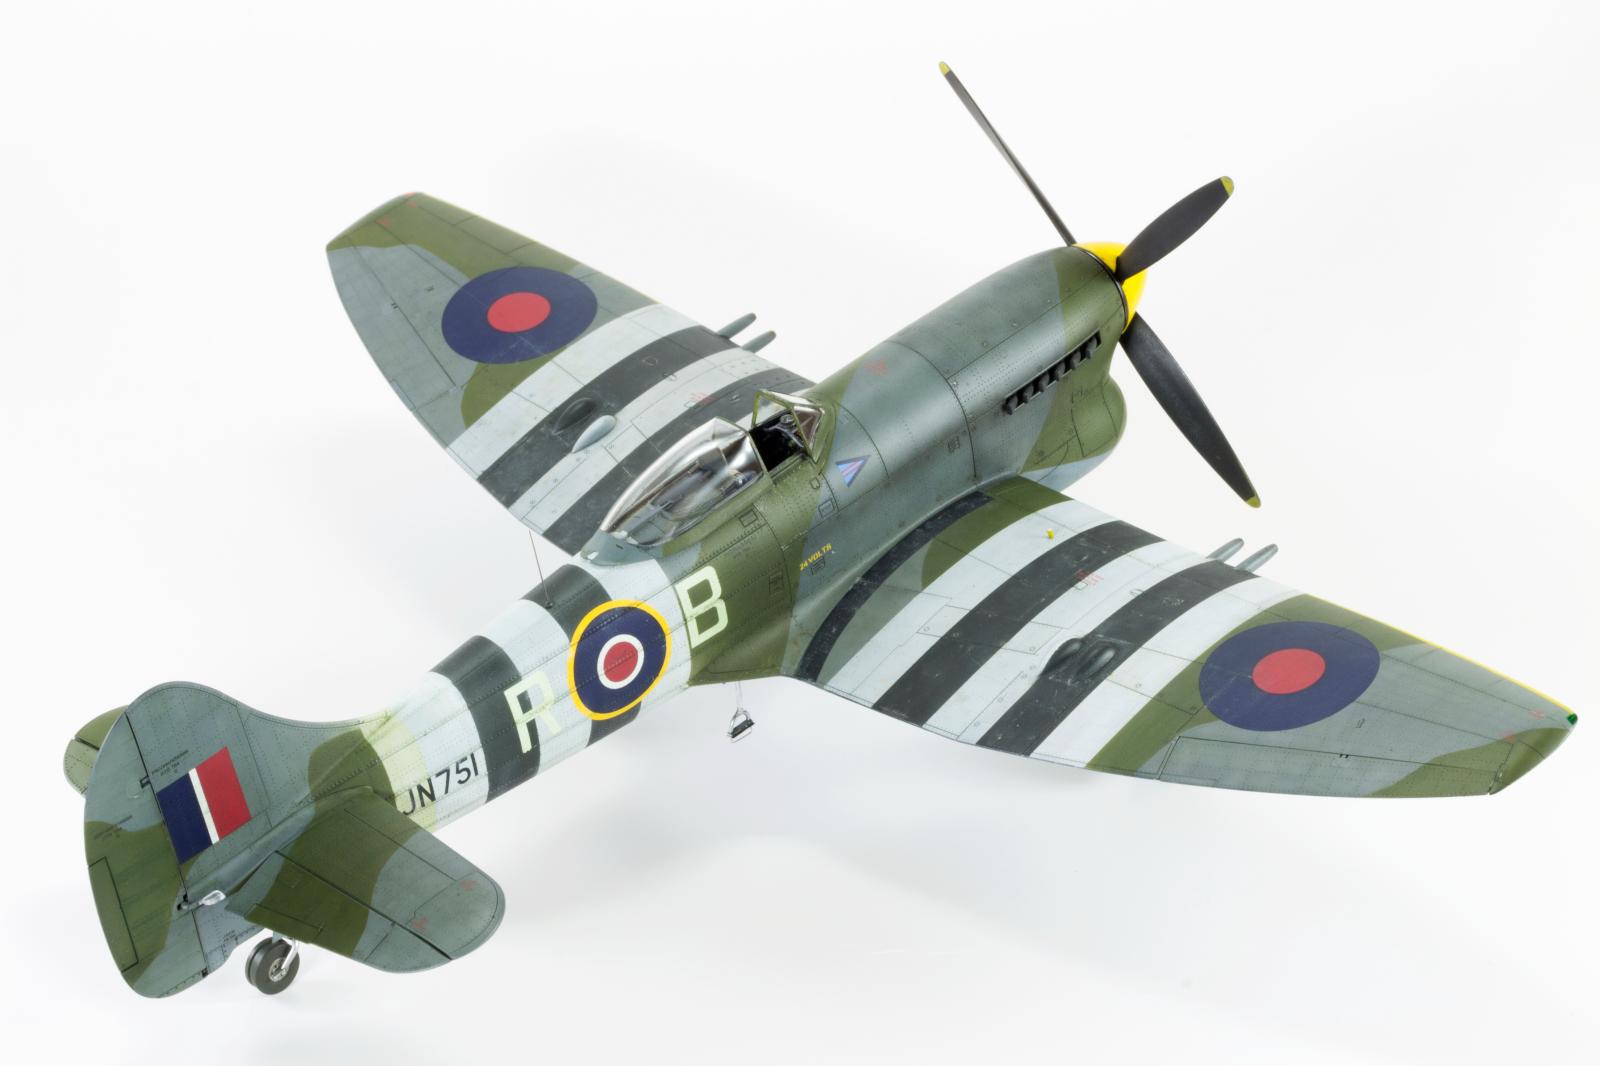
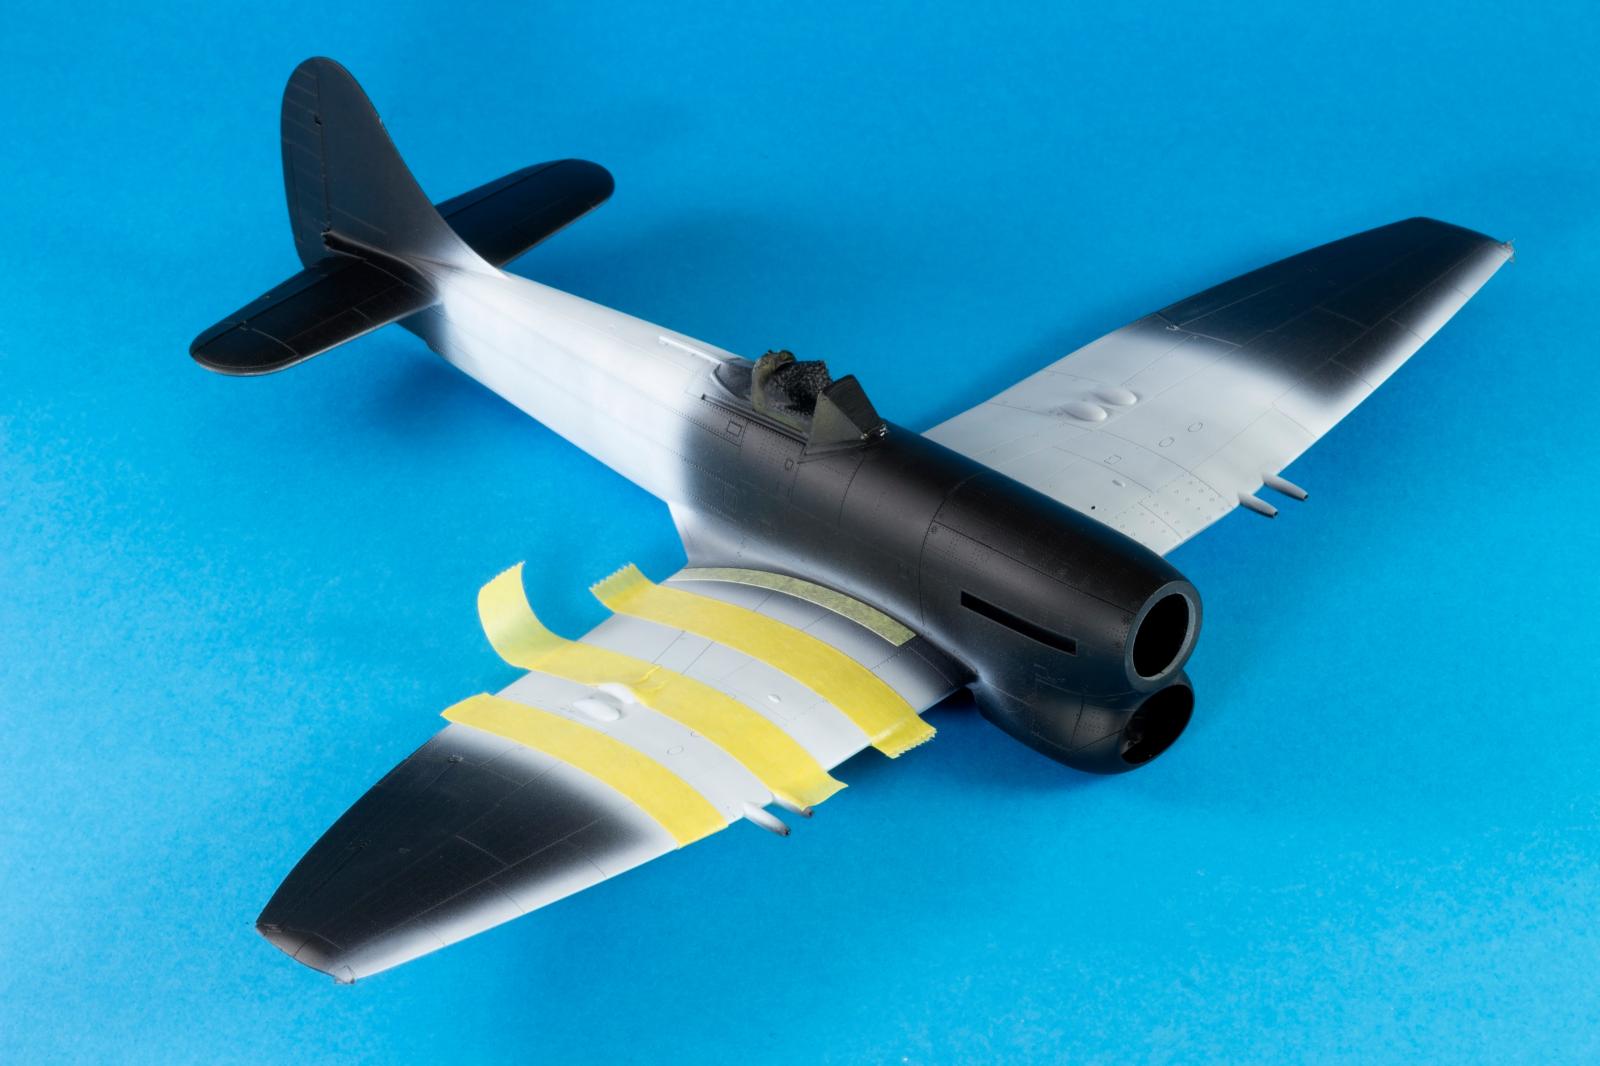
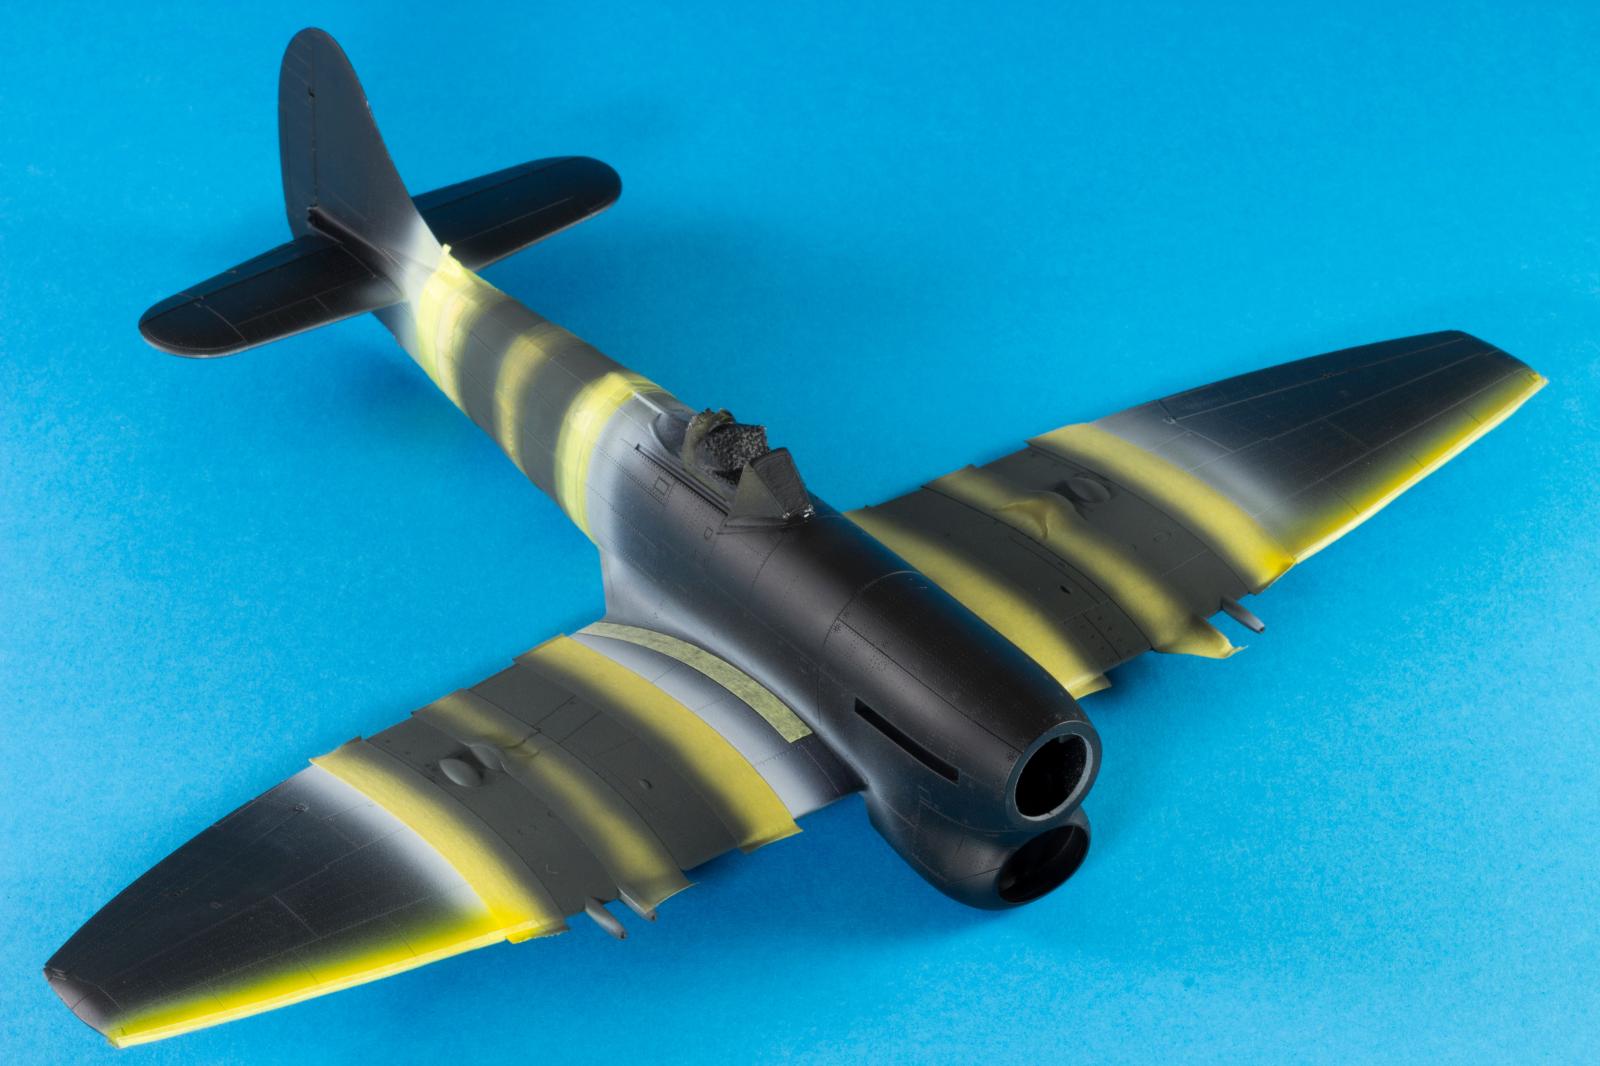
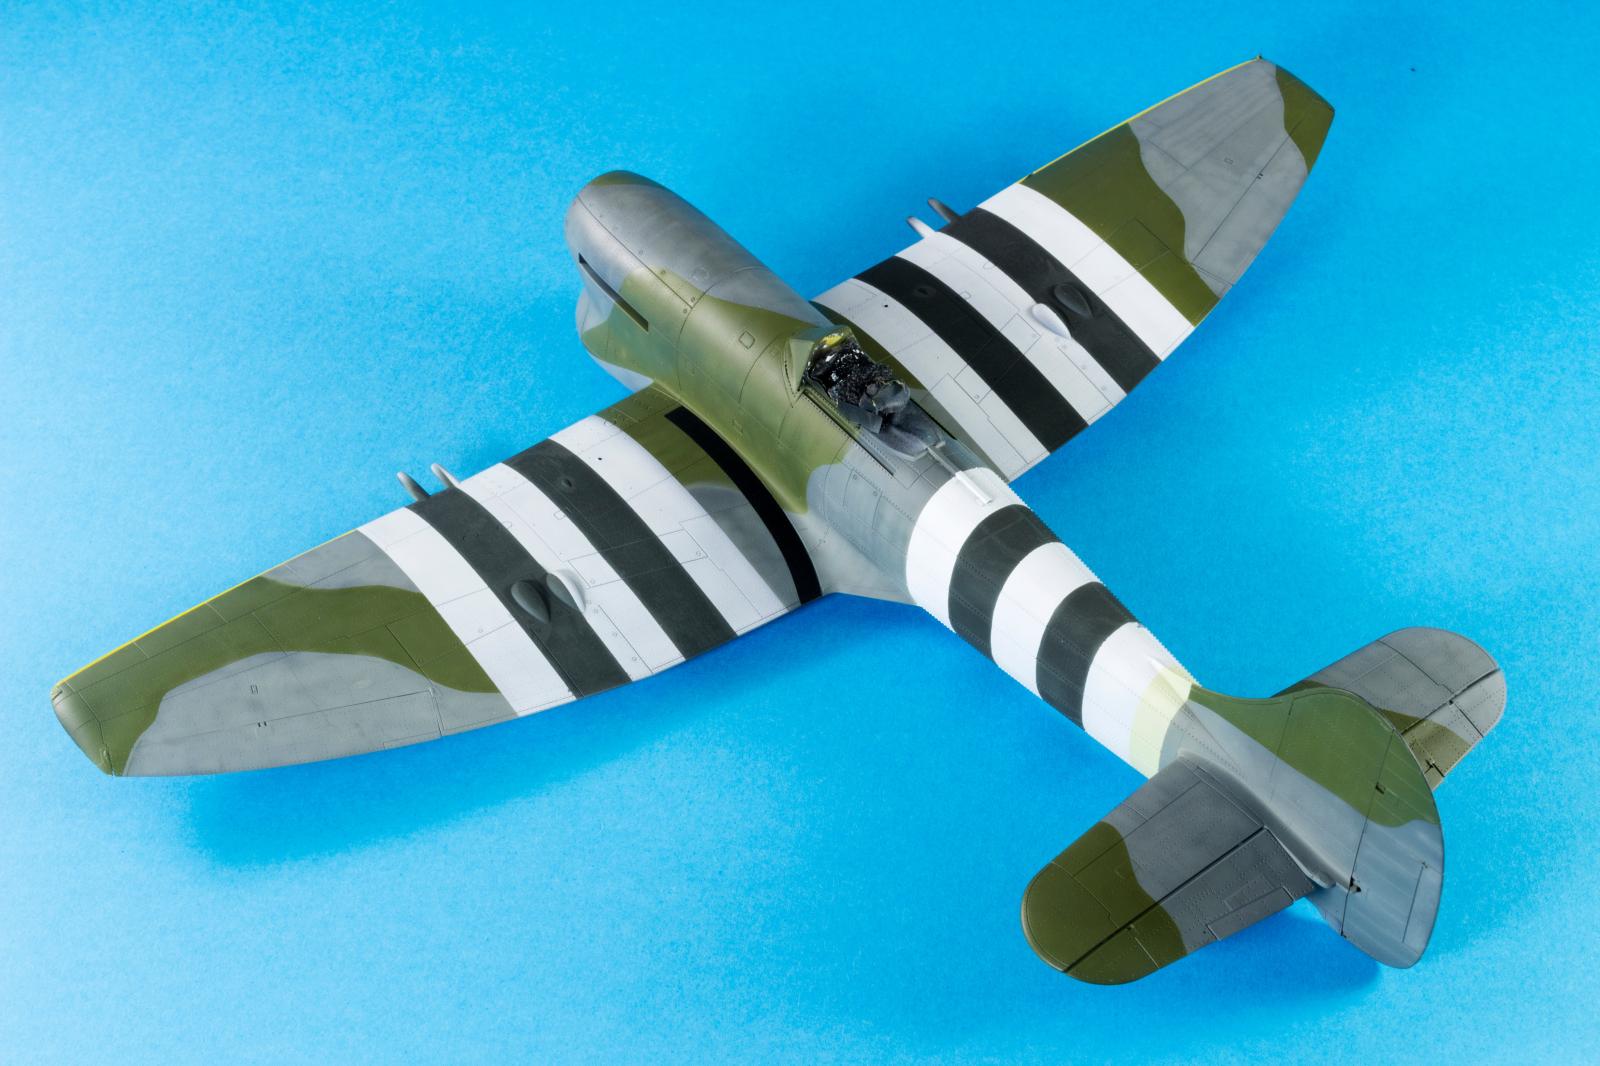
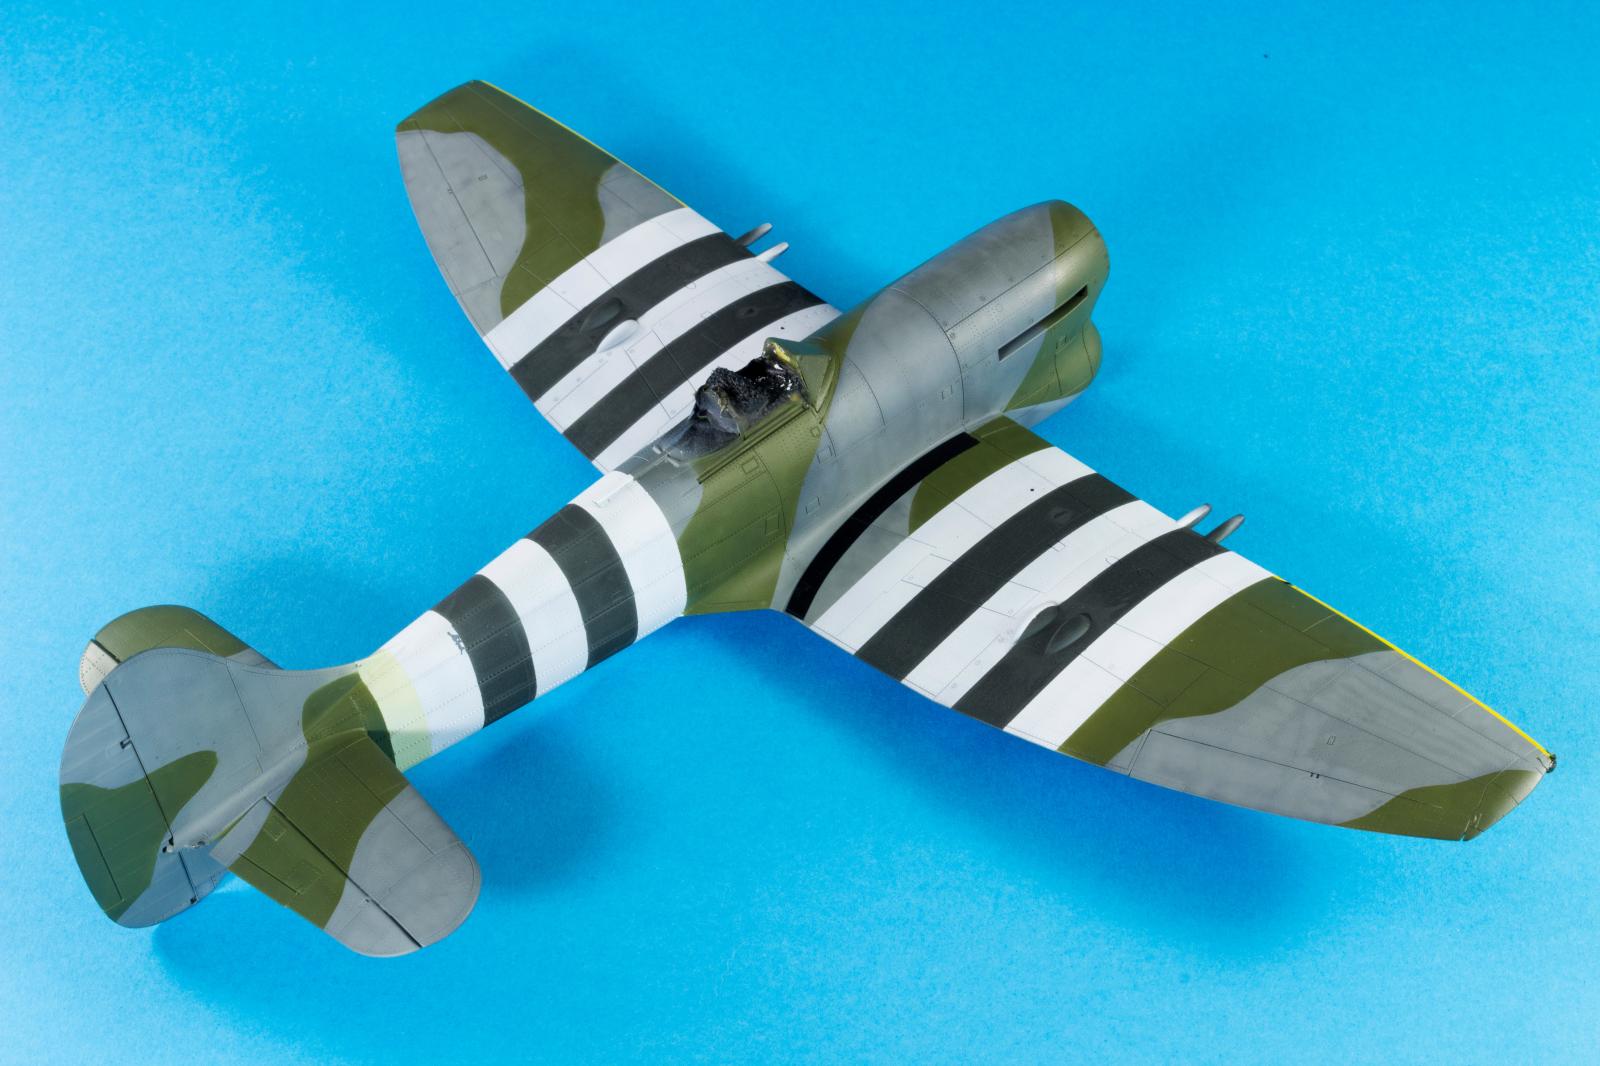
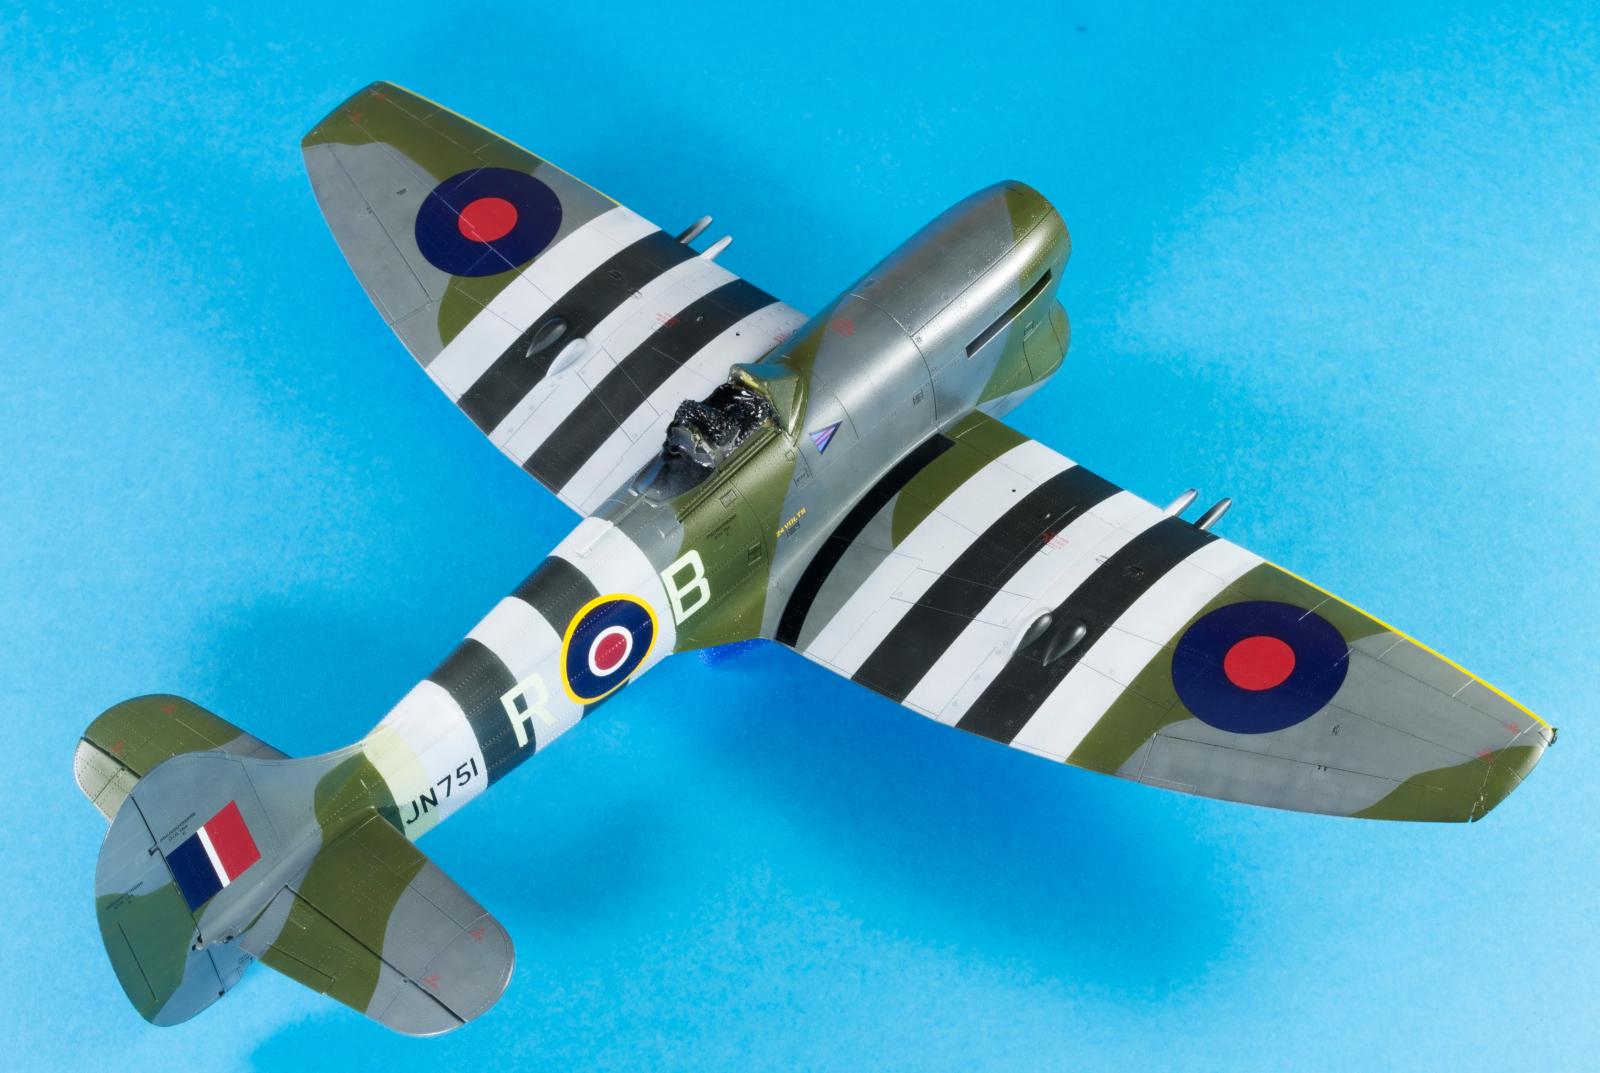
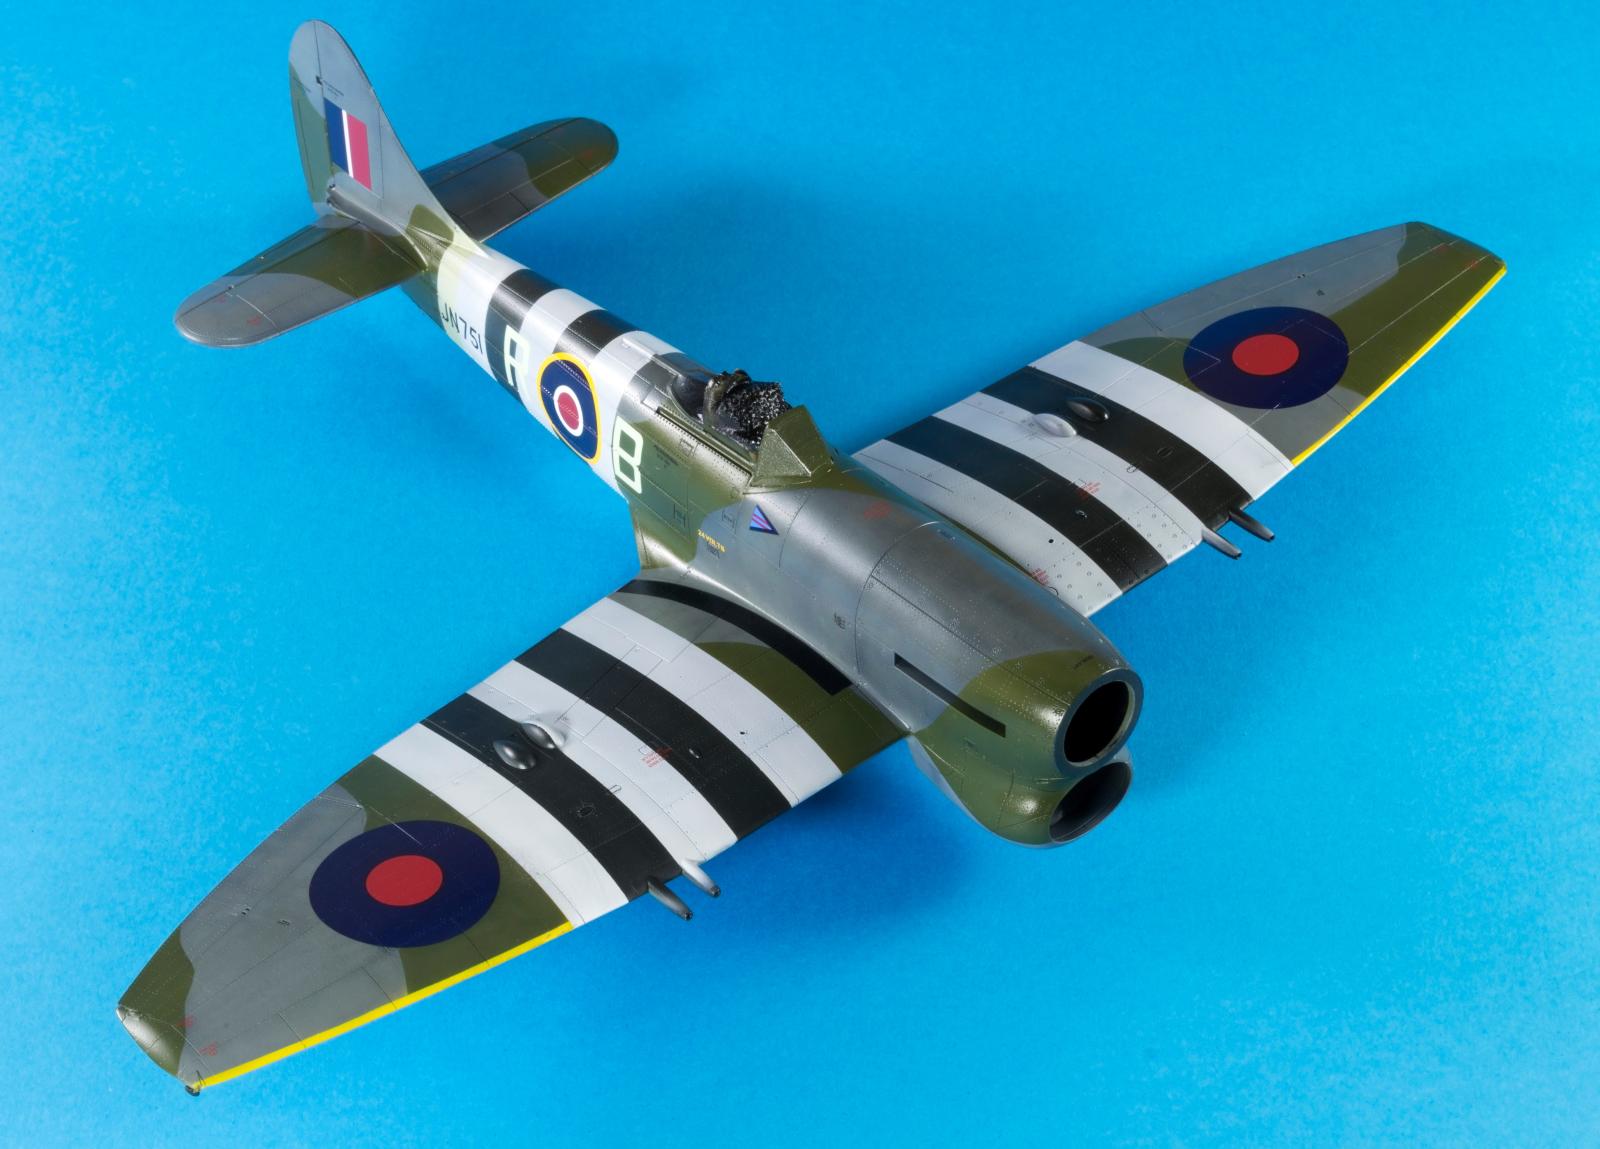
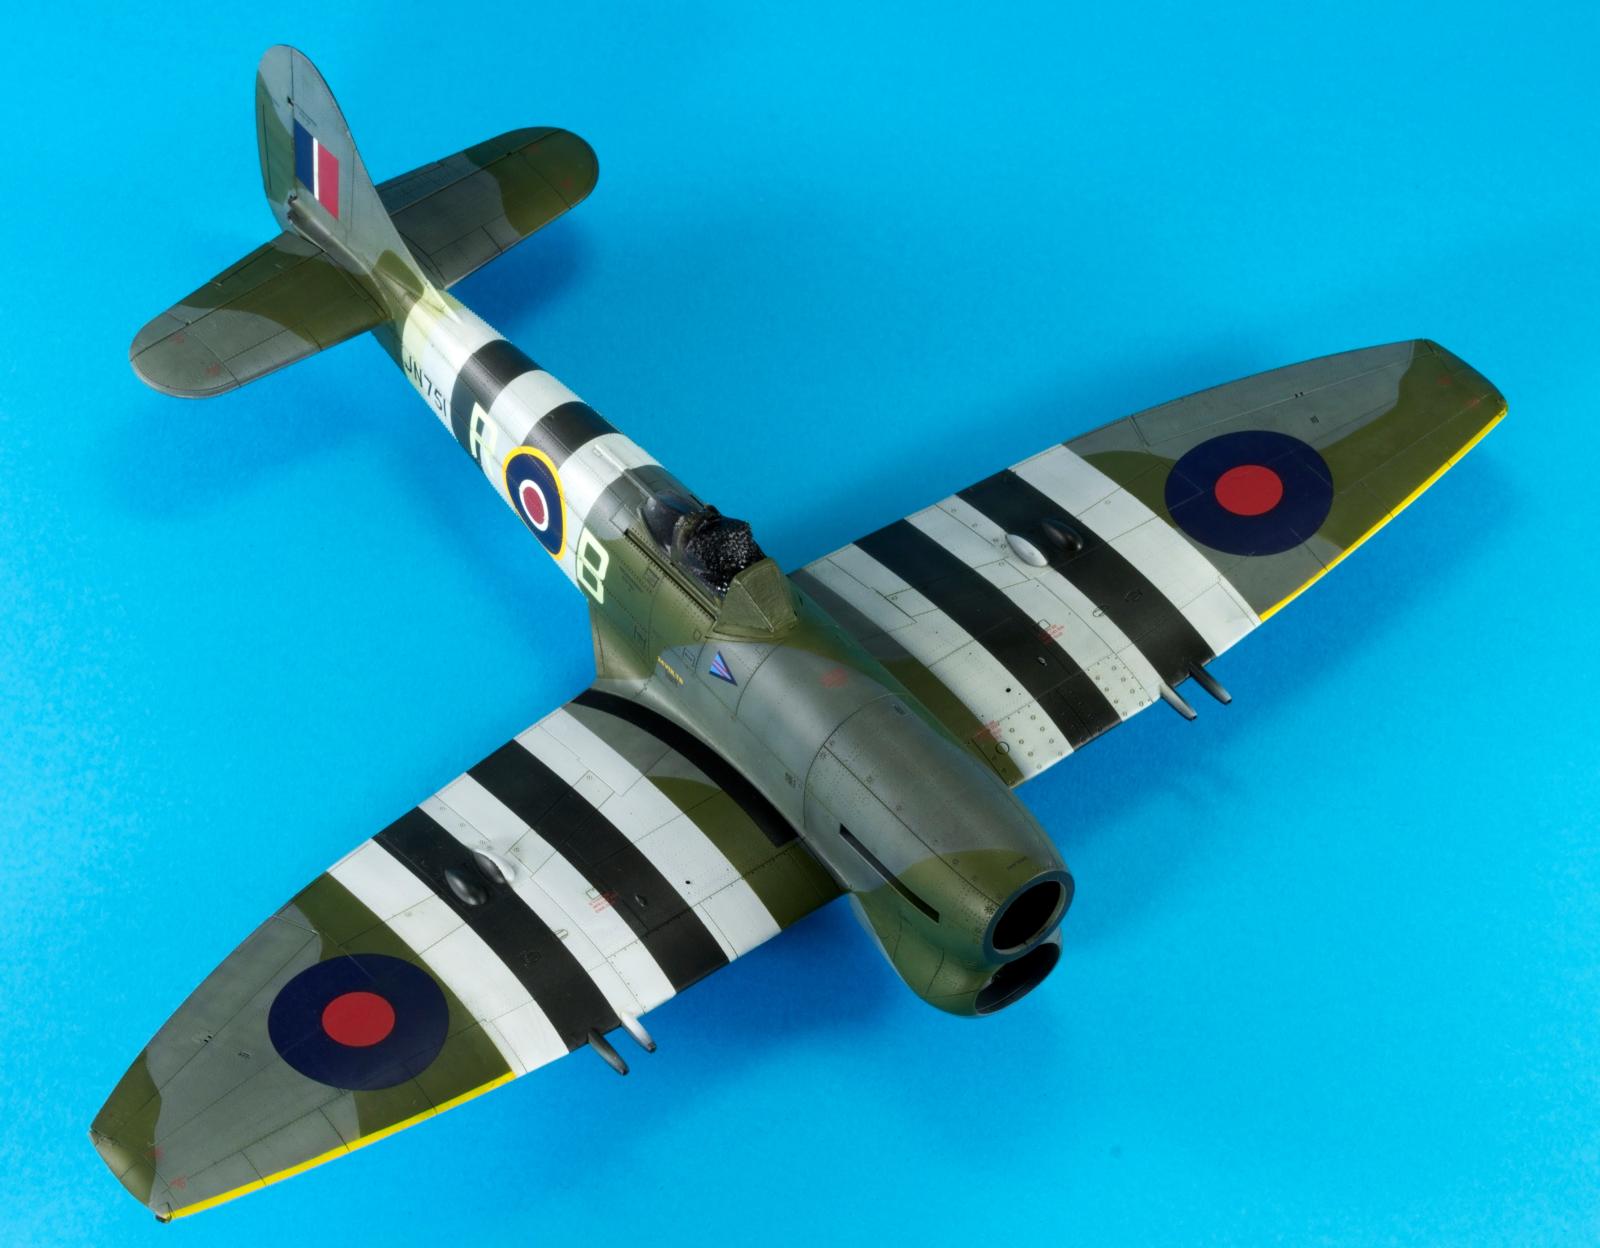
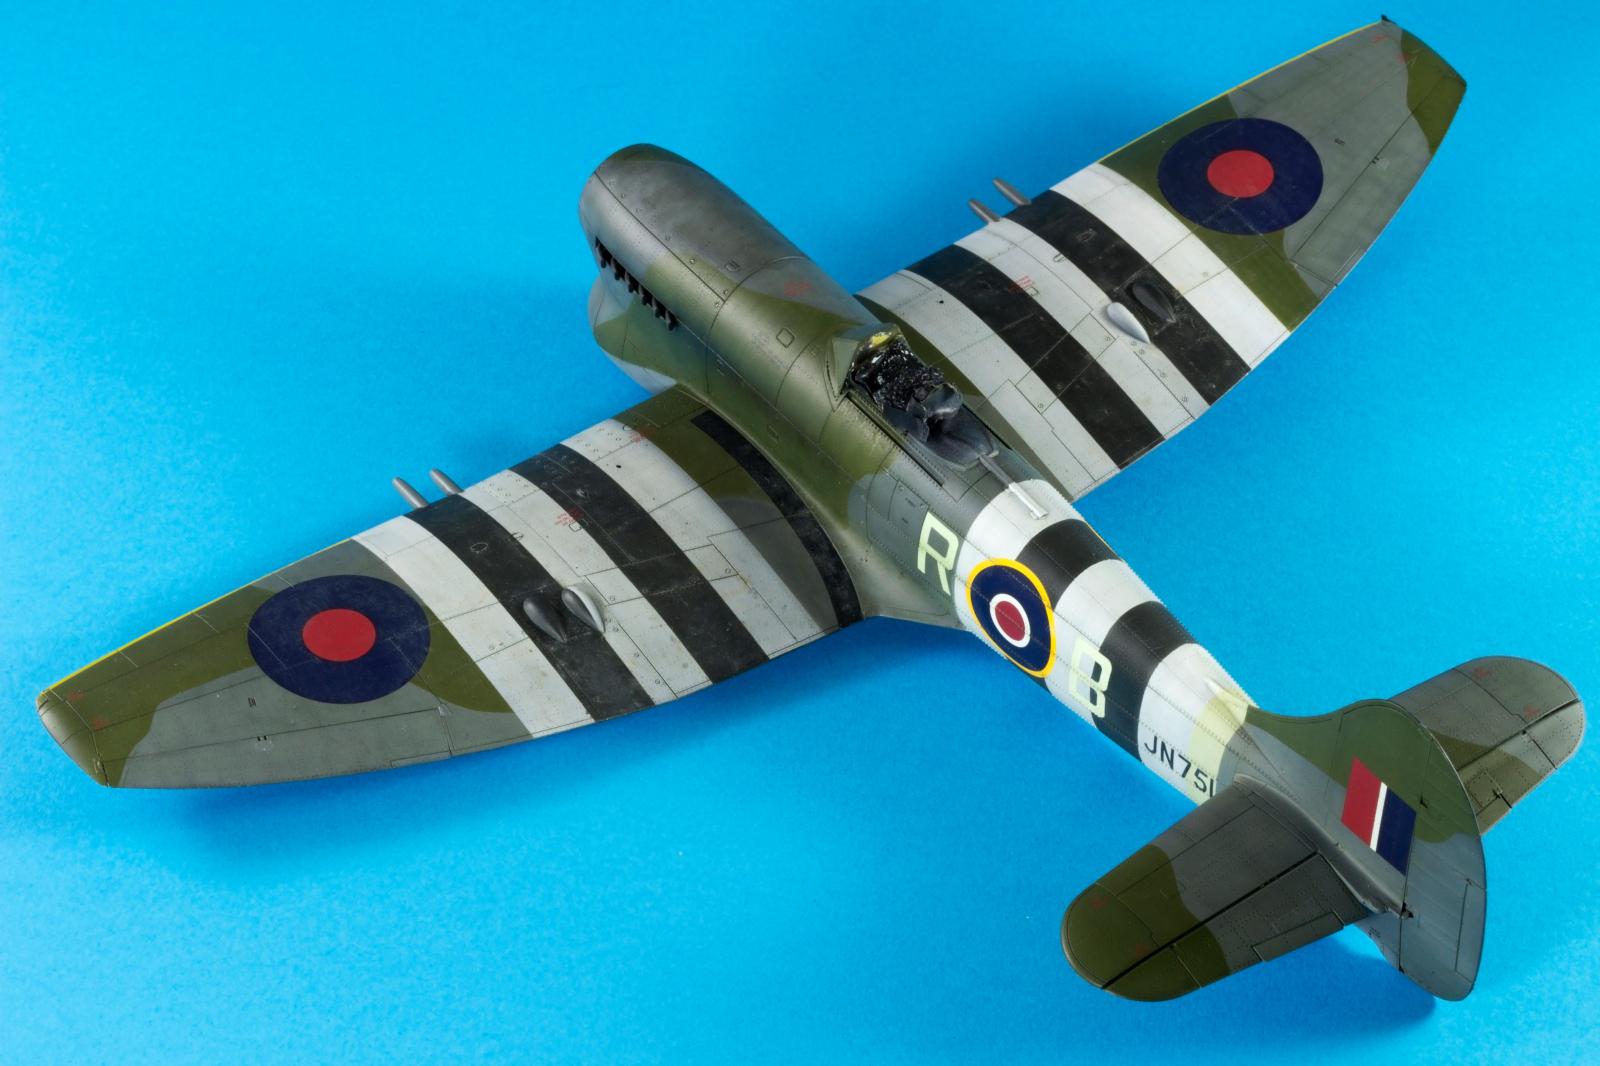
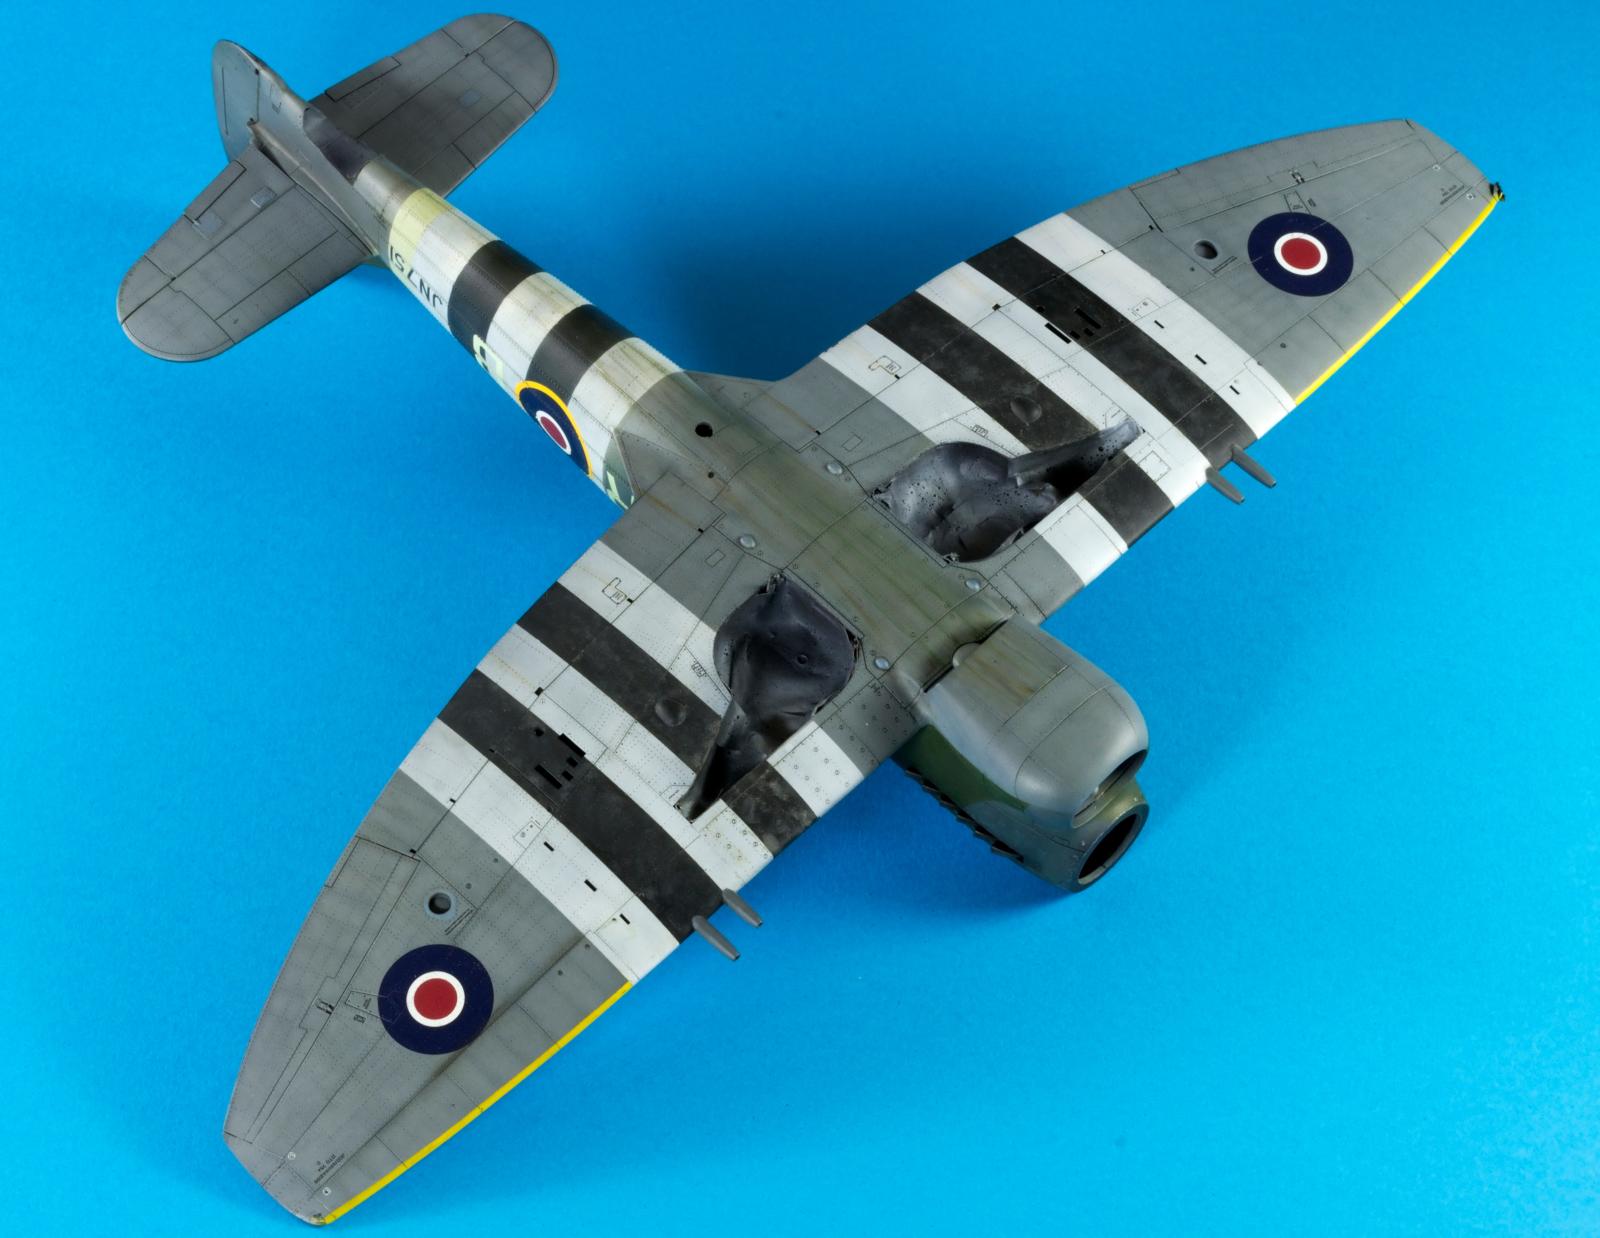
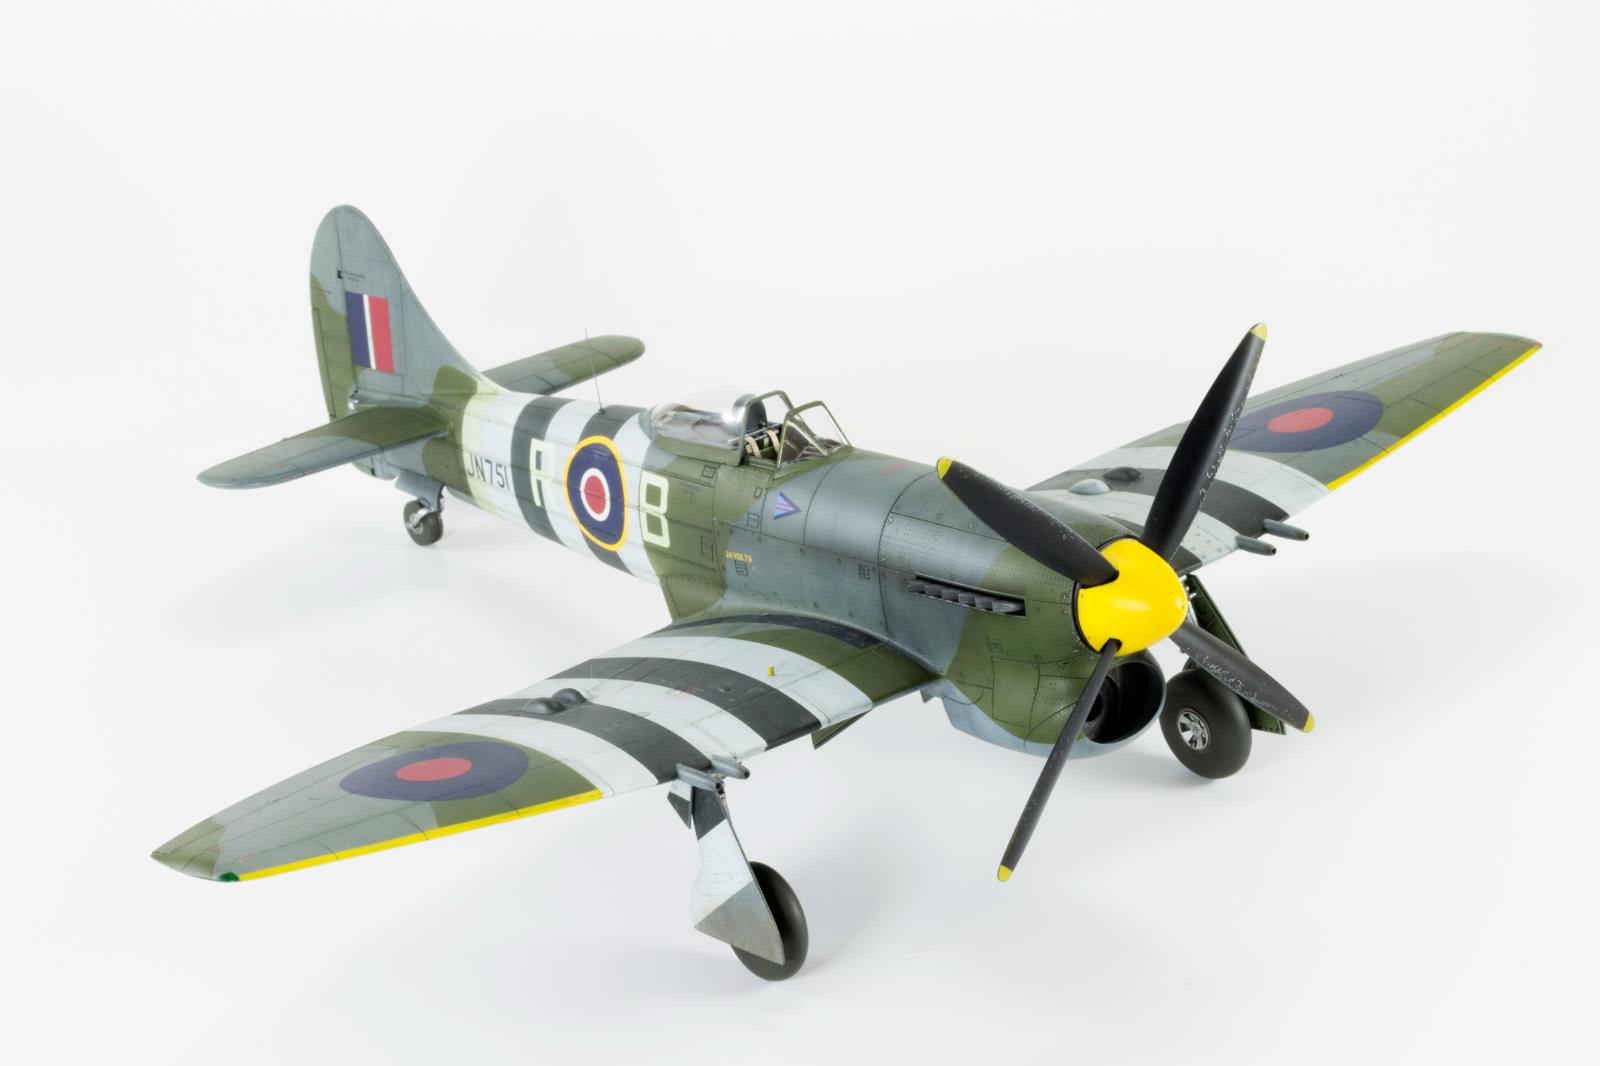
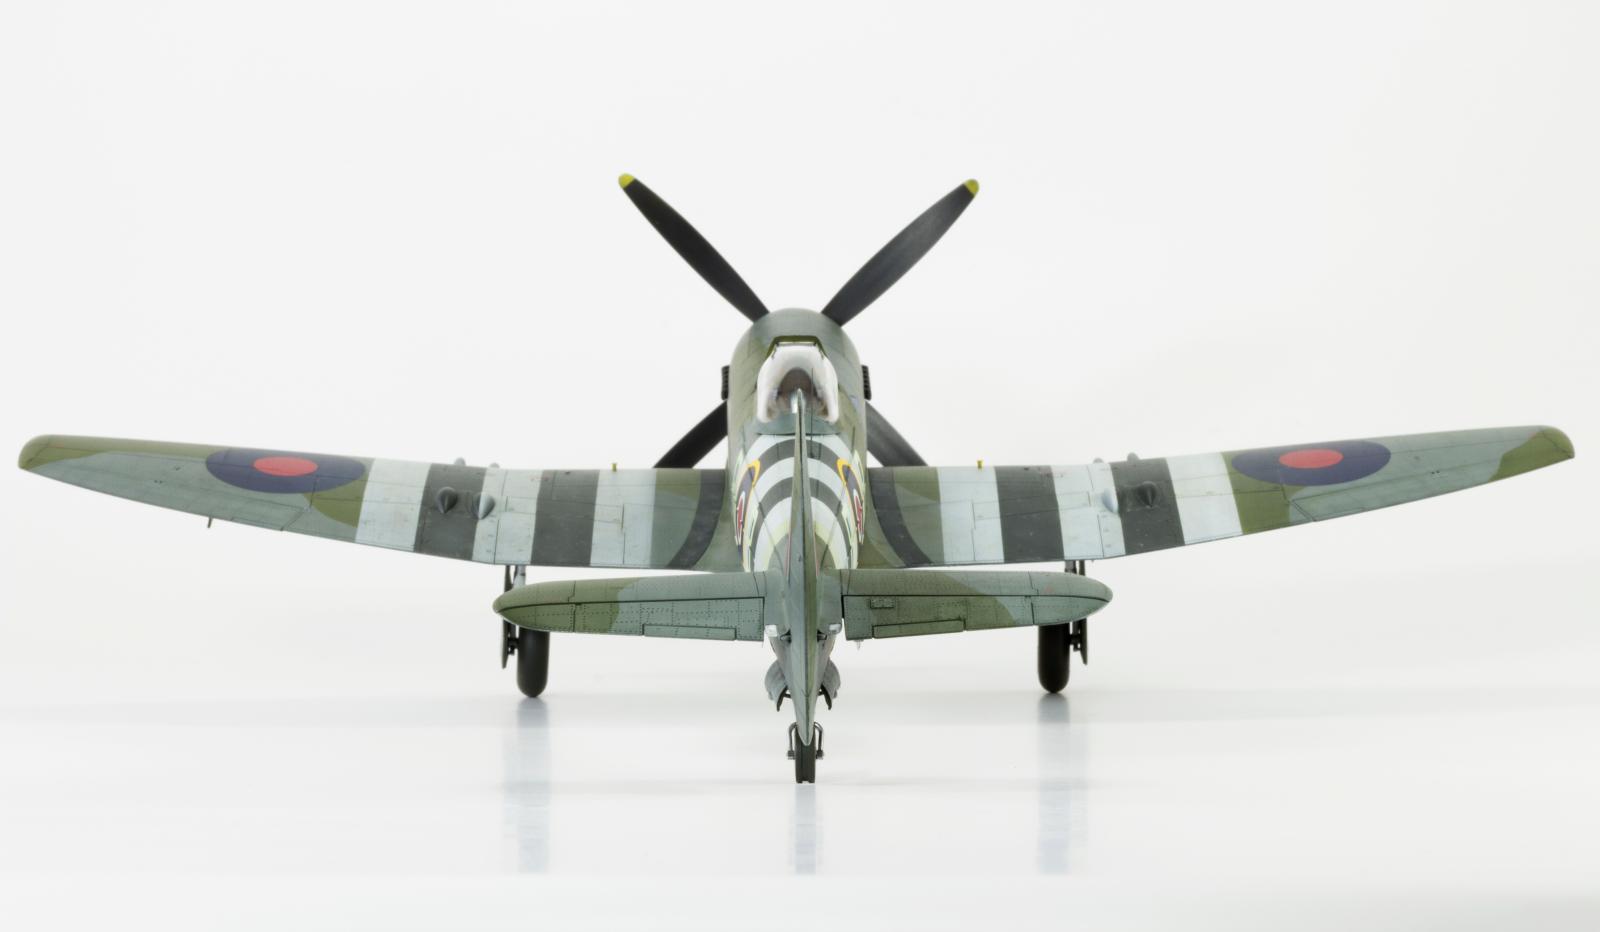
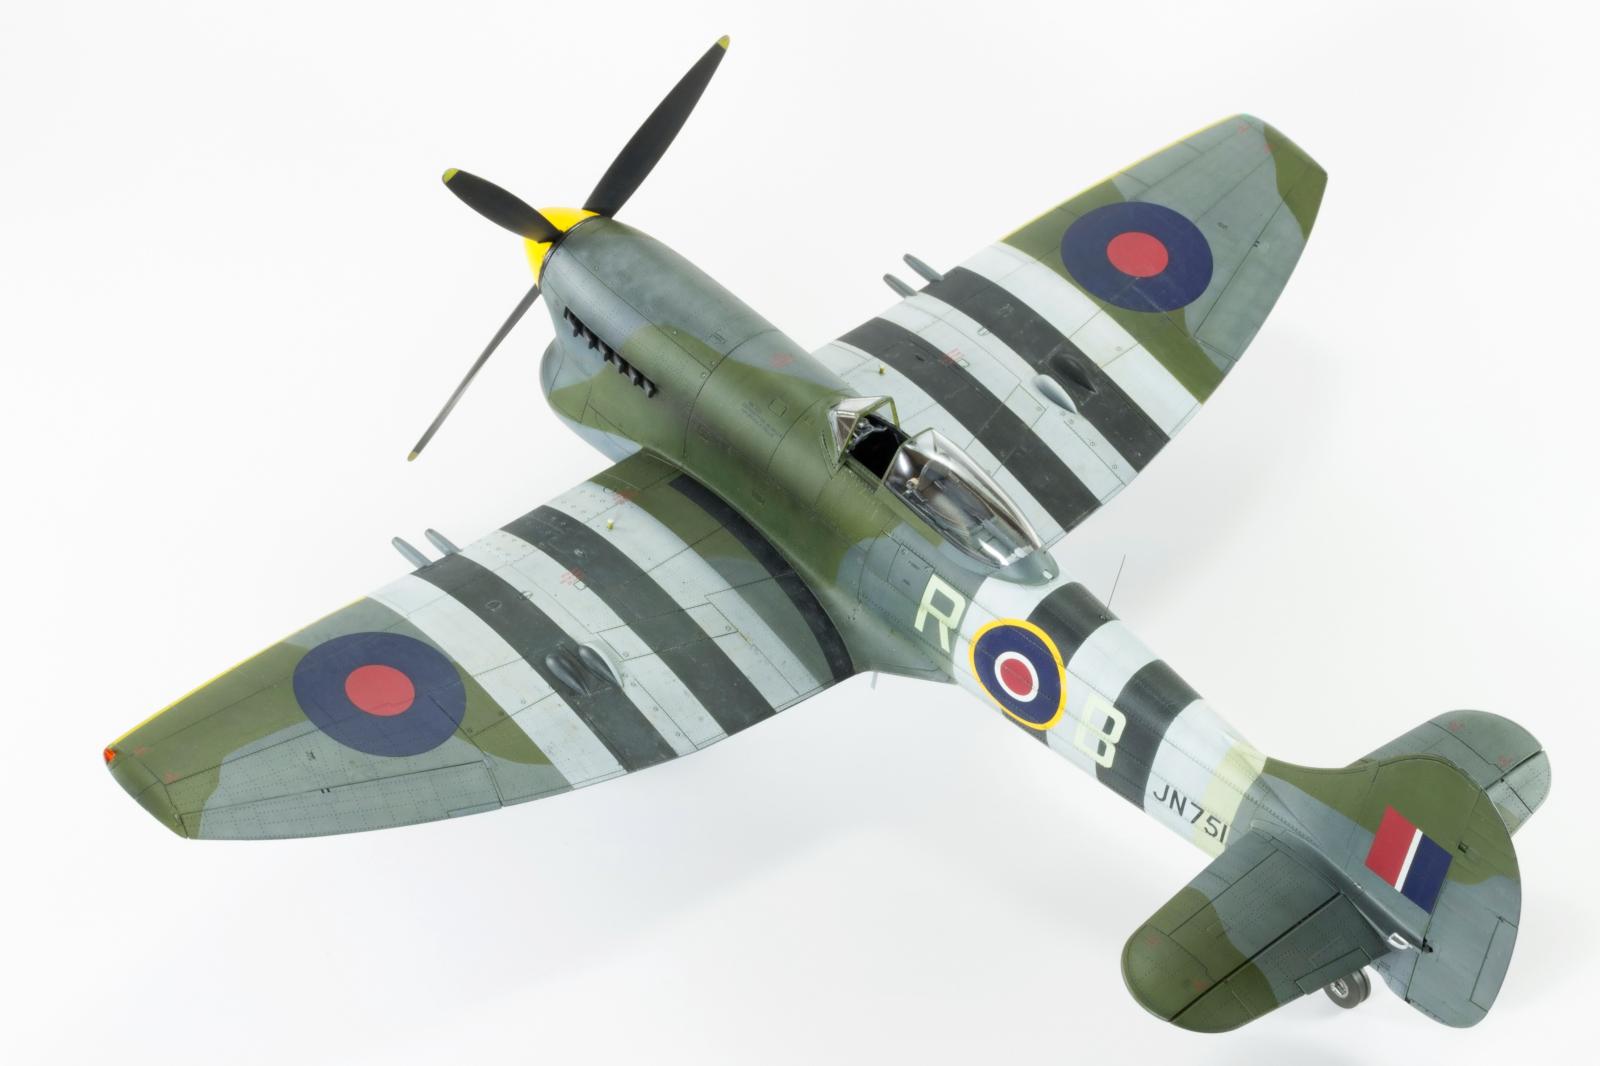
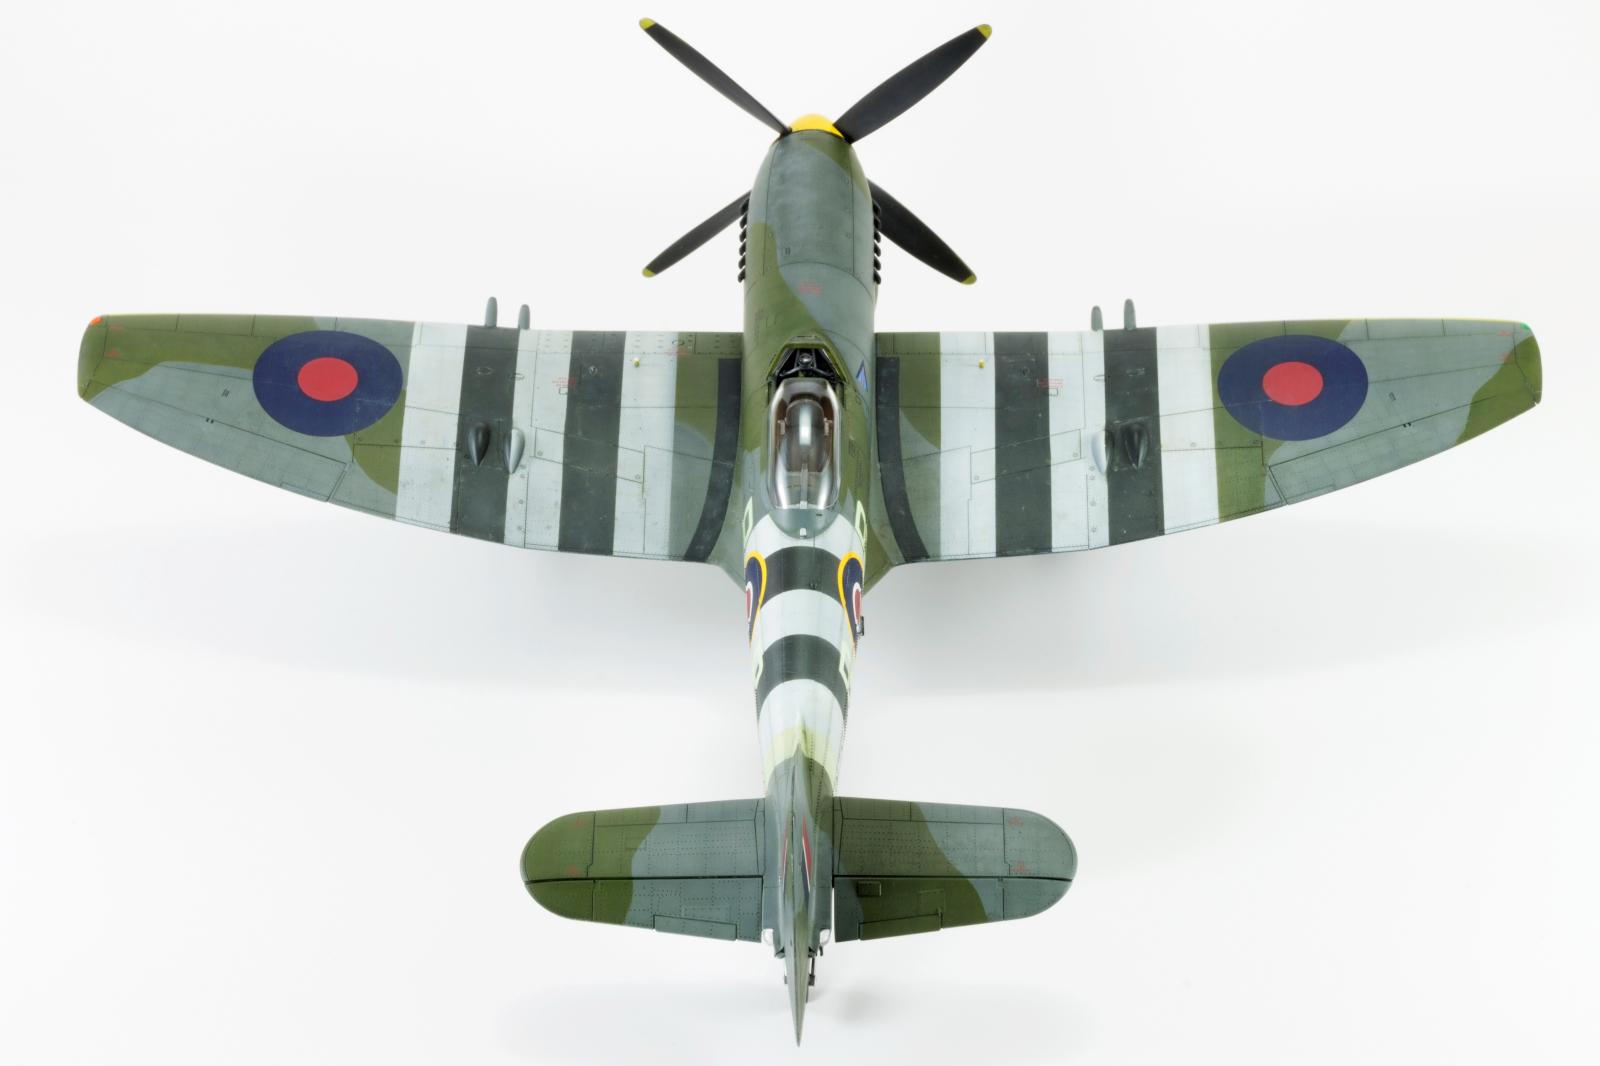
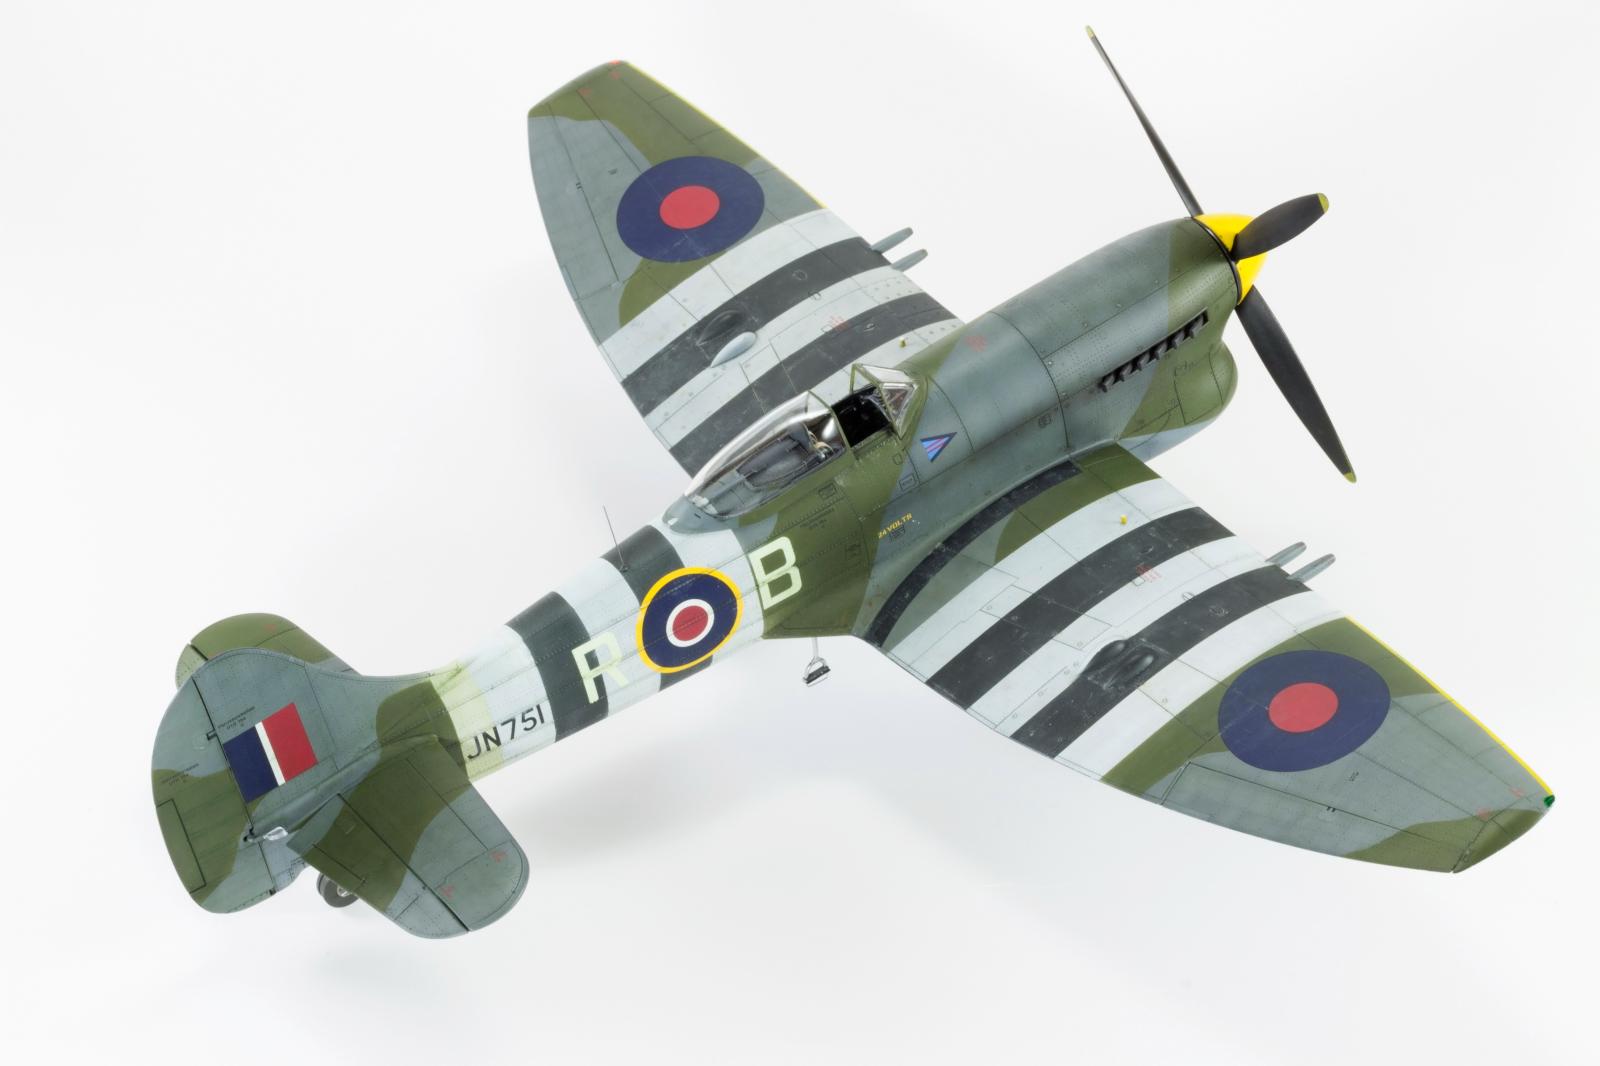
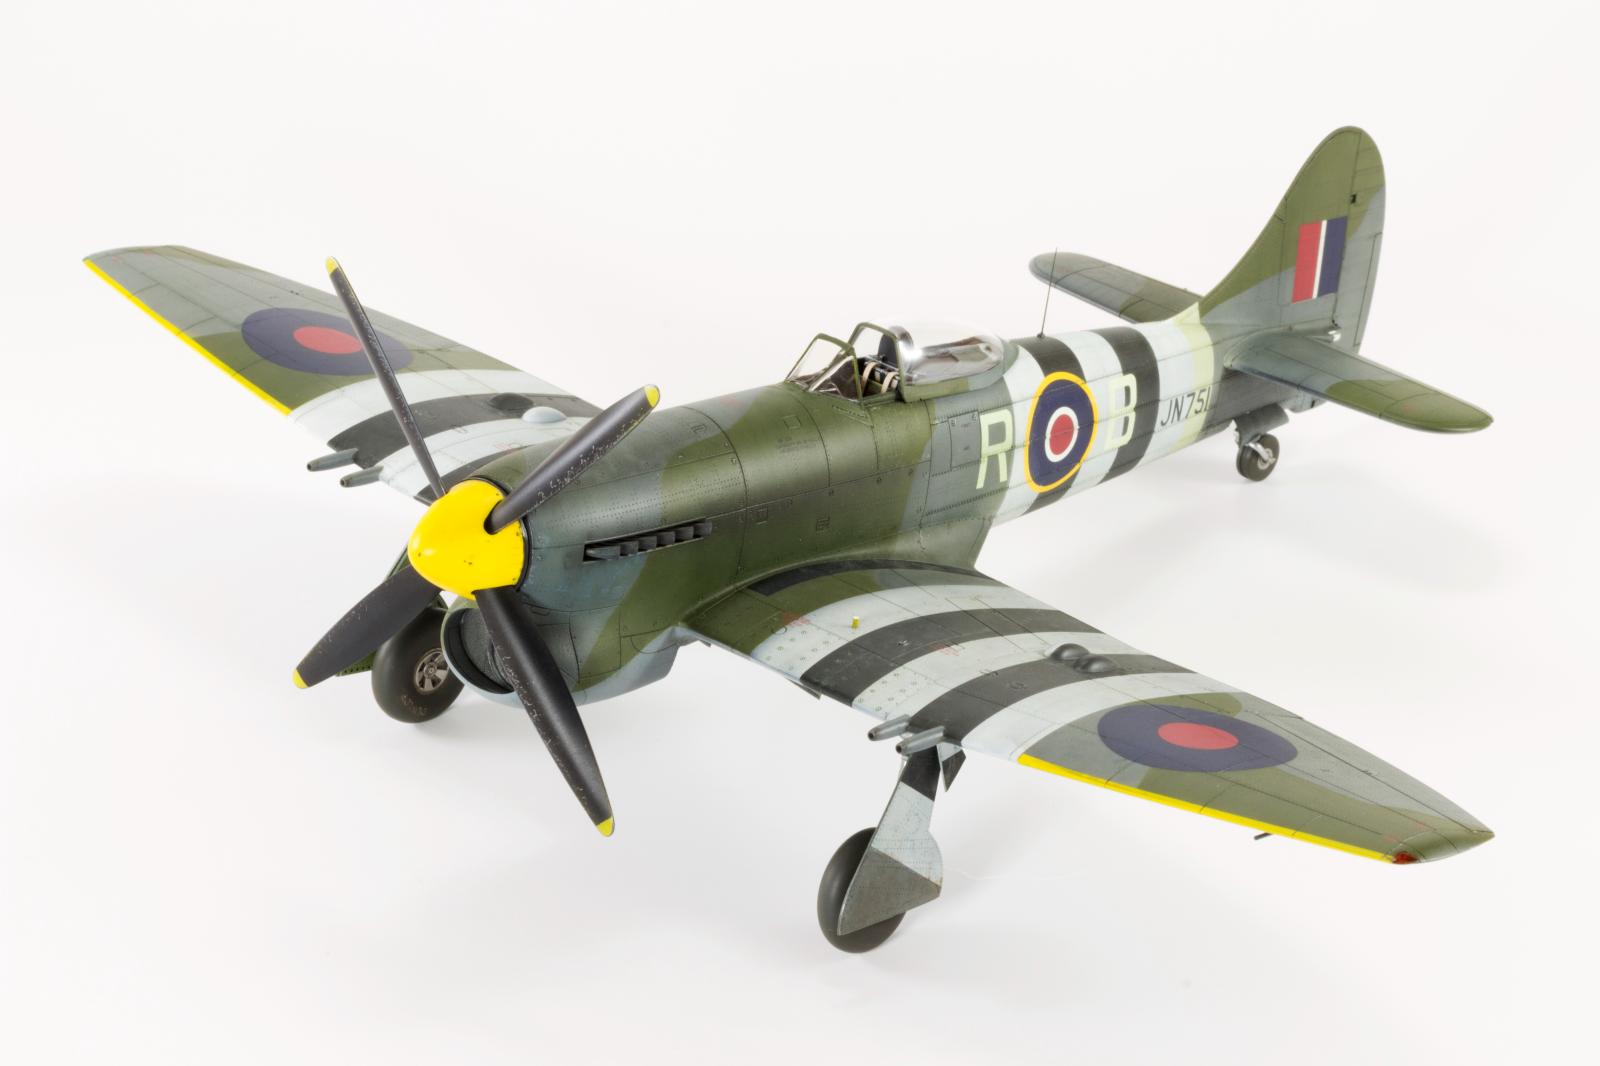
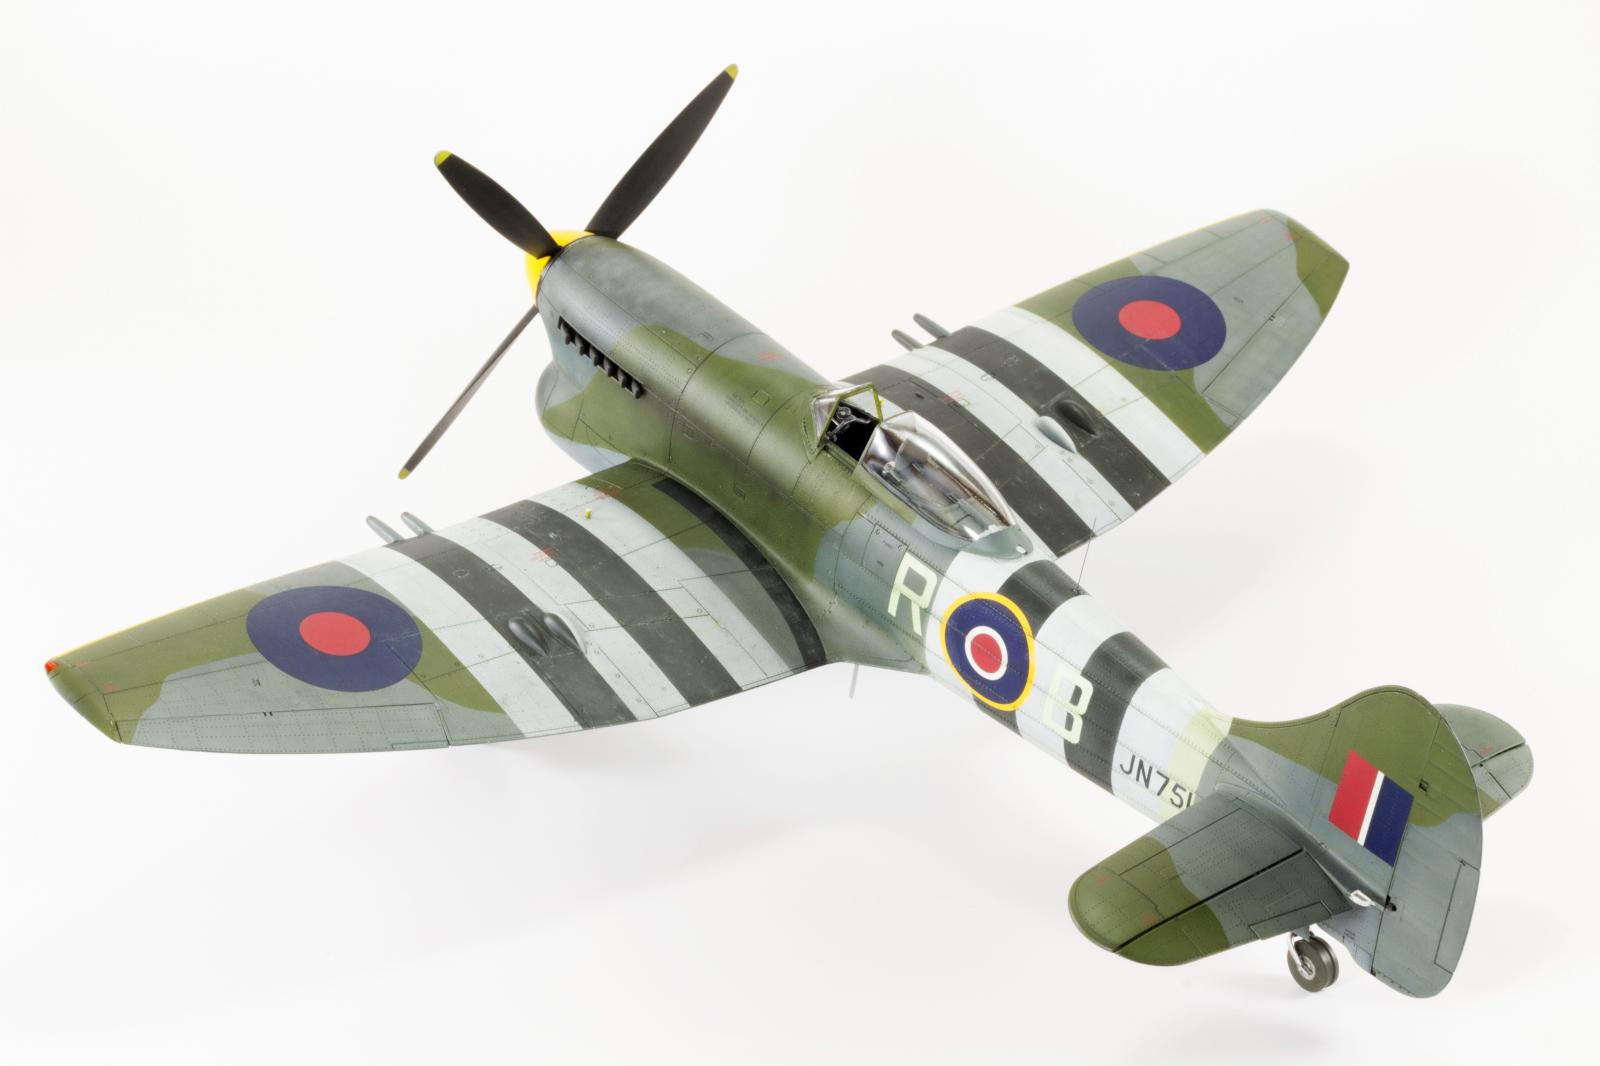
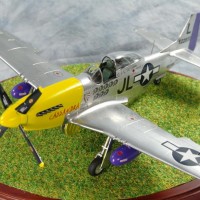
The colour scheme planned for this build consisted of airframe JN751, which was the mount of Wg Cdr Ronald P. Beamont DSO, DFC & bar, CO of No. 150 Wing, Newchurch, Great Britain, circa June 1944. This needed the application of the D-Day identification bands, both on the wings and fuselage.
The invasion stripes areas were painted white several lengths of 9.5mm masking tape used to define the areas which would remain white. The black paint was mimicked with Tamiya`s XF-69 Nato Black.
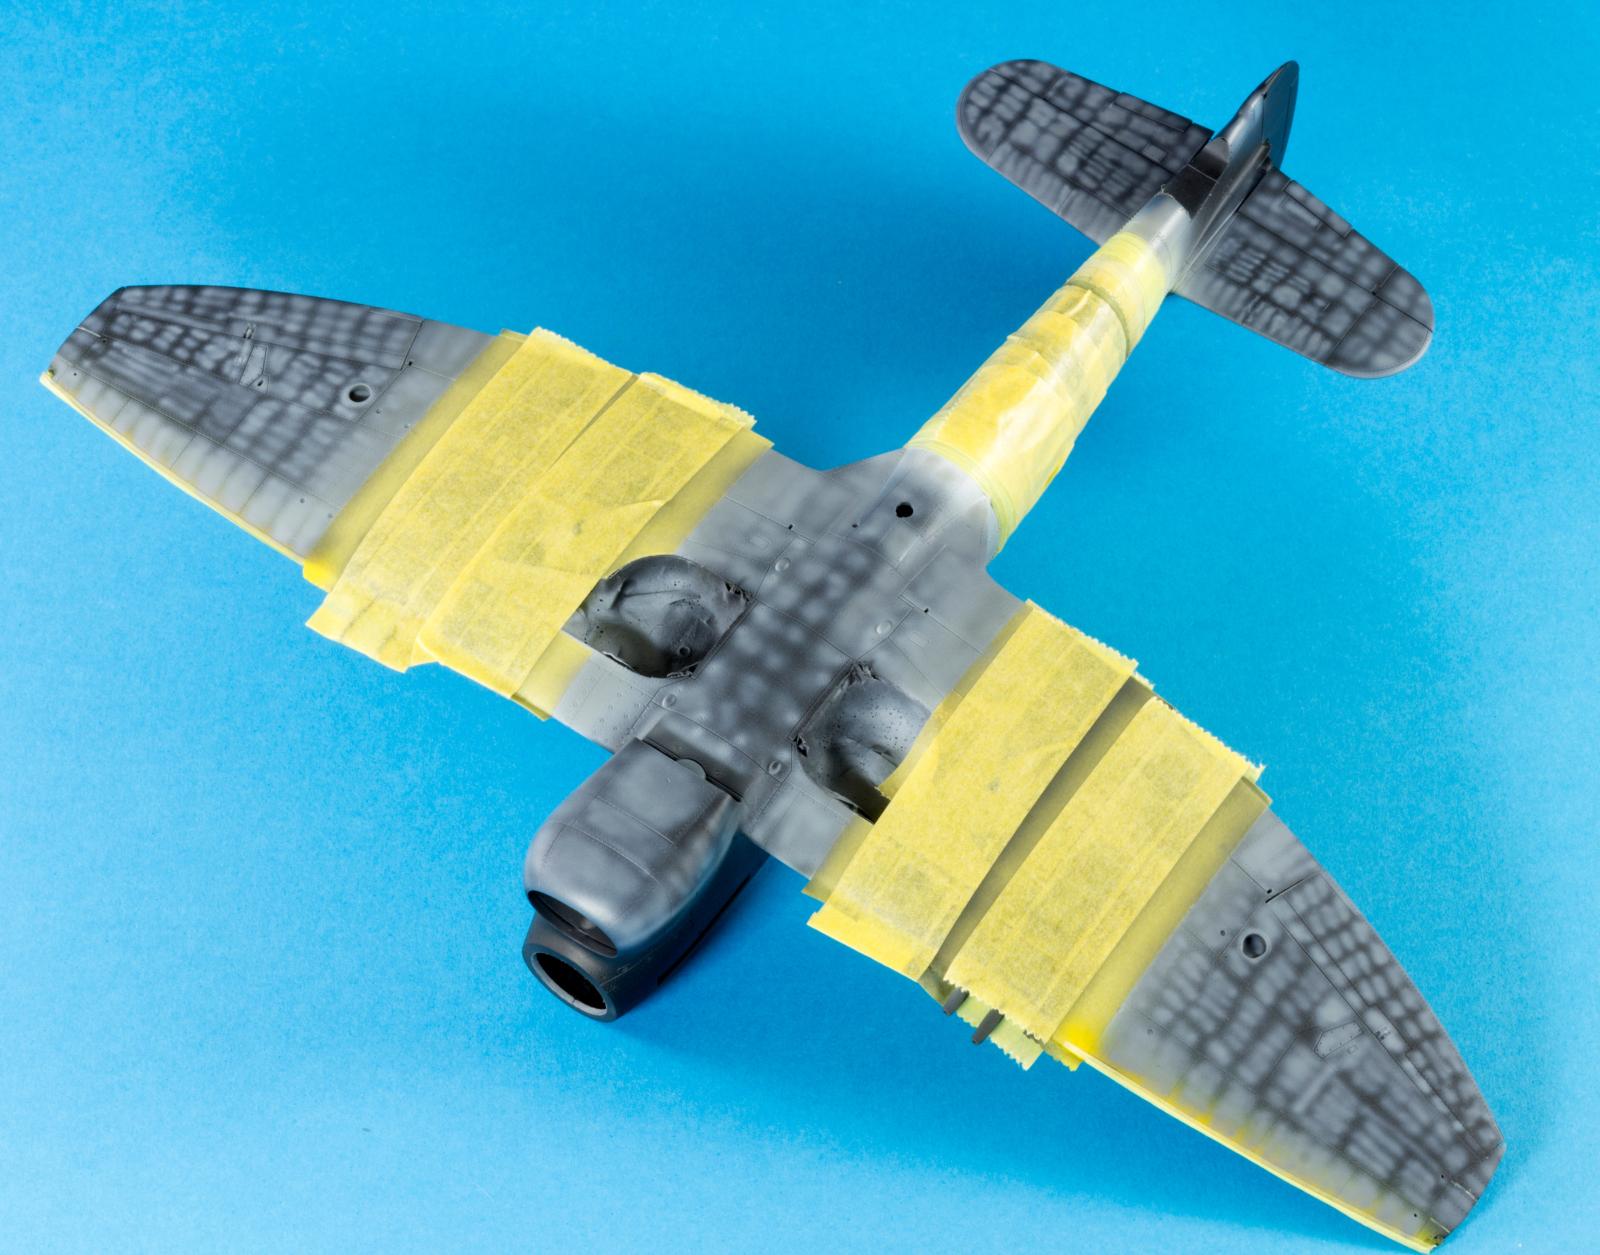
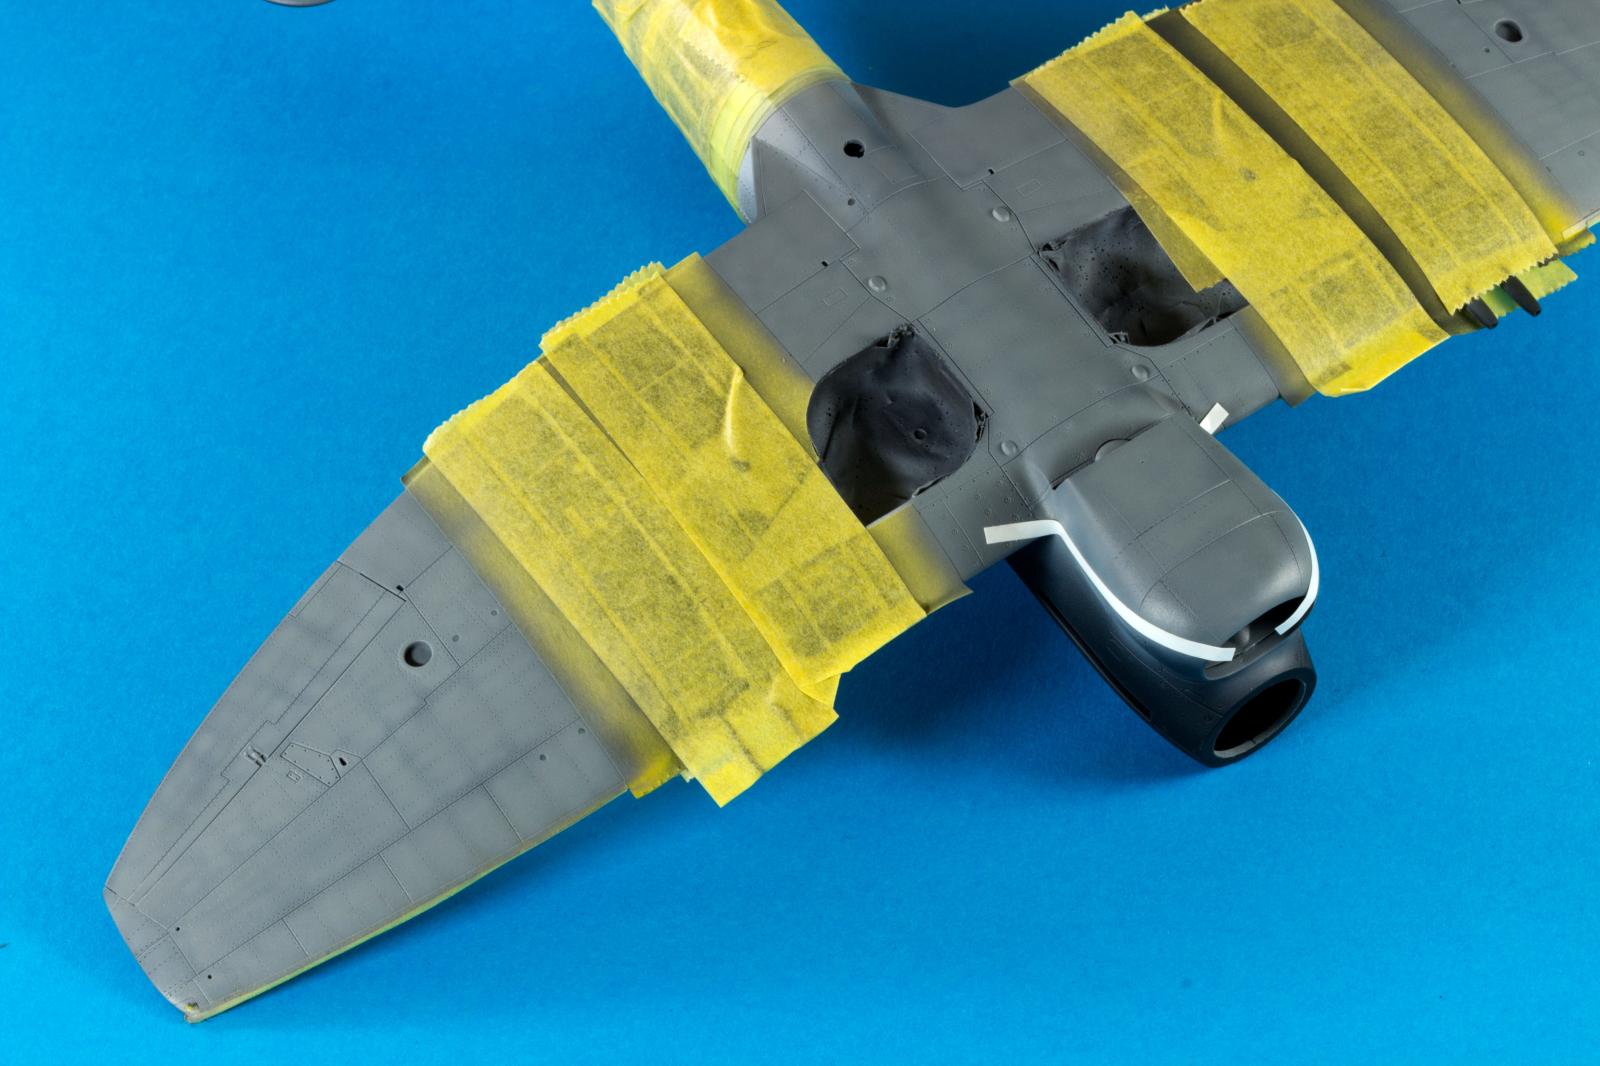
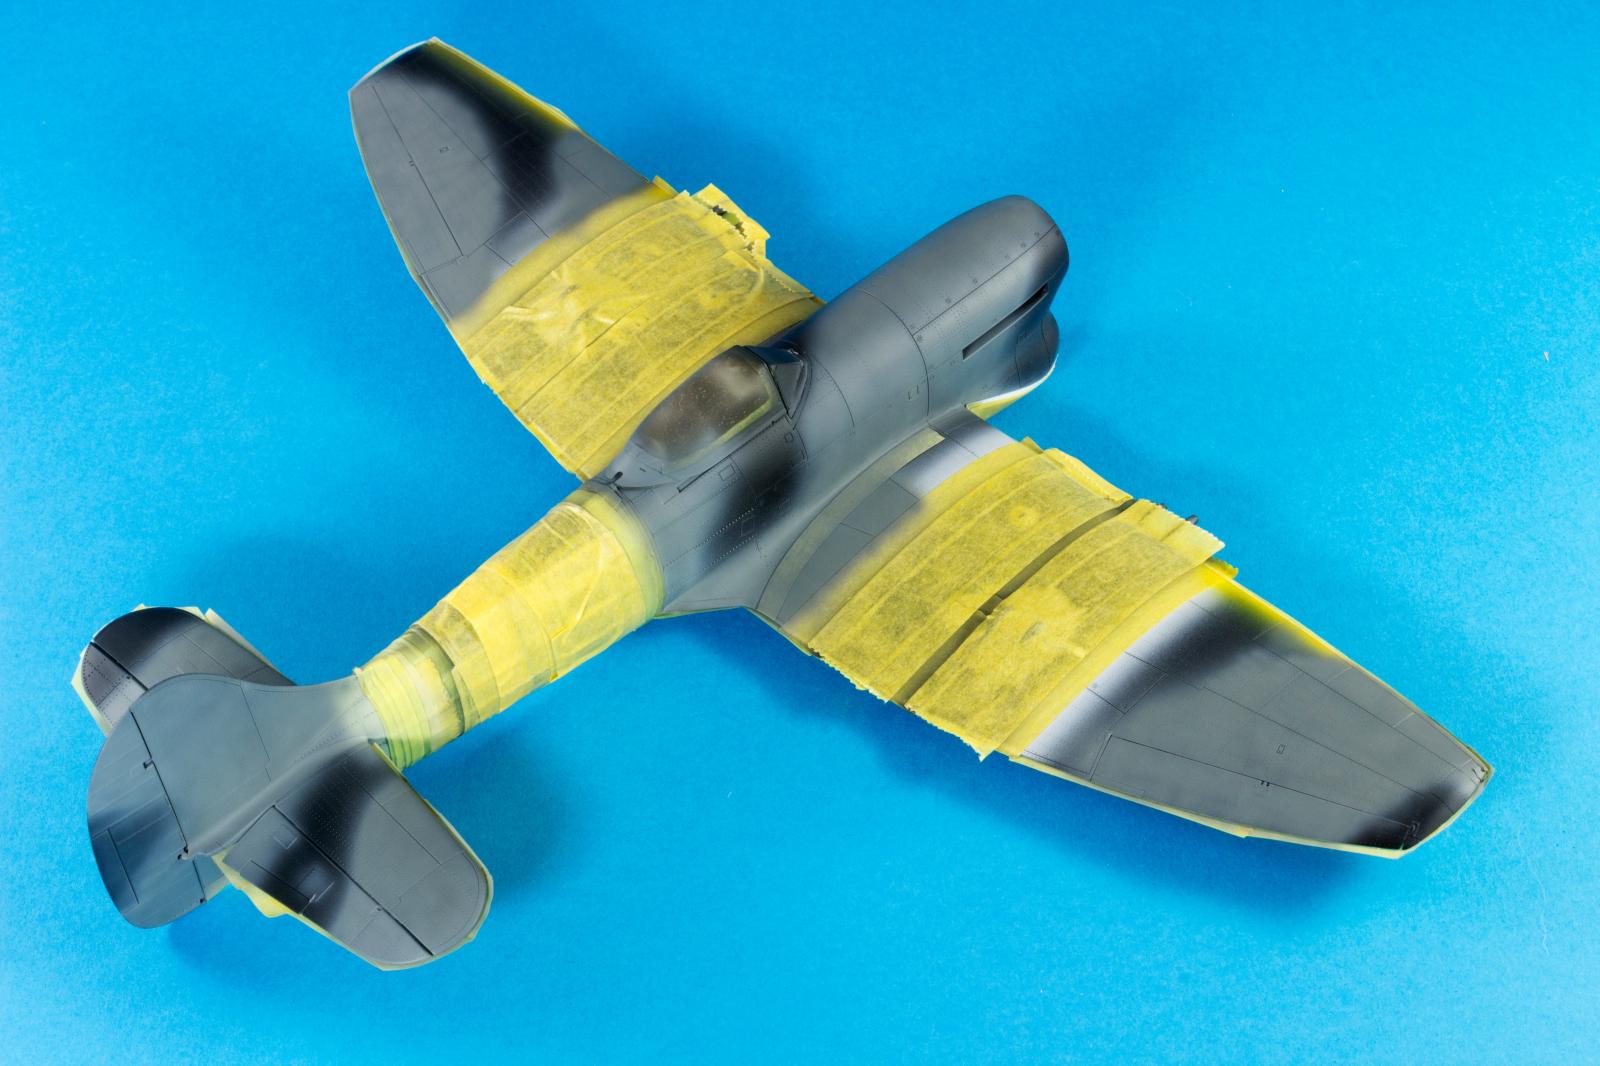
The fun could now begin. For this purpose, the Real Colors Air line from AK interactive were used, sprayed through a 0.2mm nozzle and at an air pressure of 1.2 Bar or less. The thinner used was exclusively the AK High Compatibility thinner. As usual, this modeller started with the lighter colour, specifically the RAF Medium Sea Grey, RC 289, which was to be applied on the under surface of the fuselage. To take advantage of the black primer base, the areas between the rivet rows were filled with paint before the general coverage. The paint behaved stunningly, with no clogs on the airbrush and a fantastic covering power. The adherence of the paint to the primed surface was also premium, which allowed for precision work without the fear of paint runs or inconsistencies.
AK Real Color RC289 RAF Medium Sea Grey was diluted with AK`s High Compatibility Thinner and applied between the rivet lines before the general coverage could begin.

Flexible masking tape was used to define the separation between upper and lower fuselage colours. Note the depth in the Medium Sea Grey which resulted from the use of fine layers over the black primer.
The Ocean Grey was represented by RC288 RAF Ocean Grey and applied on the selected areas as described before.
A combination of flexible masking tape and Panzer putty were used to mask the grey areas in preparation for the Dark Green. RC286 was employed as RAF Dark Green. After the removal of the masking several areas required small touch-ups.
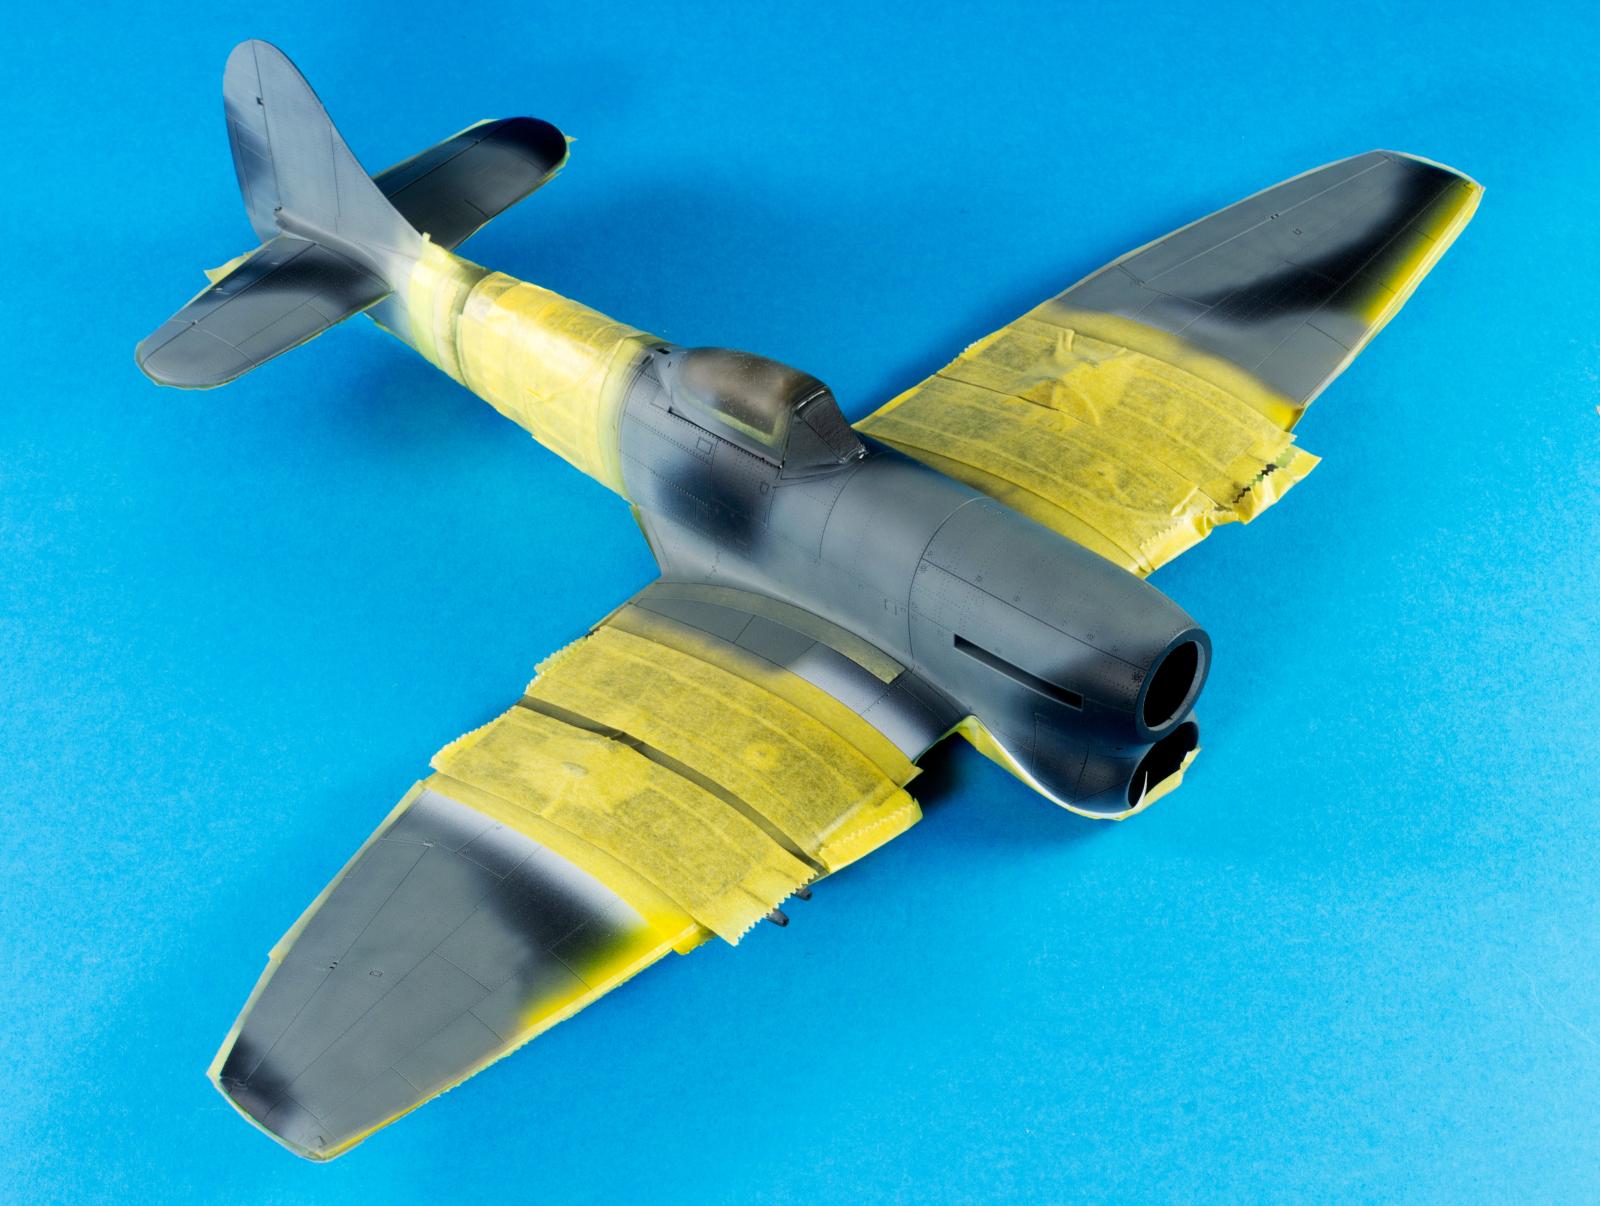

The final aspect of the basic camouflage painting. Please note the high and low lights provided by both the black primer layer and posterior post-shading.

The decals produced by Cartograph performed stunningly with the aid of Micro-Set and UMP Strong setting solution. Note the gloss surface in preparation for the decals.

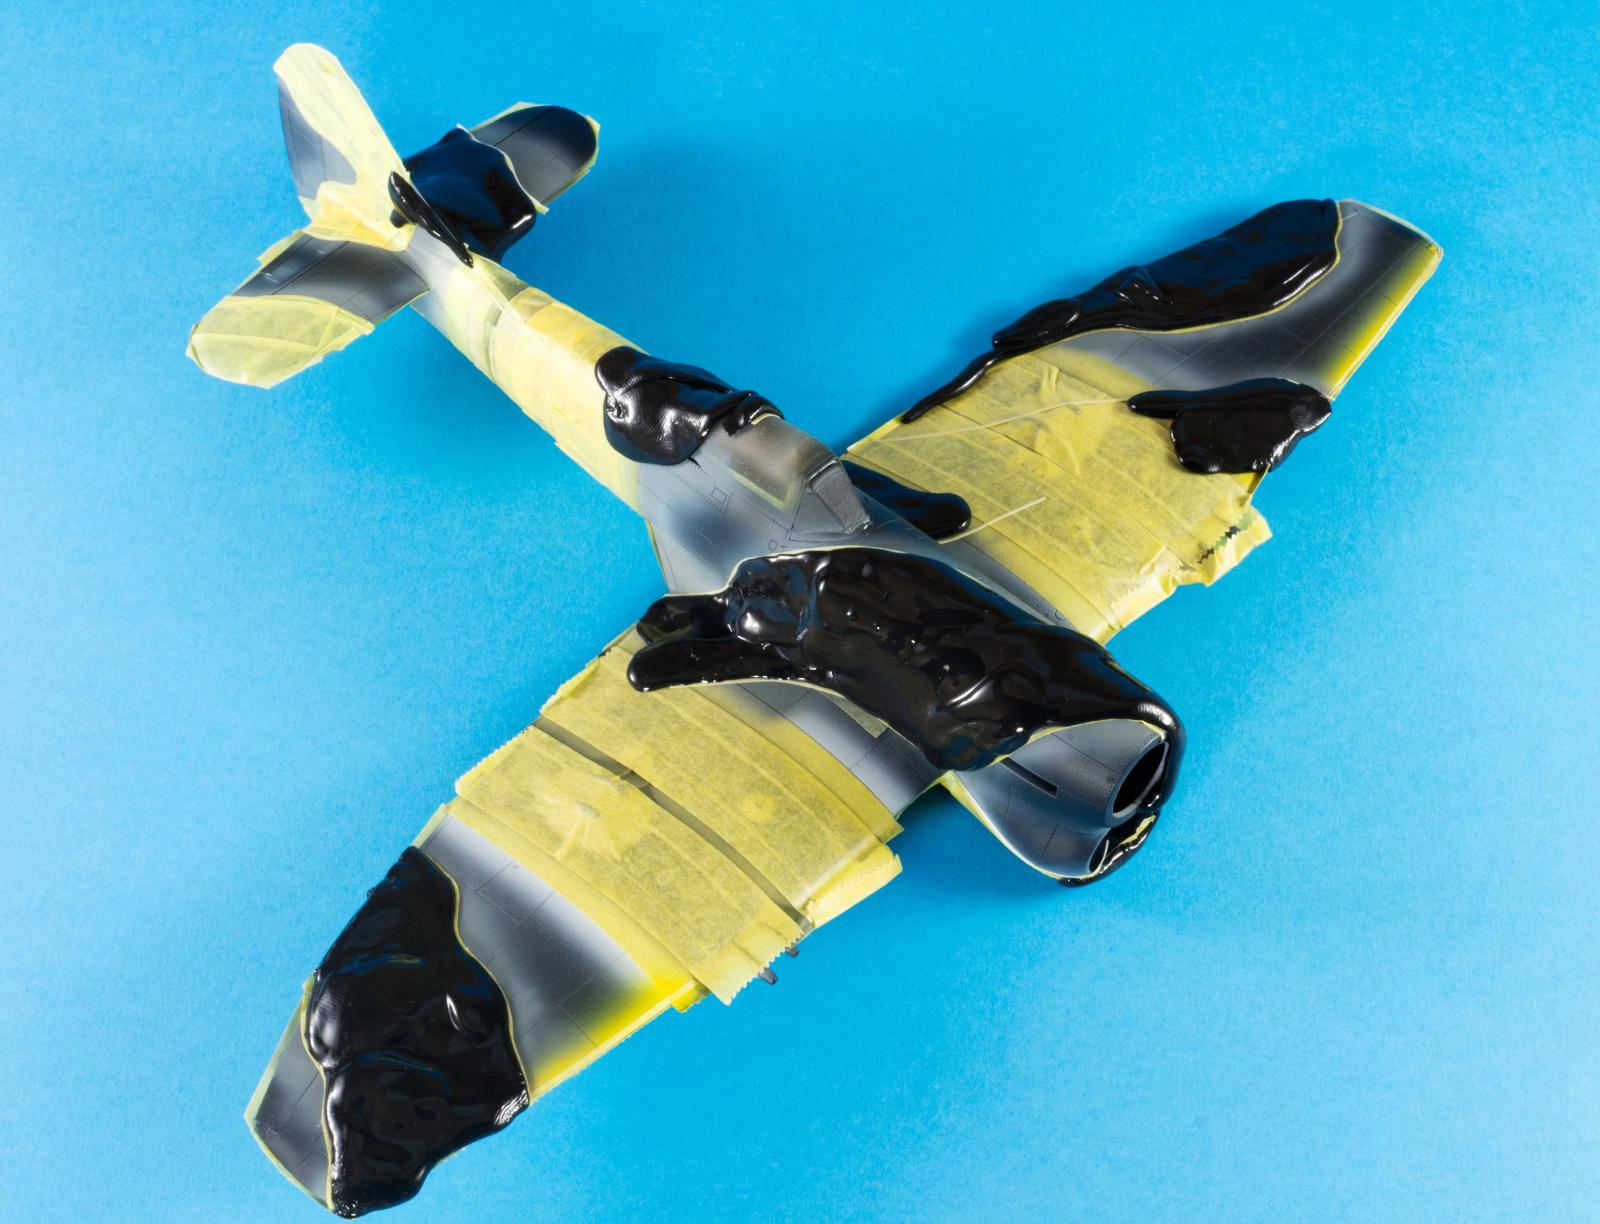
A acrylic filter was employed on the entire fuselage, which consisted of a 50/50 mix of ComArt`s 20021 Transparent Smoke and 21041 Old Oil.


Several oil filters were applied with the use of highly dilutes oil paint, namely Abteilung 502 ABT005 Smoke, ABT 020 Faded Yellow, ABT 030 Faded Navy Blue, and ABT 040 Faded Green.
The fuselage paint and invasion stripes were distressed with watercolour pencils from AK interactive, namely those on sets 10040 Green and Brown set as well as 10042 Chipping and Ageing set.
A smooth exhaust stain was airbrushed carefully with Com.Art 20021 Transparent Smoke. Please note the distressed invasion stripes.
Several structural points of the fuselage were enhanced with a dark acrylic mix airbrushed at a low pressure. This also served to create several fluid leaks.
Main airframe and assorted details ready for the final building sequence. This was performed with the use of both thin super glue and Tamiya Extra Thin Cement.
The Hawker Tempest is a beautiful airframe and in this modeller opinion Eduard made it justice. The model is exquisitely detailed and the injection quality very good. There were some minor fit issues, mainly between the fuselage underside and wing, but nothing out of the ordinary. On the other hand, the package offered is stunning. The photo-etched details and the decals provided, together with clear instructions and quality plastic parts makes it a real winner
Hope you like it!


This is some really excellent work you're displaying, but it's more appropriate in the "work in progress" section of Groups. The Headlines page is for when you have it completed.
Welcome to iModeler.
Thanks for the heads up!
The model is finished. I just had some problems with the editing of the article which i am trying to iron out.
Cheers!
José Pires
@josepedro
José, besides the brilliant build pic tutorial, I think you did full justice to the Tempest Mk.V look.
Indeed the model is good, but your skills pushed it higher.
Excelente trabalho e fotografia 😉
Um abraço!
Olá Pedro! Thanks for your comments on the model and photos. I am really looking forward to enjoy the model you`re building on the group.
Muito obrigado!
Really nicely turned out Tempest Josè. Congratulations
Hello Ben!
Thanks for the feedback!
Well done Jose, she looks great.
Hi Tom!
Thanks for the comment!
A fantastic result and excellent in progress pics, José!
Happy 2023!
Hello Spiros!
Thanks for the comment on the model and photos!
Happy new year!
An excellent performance on this one, José @josepedro
Thanks for sharing the work in progress.
Happy New Year.
Hello John!
Thanks for the feedback.
It´s a pleasure to share the process of building and painting the model!
Happy New Year!
Great job on the build, Jose. I like the progression pics. The overall build is superb but, for me, the cockpit really stands out...a real gem.
Hi Gary!
Thanks for the comment.
I really enjoyed building the cockpit. And Eduard really spoils the modeller with options for the "office".
You get moulded plastic IP and consoles, photo etched ones and flat plastic itens to decorate with decals.
A very comprehensive package straight from the box!
The Tempest is a beautiful plane, and you’ve really done it justice with this equally beautiful model.
Hi George!
Thanks for the feedback!
I totally agree with you on the Tempest being a gorgeous plane!
Well done, Jose! This is really top quality work. Welcome.
Hi John!
Thanks for the comment and welcome!
A real beauty!
Hello Chas!
Thanks for the comment!
Really excellent work here, top notch modeling skills on display! Thanks for sharing
Hi David!
Thanks for the comment!
Have a great New Year!
A beautiful build, and I appreciate the play-by-play of your paint and weathering techniques - I'm always looking for ways to improve my skills!
Hi Greg! Thanks for the feedback!