Eduard Weekend 1/48 Avia B.534/III
Developed in the early 1930s, the B.534 made its service debut in the Czechoslovak Air Force in 1935. At the time, it was one of the most advanced biplane fighters of any nation. Its license-built Hispano V-12 engine gave it a top speed of over 250 m.p.h., it was armed with four 7.92 mm machine guns mounted in the forward fuselage, and its riveted steel-framed wings allowed it to carry bombs as well. Pilots found it extremely maneuverable. Later variants featured a closed canopy. Although Czechoslovakia was partitioned by Germany before it could be used in combat by the Czechs, the Slovak Air Force made use of the B.534 during the war, both in support of German forces in Poland and the Ukraine, and against Hungary during the Slovak National Uprising of 1944. During the latter conflict, a B.534 shot down a Hungarian Junkers Ju 52, the last recorded air-to-air victory by a biplane.
When I started this project, I thought it would be a relatively simple, straightforward biplane build. Yeah, right! This had to be one of, if not the most, fiddly kits I've ever done. I built it mainly OOB, but I used an Eduard Zoom PE set for cockpit details, seat belts, ring-and-bead sight, pitot tube, and rigging attachment fittings. The latter items were tiny, flimsy bits that had to be folded over on themselves. Enough of them broke during construction that I had to invest in another set. I drilled out the oblong exhaust stack holes. The attachment of the ventral intake grill was quite tenuous, so of course at some point it came off inside the fuselage. I was fortunate to be able to retrieve it with tweezers and re-cement it.
With the lower wing in place, everything was painted before installation of the upper wing. I used MRP-169 "Light Khaki Avia B-534" for the olive drab. Czech-produced paint for a Czech-produced plane—what could be better? The NM lower surfaces were done with Alclad Duraluminum, my favorite Alclad shade. Decals came from the kit and worked pretty well. Markings are for the 2nd Air Brigade, 51st Squadron, Olomouc, Czechoslovakia, 1937-39.
So now it was time to mount the upper wing once all the PE rigging fittings had been superglued in place. Here is where things got really fiddly. As is so often the case with Eduard kits, the locating pins and holes for the struts are miniscule, aptly descibed as "pimpels and dimpels." That, combined with the extreme outward slant of the cabane and interplane struts, made them very difficult to locate and attach securely. I can't remember how many times pieces came apart, necessitating re-gluing and repair of damaged paintwork. I breathed a sigh of relief when everything was finally together, and I put the model aside for a couple of months before tackling the rigging.
So, the rigging. Having opted to go with the PE fittings, I had to abandon my usual stretched nylon fishing line for something rigid. I went with Wonder Wire, .006-inch diameter, ceramic rigging material that I used to purchase from Precision Enterprises in Vermont. It's nice and stiff and can easily be cut with a knife or scissors. I painted the pieces Testors Metalizer non-buffing Steel applied with a mini-brush. Getting the pieces aligned on the PE fittings and secured with superglue turned out to be an exercise in frustration. I estimate it took an average of 15 minutes per piece.
Once all the rigging pieces were finally secured, just a few tasks remained: the PE ring-and-bead sight, the PE pitot tube, the radio antenna wire (stretched invisible mending thread), and the propeller. Period photos of the propeller show very contrasting laminations. I started with a base coat of Mr. Color Sail Color, then masked it with .4 mm strips of masking tape, then applied Model Master Burnt Sienna, then "varnished" with a one-to-one mix of Tamiya Clear Orange and Clear Yellow. Finally, I masked the natural wood areas and applied the Light Khaki for the painted strips.
In the end, the Eduard kit yields a nicely detailed replica of a little-known aircraft. I just wish they had made a few more builder-friendly engineering choices. Cheers, Pip
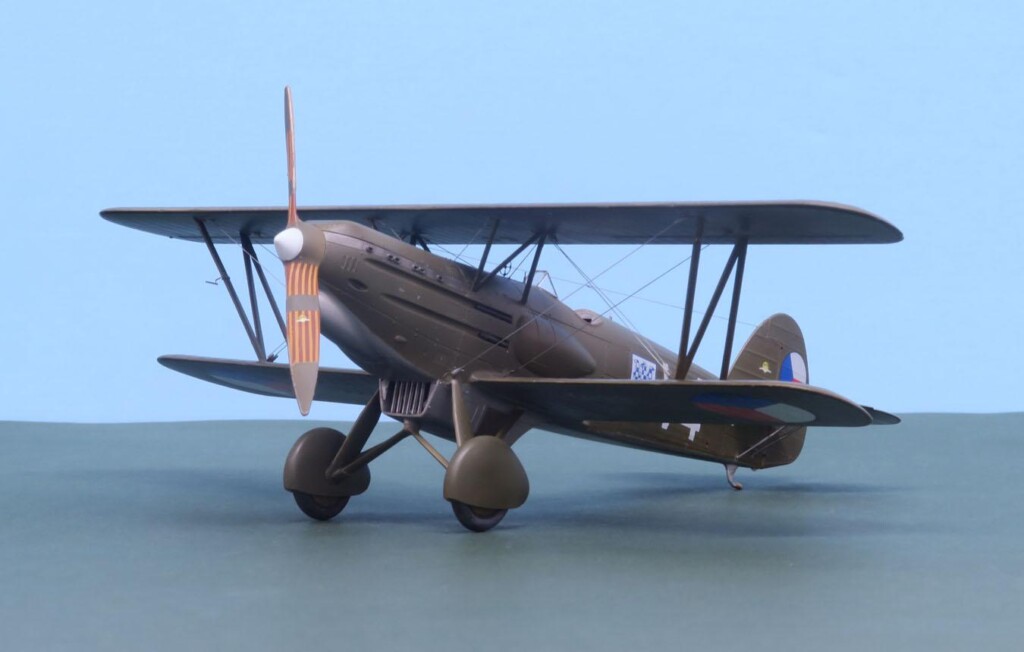
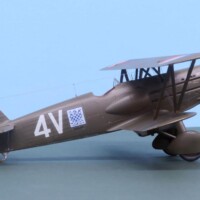
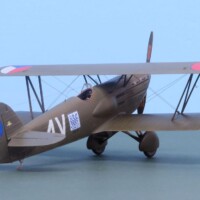
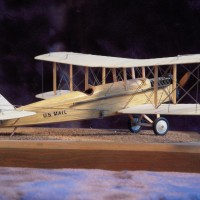
A very fine looking machine
Thank you, George.
Beautiful work, Pip @seawinder
Thank you, John.
Superb result on this challenging kit, Pip!
Well done!
Thanks, Spiros, much appreciated.
Excellent work and great choice of colour scheme - the 1/72 version is just as challenging but (I'm not sure you'll believe it) they are some of the better biplane kits out there.
Thanks for the comment, Christopher. I do agree it's an accurate and well-detailed kit. Just wish it weren't so finicky to build.
Very nicely done Pip.Even with all the kits difficulties you built an outstanding biplane there. Great job.
Thank you Clint!
Well done, Pip!
Thank you Gary!
Top notch work Pip. The rigging and prop look great.
Thanks, Dale!
Congratulations my friend. Very nice building. I have also built this kit and it is really a little difficult. I like very much your rigging and your propeller!
Thank you, Kiriakos, much appreciated!
Looks great! Your efforts paid off.
Thank you Greg!
Nice clean work on that model and a rare one it is.
Thank you very much!
That is an excellent looking biplane. A masterful job building it. (@seawinder).
Thanks, John, much appreciated.
The Czech Fury! Nice to see one of these built, Pip. Great work.
Thank you John! Actually I what I've read it was probably better than the Fury.
Excellent build. I built this one when it first became available a few years back, still one of my favorites.
Thank you Chas!