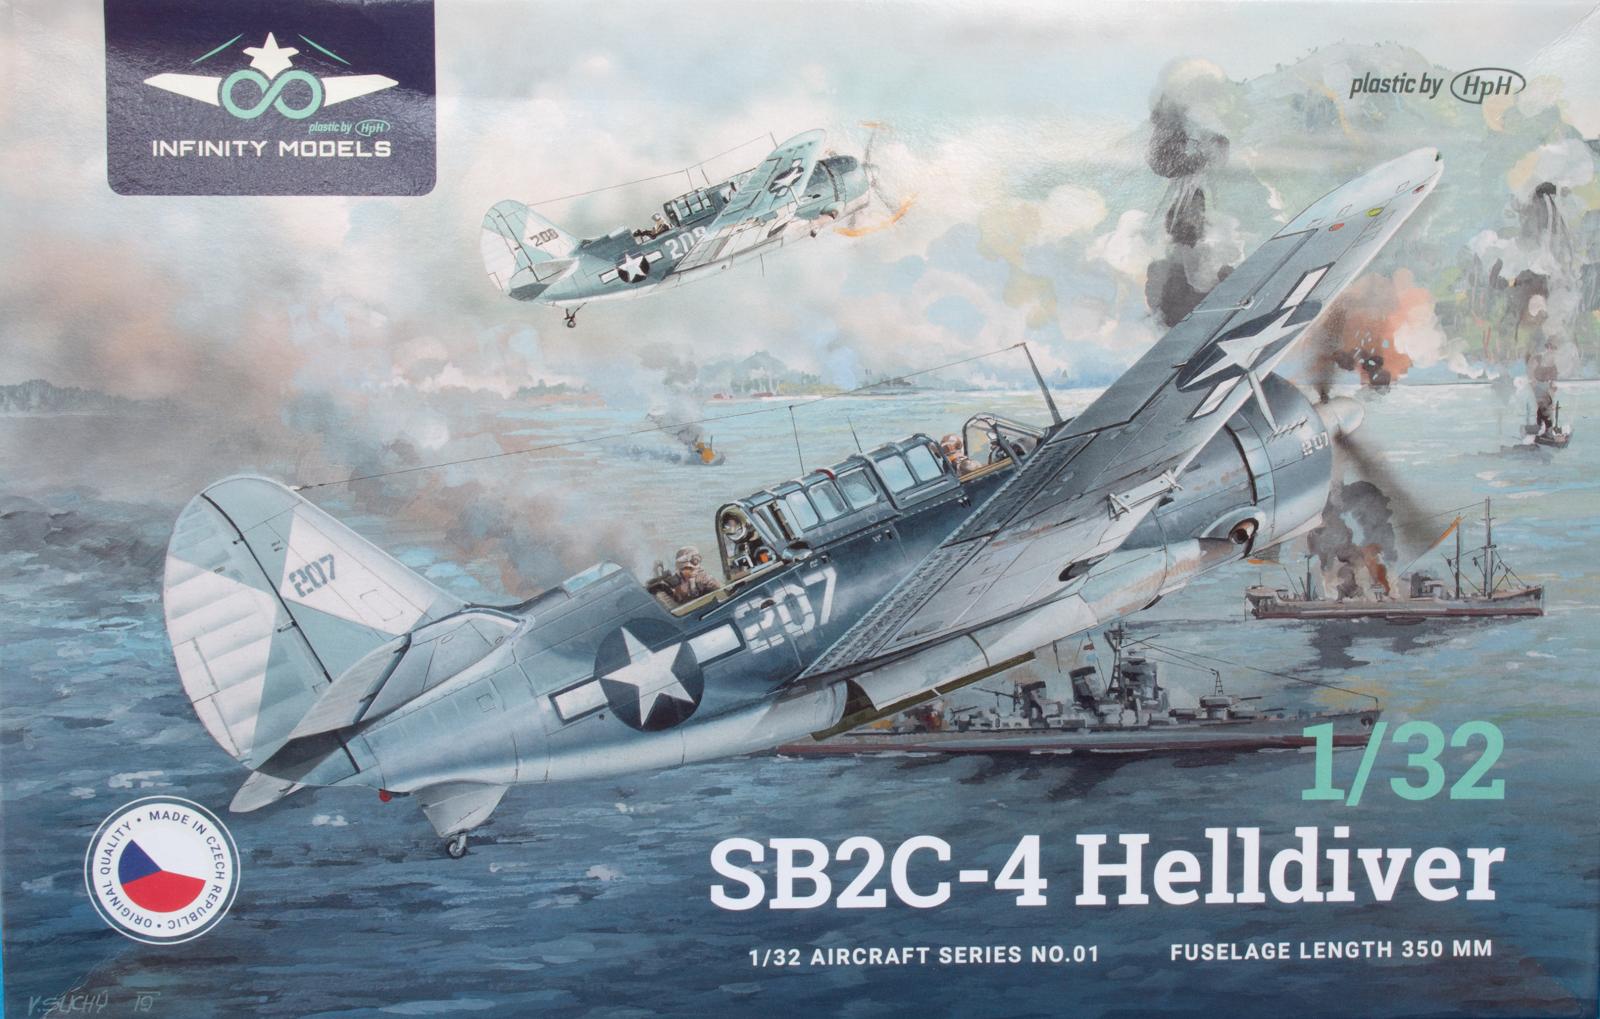
Taming the 'Beast' – Building the Infinity Models 1/32 SBC-4 Helldiver

First impressions
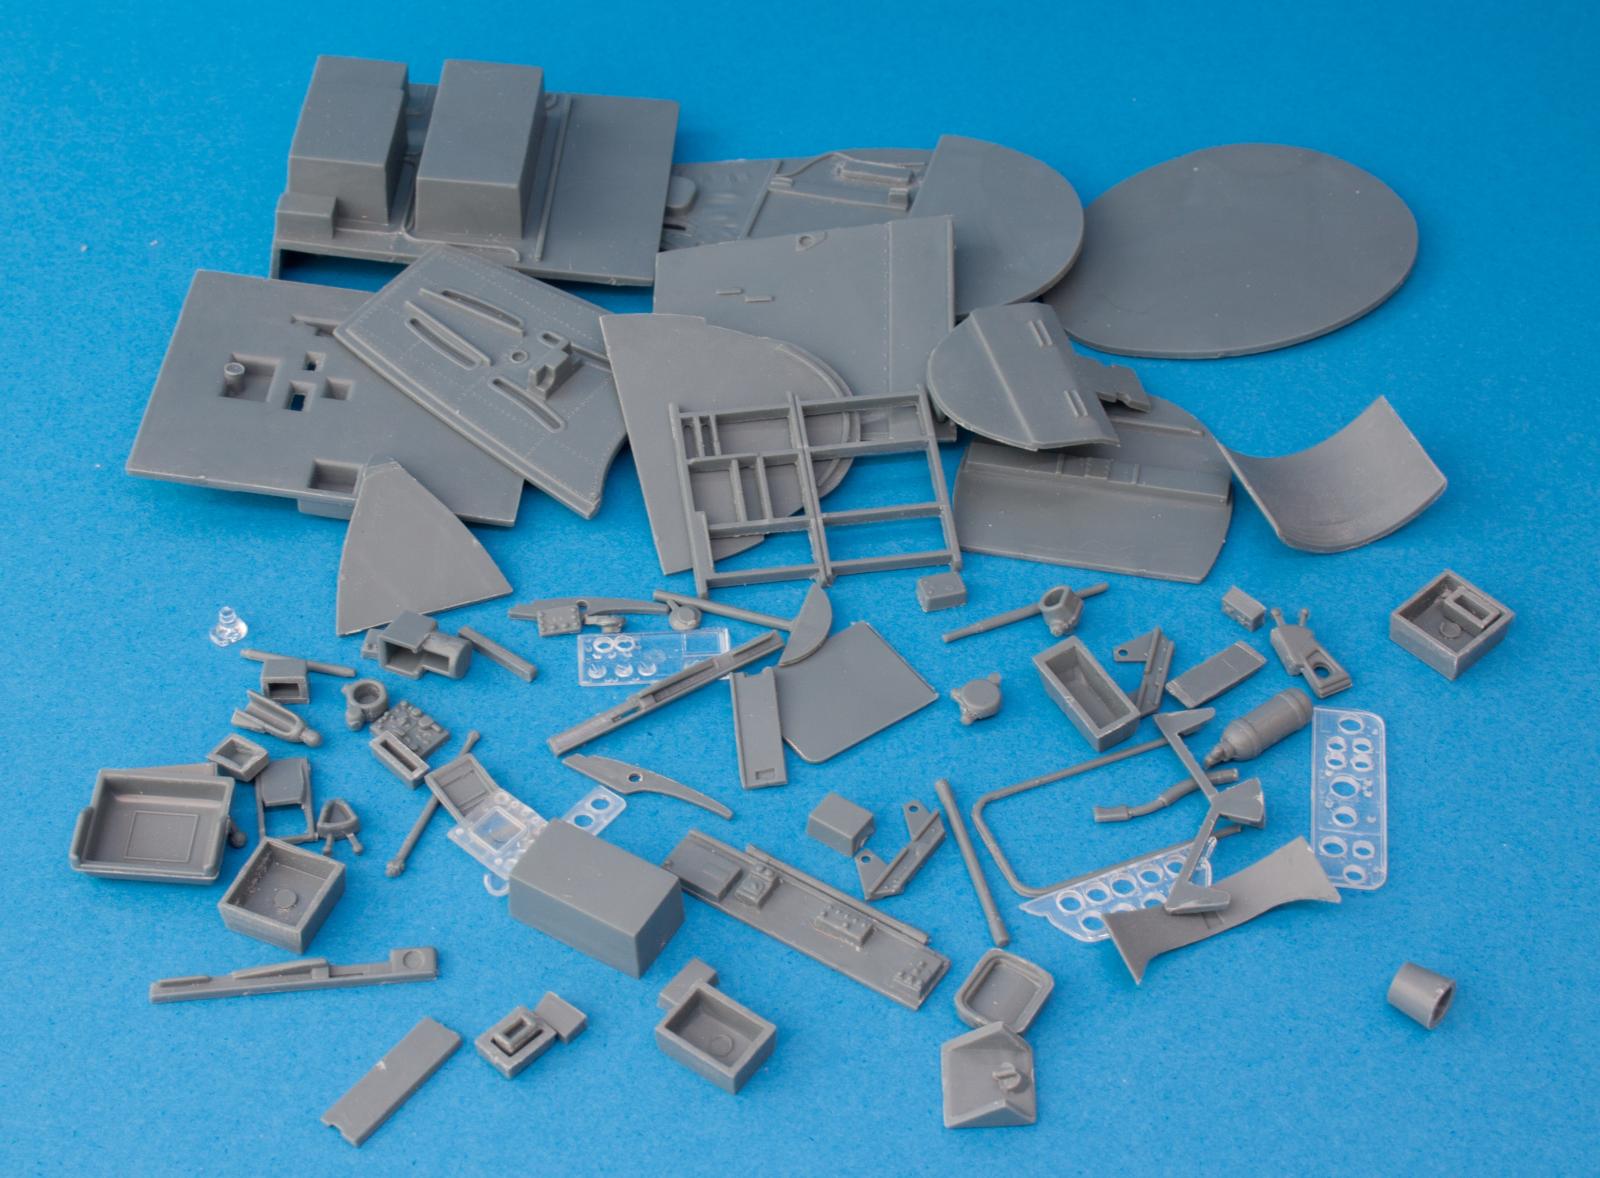
Getting started
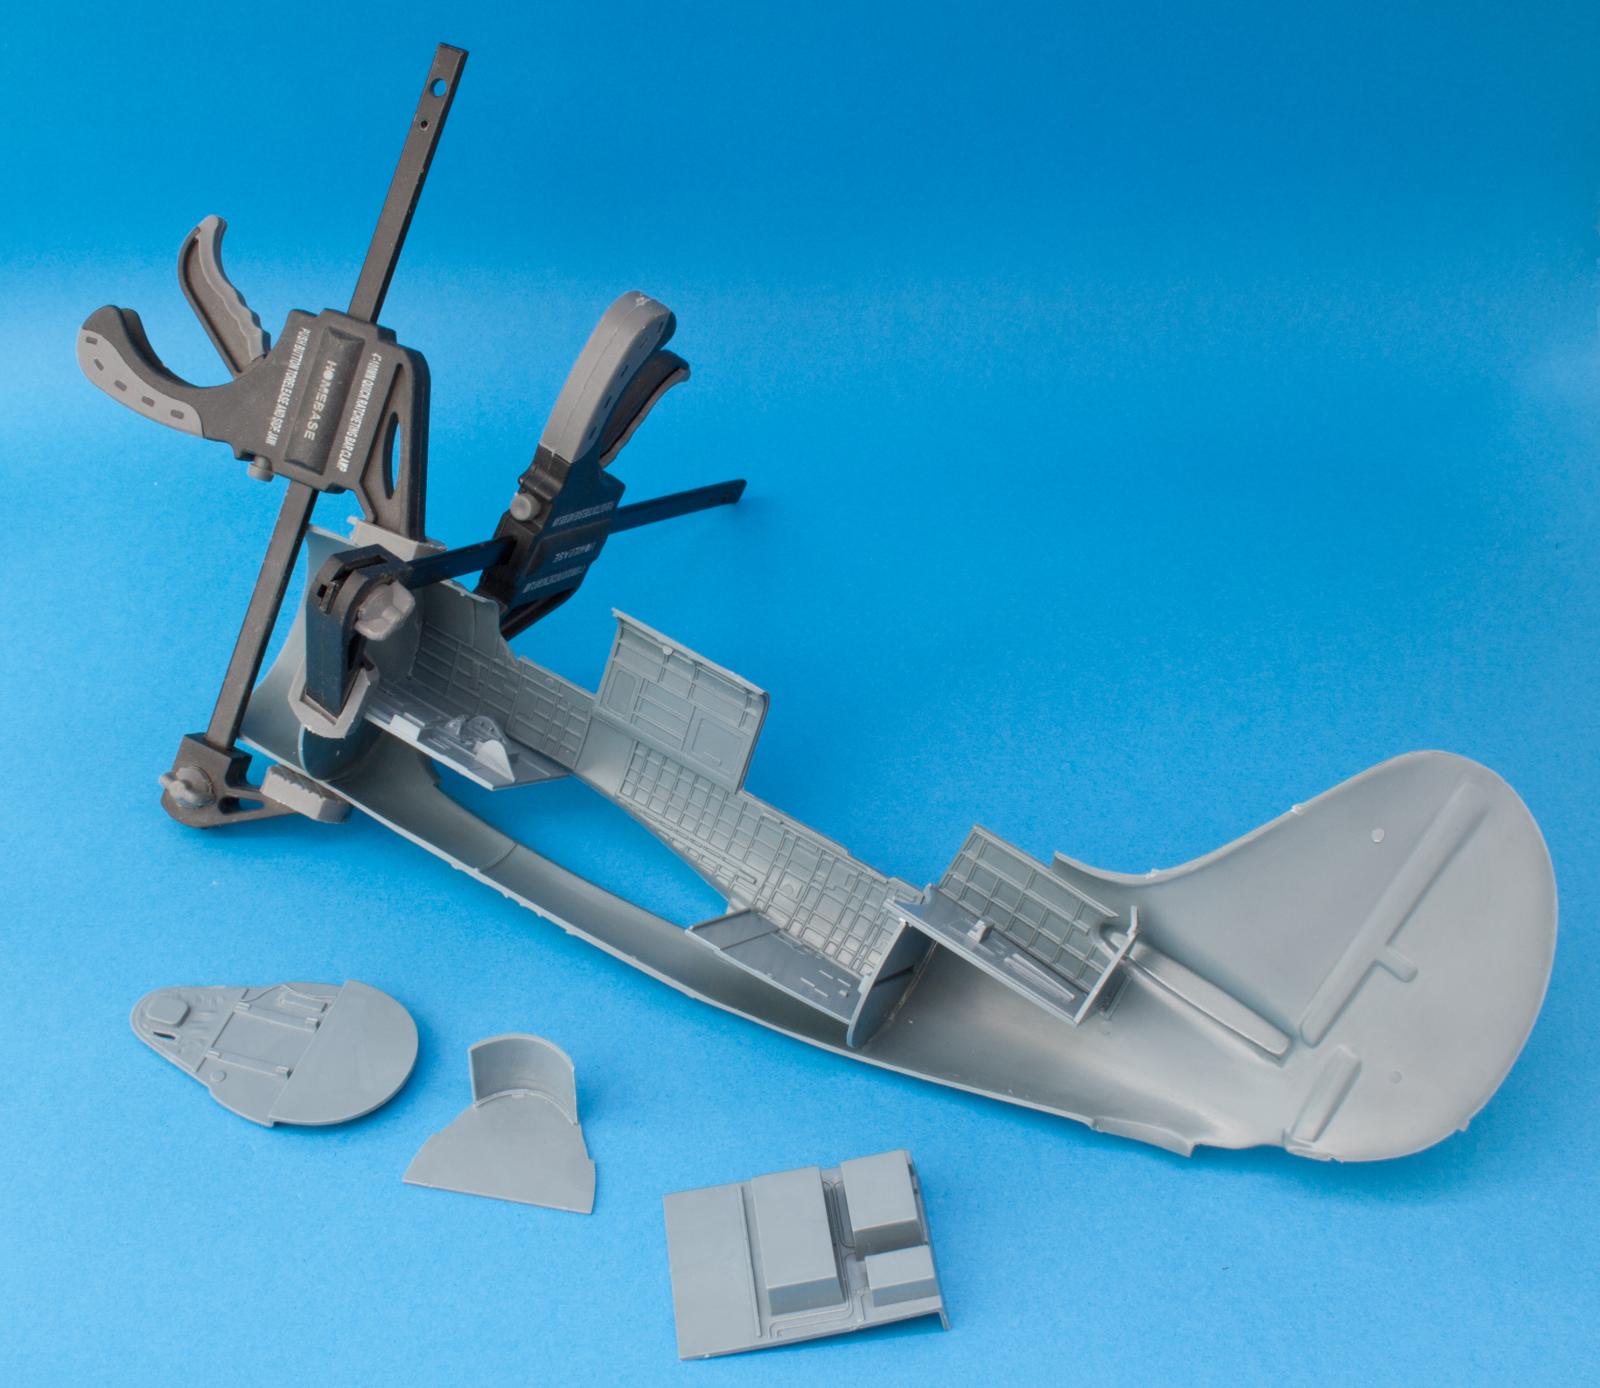
The fuselage halves were well moulded and detailed but had no locator pins around the edges. To aid fuselage alignment, three large tabs were made from scrap plastic and shaped to the interior curves of the fuselage. There were a number of floor and bulkhead parts to be fixed in place before any painting was attempted and any detail parts fitted. They were of variable fit, some almost perfect and others requiring some reshaping and clamping. Once all was in place, the fuselage halves were taped together to check the overall fit, which proved satisfactory.
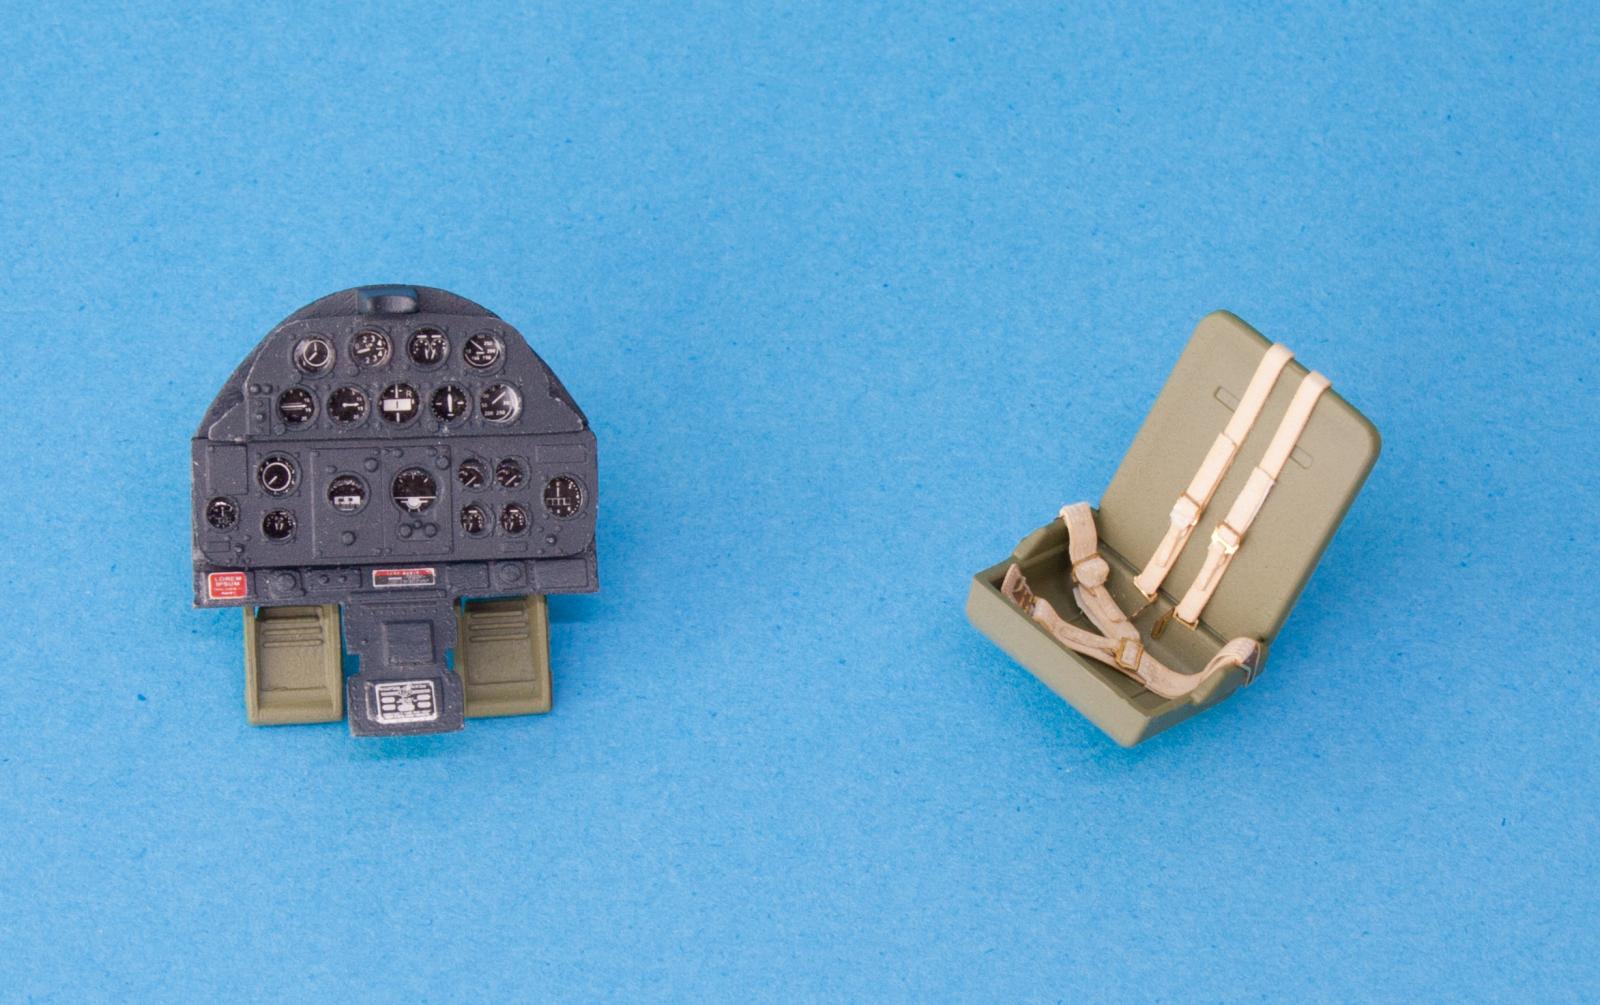
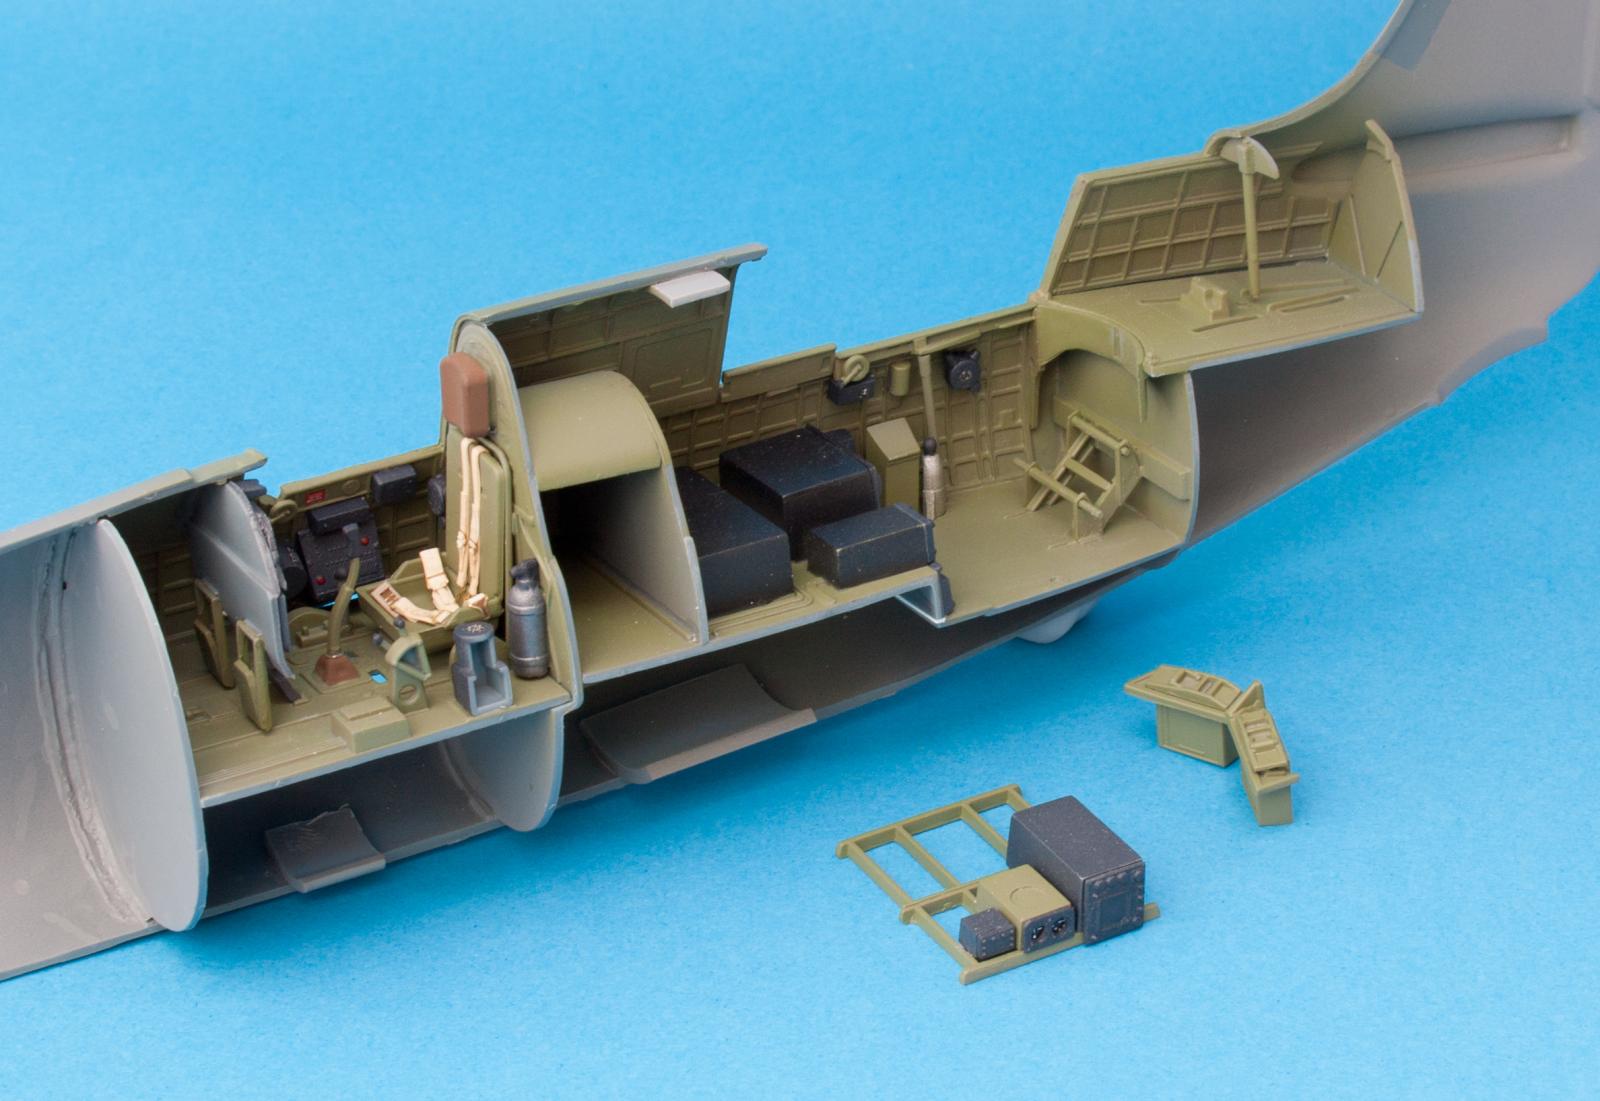
There are a lot of parts to add to the interior and the extensive glazing means that much of the work can be seen, so time and effort spent at this stage is well rewarded. There is a cockpit upgrade set available, but the standard kit represents this area quite well anyway. One or two points of note begin with the instrument panel. This is a transparent moulding with a grey plastic backing. The dials are represented on a decal that is to be put on the backing with the transparent panel put on top. This looked unlikely to work very well. In fact, the glass covers on the panel were reamed out with a small drill and needle file. The whole panel was then thinned down on a sanding sheet to reduce the depth of the instrument recesses, and the panel then painted as normal. The decal with the dial detail was separated into smaller subjects and these were added in stages to the backing panel, ensuring correct alignment by dry fitting of the front panel every time. The front and rear panels were then attached, with the glass instrument faces being represented with a touch of Humbrol Clearfix. This procedure was also used on some of the smaller panels that feature in the aft cockpit.
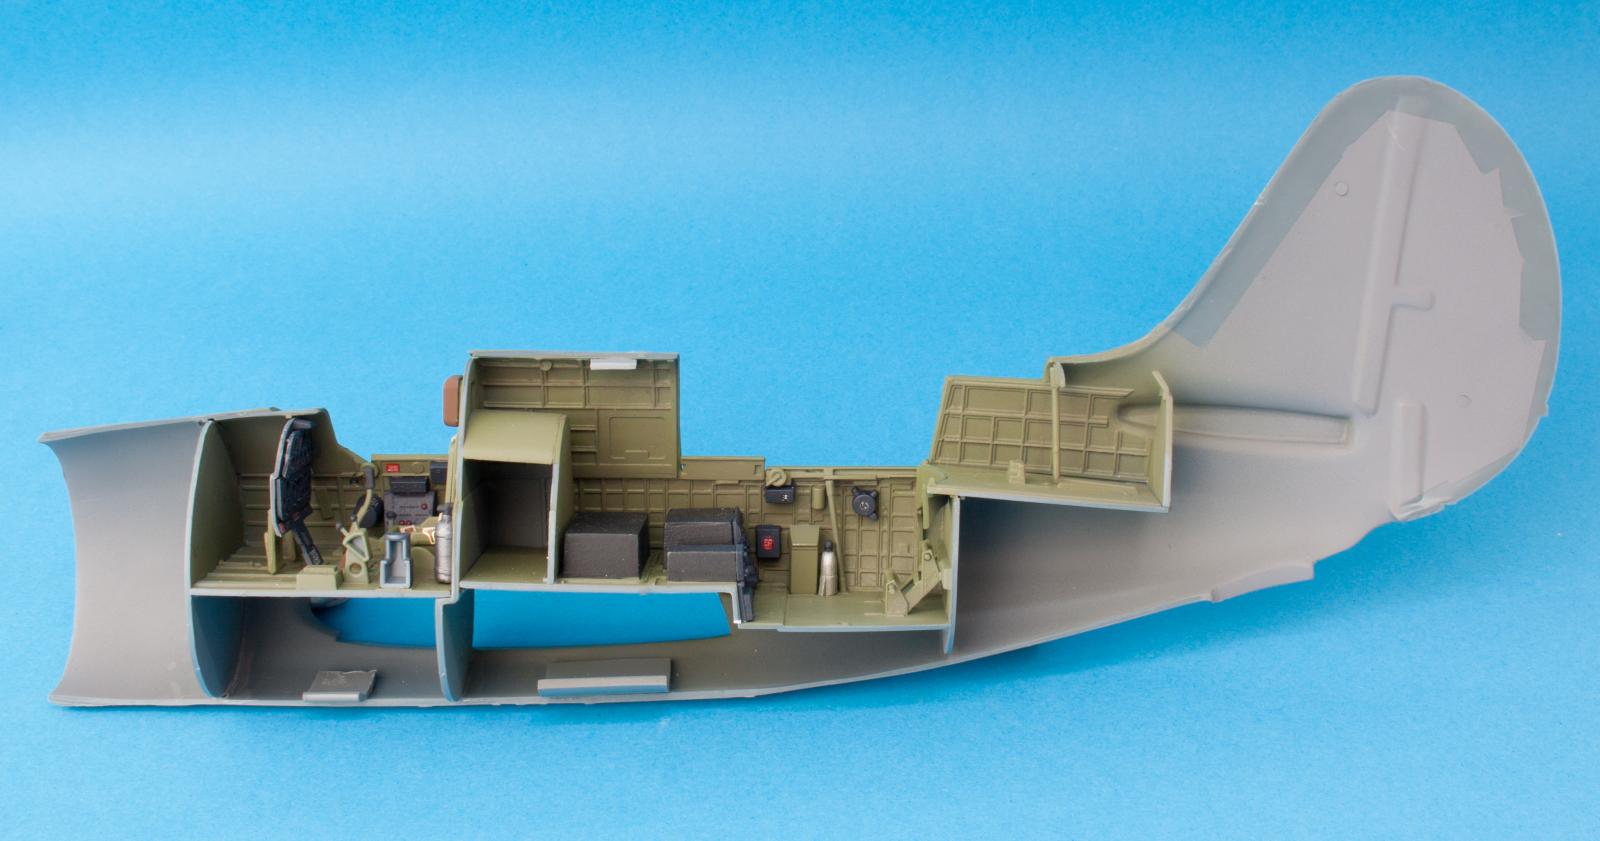
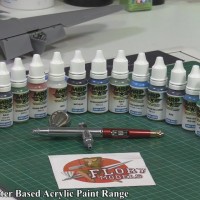
Once the various bulkheads were in place and the individual cockpit components identified and cleaned up, everything was given a coat of Halfords Grey Plastic Primer. For the FS 34151 Interior Green, MRP's 131 was used. This is an acrylic lacquer that can be airbrushed straight from the bottle. It went on very well, with a good even coverage and adhesion. It took a little longer to dry than standard acrylics, but gave a very resilient finish. The only downside was the heavy vapour given off whilst spraying it, requiring good ventilation and the wearing of a mask.
Interior issues
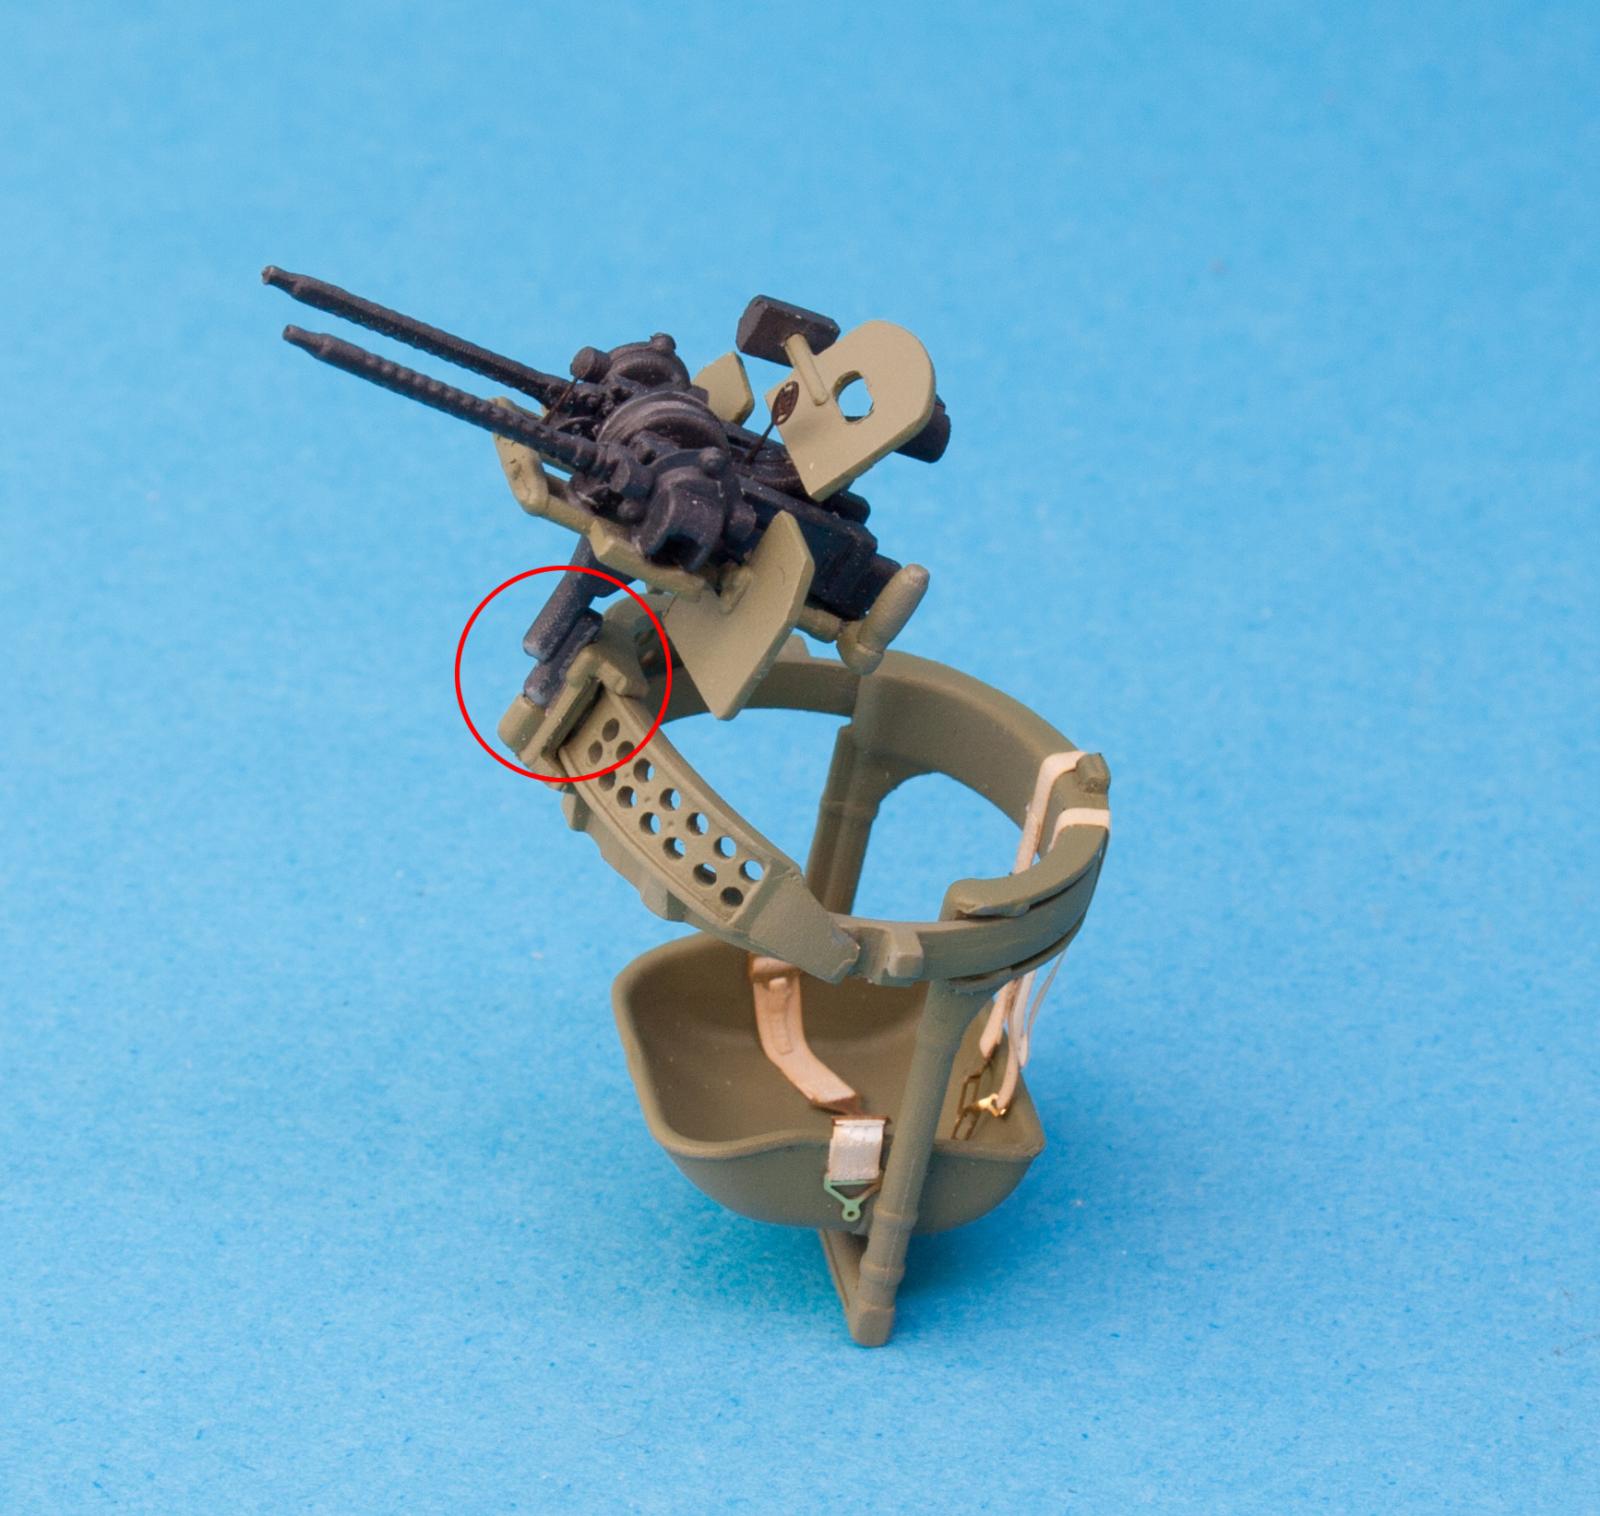
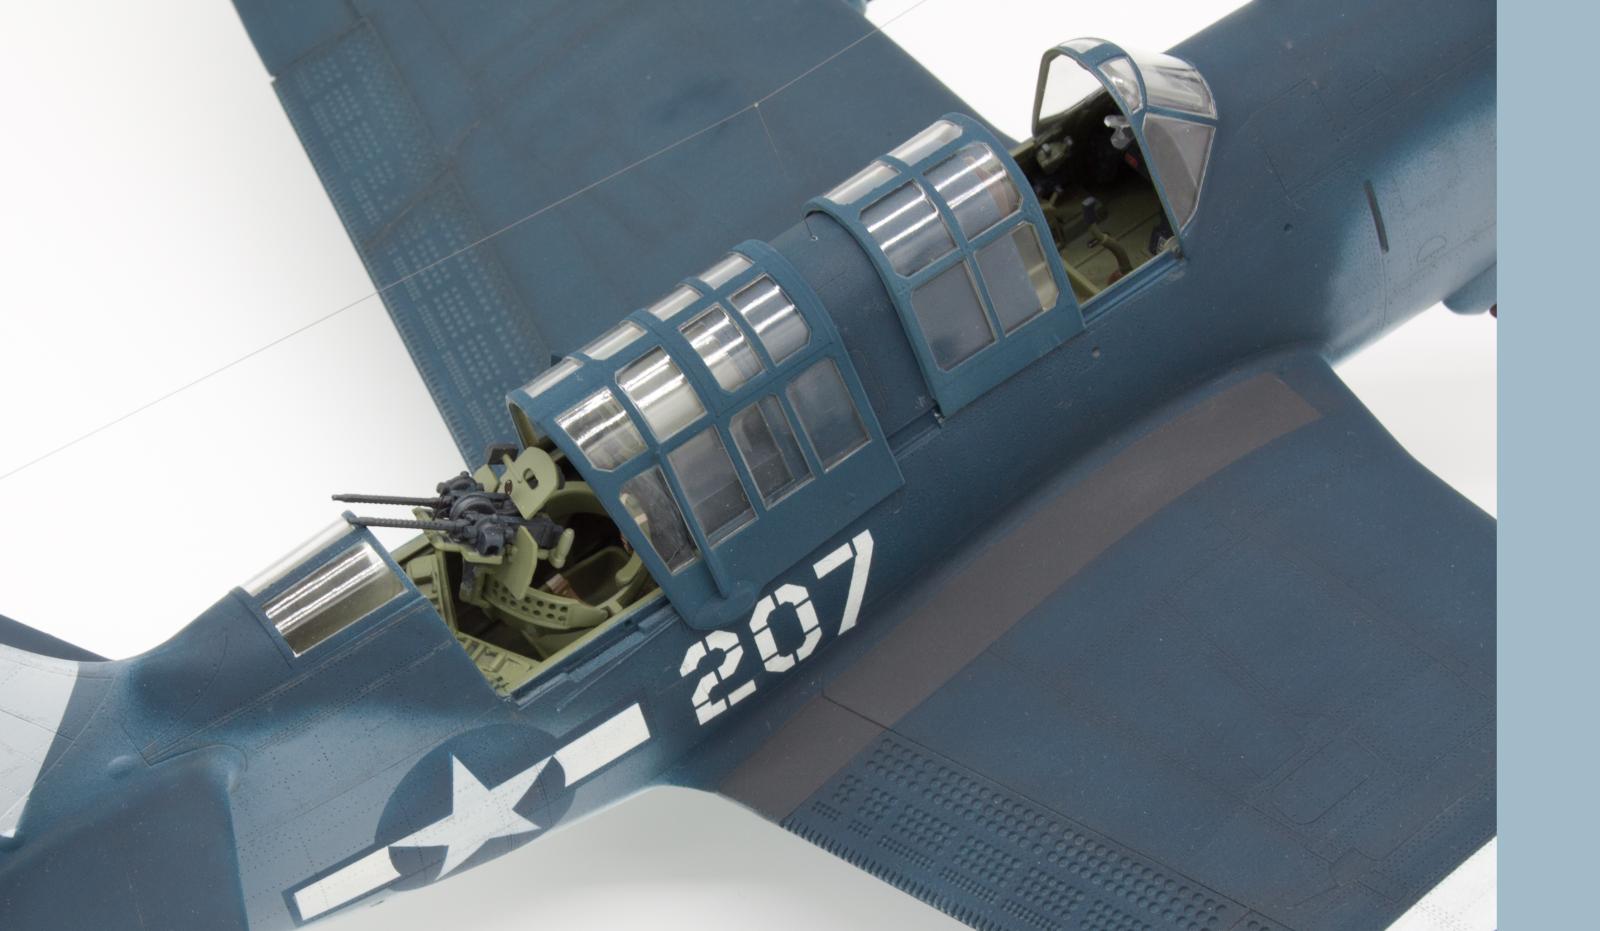
The instructions have the rear gunners seat, guns and mounting ring assembled and attached at a much later stage but it is far better to do the assembling now. This is because the rear cockpit is very crowded with various bits of equipment and unless it is all positioned carefully, there won't be room for the seat and guns to be inserted, so constant checking is necessary. As it was, the aft end of the bracket holding the ammo boxes (G16) needed shortening by about 3mm to allow sufficient clearance for the ring to be easily inserted. The gun rail (F23) has the distinctive lightening holes moulded solid, but their position was clearly enough indicated to make reaming them out quite easy and that certainly improved the finished appearance. An important modification is required to the part that mounts the guns to the rail (D52). If this is fitted as per the instructions, the guns will sit too high in the cockpit. The part has two vertical rods moulded next to each other, with the rear one longer than the front. The rear one needs to be cut away. The remaining shorter one is attached to D60 and then to the gun ring. This makes the guns sit lower and largely solves the problem. There is a PE gunsight provided but the ends of the barrels will need reaming out to improve accuracy further.
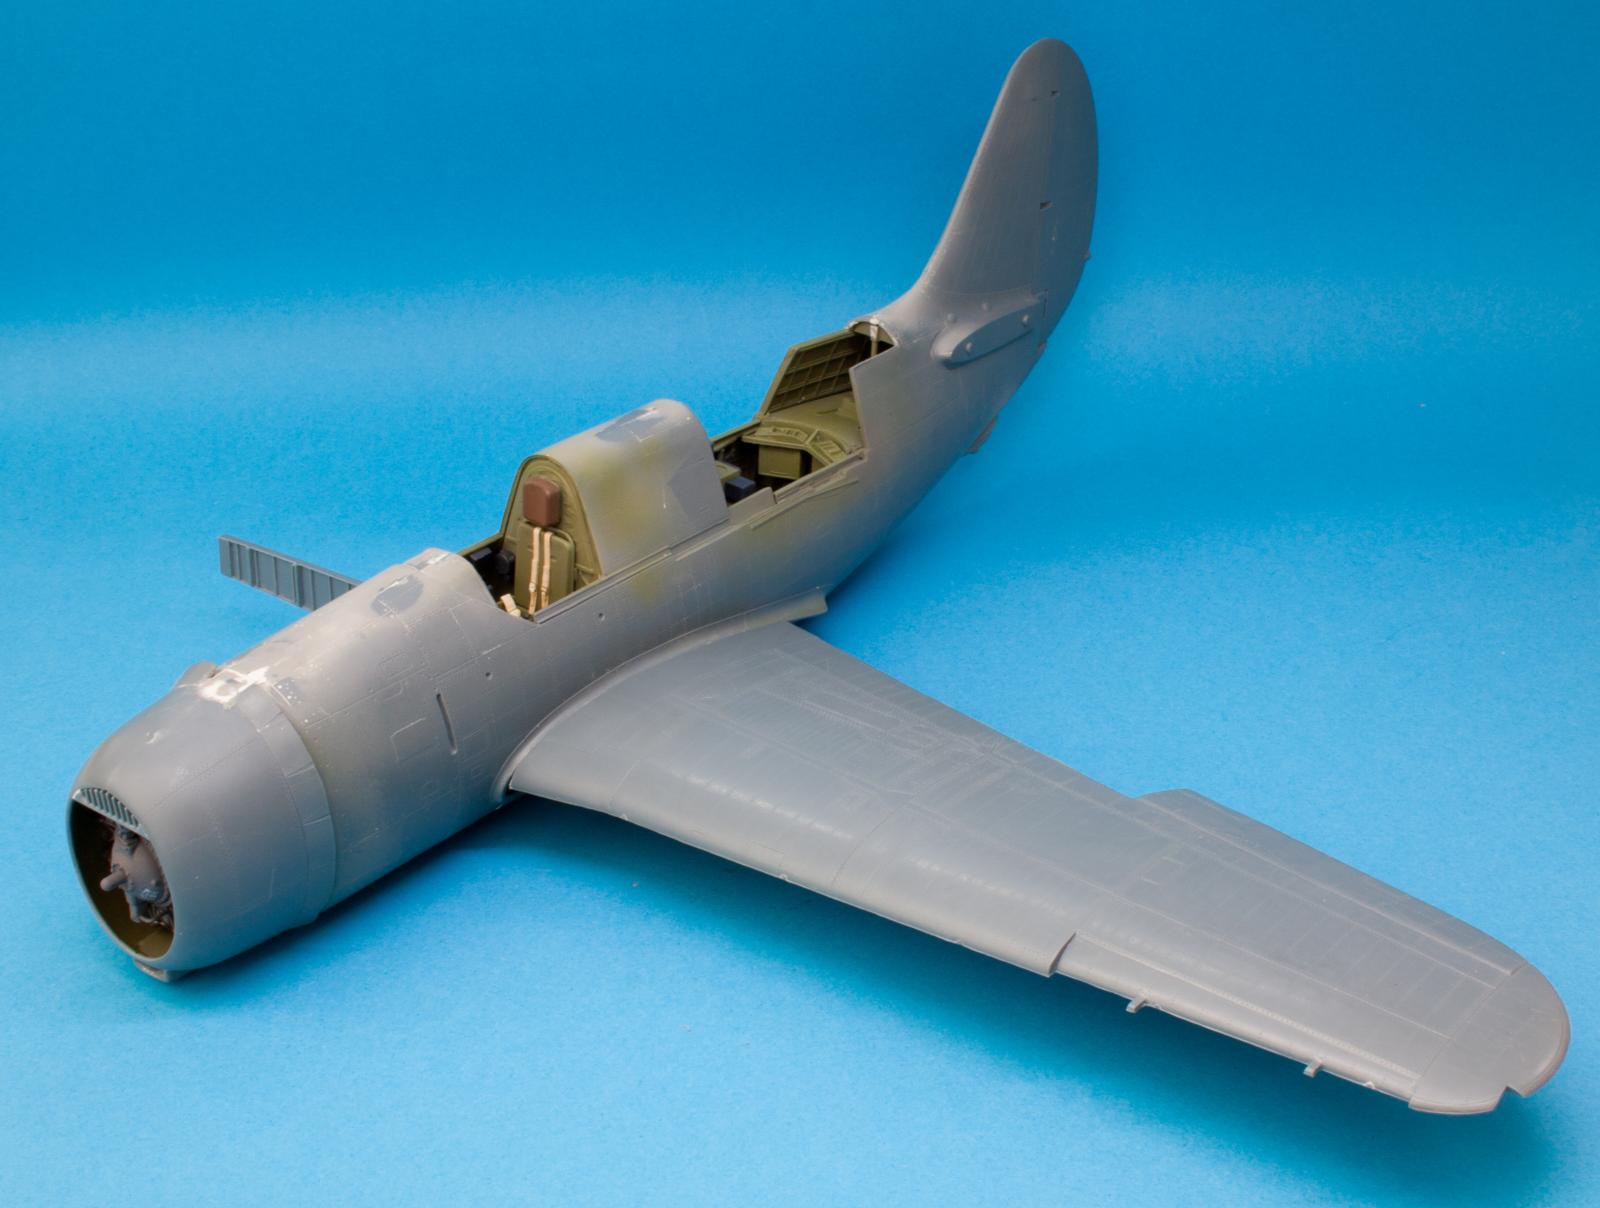
The fuselage halves were then mated together. The fit was generally good in terms of the absence of any gaps but alignment was not perfect and the join lines were very prominent, requiring a lot of attention to get rid of without losing too much surface detail. The wing spar (part I10) is best added after the halves are assembled, rather than before as the instructions recommend; it is easier to get it properly aligned this way.
Engine trouble.
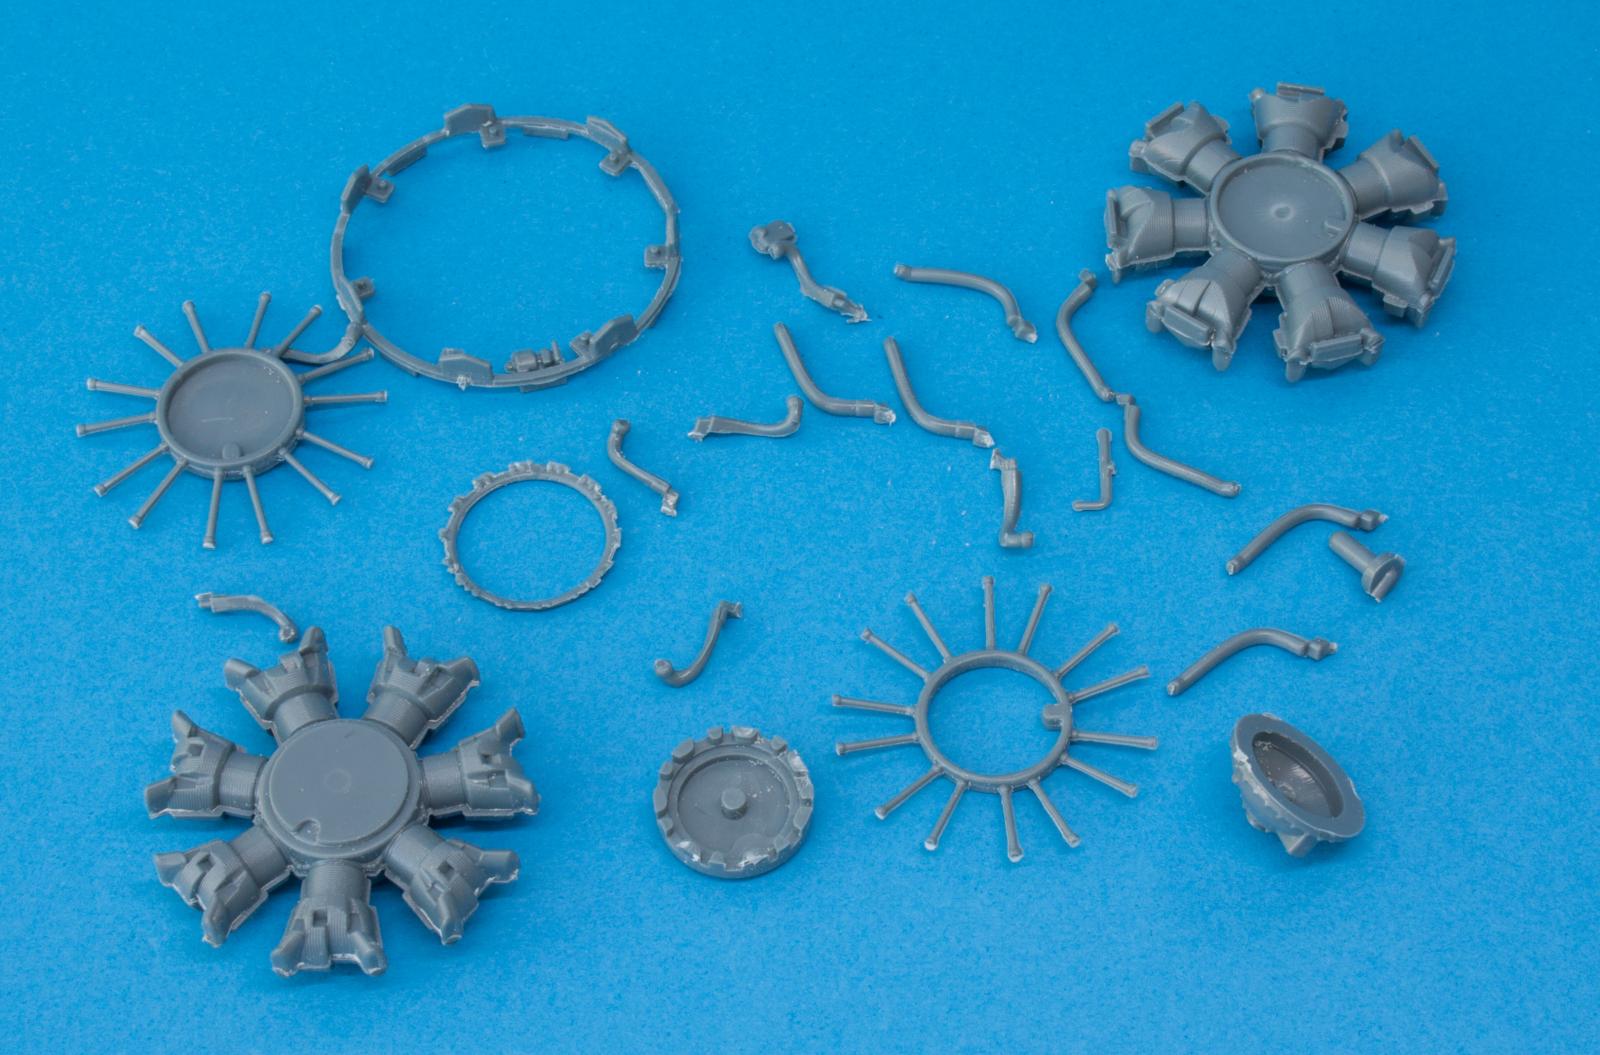
The engine and cowling were completed next. The cowling components were well moulded, nice and thin and capturing the complex shape of the real thing. The prominent join seams needed removing and a touch of filler was required around the edges of the front intake, but the finished item looked good. The cooling gills are moulded in the open position but it would appear from both in-flight and parked photos of the Helldiver that this was often the case anyway, so it wasn’t really a problem. The engine components looked pretty basic at first glance, but once they were cleaned up the level of detail was reasonable.
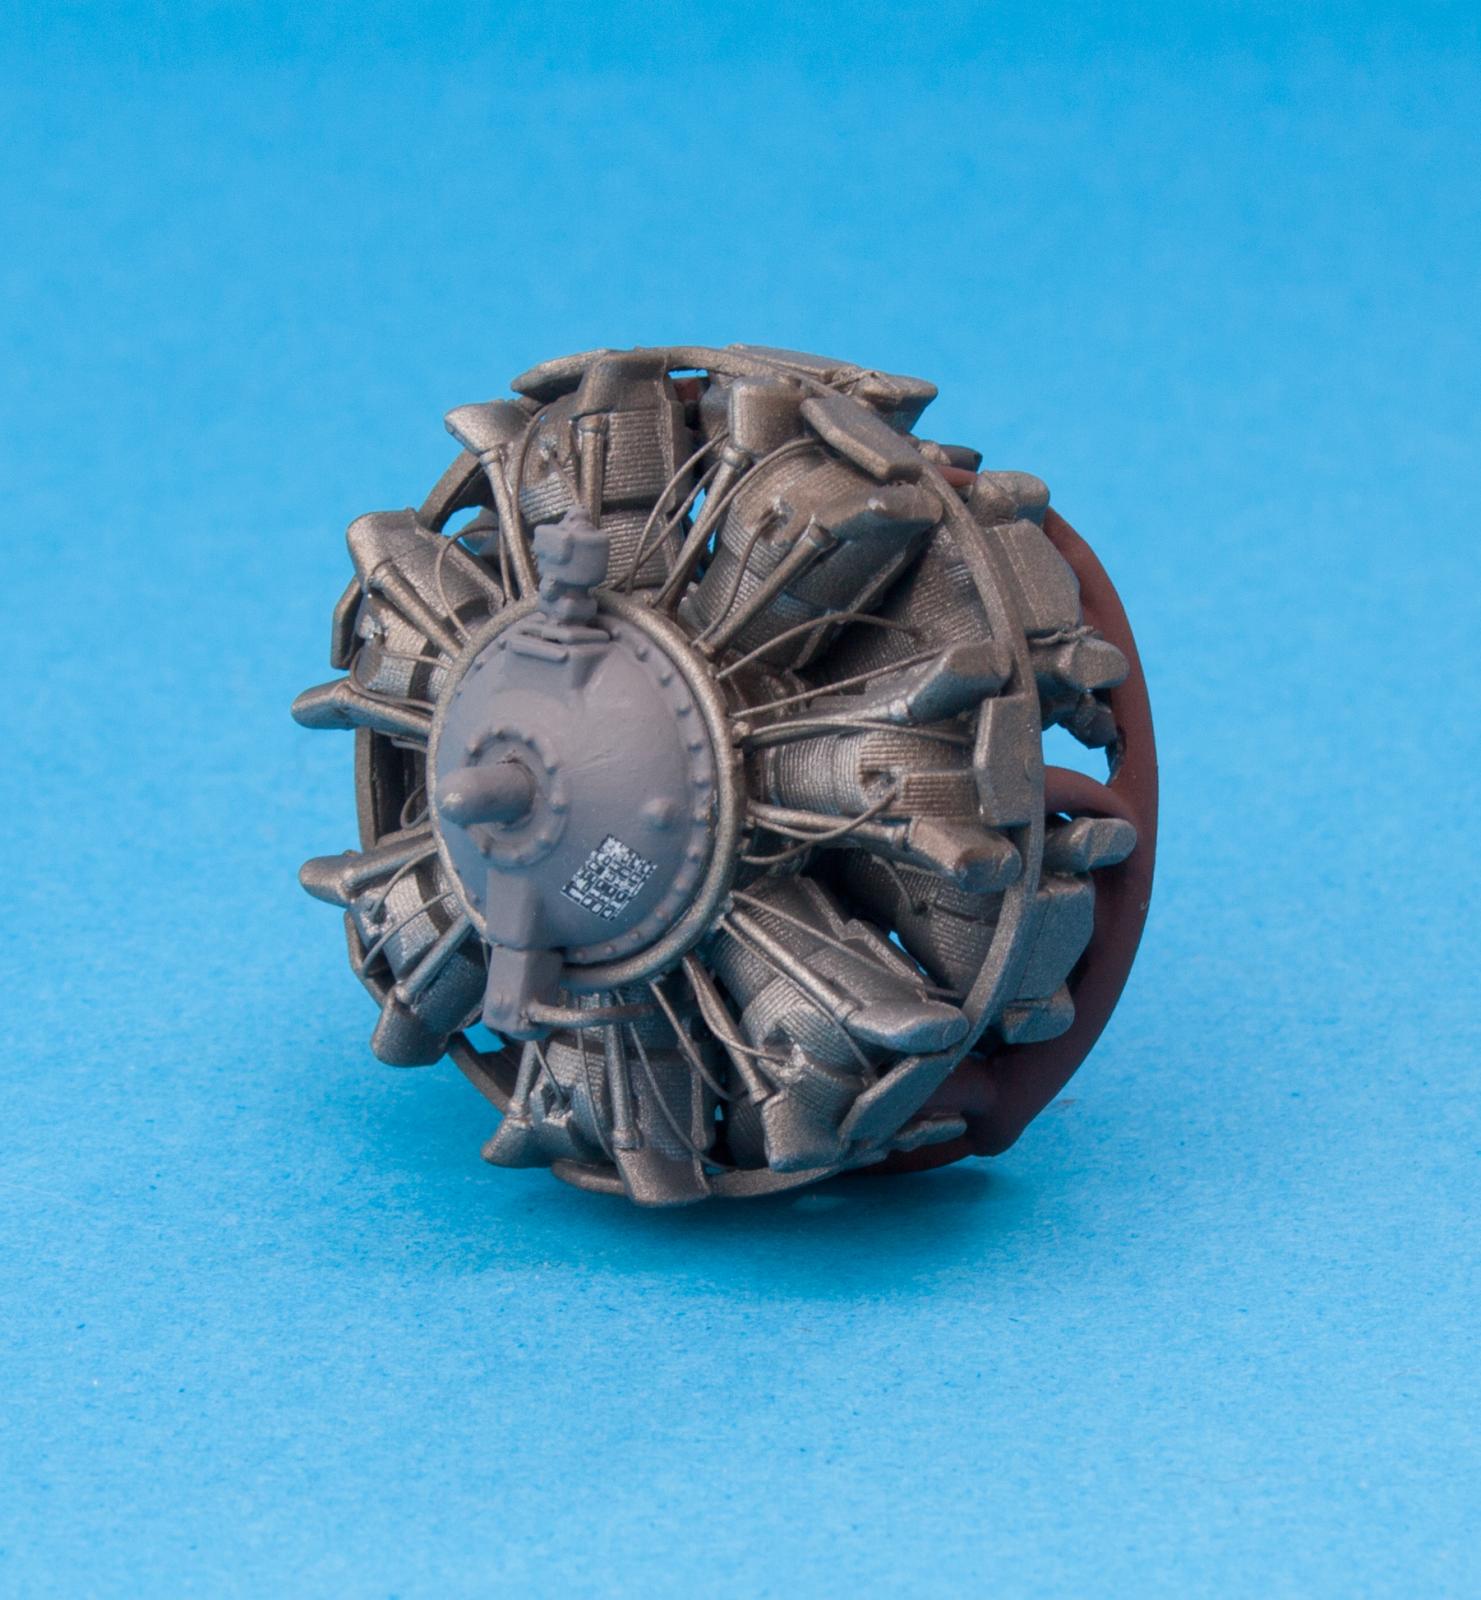
The missing ignition leads were represented with fine strands of round section rubber. The individual strands were first attached to the collector ring (part E7) and then run into pre-drilled holes in the front and rear of each cylinder where the spark plugs would have been. Attaching the leads in the correct firing order is not that difficult as there are plenty of on-line pictures of the real engine to show how they go. The completed engine was attached to the fuselage with no problem, but the cowling has a prominent join line at the top that needed serious filling.
Now, the hardest part…
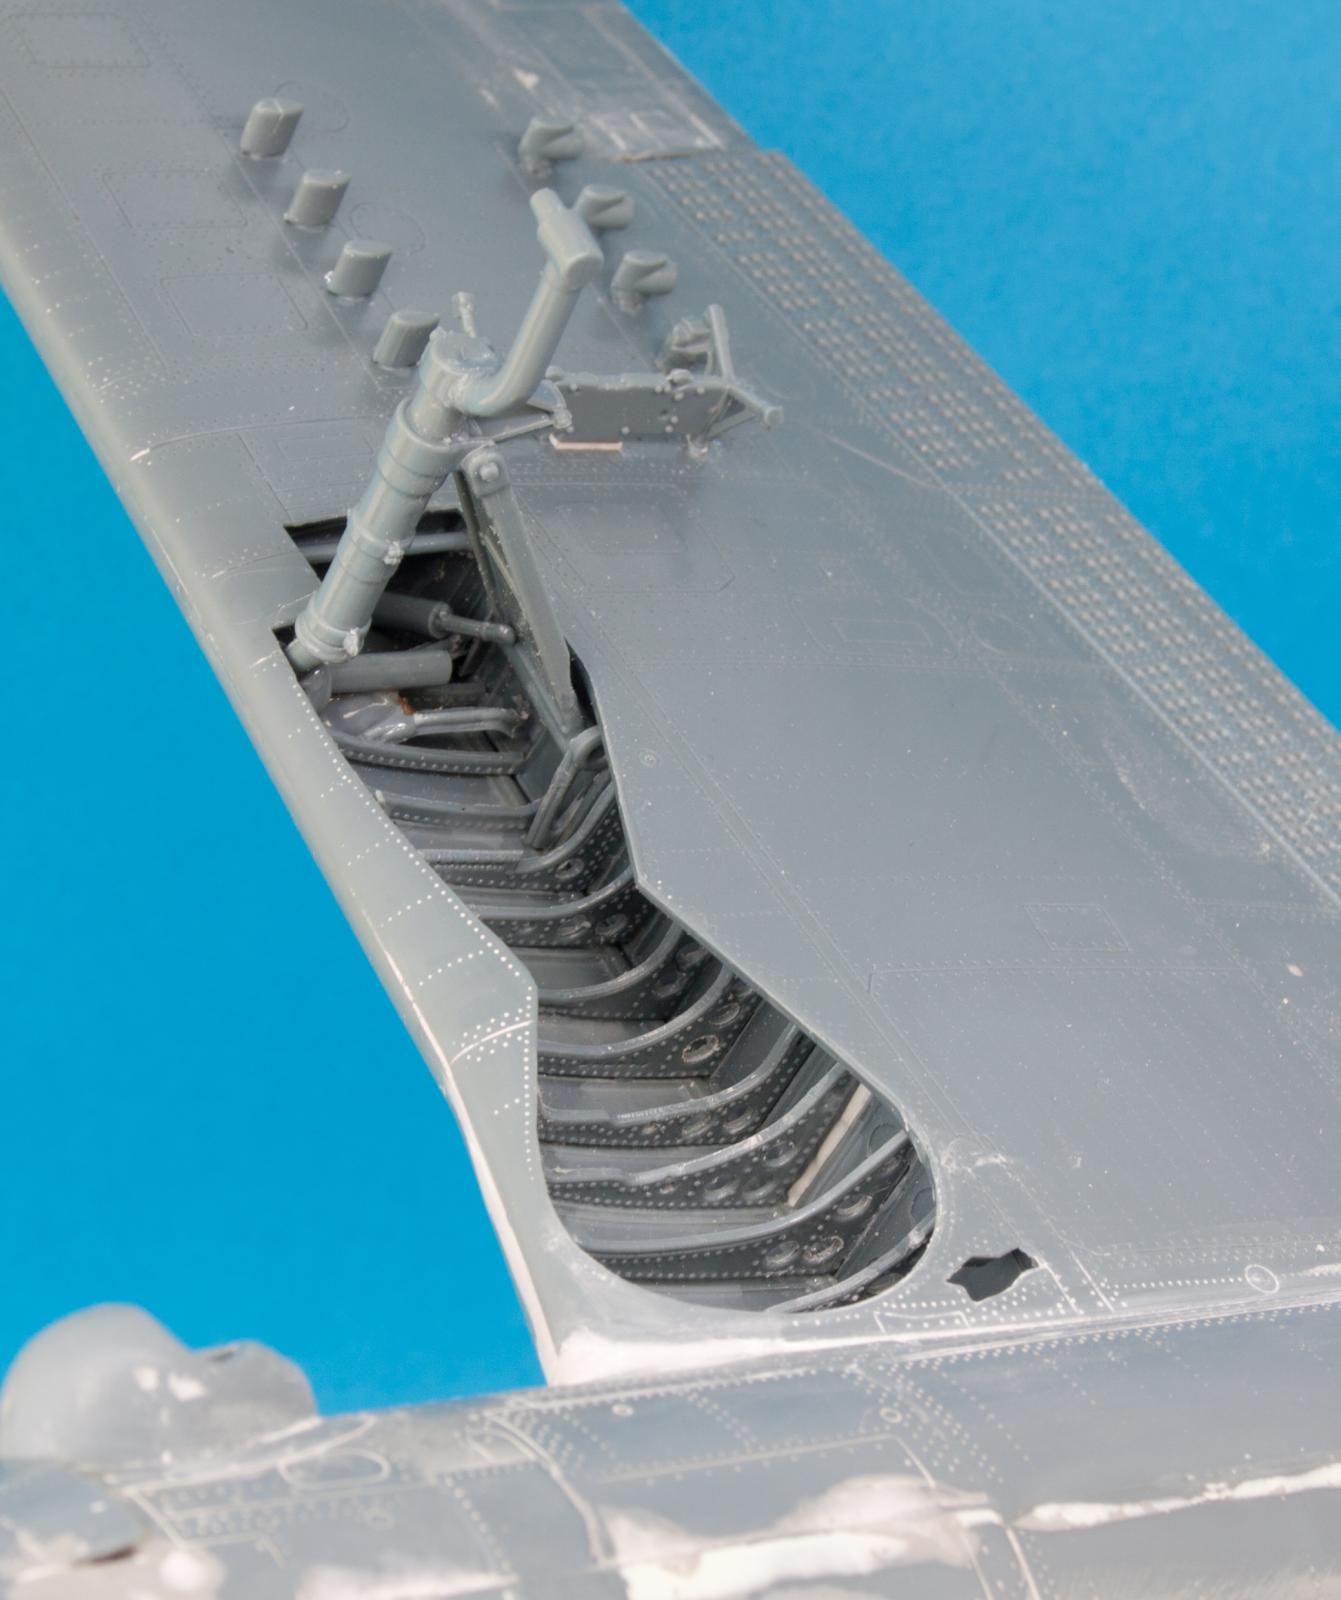
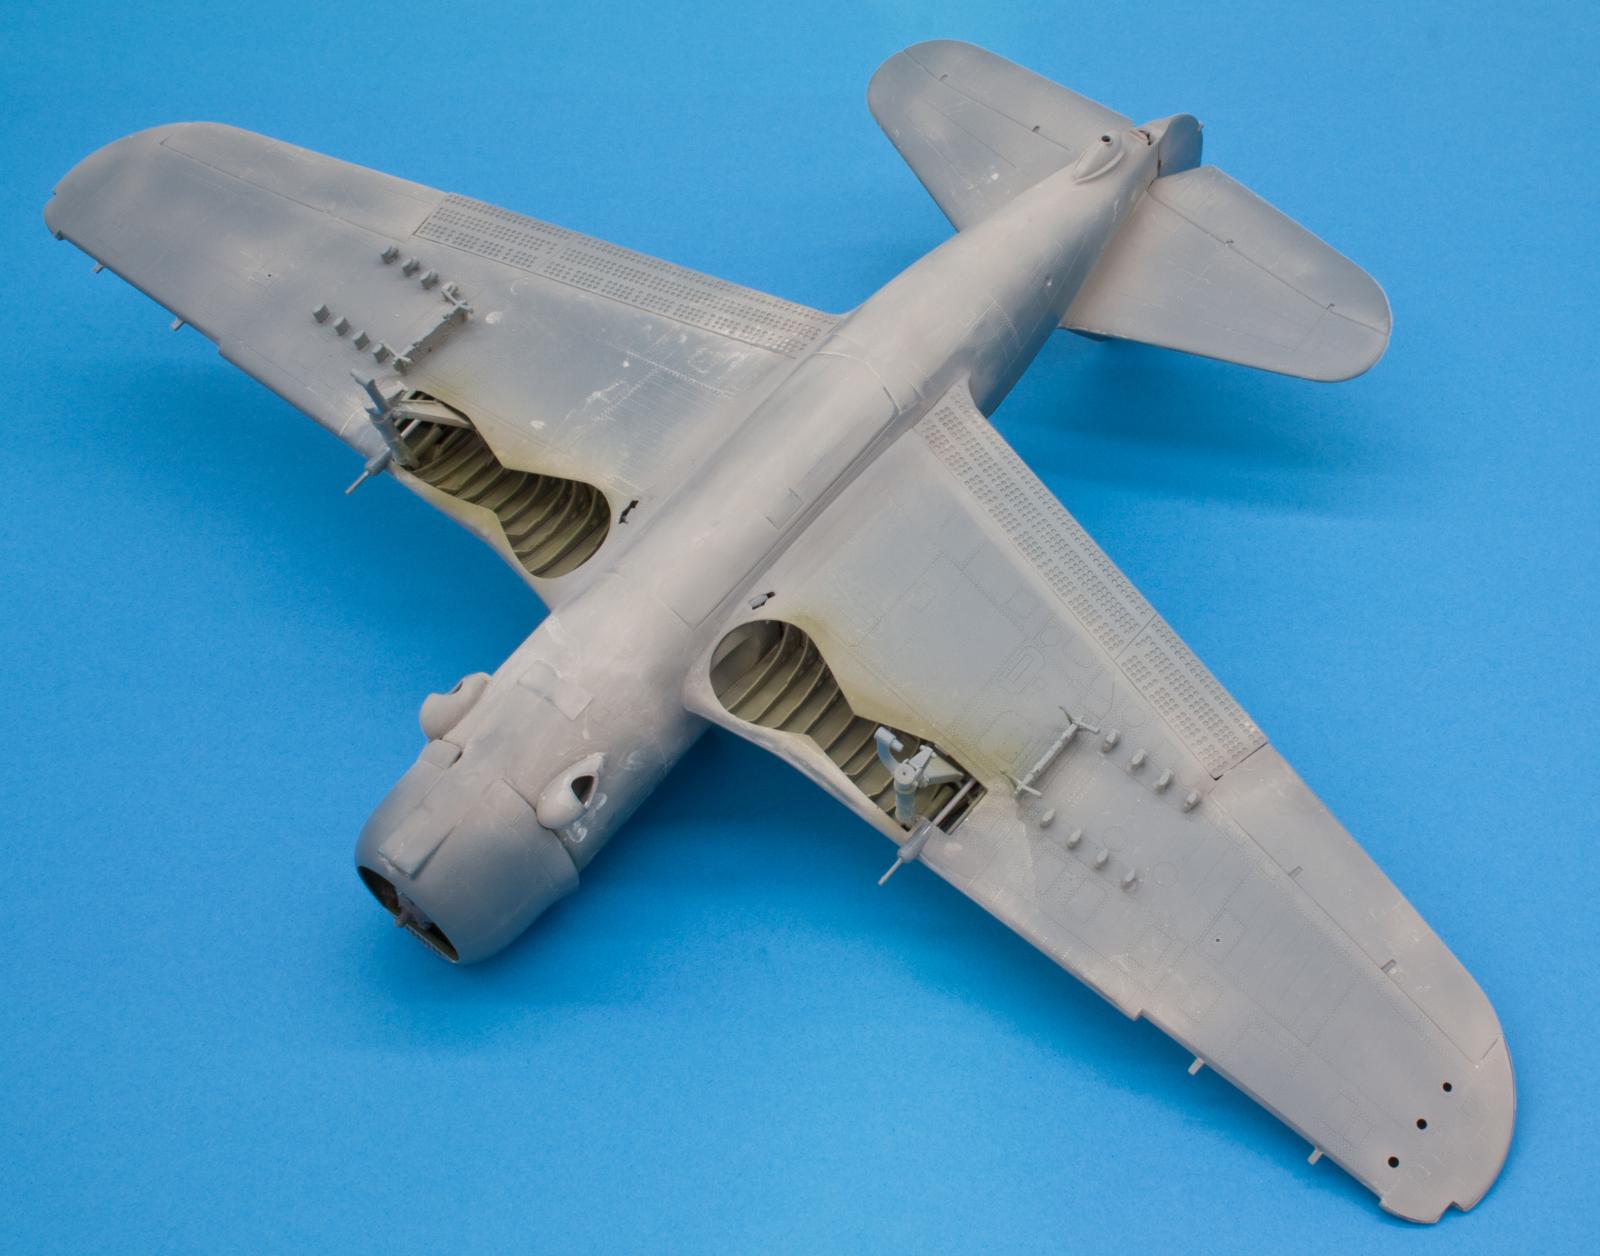
The wing assembly proved the major issue with this kit. The instructed sequence of assembly is rather unusual, with the upper halves being attached to the fuselage first, the ribbing in the undercarriage bays being added next, then finally the lower wing halves attached and the job is done. In theory. In practice, it proved less straightforward. Things started off okay, as the upper wing halves mated well with the fuselage after a bit of gentle reshaping. However, then came the problems. Dry fitting of the lower wing halves showed some alignment issues with the upper halves. Also, fit with the fuselage, although good along most of the chord of the wing, was very poor at the root leading edge. In addition the rib detail in the upper wing wheel bays didn't match up with the corresponding detail on the spar. If one side was lined up correctly, the other side did not. Really, the best solution is to split the spar in its centre and insert a 2mm plasticard strip to lengthen it. The spar in this build was too firmly attached to be easily removed, so a bit of misalignment had to be accepted. The lower wing halves were attached to the upper and the large gap at the leading edge root filled and sanded. The rib detail in the wheel bays should have been added before this was done, but such was the importance of getting the main wing components assembled correctly, that the detail parts were inserted into the bay areas after the wings were built.
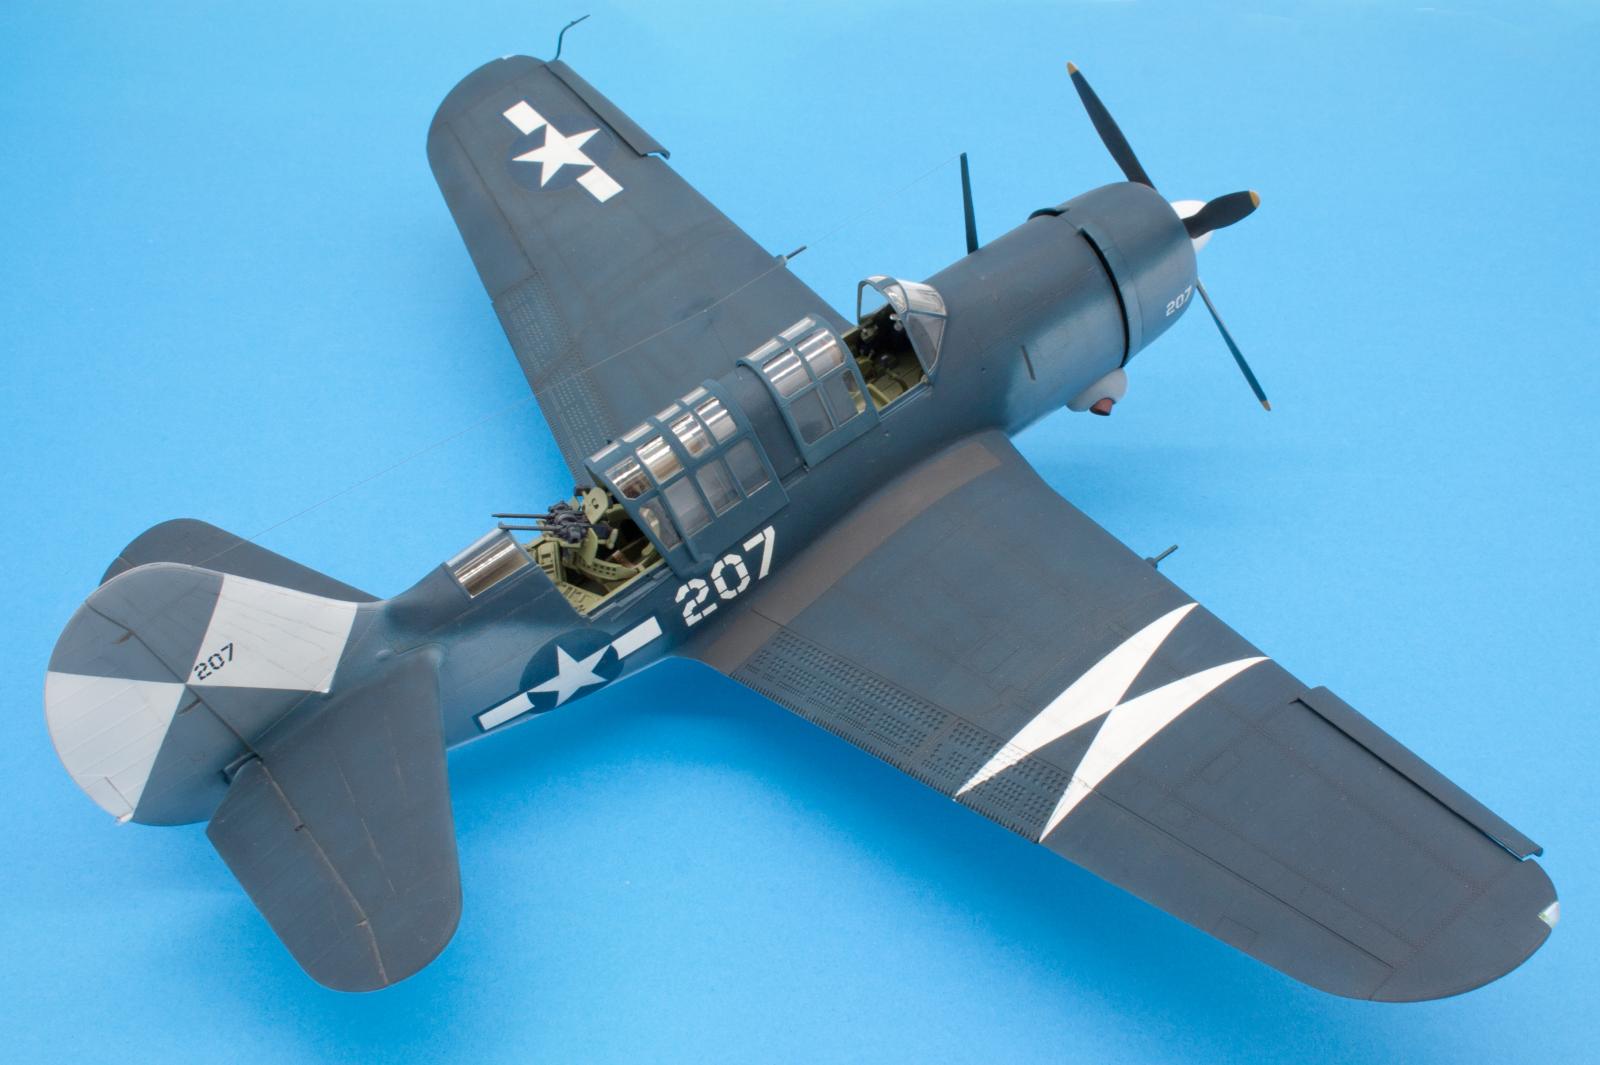
Fourteen ribs need to be added to each bay. This proved a major task because the fit of most of them was awful. A lot of cutting, sanding, reshaping and filling was required and the task seemed almost endless, but the finished area did look quite effective. Then the main undercarriage units were added. This was earlier than indicated by the instructions. It was done because the wheel bays contained no obvious points of attachment for the mainwheel legs and the problem was best sorted now rather than later. This is a very heavy model, and needed a well attached undercarriage. The individual components were identified, and after another long seam-clean session did look acceptable, especially the mainwheel legs. The mainwheels are not very convincing though, and investing in a replacement resin set may be a good idea. Fitting the undercarriage into the wheel bays was difficult, not helped at all by vague instructions and poorly fitting parts. A diagram of the completed unit would have saved a lot of time and effort, because the engineering does actually work, once you've figured out how to do it.
Now things get easier…
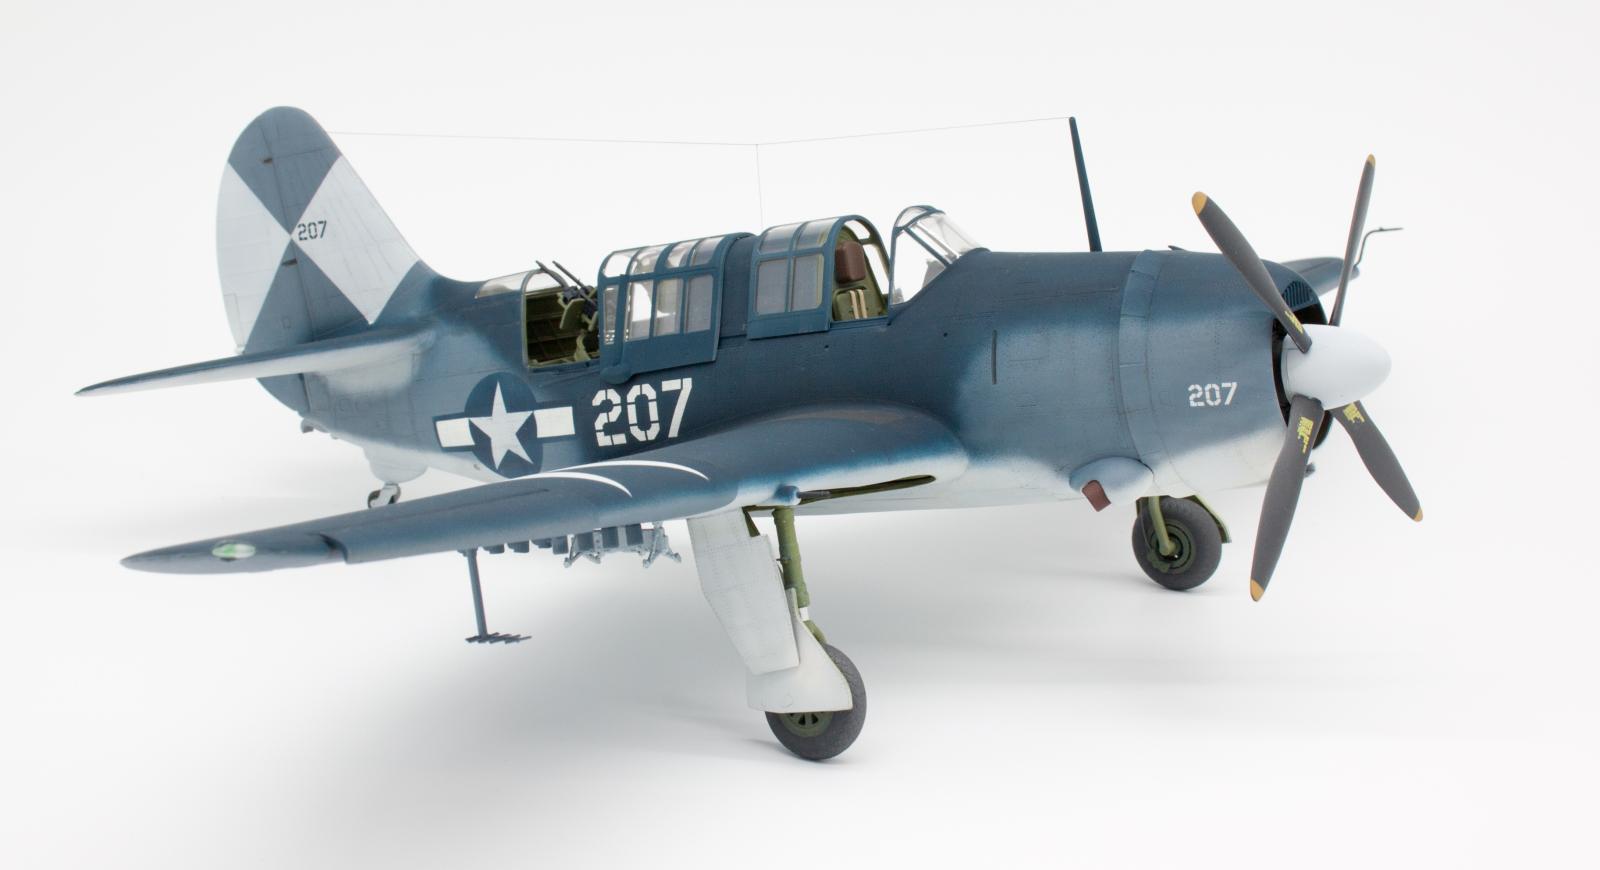
The bomb racks and rocket launching points were added next and as no holes are provided, these all need to drilled individually. The instructions recommend a 1mm drill but 1.5mm gave a better fit. The drilling points are clearly indicated. Then the dive flaps were fitted, and again there were some issues. The complex pattern of perforations on the flaps was a distinctive feature of the SB2C-4, replacing the simpler pattern found on the earlier versions. A PE set is available separately and it was disappointing that these were not included in the standard kit, bearing in mind its high initial cost. The basic plastic parts in the kit are just about adequate, but some trimming and reshaping was necessary to get them to fit, particularly at the wing root. Once this was done, the tailplanes were added and the basic airframe was almost complete.
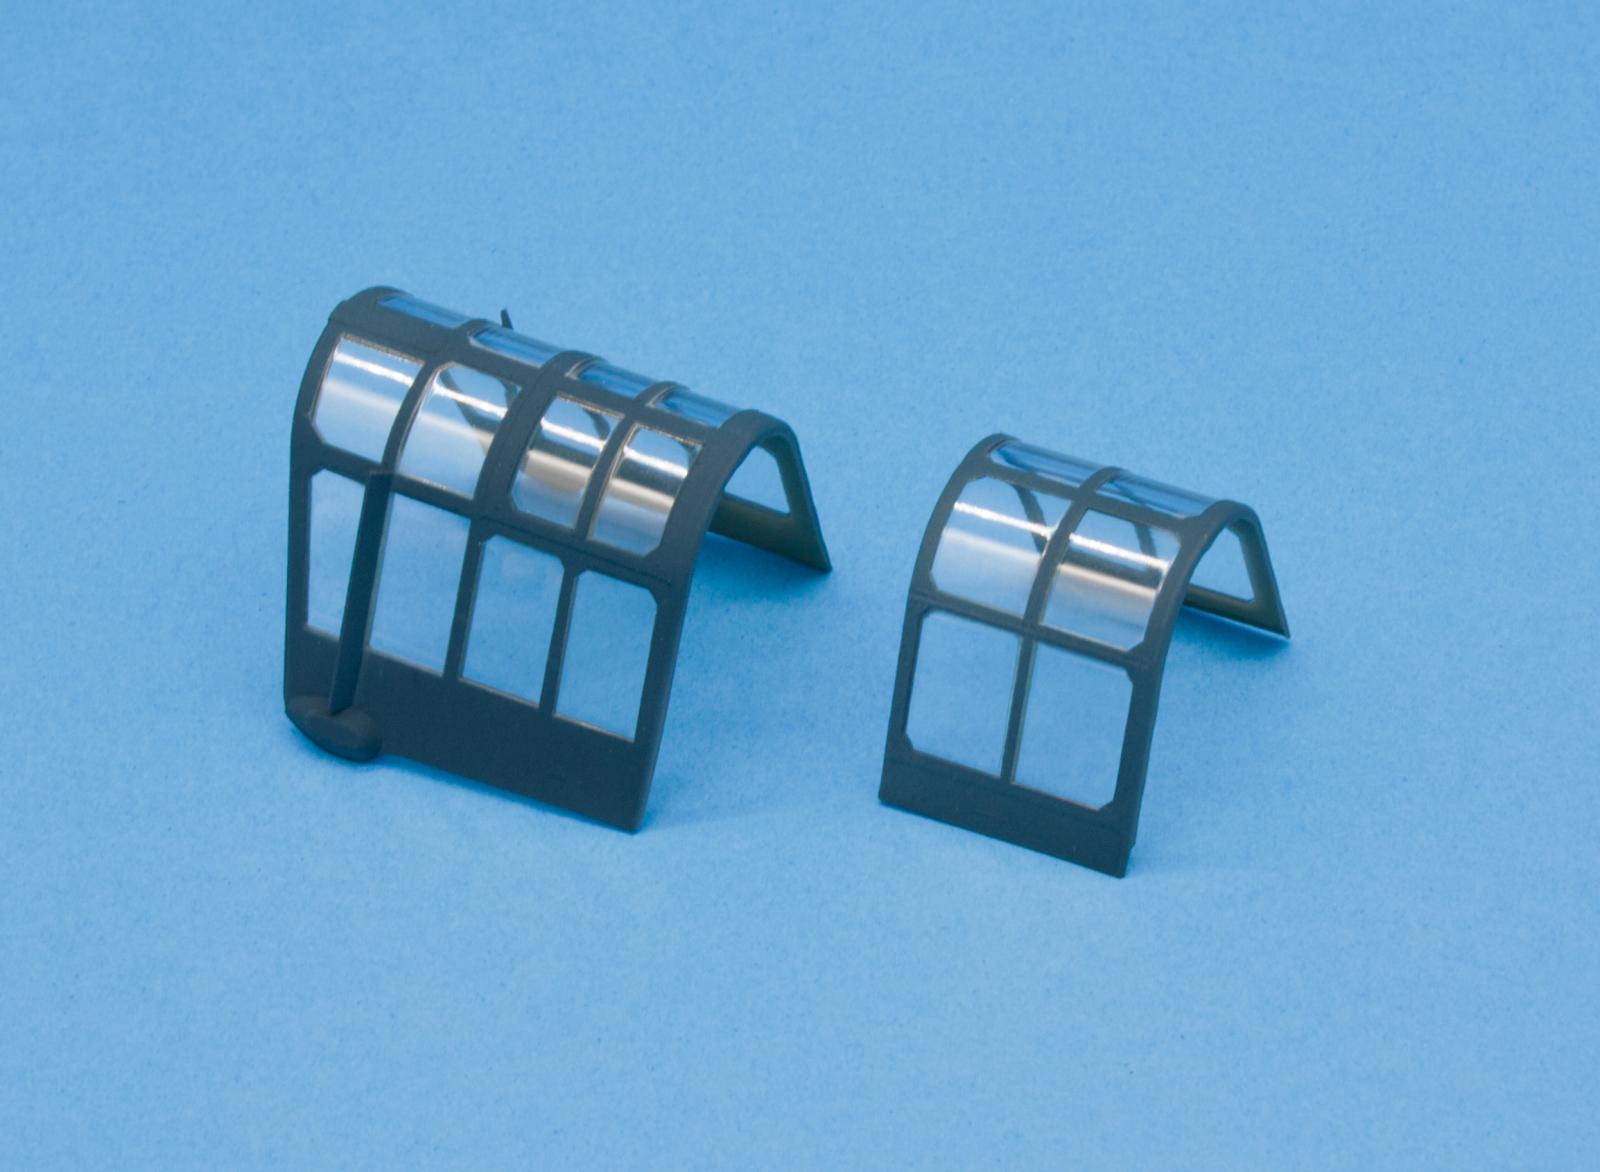
The cockpit transparencies were painted at this stage, as several of them need to be fitted to the fuselage before the main paint scheme is applied. The parts are nicely moulded and very clear. The hard work of masking all those frame lines was greatly eased by the Dead Design Canopy Mask VM32 020. This provides masks for both the inside and outside of each component and worked very well in practice. Another set, UC32 007, provides masks for the wheel wells which also proved most useful.
Painting and markings.
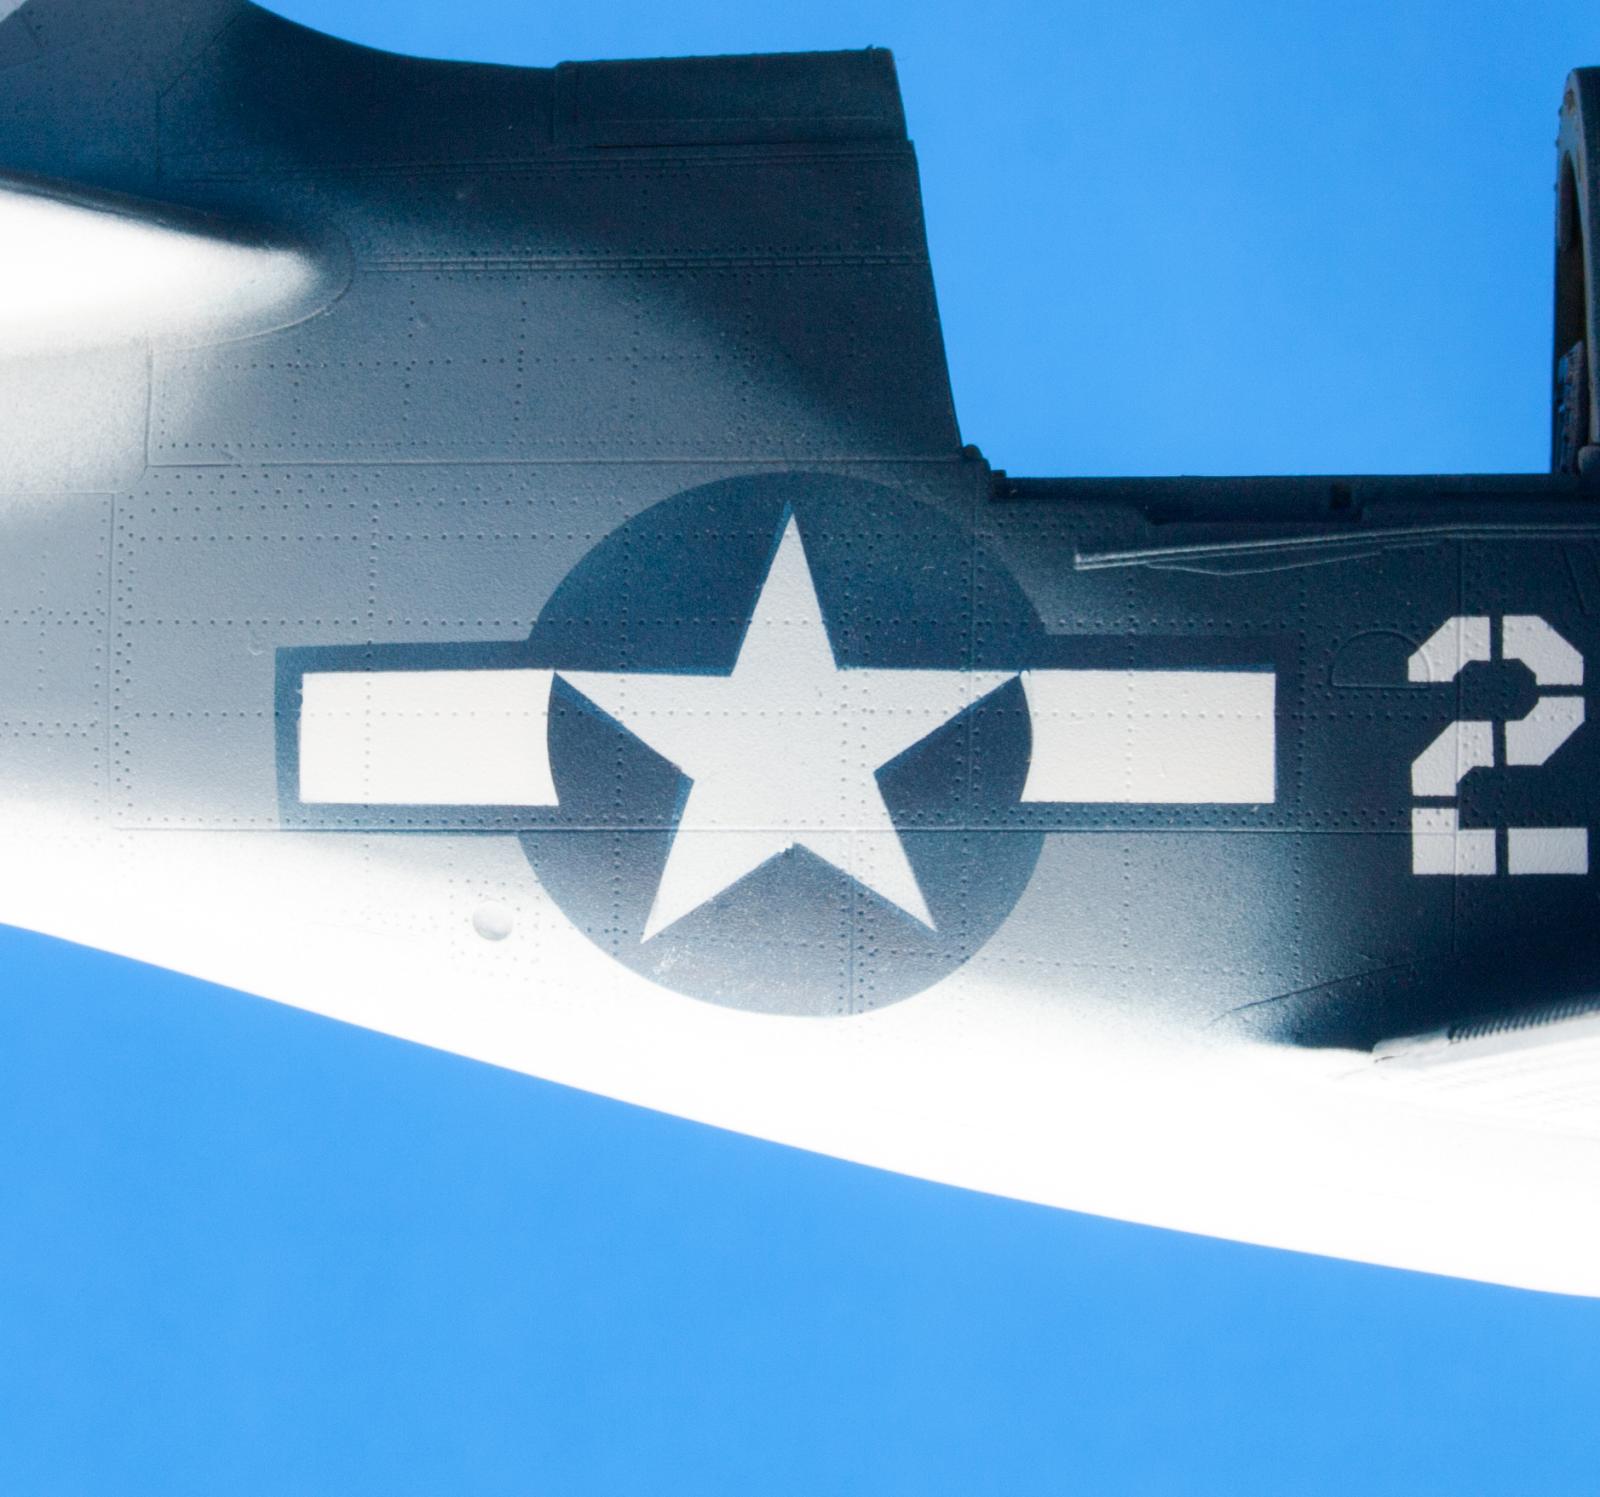
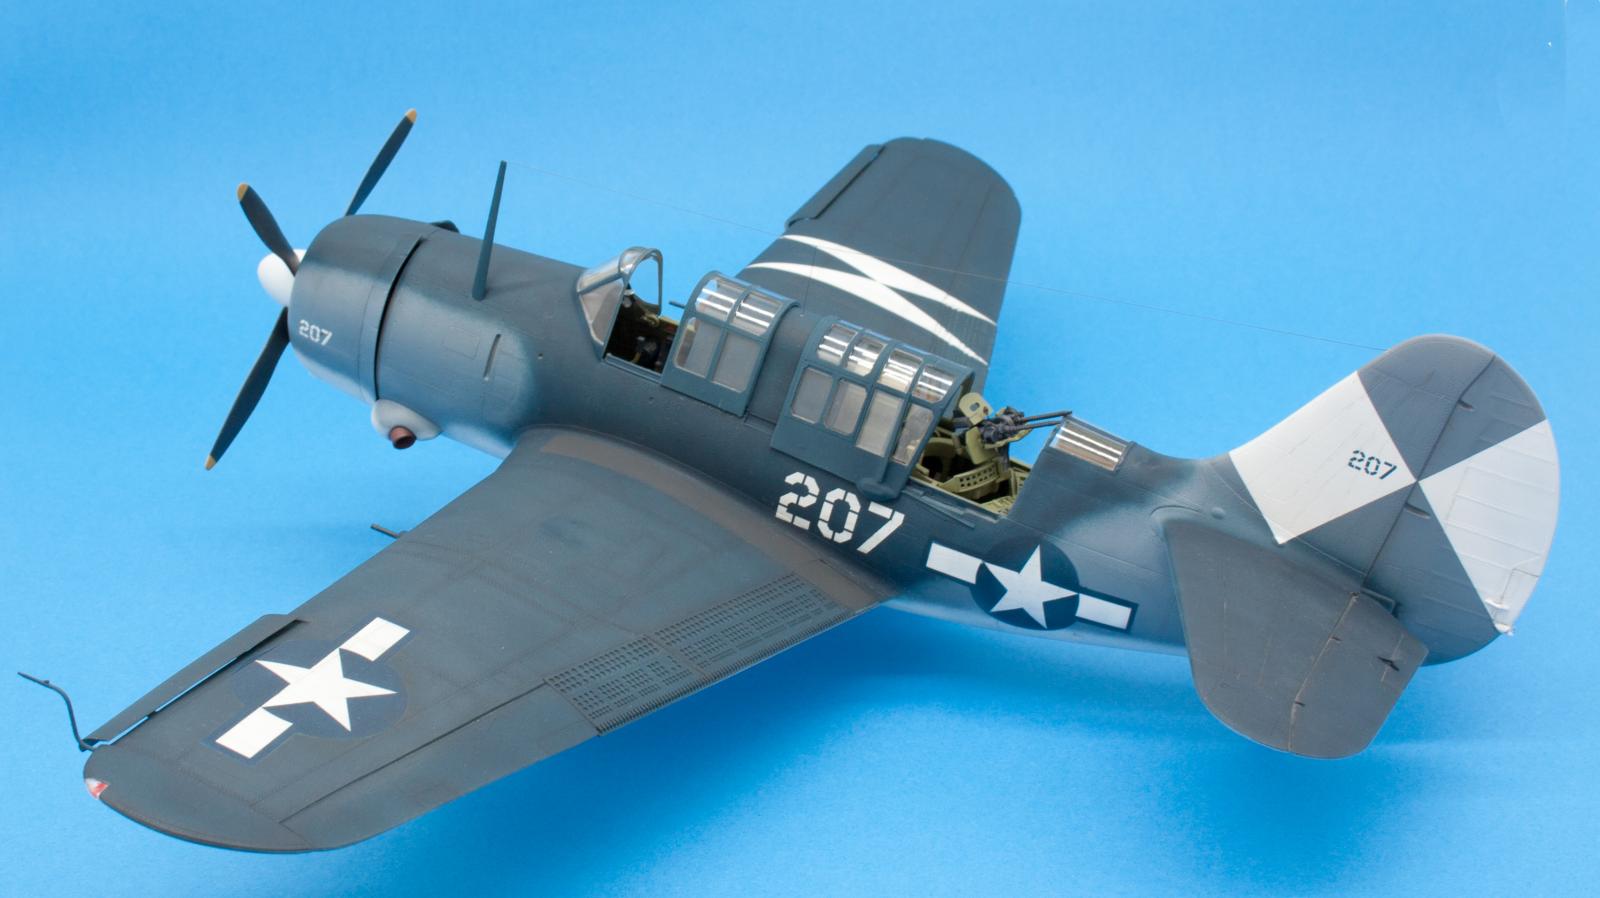
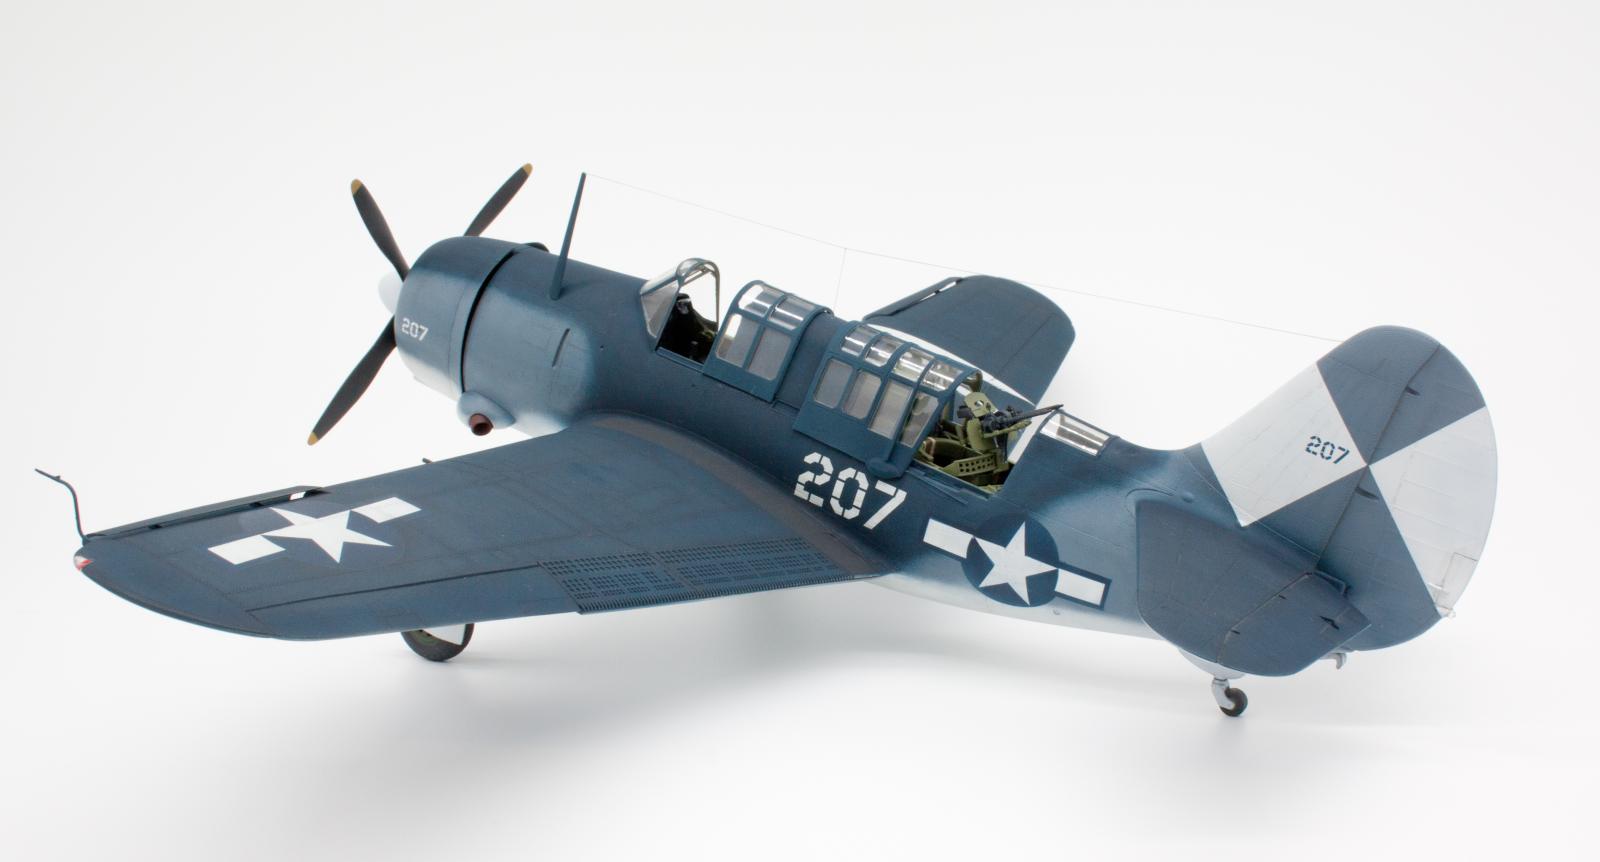
The painting of the model was reasonably straightforward. The kit offers two alternative marking schemes. There is an overall semi-gloss blue machine from VB-12, or an aircraft in the earlier three tone scheme from VB-83. The latter was the one chosen here. The overall coat of grey primer revealed quite a few blemishes to be cleaned up, and once these were sorted out the surfaces were all rubbed down with a soft polishing cloth. Dark grey pre-shading of the panel lines was done in this case, although a similar effect can be achieved by using the Mig weathering washes after the main colours have been applied. Then the Colourcoats ACUS37 was applied to the undersides, ACUS08 Intermediate Blue to the vertical surfaces, and ACUS33 Non-Spectacular Sea blue to the upper surfaces of the fuselage, wings and tailplane. The paints performed well, giving good coverage and no clogging at all. Colourcoats suggest various thinners can be used, particularly their own. However, cellulose thinners were used in this instance and worked fine. A mixture of three parts thinner to two parts paint gave the best results, incidentally.
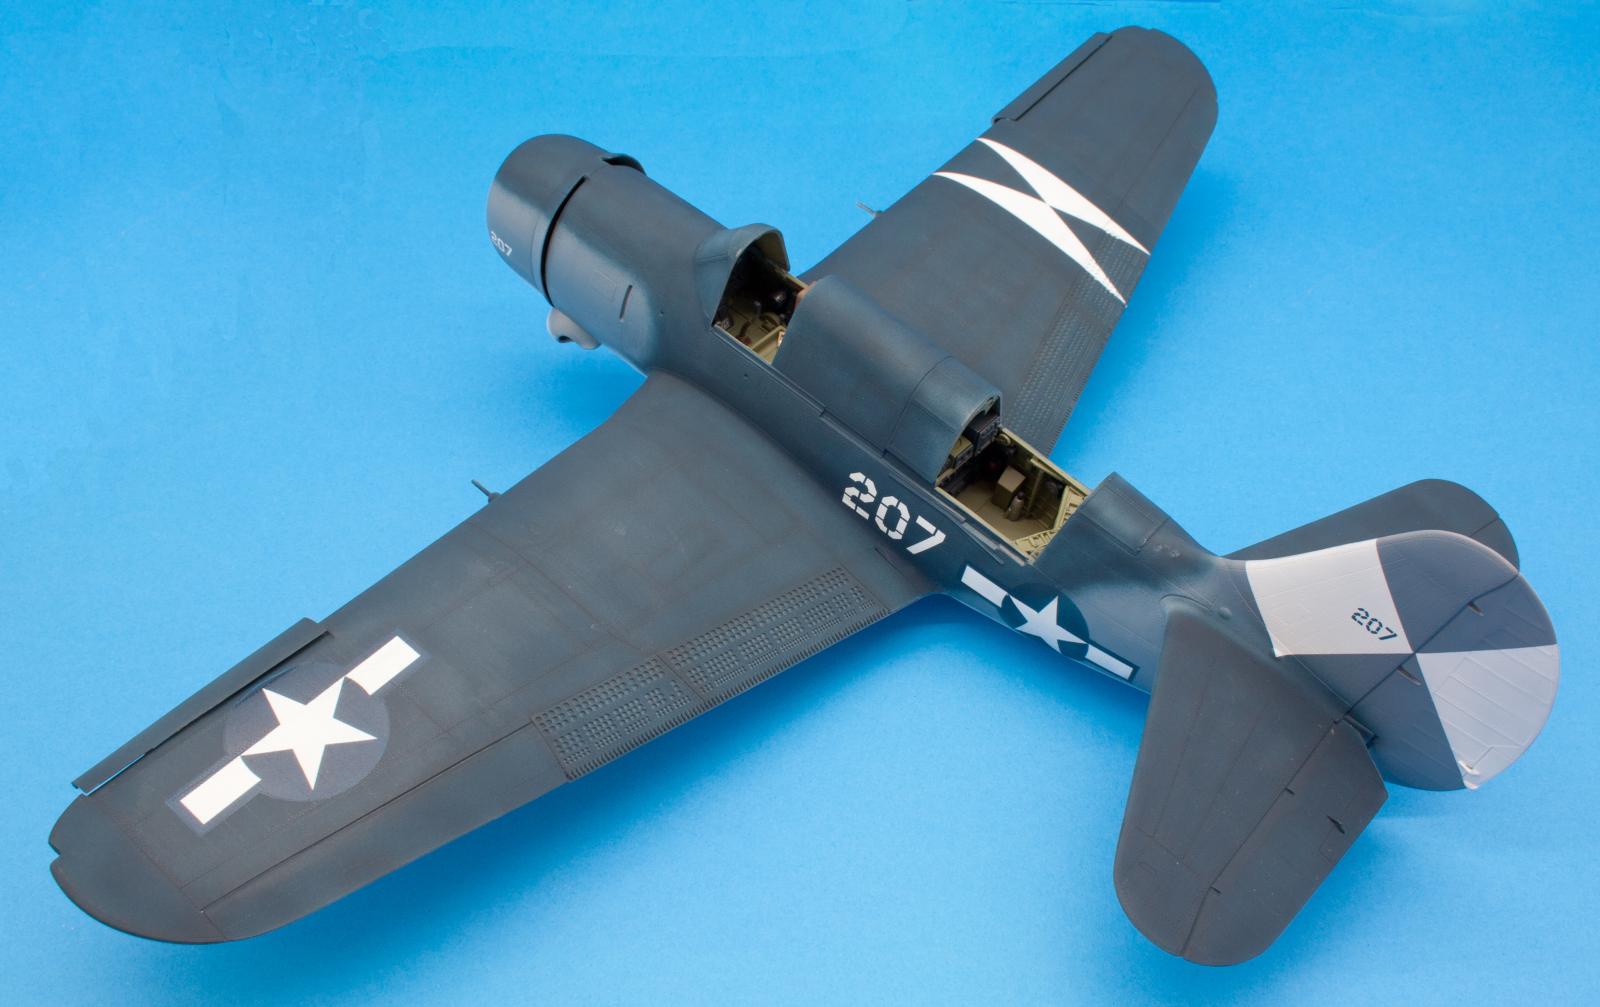
Applying the markings was a time-consuming but rewarding task. Dead Designs sheet VM32 041 provides masks for the national markings and ID numbers. The mask also corrects a stenciling error on the decal sheet and presents the numerals correctly. However, it contains no masks for the white diamond shaped group markings on the starboard wing and the sides of the tailplane. These need some careful measuring and masking to get right, and were done before the numerals and ‘stars and bars’ were done. The numerals were done next. The masks were very good and worked well, but care was taken to extend the masked area beyond the stencils to guard against any overspray. Finally, it was time for the national markings, beginning with the ones on the port upper and starboard lower wings. These also went on well, with the white areas being sprayed first and the Insignia Blue (Colourcoats ACUS39) applied last. It was more difficult to paint the fuselage markings, as the mask is easily distorted by the curvature of the fuselage, but it worked in the end.
The decal sheet provides extensive data stencils but these can almost all be omitted from the variant modelled here, as they were invariably painted over in service. Not so with the later overall semi-gloss blue variants, where the stencilling clearly remained, so quite a few hours of careful positioning would be required for anyone choosing this variant.
And finally…
Final assembly was reasonably straightforward, but care was needed when adding the undercarriage doors. Photo-referencing is essential to check their correct alignment. The propeller and main transparencies went on fine. The wing tip lights need some pre-colouring before they are fitted. A 1.5mm hole was drilled inside each one where the paint was added to give the impression of a coloured bulb. The trickiest job appeared to be the installation the guns and the gunners seat, but in practice it proved quite straightforward. A final overall coat of Johnson Klear mixed 50/50 with distilled water was applied and the model was done.
So at last we have a 1/32 representation of ‘The Beast’ and thanks are due to Infinity for producing it. However, it’s not a kit for everyone. Completing it requires a lot of experience, a lot of time, and considerable love for the subject aircraft. A deficiency in any one of these areas will most likely result in frustration and an uncompleted project. On the other hand, the very fact that the kit is such a challenge will make it attractive to modelers wishing to show off their skills, and a well completed model will get a lot of interest.
--- pic23 not found ---


Great build & finish. Super progress photos with detailed comments. All good.
Thanks Bob.
Much appreciated!
Great looking build, and fantastic article.
Hi Mark
Many thanks for that.
It took me four attempts to get it submitted successfully, but at least that means the next one should be easier.
A real triumph of talent and skill over plastic, and a great result.
There ya go. Great job beating this one into submission, and a very good article.
Hi Bill
Thanks you!
'Beating into submission' is exactly what it felt like.
Best regards
Peter F
Awesome result on a very challenging kit, Peter!
Congratulations!
Thanks Spiros
Hopefully I'll be sending in something else before too long.
Wow, I'm speechless, Peter @fearonntlworld-com
What an amazing result and thanks a lot for this great write up.
Well done.
Many thanks John
The build was a bit of an ordeal, but I was left feeling at the end that it was just about worthwhile.
Best regards
Peter F
Good article with a beginning, middle and end. A logical progression with photos
Good pointers on how to improve and complete each assembly. Some strong work that is well thought out Peter. This easily could be printed in hard copy. Thank you for sharing.
Thanks Stephen
No problem - glad you found it helpful.
A video of the build is available on my YouTube channel, it goes into more detail and includes more pictures, so you may find it worth a look.
Best regards
Peter F
This is beautiful! Love the Helldiver, great job on a challenging kit.
Thank you!
Building the Devastator was like therapy after this project.
Beating a challenge is always good though.
This is a really beautiful build of what seems like a challenging kit. Beautiful outcome. Your blow by blow build commentary and photos are excellent, especially for anyone lucky enough to have one of these kits. Great work all around.
Thanks Clint
So many appreciative responses - it makes the effort worthwhile!
Best regards
Peter F
Beautiful beast and article. Well done Peter !
Hi Paul
Thank you!
Best regards
Peter F
Excellent job taming this beast.
Thanks Dan.
Beautiful work! Well done!
Thanks Michel
Very gratifying to have the hard work recognised.
Impressive work, I have read nothing but how hard this kit is to build, you did a great job!
Thanks Rob
In retrospect, I have to say that it was worth the effort. I haven't seen very many other examples of completed models from this kit.
An excellent build and model - well done!
Hi Greg
Thanks for that.
Very gratifying to have built a kit that seems worthy of so much attention!
Best regards
Peter F
A well written story of the construction process highlights a marvelous Helldiver. @fearonntlworld-com
Hi John
Many thanks.
The more appreciation that comes, the more I feel the effort was worthwhile!
🙂 ... Greetings ... 🙂 :
I have always been attracted to the Helldiver since my younger years building the 1/48 scale
Monogram kit. This build of yours Peter, has just given me more desire to build one again .
Lovely work on this model, after a few short cummings, you have ended up with a nice
representation of this aircraft.
Thank you!
I always feel that the best compliment that can be paid to any model or article is to find that it inspires someone else.
I too have fond memories of the Monogram Helldiver. Monogram kits were never very widely available here in the UK in the 1960's, so to get one was really special.
Great article and a fine result on that beast!
Hi Chas
Thank you!
One of the benefits from the Helldiver build was that it made the next project, the Trumpeter Devastator, feel like a walk in the park.
Best regards
Peter F
Amazingly great result you wrestled from the muck of kit that fought you during the build.
Hello David
Thank you.
This built certainly was a bit of a battle, but a hard fight at least makes the victory all the sweeter.
Best regards
Peter F
Great article and finished model. I believe YOU tamed The Beast.
One of the best SB2C articles I have ever seen. Thanks.
Hi Bob
High praise indeed! Many thanks.
I made a bit of a mess with the photos when submitting the article, as I was unused to how everything works.
More pictures and a more detailed account of the build can be found on my YouTube channel. I don't seem able to post a link but the address is :
It may be worth a look.
Best regards
Peter F
Hi Bob
High praise indeed! Many thanks.
I made a bit of a mess with the photos when submitting the article, as I was unused to how everything works.
I've mentioned before that a more detailed account of the build can be found on my YouTube channel. The address is : https://www.youtube.com/watch?v=VqUmeIed8Ro should you want to take a look.
Best regards
Peter F