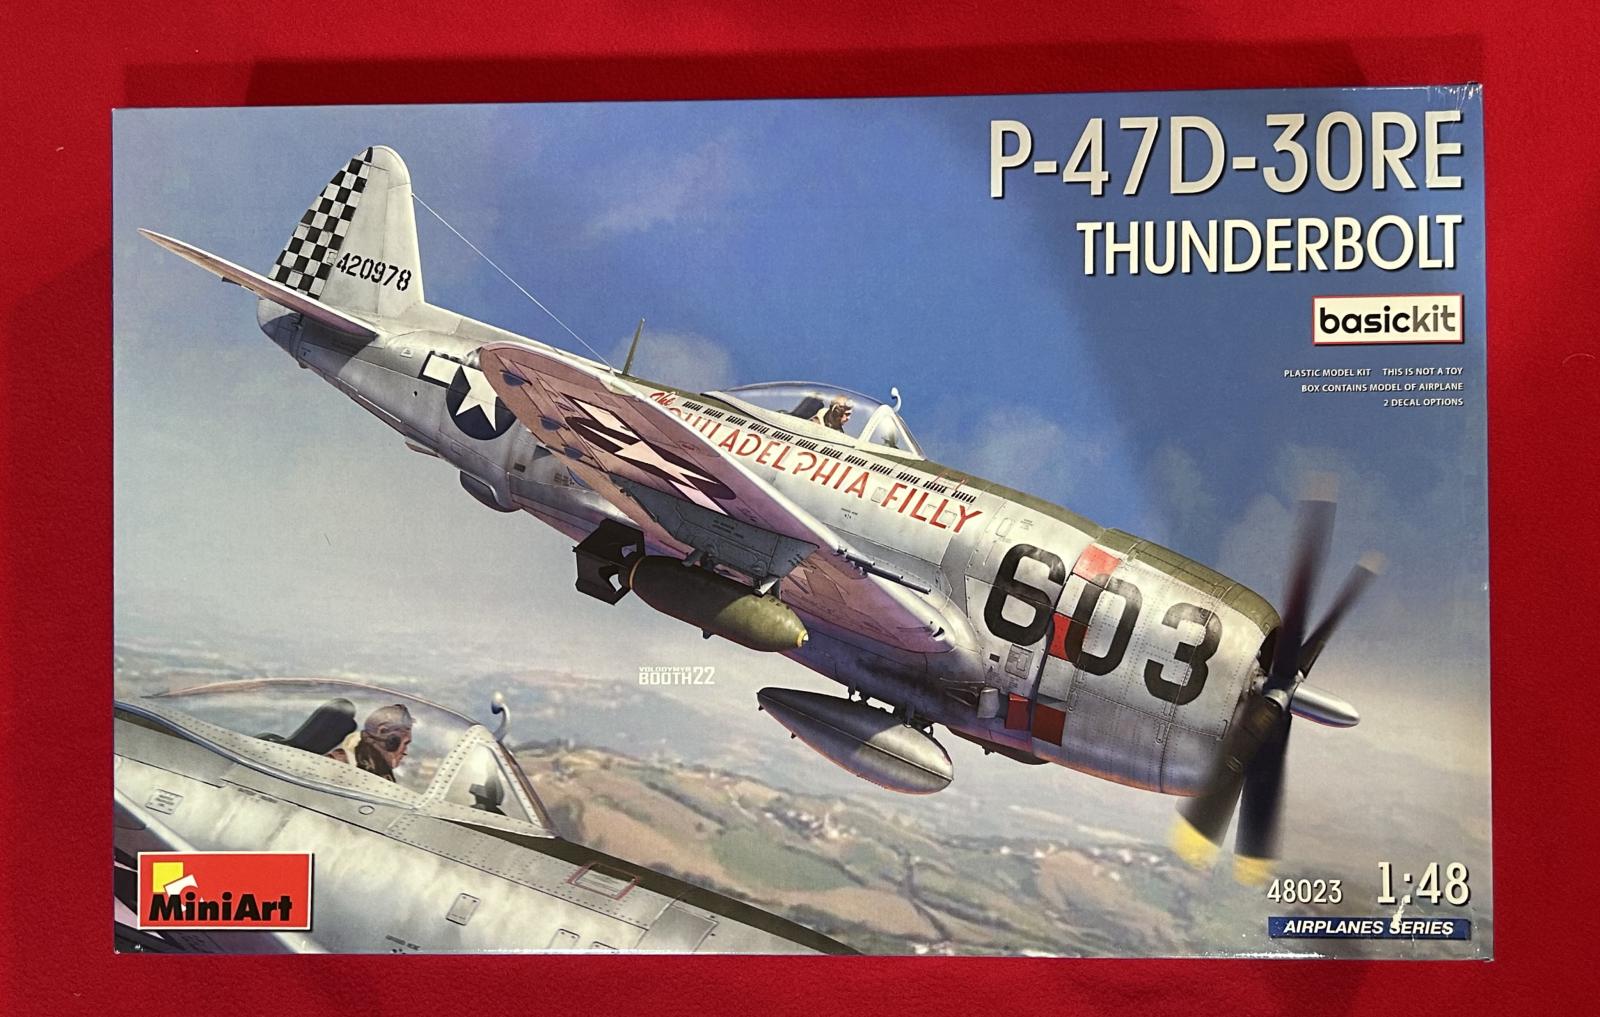
Review: 1/48 scale MiniArt P-47D-30RE Thunderbolt "basic" # 48023 Kit Review
This is a model that I knew I had to get my hands on once it was available. Lo and behold, it was offered for "Presale" at Squadron a month or so ago... Just when I spent too much on other kits for Christmas and I thought my wallet was safe.
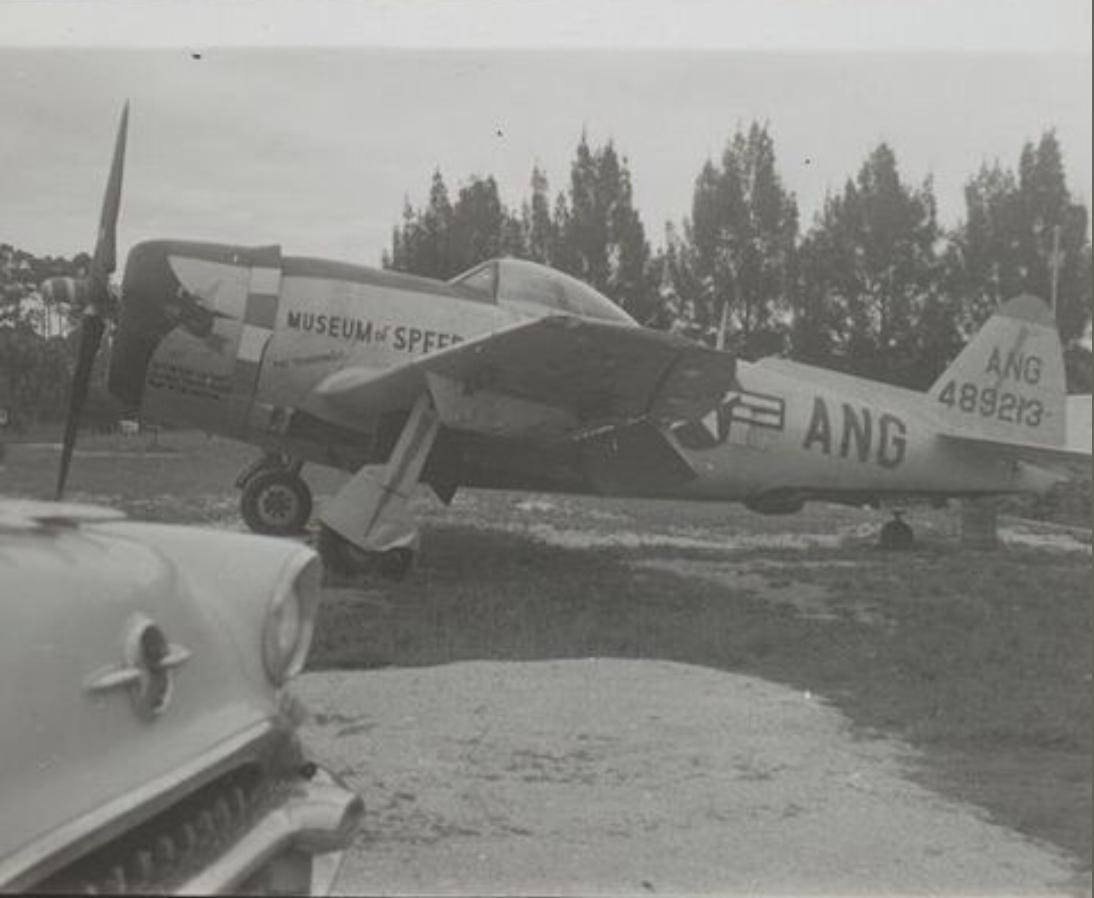
When I was a little boy, there was a museum near our home, that had a real "full scale" F-47N parked out front in the open air, exposed to the elements. My Dad would stop by regularly and let me literally play inside the cockpit as if I was the pilot. Dad would pick me up and place me on the wing just above the main landing gear. He would then climb up on the Thunderbolt and slide the canopy open. Then once he saw the cockpit was clear of "all the critters", he would sit me in the pilot's seat and I would play there until Dad got tired. I remember moving the joystick around and having a blast... I was just a wee little one but I remember it just like it happened yesterday.
So I am kind of a P-47 fan you might say...
Sadly the Museum of Speed is no longer, the building was demolished, and the plane was sold off, eventually used to provide wing parts to repair a P-47 that was damaged in a landing when it caught fire. Rumor has it the P-47N has since been slated for a full on restoration. The Thunderbolt I played in was one of the last flying F-47N's that was in service with the Puerto Rico ANG when it was flown to Daytona Beach in 1955.
This kit was made available to me by my wallet, so I spent my hard earned money on it... and it was not a gift to get a favorable review. So I can promise you what you see here is factual. You can look at the pictures I'm providing, and decide for yourself.
This model looks VERY nice in the box, and I can see it hitting the work bench soon.
So with the introduction out of the way, lets get on to what is in the box... 🙂

The illustrations on the side of the box show what the decal options are included inside. There is also a short description of the unit with which the Thunderbolt served with. Both Thunderbolts are in a bare metal finish.
The first option is "Torrid Tessie" which was flown over Italy in 1945.
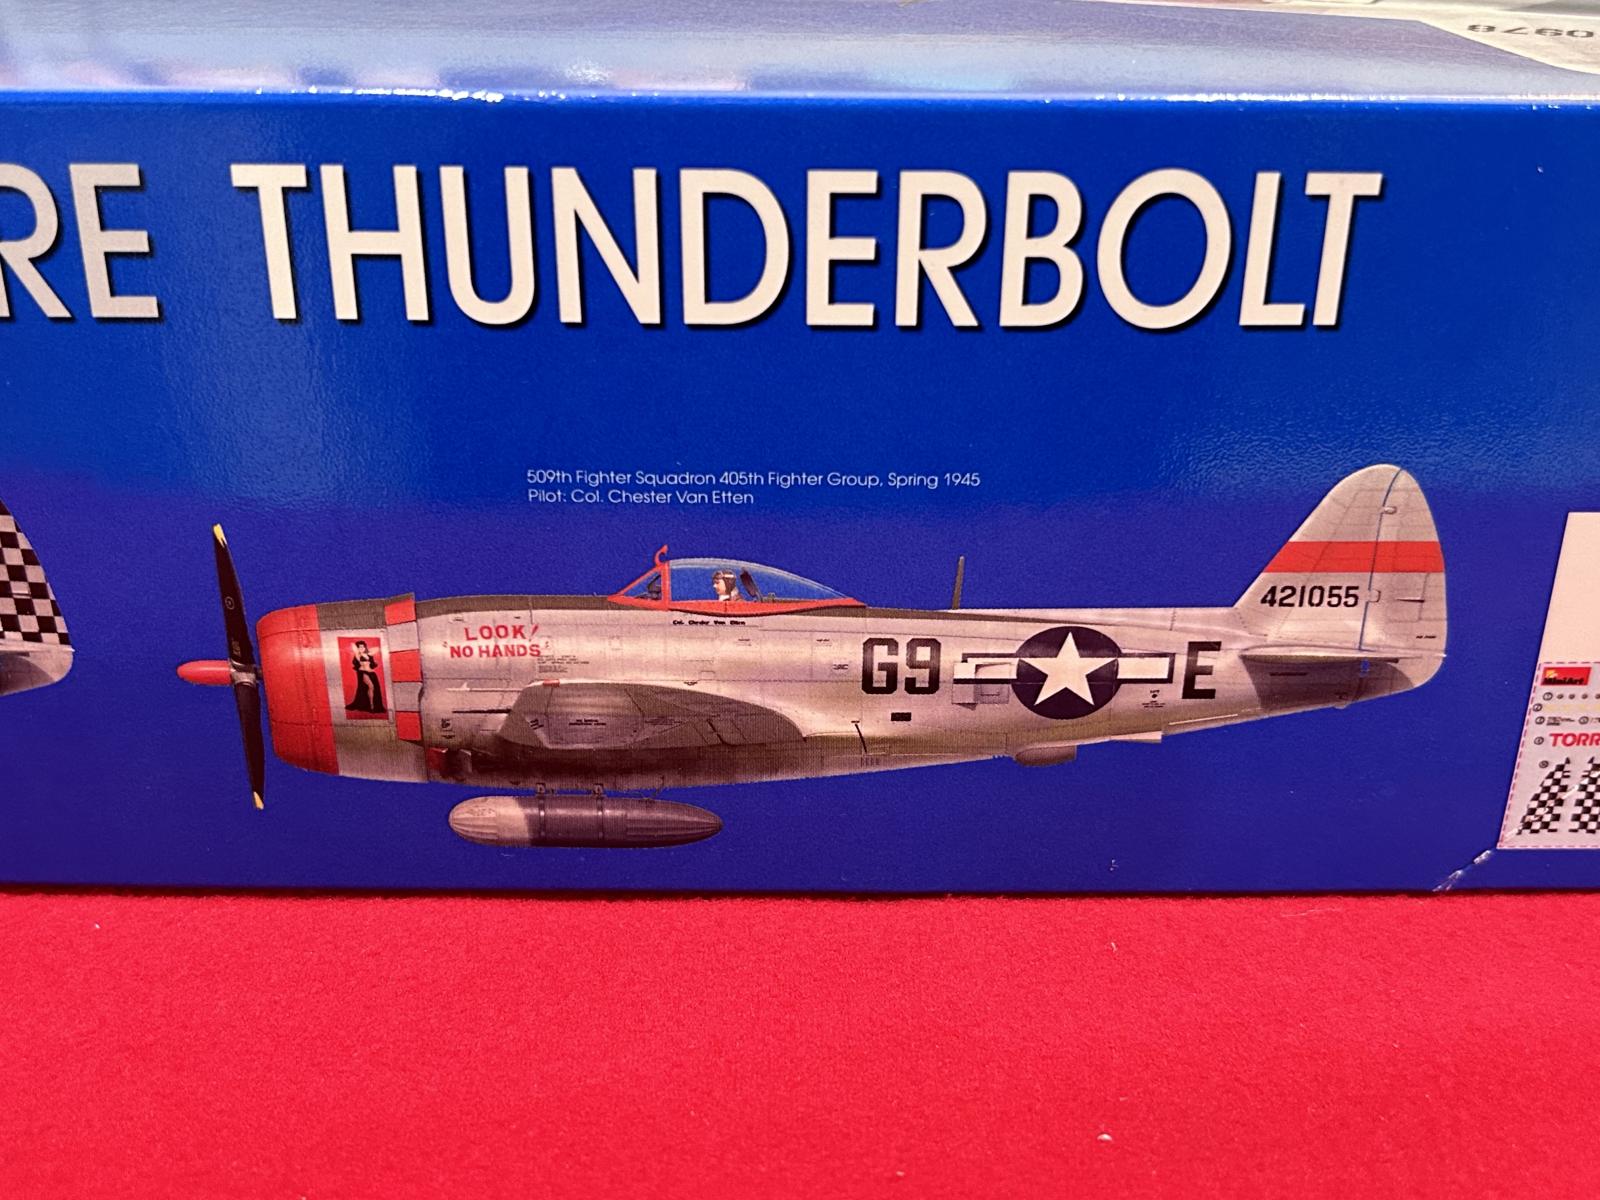
The second option is this plane. It is named "Look ! - No Hands " It was also in service in 1945. I have this very same decal set that was included as part of an old 1/32 scale Revell P-47 D bubbletop kit. I'm interested to see if there are any discrepancies noted between the two. I will check into this and report my findings back to you later.
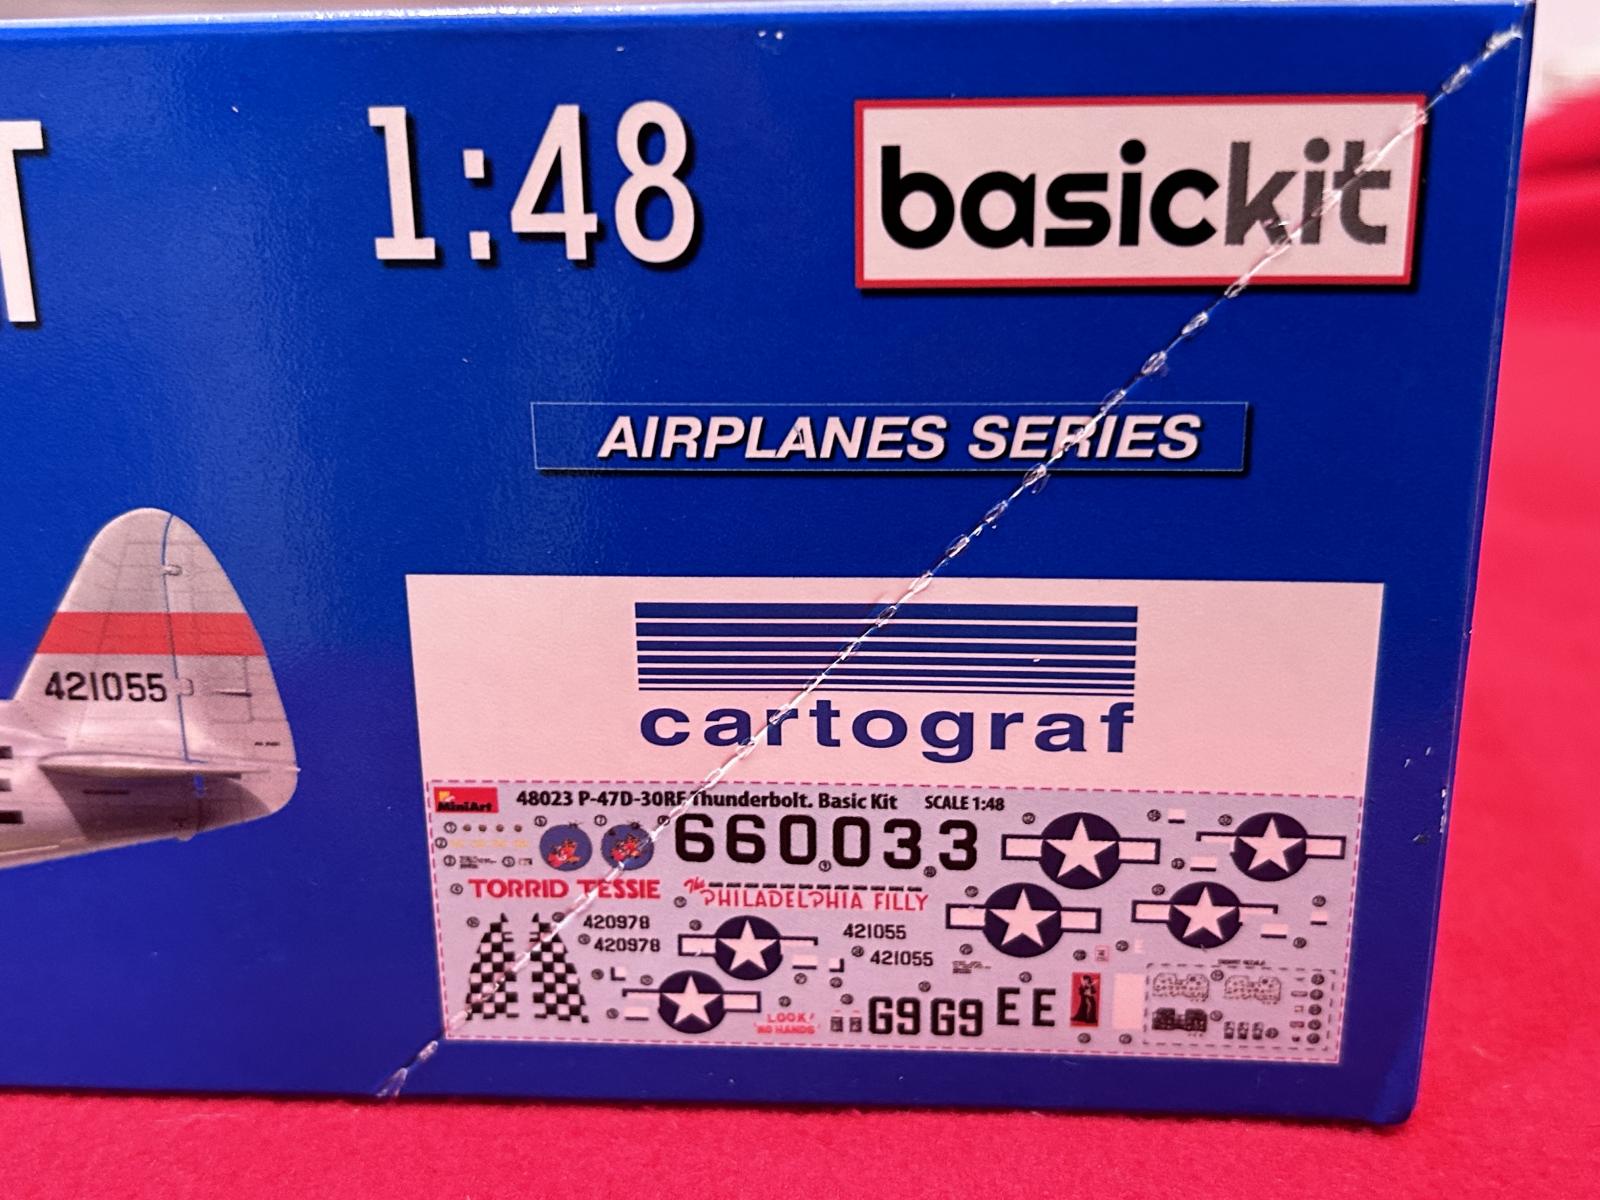
The decals for the model were manufactured by Cartograf, so they should work well, and be printed nicely.
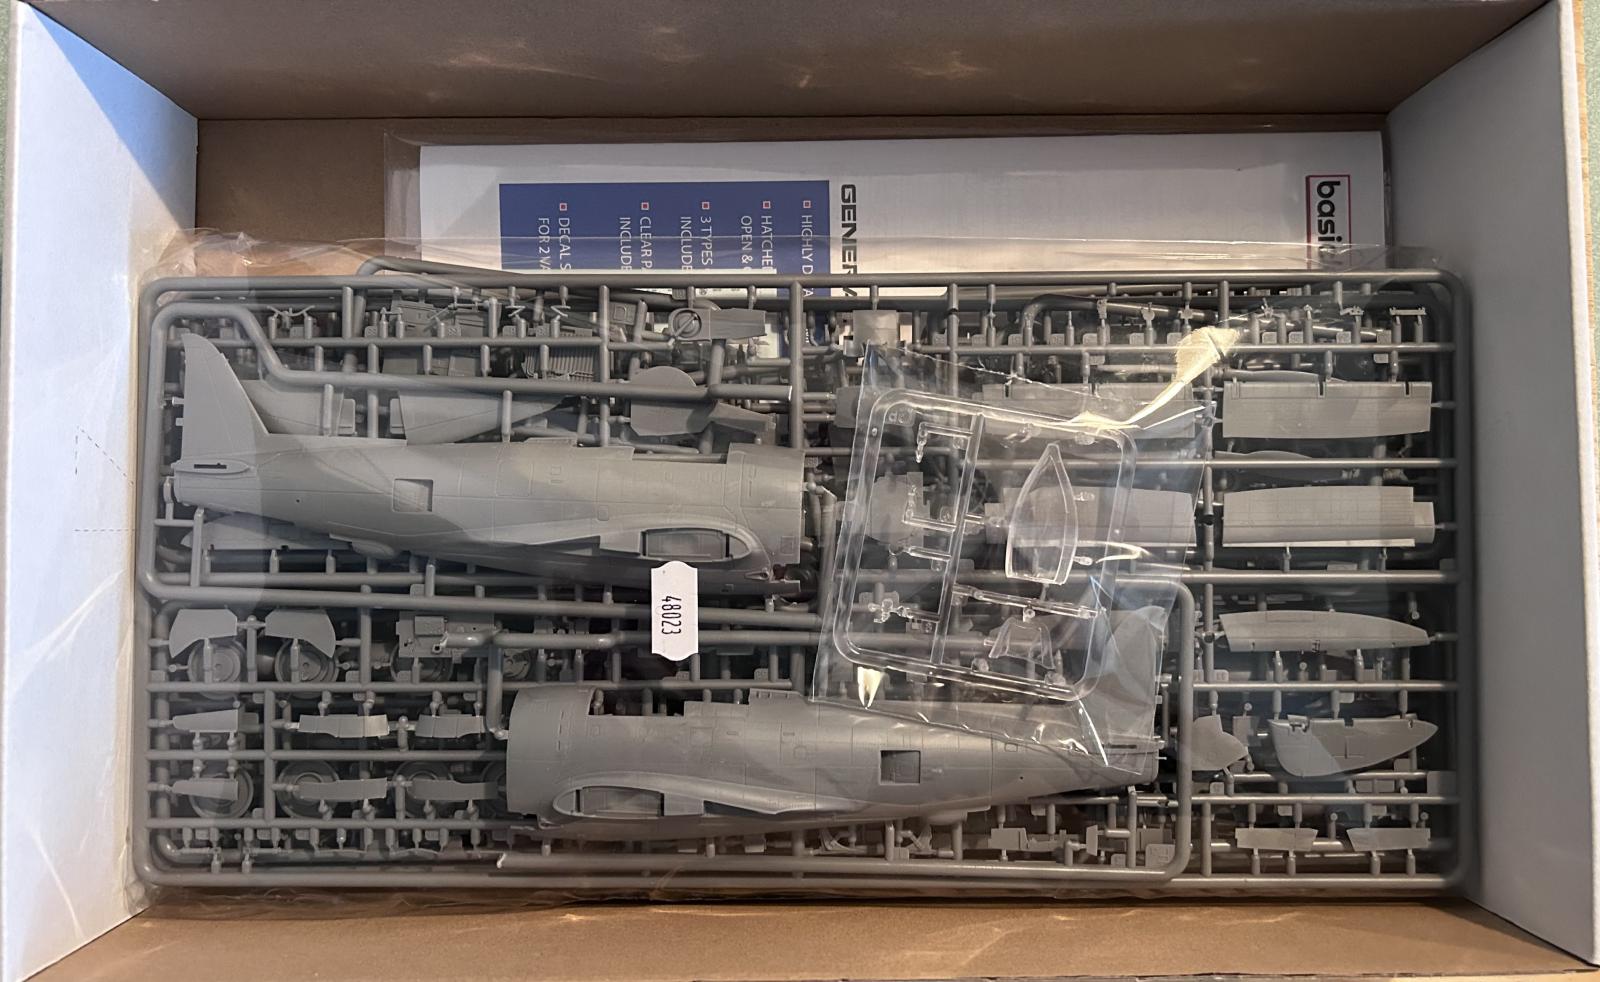
This is what we see when the box top is removed, revealing what is inside. It is packaged a substantial cardboard box, that reminds me of the recent "new tool" ICM kit boxes. This is a "good" thing.
The plastic parts are molded in a Gray plastic, with the canopy and other lighting / lens parts done in a Clear plastic.
My parts were all molded exceptionally well, with no readily apparent sink marks or flashing. The molding quality is nice and very crisp.
The kit's plastic parts are all stored inside a single larger plastic bag. This is a "not so good" thing.
My kit's parts trees were not individually wrapped as we will find with some other manufacturers, especially with some of the higher end companies.
Packaging the parts this way might allow them to become scratched or damaged with rough handling. But we are not supposed to play football with our models in the box. OK maybe the delivery service will, prior to arriving at their intended destination.
Even so, my kit arrived in excellent condition, with nothing found damaged or missing upon close inspection.
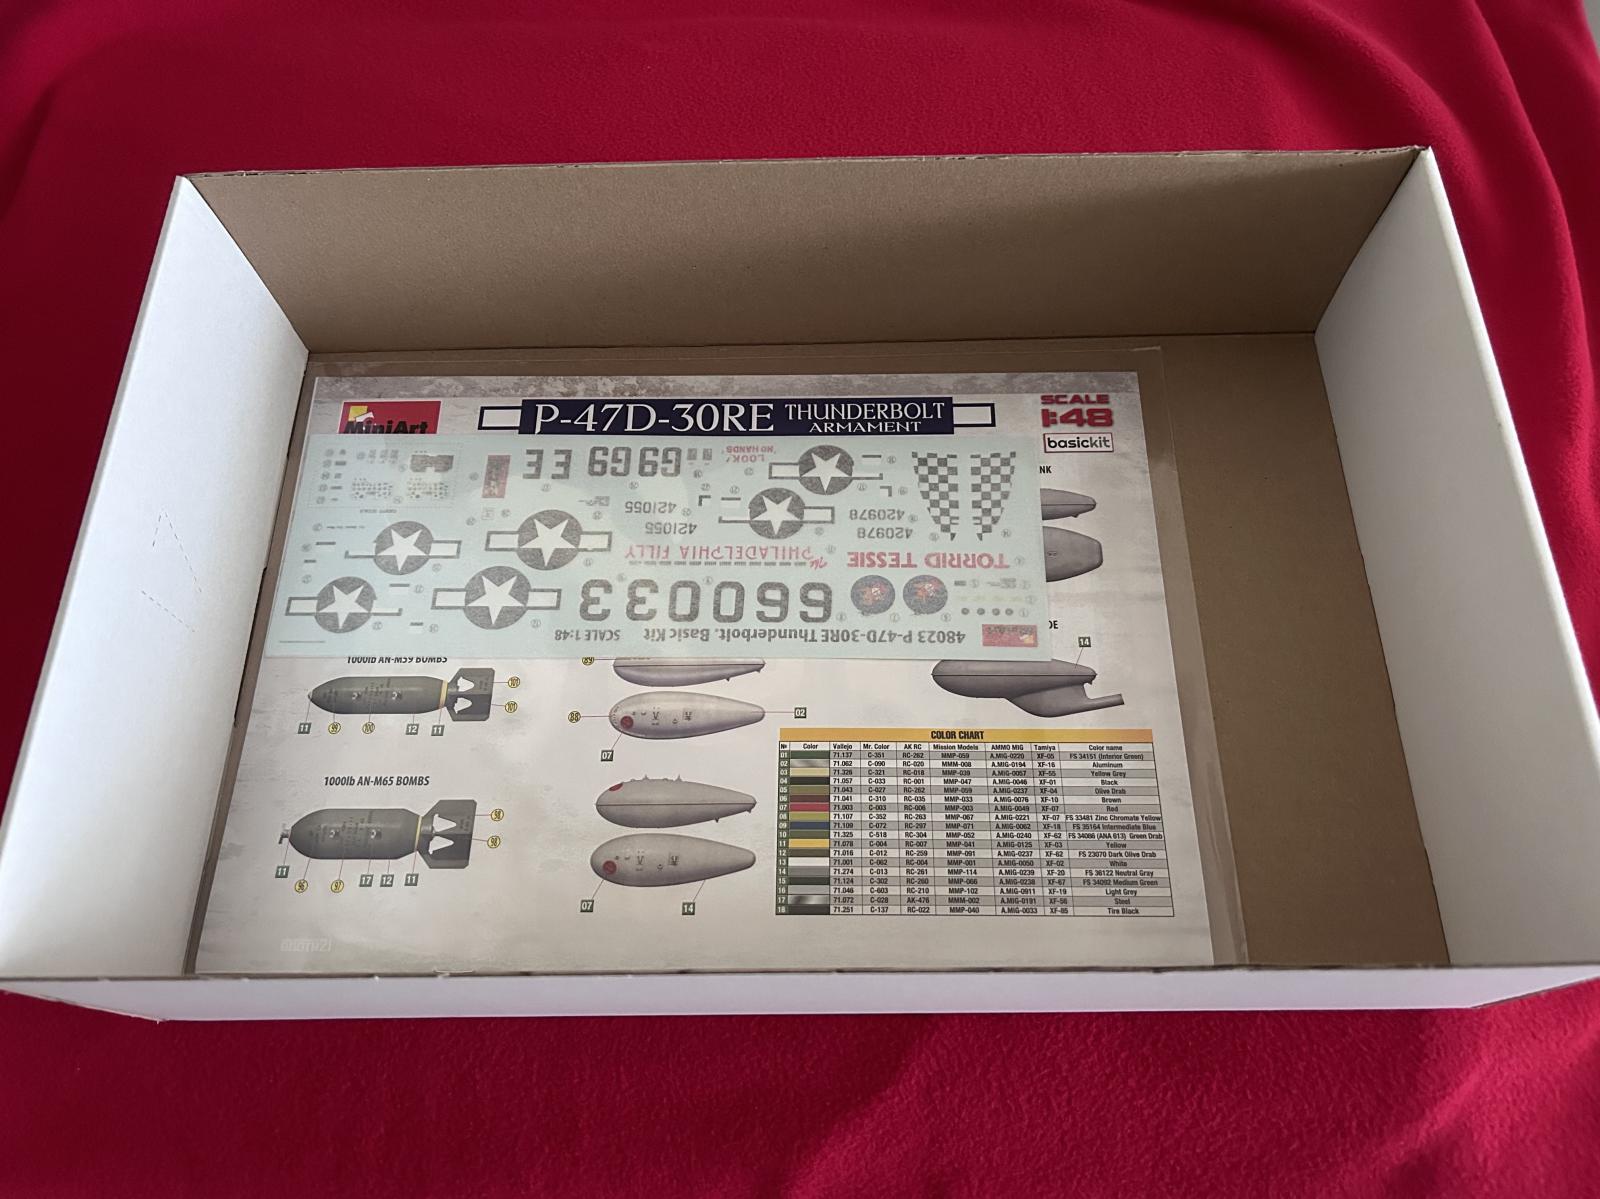
Once the plastic parts are removed from the box, you will find the instructions and the decals are placed on the bottom of the box.
-

- 1. Ordnance and stencil decals

The instructions are sealed in a bag with the decals. There is a second smaller set of decals that are to be used for the stencils and the ordnance that is provided in the kit.
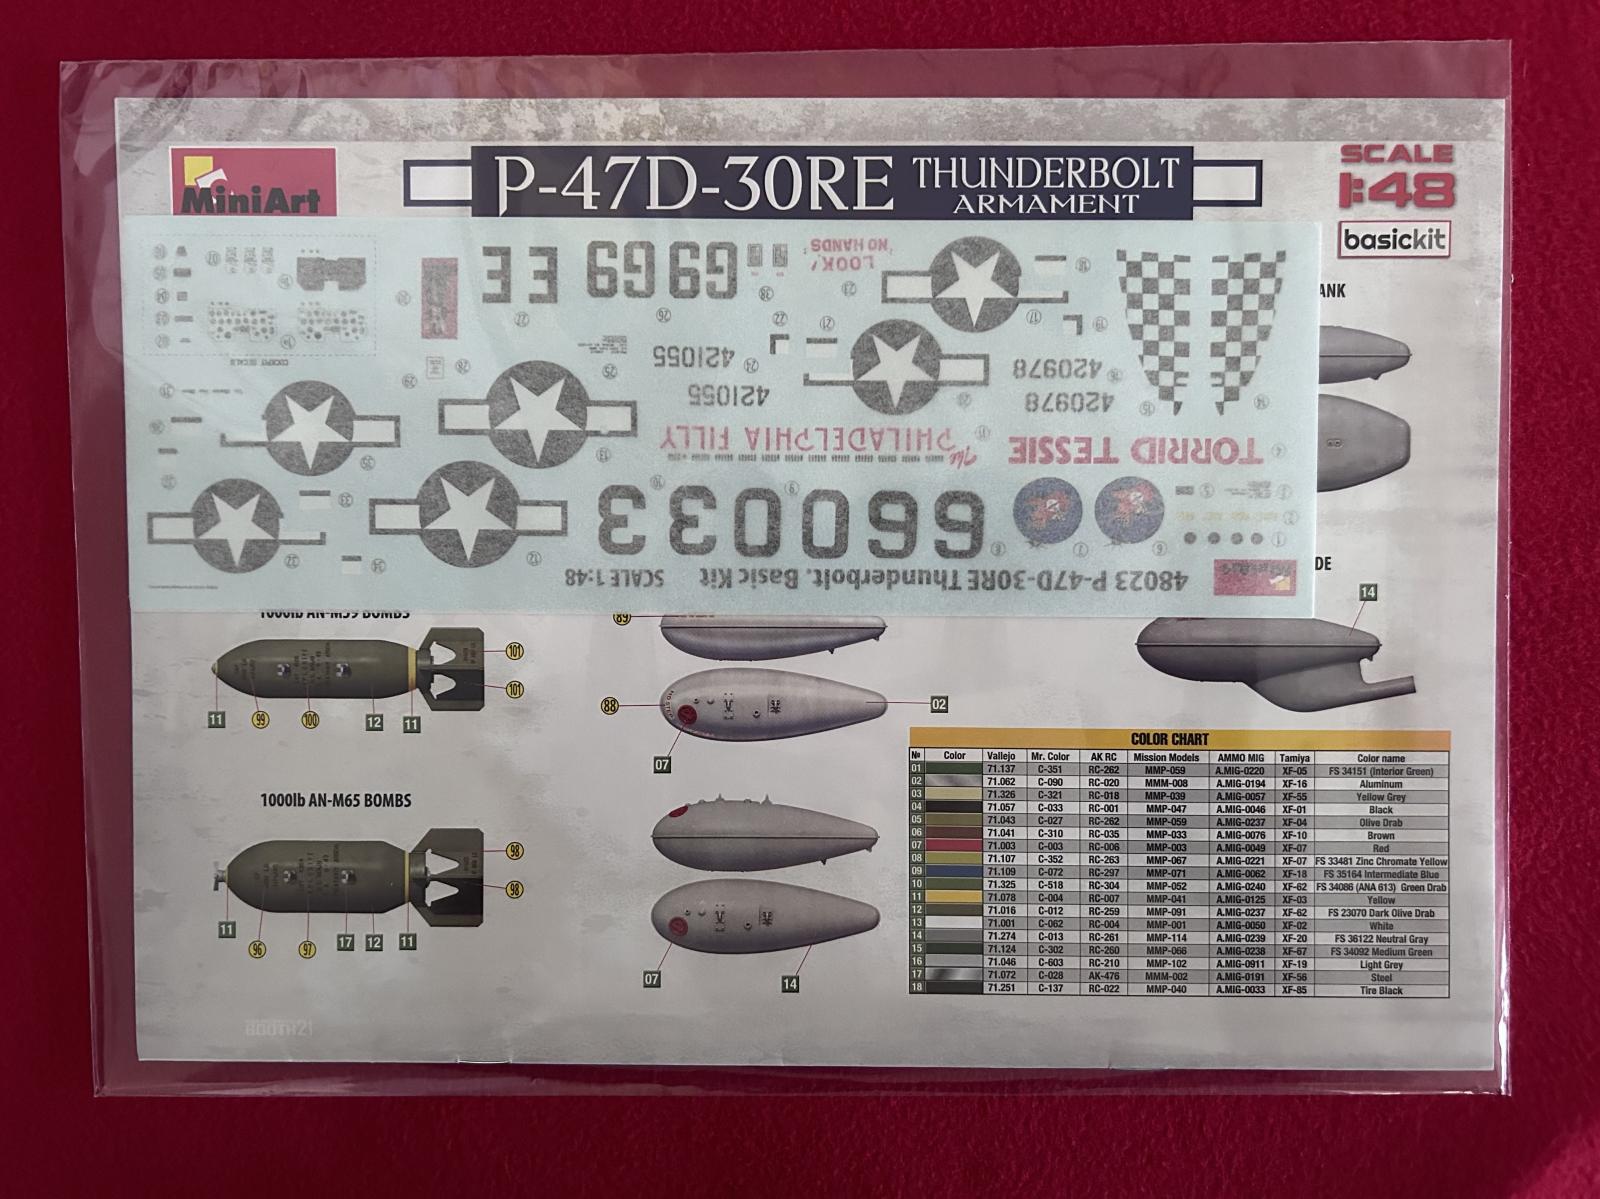
The majority of the decals are placed on a larger sheet, and mine were placed on the other side of the instructions. Here you can see the ordnance painting and decal markings are printed in color. This is a nice option.
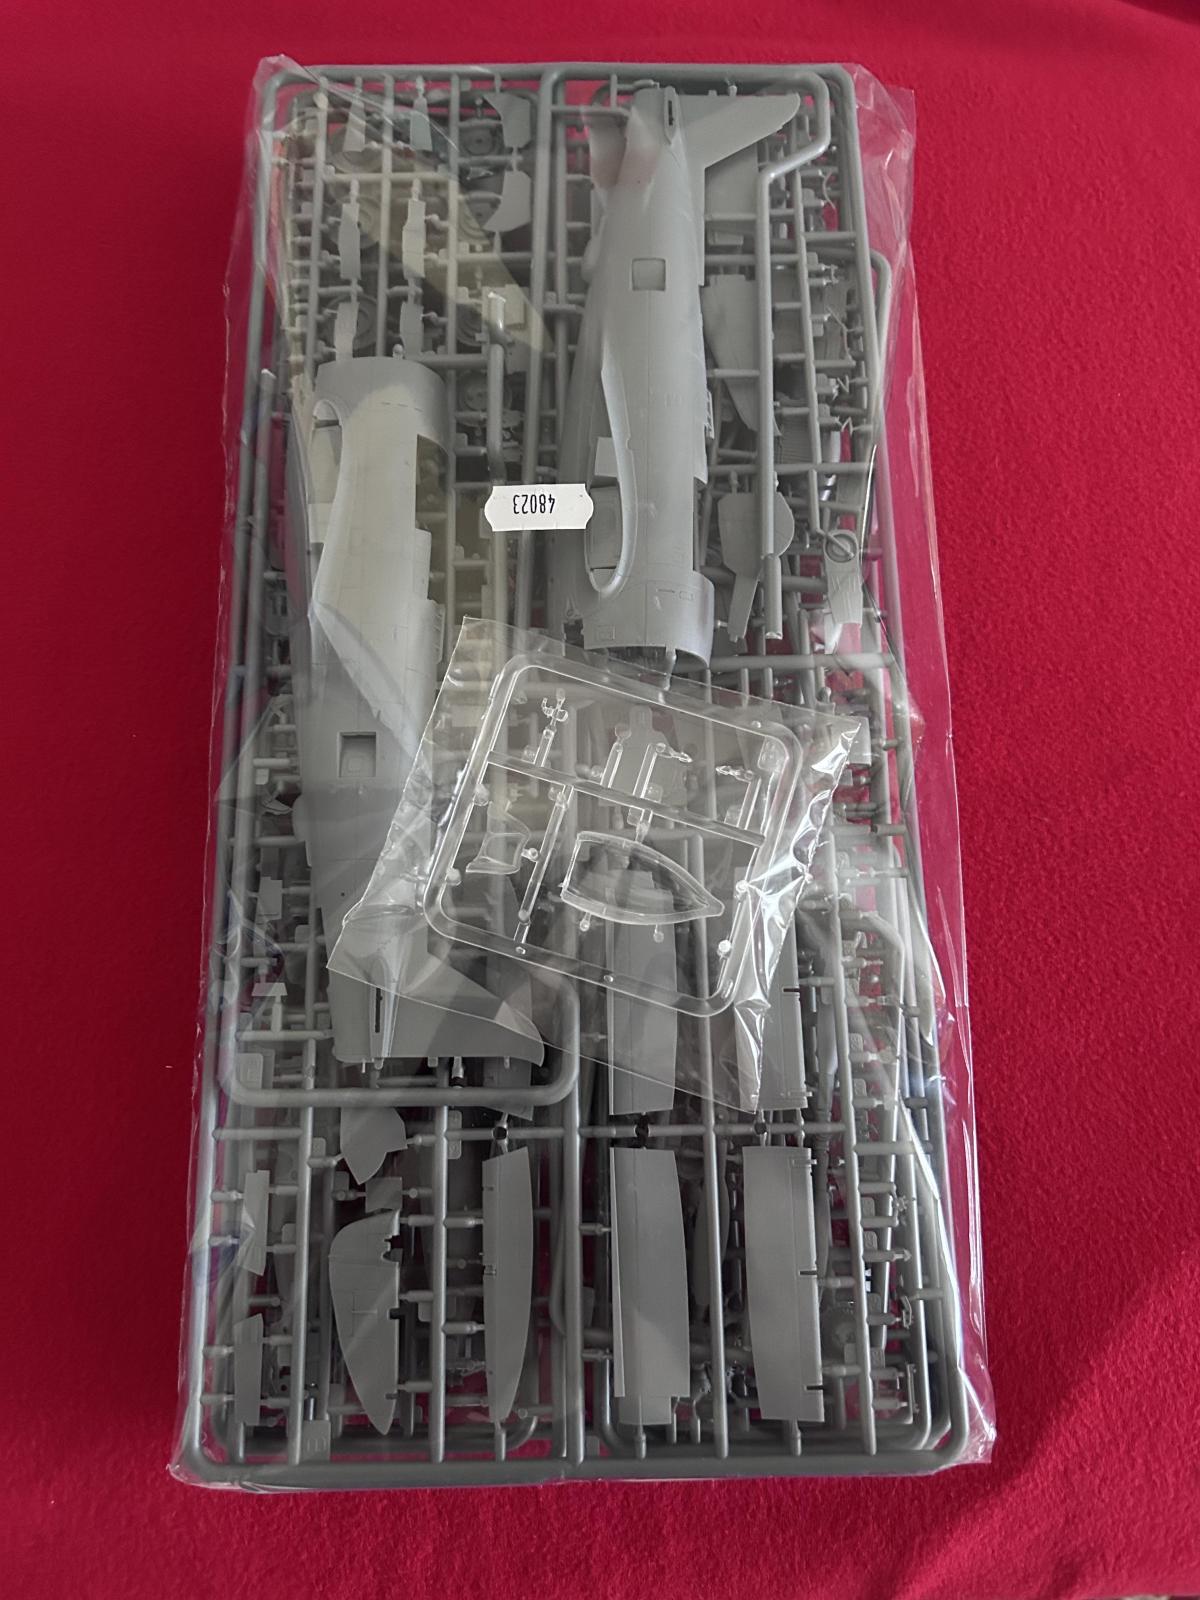
This is the single large bag found inside the box upon opening. Inside the bag are contained all of the Gray parts. You will also find the Clear parts are secured inside the large bag too.
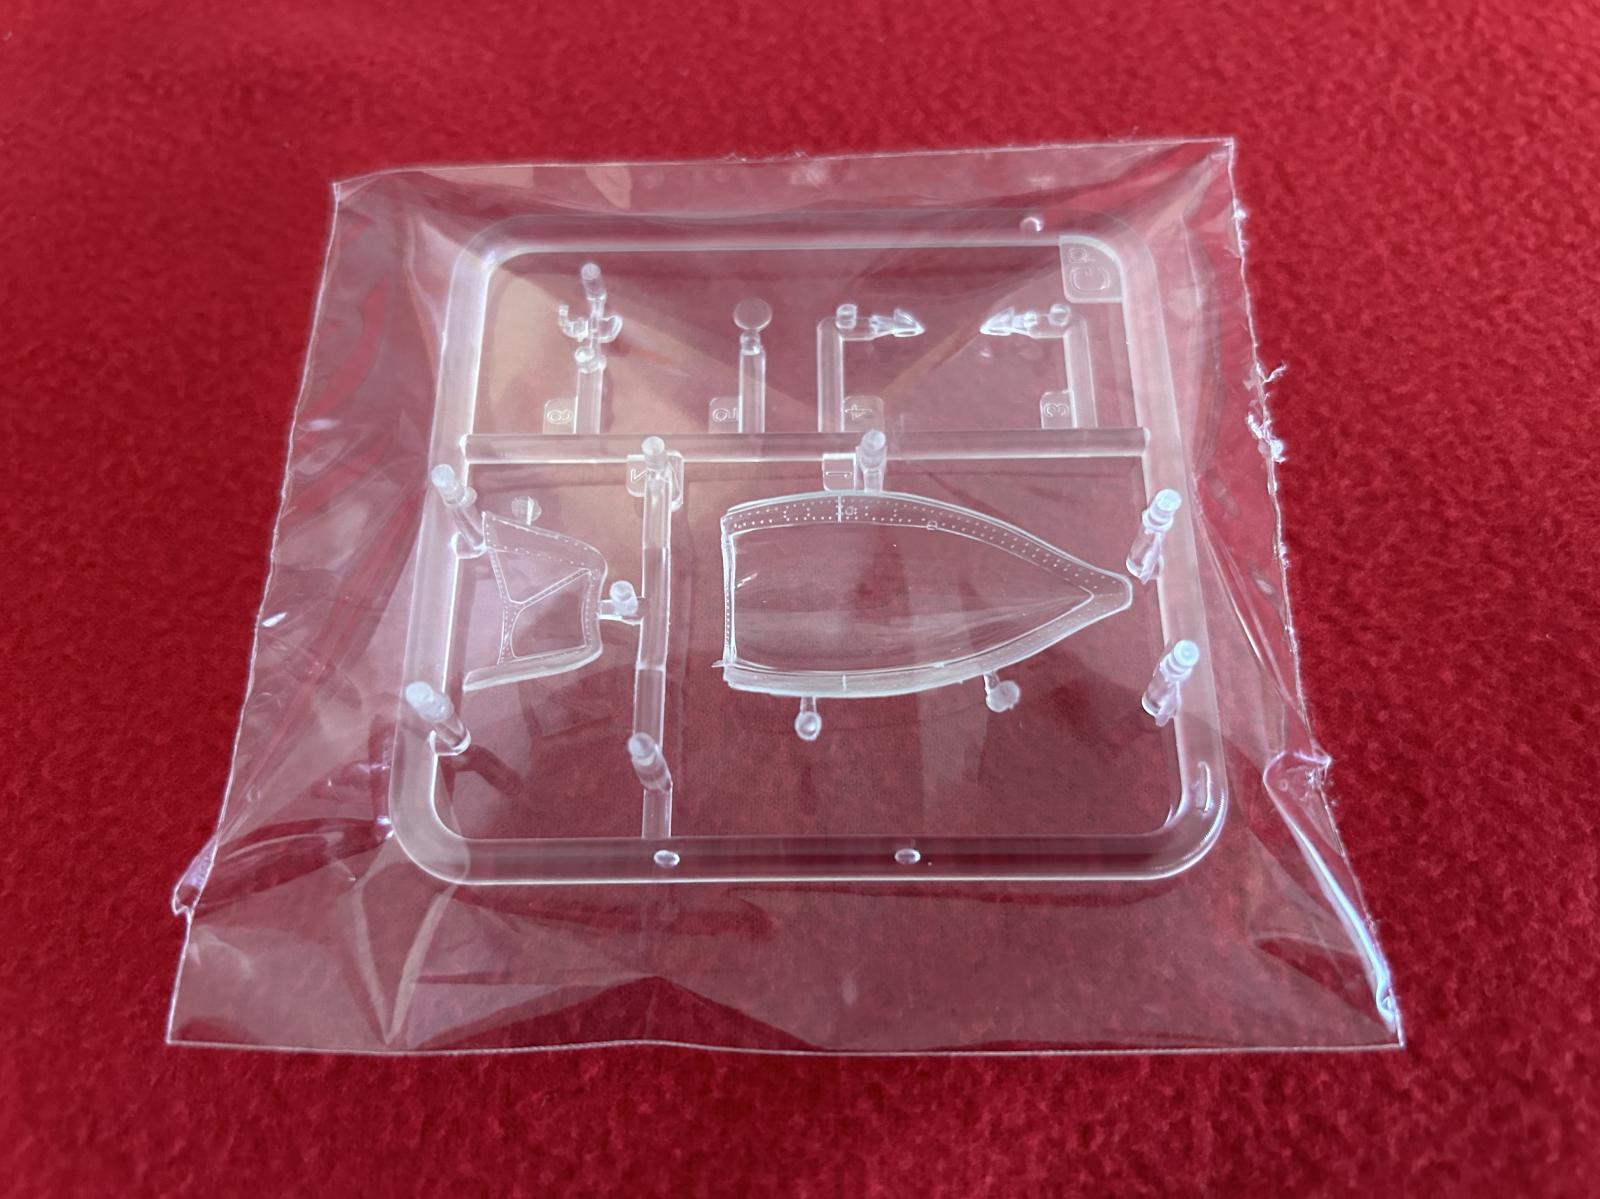
However, the Clear parts are wisely bagged in a smaller separate bag to help prevent damage or scratching.

The fuselage halves are nicely molded. They are done as a single half section, similar to how the modern Eduard kits are molded. This is a good thing because it eliminates the need for inserts which can be troublesome. The extended fin is molded in place along the top of the fuselage spine, so you will not have to rely upon an insert or separate rudder / fin assembly here.
I consider this a plus. Time will tell if I am wrong or not.

The rivet and panel lines are nicely done. The intercooler doors are molded in place, and are in the "Open" position. Here you can see some of the panel lines and rivets.
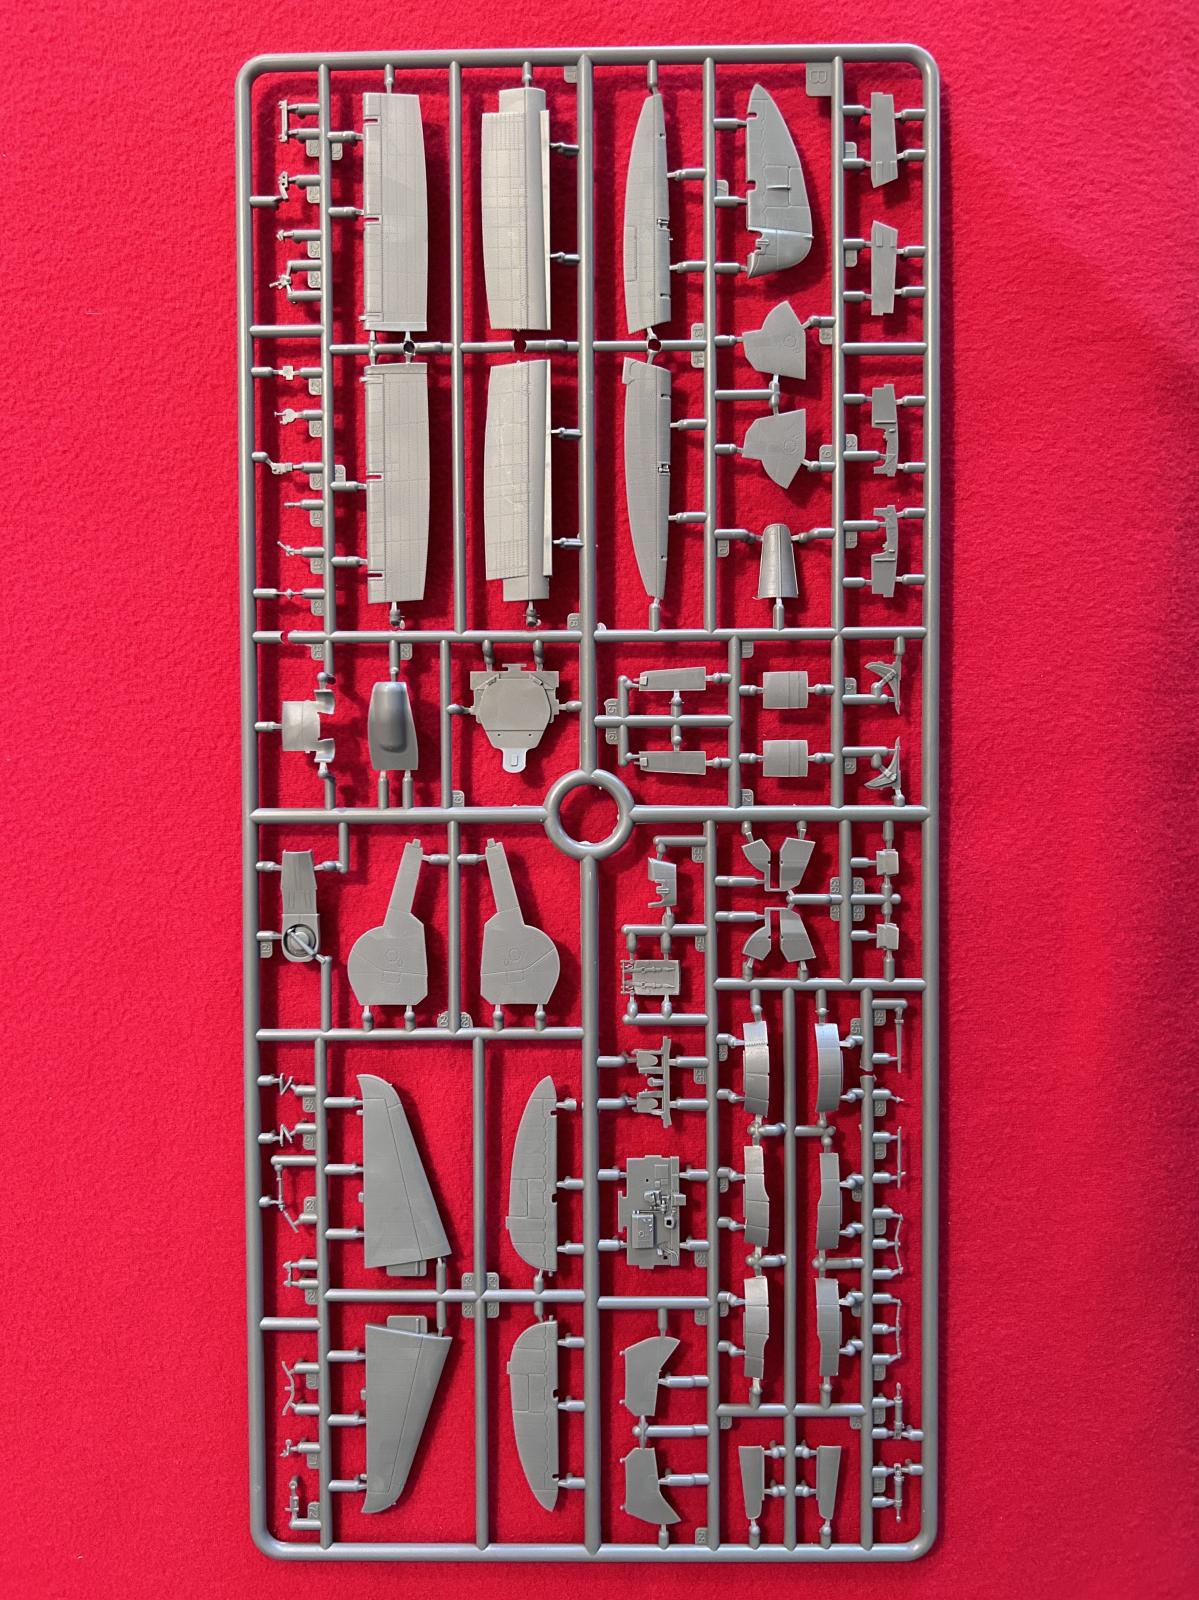
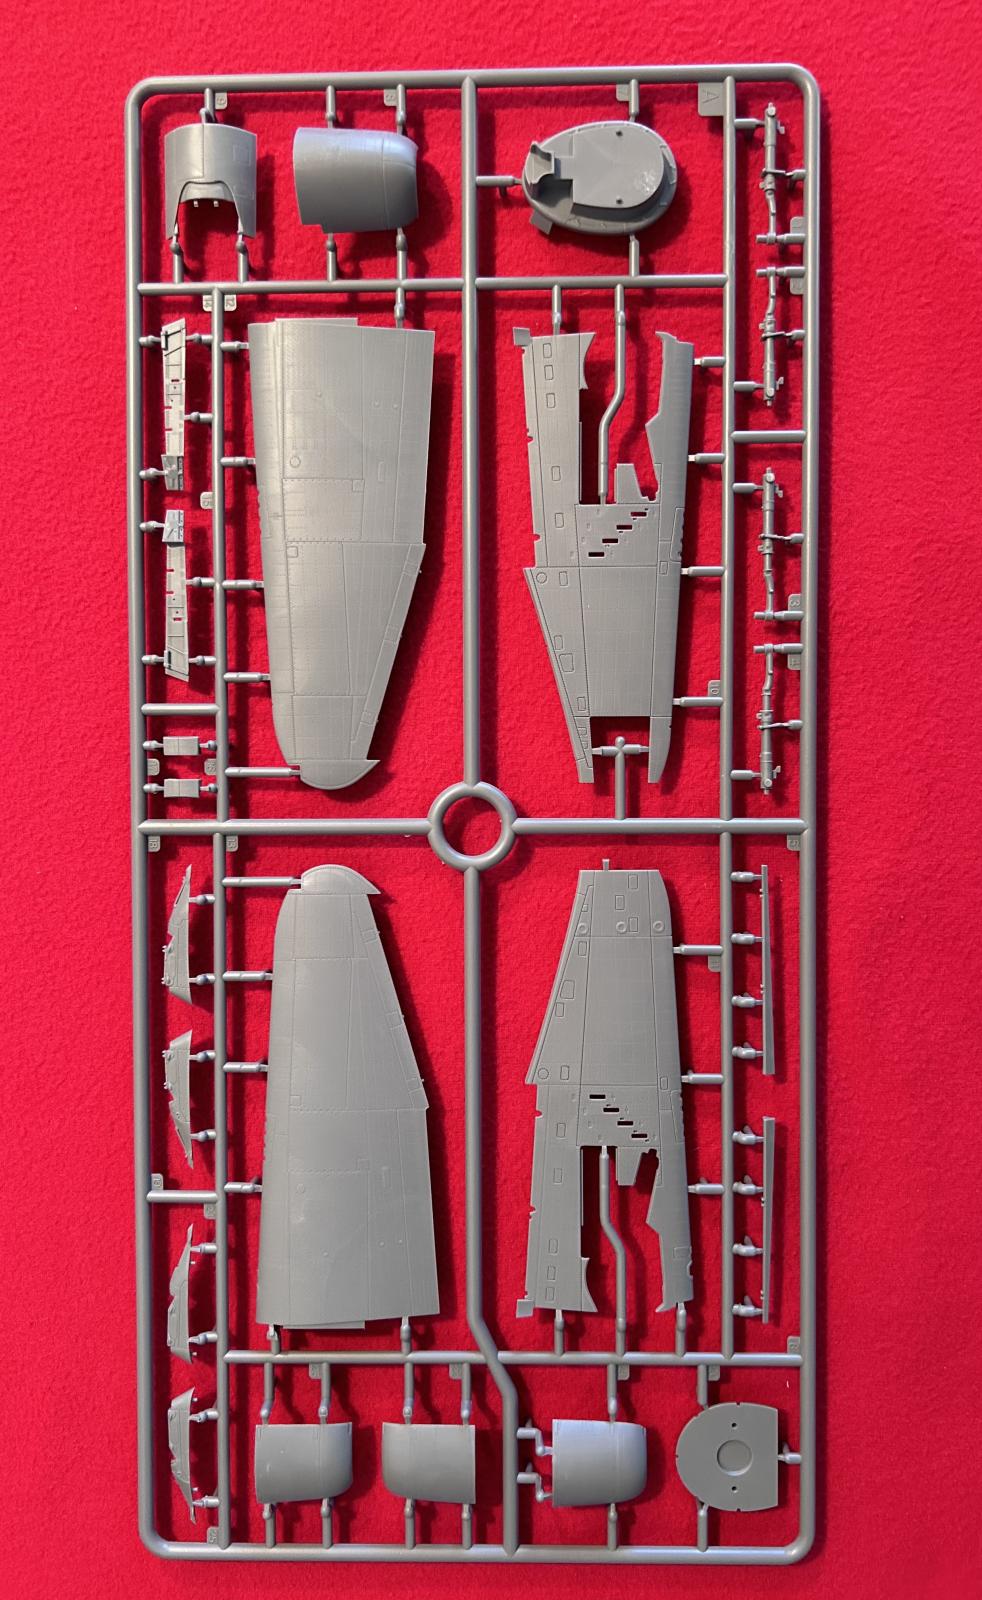
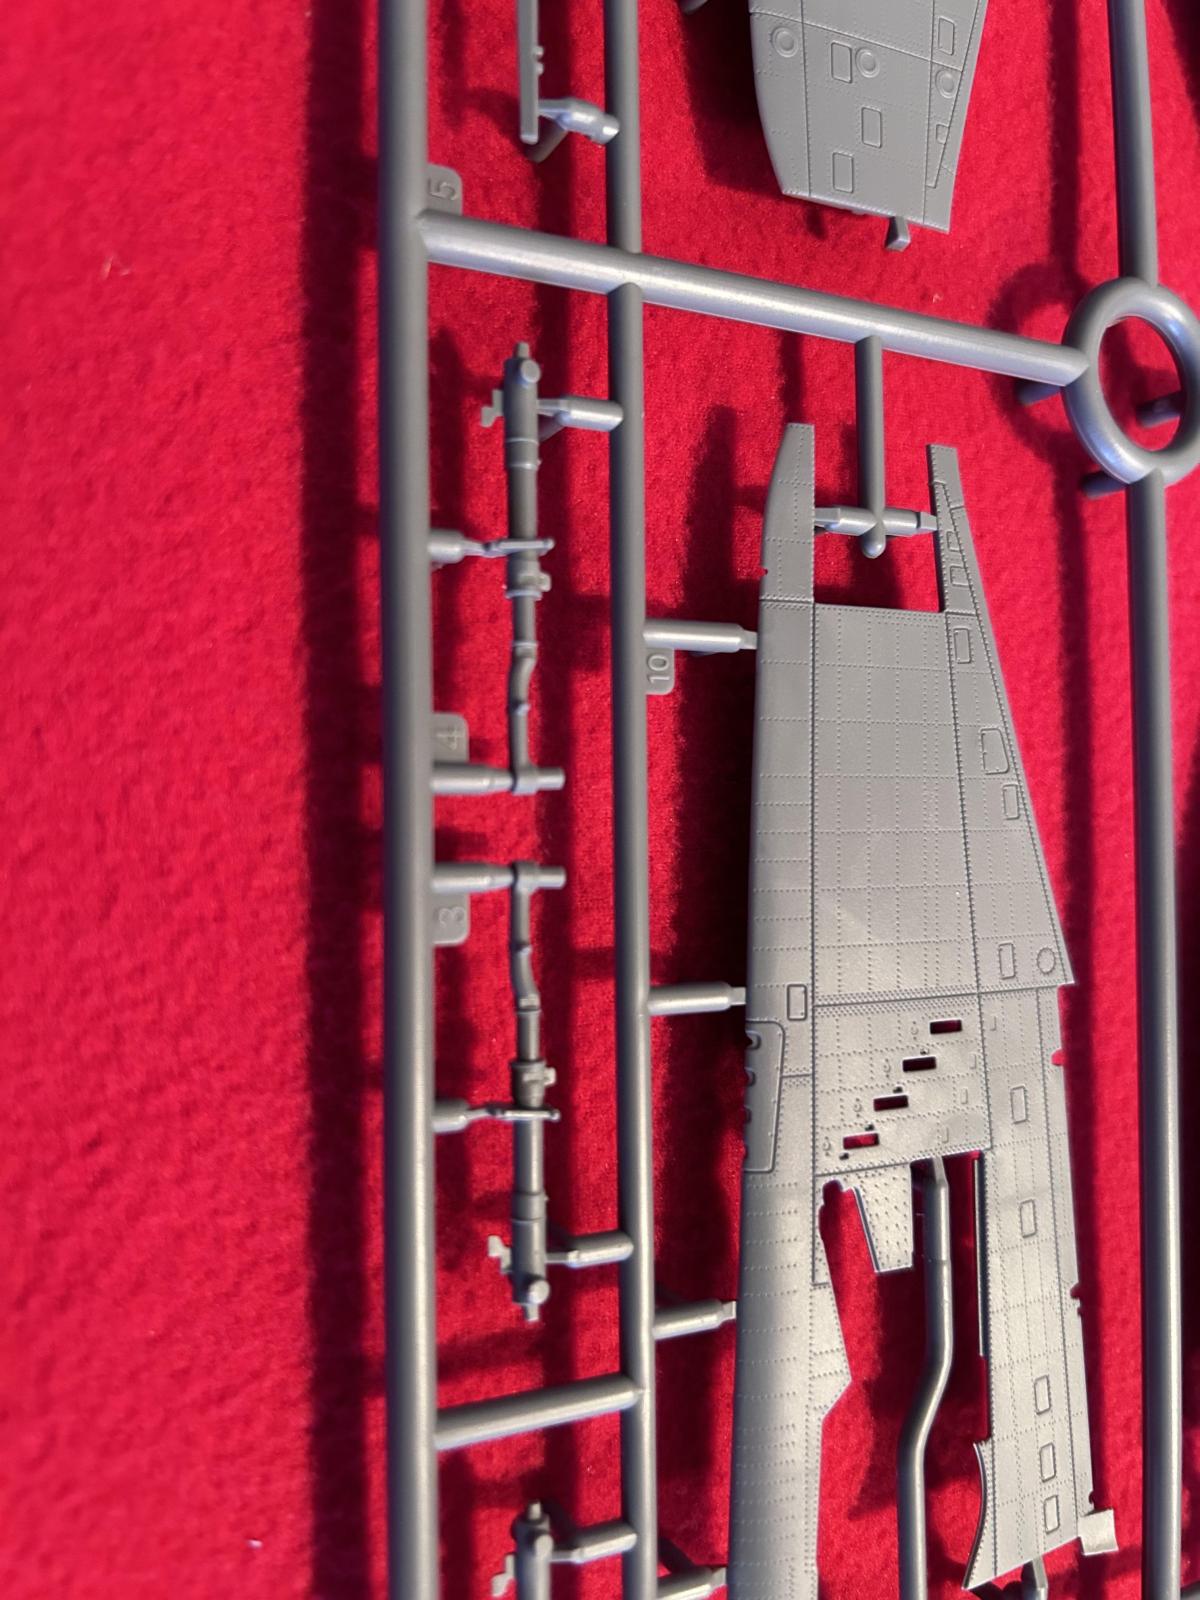
This is the parts tree that contains the stabilizers, flight controls, flaps and other smaller parts. These "moveable" items are molded separately, and are not molded fixed in place. The details look very nice. I have not studied the instructions yet, but it may be possible to pose these in a deflected position.
However, I vaguely remember reading something about how the P-47 had a spring loaded control stick. This would have kept the controls centered, especially if the controls were locked. So these parts were likely to be seen centered. This is what we see in pictures of P-47's that are parked.

This is a close up showing the flaps, and ailerons. You can also see the main landing gear covers, and a one piece tail wheel cover to be used if you decide to build your model posed "In Flight".

Here you can see the details as molded into one of the flaps.

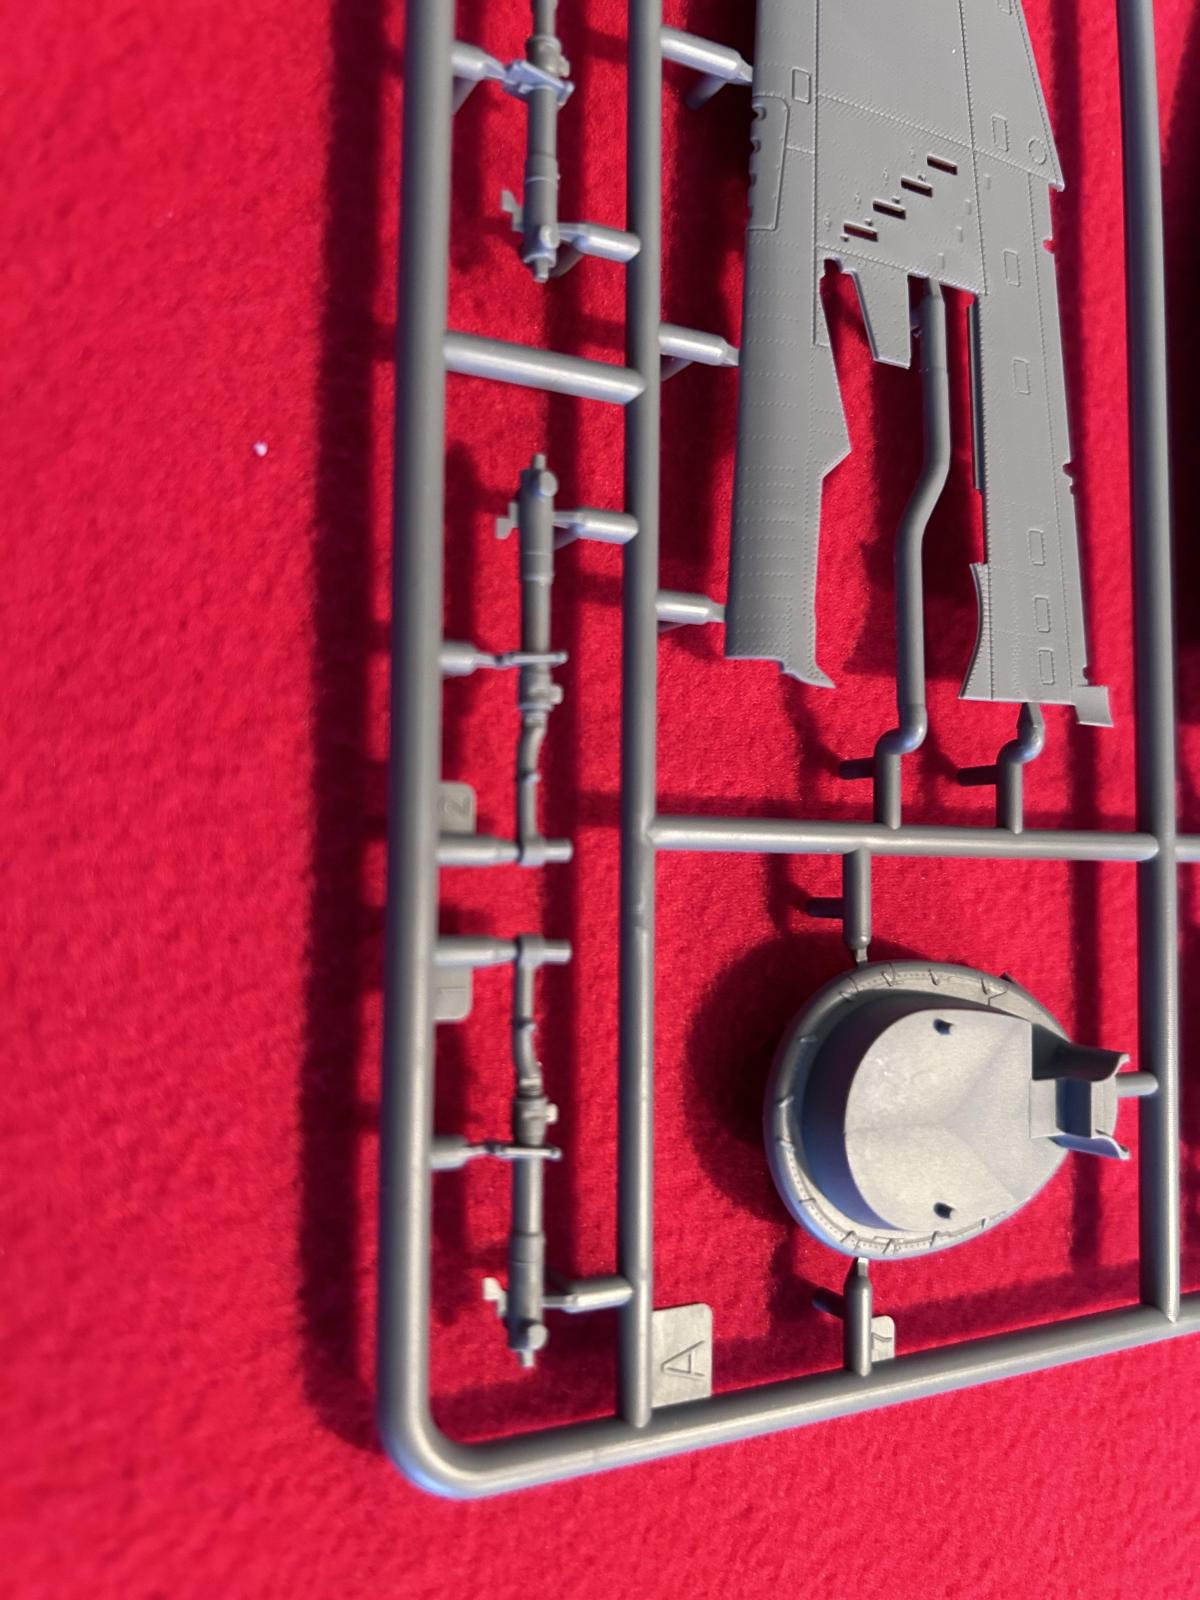
The main landing gear doors are provided as a single part to use if you wanted to build your model "in flight". There is a second set that was shown previously that are to be used if you are building your Thunderbolt with the gear down.
There are also two different styles of main landing gear struts. One is compressed, as if the plane was fully loaded prior to a mission. The other set of main gear struts are more relaxed, and will give the plane the look as if it was parked empty after completing a mission.

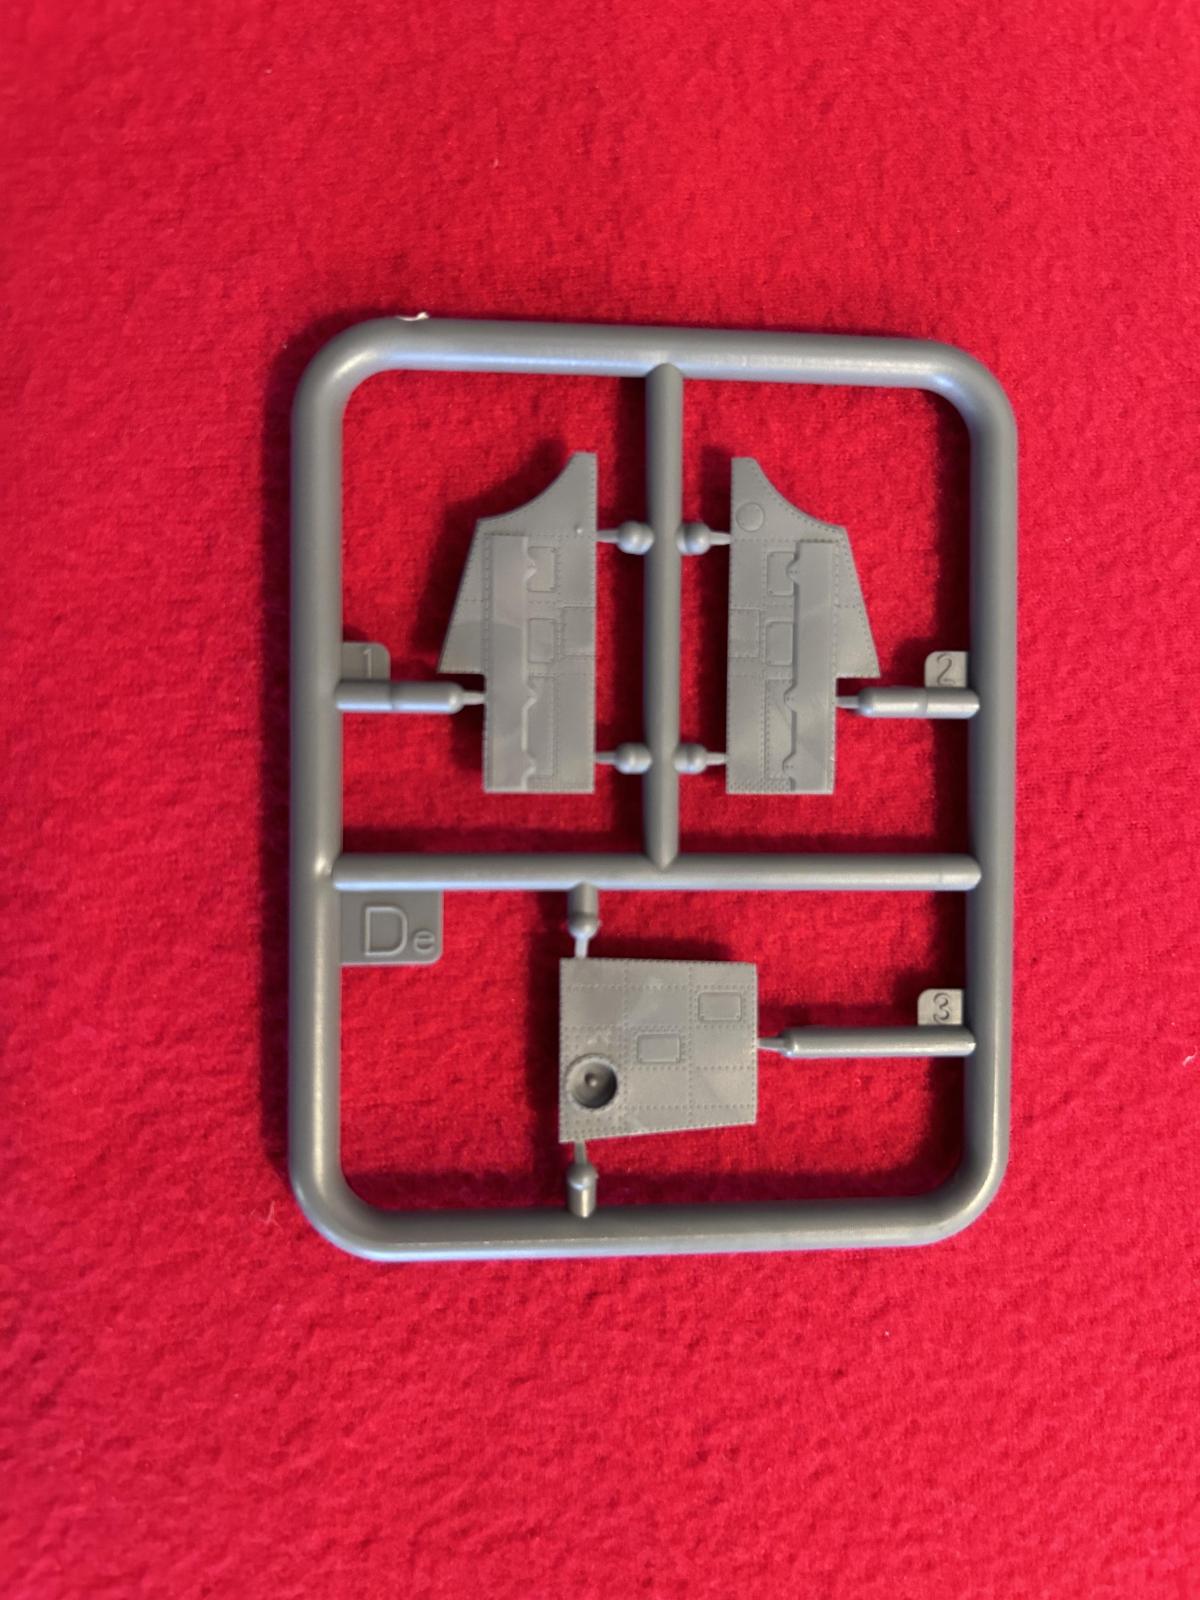
Here are the parts included that set this kit apart from the earlier release of the P-47D-25. This shows the "Flat" style of cockpit floor, and the different style of cockpit side walls. The "Flat" style was incorporated into the assembly line sometime during the P-47D-28 series of aircraft at both of the Republic factories.
The instrument panel was also different on the later T-Bolts. You thought I was going to say "Jugs" didn't you ? Not me. 😉
The earlier versions had the corrugated floors and different side walls.
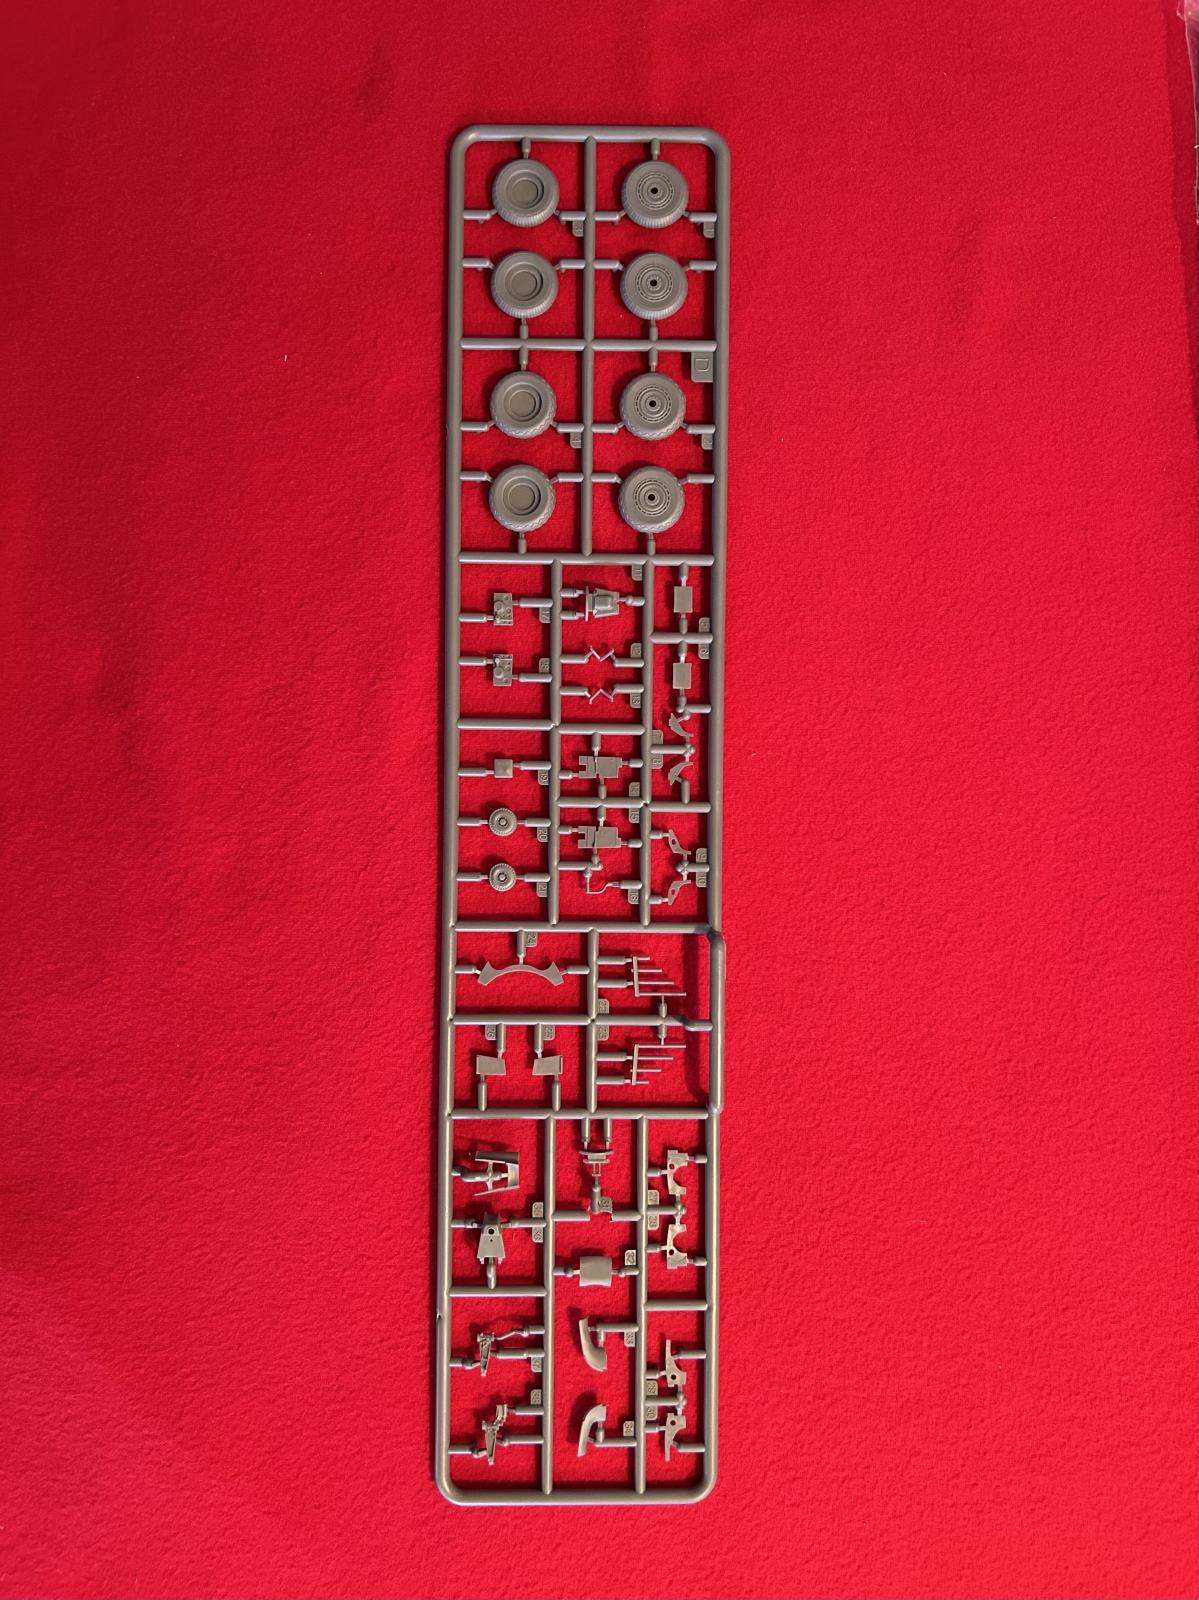
This is the parts tree that contains the main wheels and tail wheel tires. There are two different sets of tires, and two different tread styles are included.
Another set of bulged tires are included on another plastic parts tree, and we will get to that one soon.
-

- 1. Landing light covers
- 2. landing light
- 3. Dive / compression flaps
On the wings, Mini Art has followed the Tamiya building style and decided to use inserts to depict the changes that were made as the aircraft evolved over time. Once such area was the landing light. Here we can see the landing light, which was retractable on the real plane.
This particular landing light blanking insert also has the dive brake flaps molded into them. The P-47 had a problem with compressibility as it would near the sound barrier in a long dive. So this plane (and the P-38) had compressibility flaps installed on the later models, after several pilots were killed when they could not pull out of a dive.
The need for the compression flaps is why the landing light was moved to the outer wing.
On the earlier P-47, the landing light was located near the landing gear, inboard of the wing mounted MG's.
On the later versions, the landing light was moved further outboard, and was now much closer to the wing tip. This is why we have these inserts shown here.
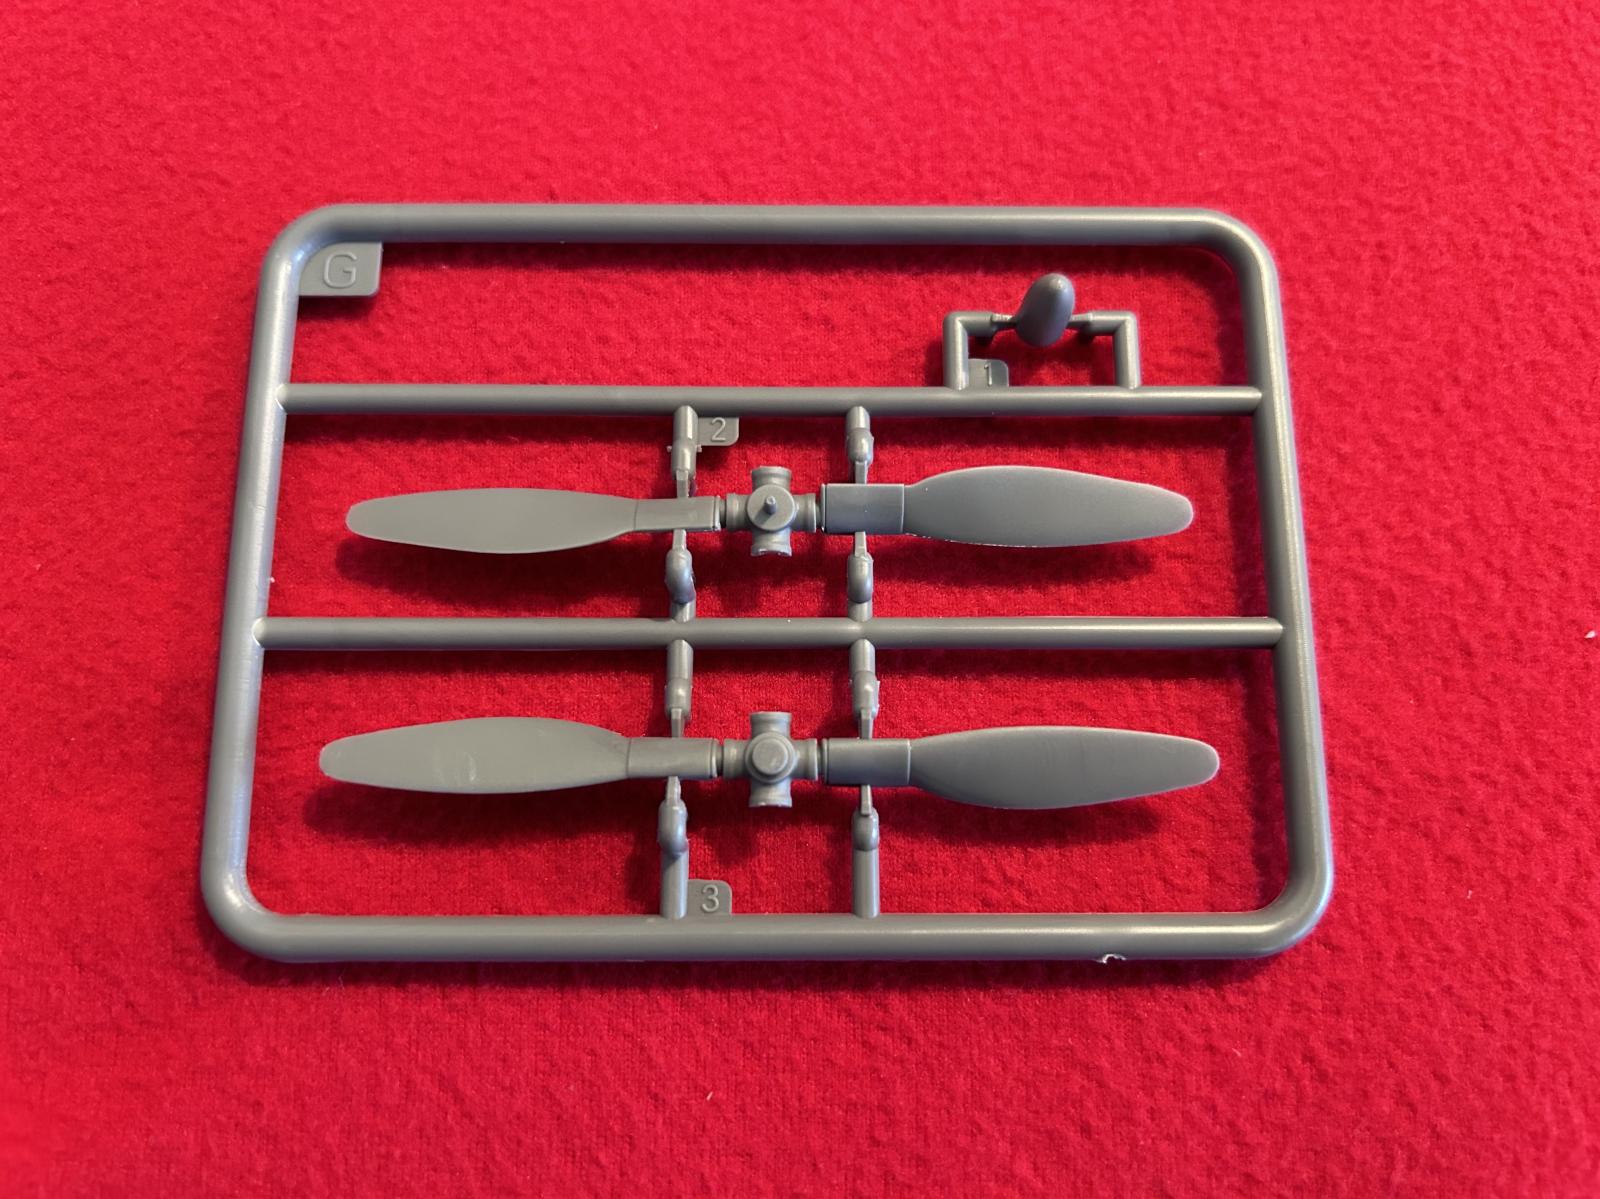
Only the Curtiss electric asymmetric paddle blade propeller is included. It also has the smaller / pointed propeller hub. Some of these P-47's used a Hamilton Standard prop in the field. The HS prop has a much larger hub and the end is more rounded.
I think you could "borrow" a propeller assembly from one of your Tamiya kits if needed and things would be fine.
So please be sure to check your references here.
Not having a choice of propeller style is something I will remain neutral on as far as a recommendation goes. It would be very nice if Mini Art followed Tamiya's lead here, and included several different propeller styles to give the builder choices.
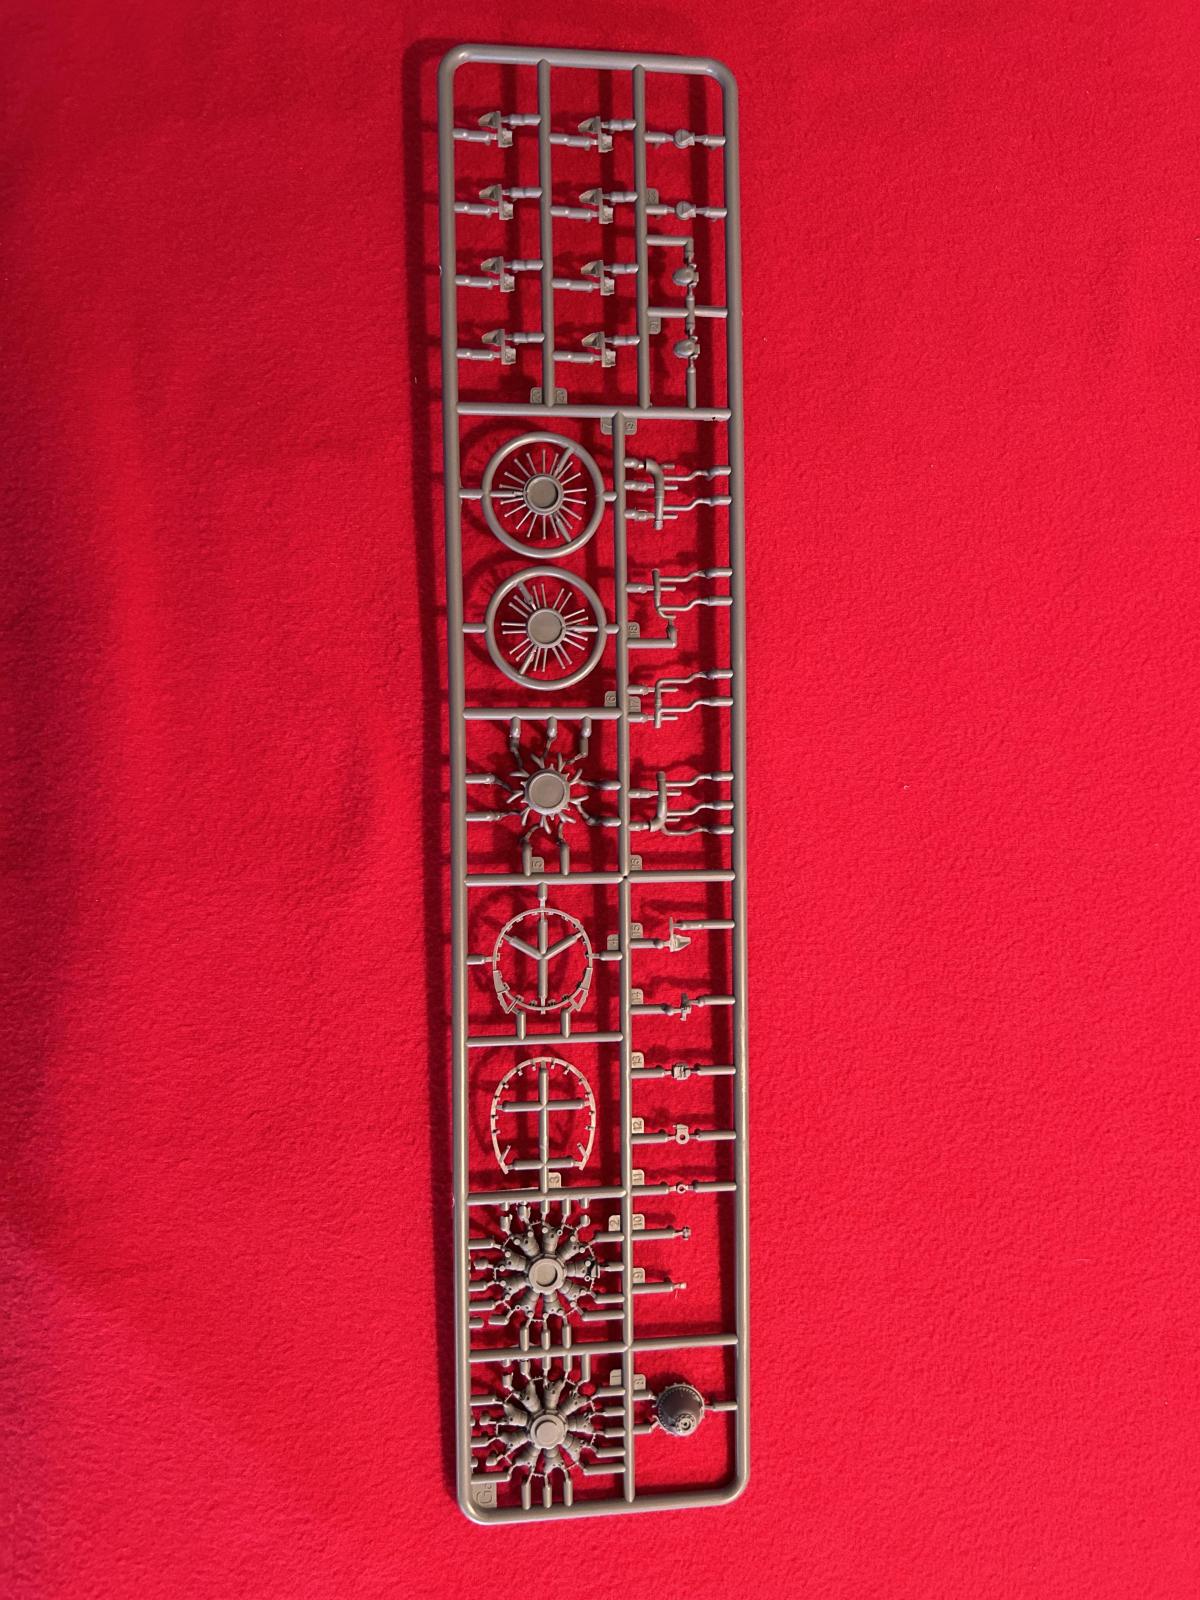
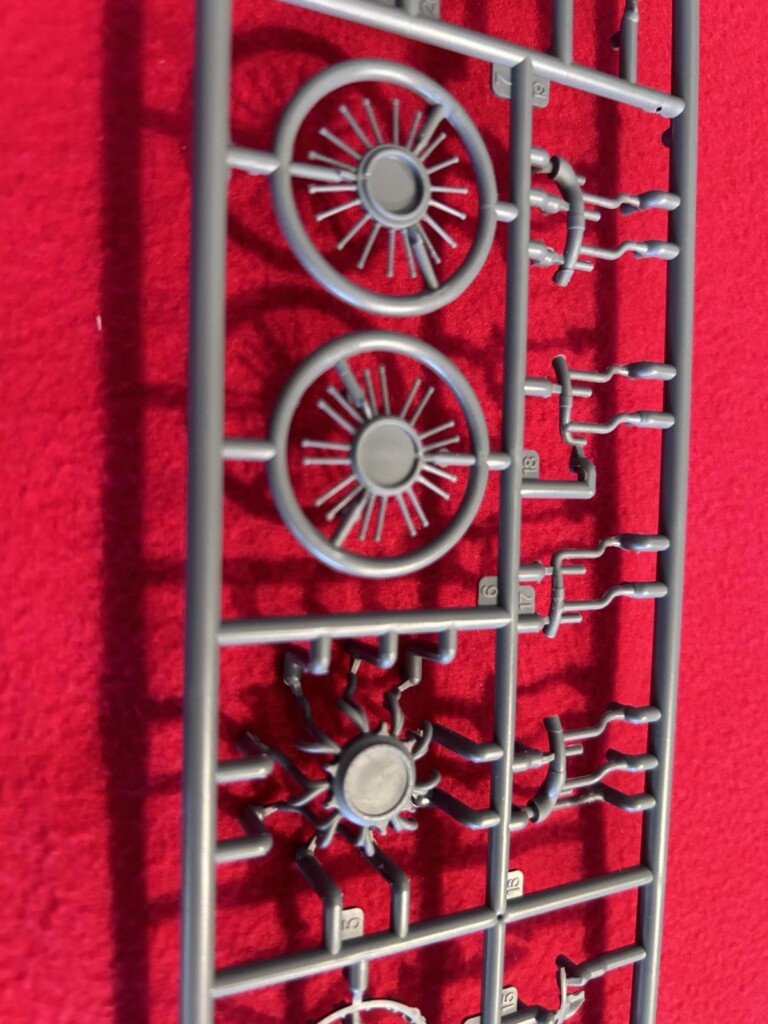
This is the highlight of the kit in my opinion. The exquisite Pratt and Whitney R-2800 -59 was used in the P-47D-30. This version of the engine used the later style magnetos. These are the ones that look more like a horse shoe crab to me.
However, both the early (rounded more sharper edges) and later (horse shoe crab) styles of magneto are included.
The engine is made up using a bunch of parts. The complete exhaust system is also included, so one could really have some fun with super detailing this one. I believe the engine is a kit of it's own...
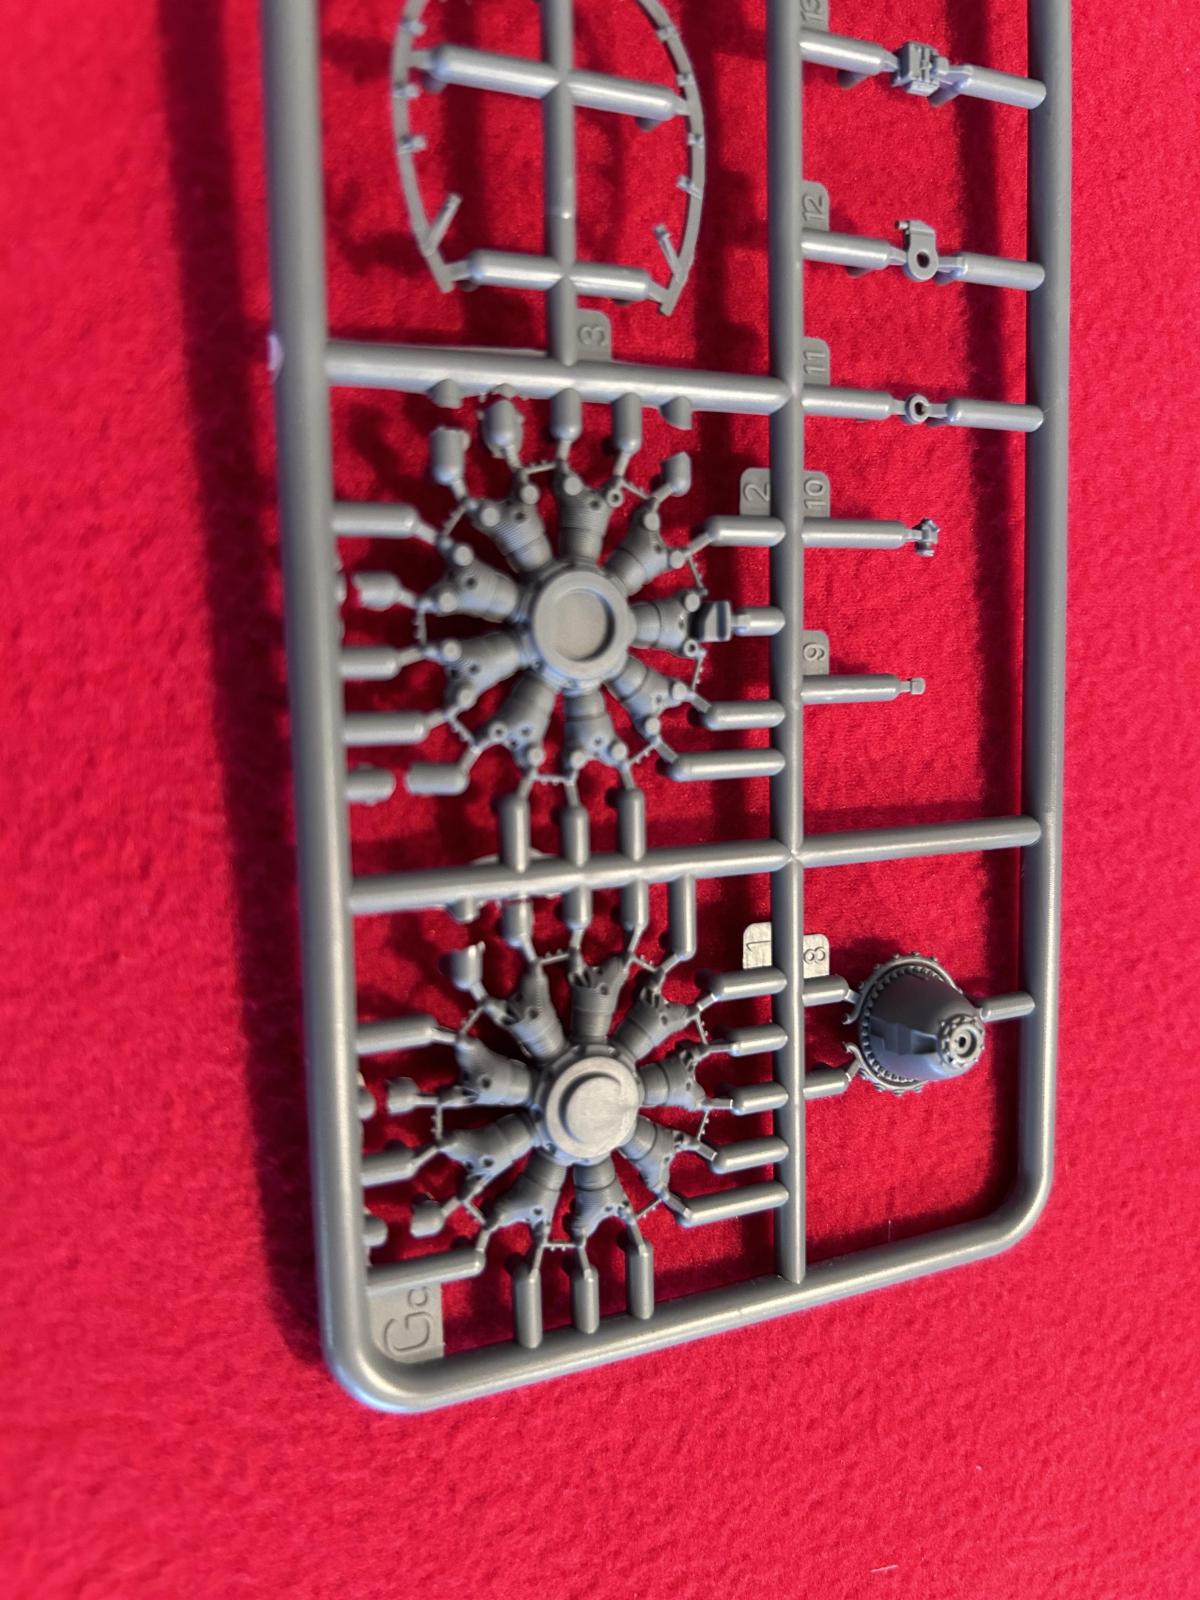
Here you can see how crisp the molding is, showing the cooling fins. OK I am a self confessed "gear head" and aviation geek... I love this stuff to the point of almost being obsessed with it. Well, maybe not that bad, but close ! 😉
-
- 1. Intake tubes
- 2. Pushrod set
- 3. Pushrod set
- 4. Exhaust pipes

In this photo, we can see the two sets of pushrods. The cylinders are nicely molded, and the cooling fins look great. The gear reduction case looks exactly as it should. I have seen quite a few of these "up close and personal" in real life...
On the right side of this picture, you can see some of the various parts that make up the exhaust system.
-

- 1. Late style horse shoe crab magneto
- 2. Earlier magneto
- 3. Cylinder cooling baffles
- 4. exhaust
In this next picture shown above, we can see the two different styles of magneto that I was describing earlier. You can also see part of the exhaust system, and some of the cooling baffles, that were used on the real plane to direct the air flow around and over various places on the cylinders and heads.
The only thing this engine is missing is the oil... 😉 Maybe the plug wires too... 😉
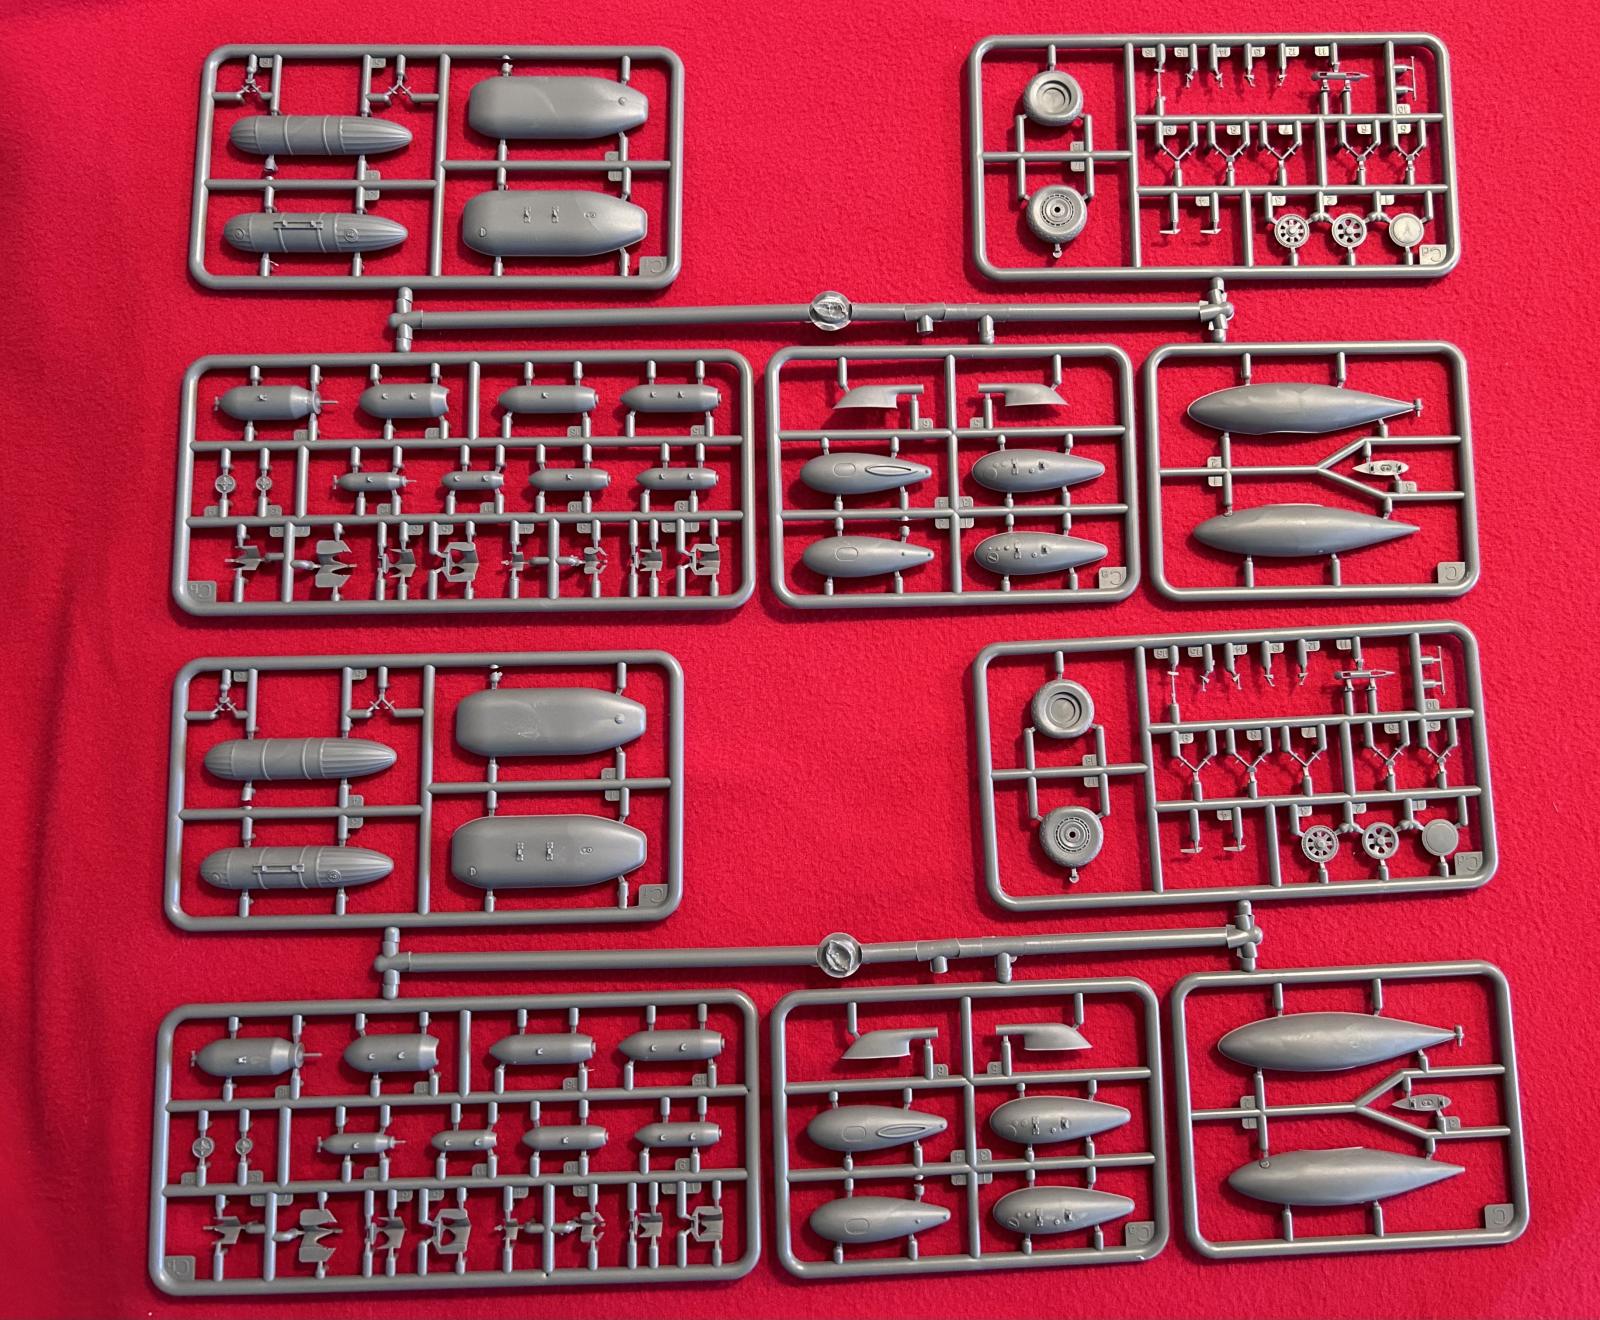
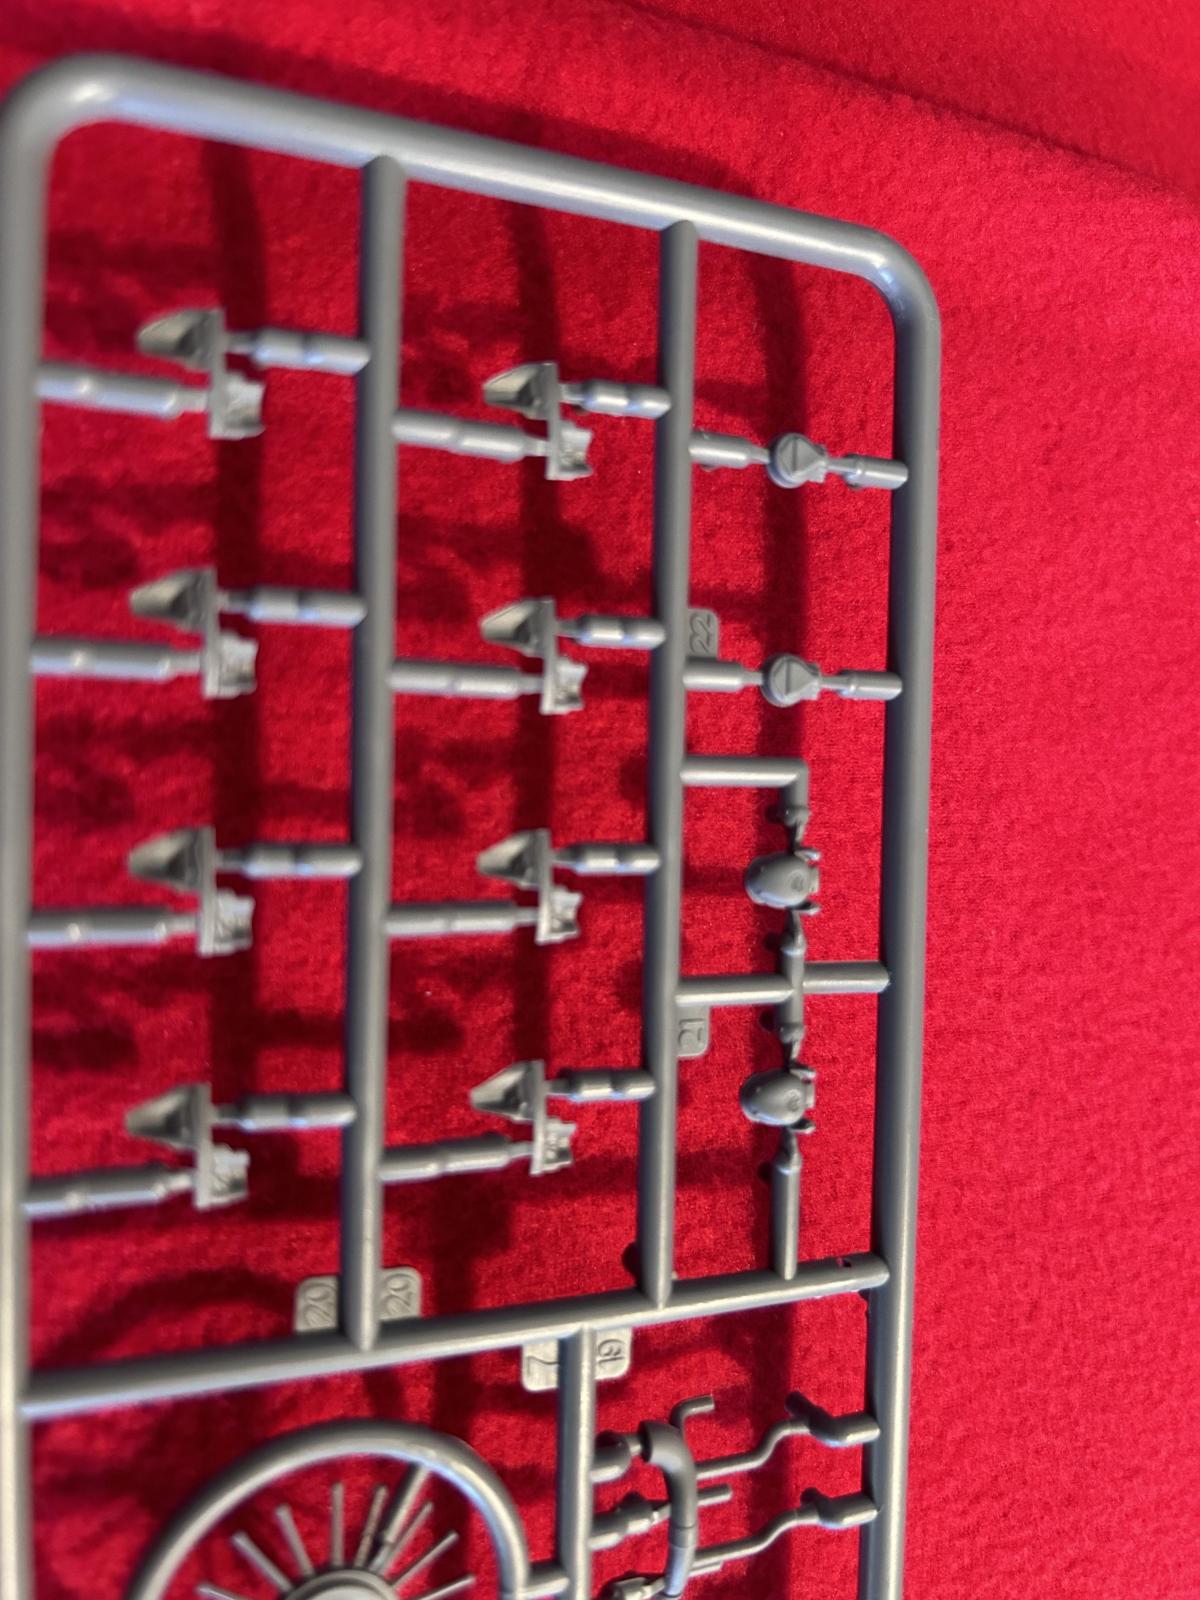
This is what is included as a part of the extensive ordnance and drop tank features.
Here we get two complete plastic trees containing these parts. They are identical.
This kit has bombs, and three different types of fuel tanks,
and it even has a smoke dispenser ! I have never seen that before in a kit.
Score another "good" call for Mini Art here. The ordnance and drop tanks are very nice.
-

- 1. small drop tanks
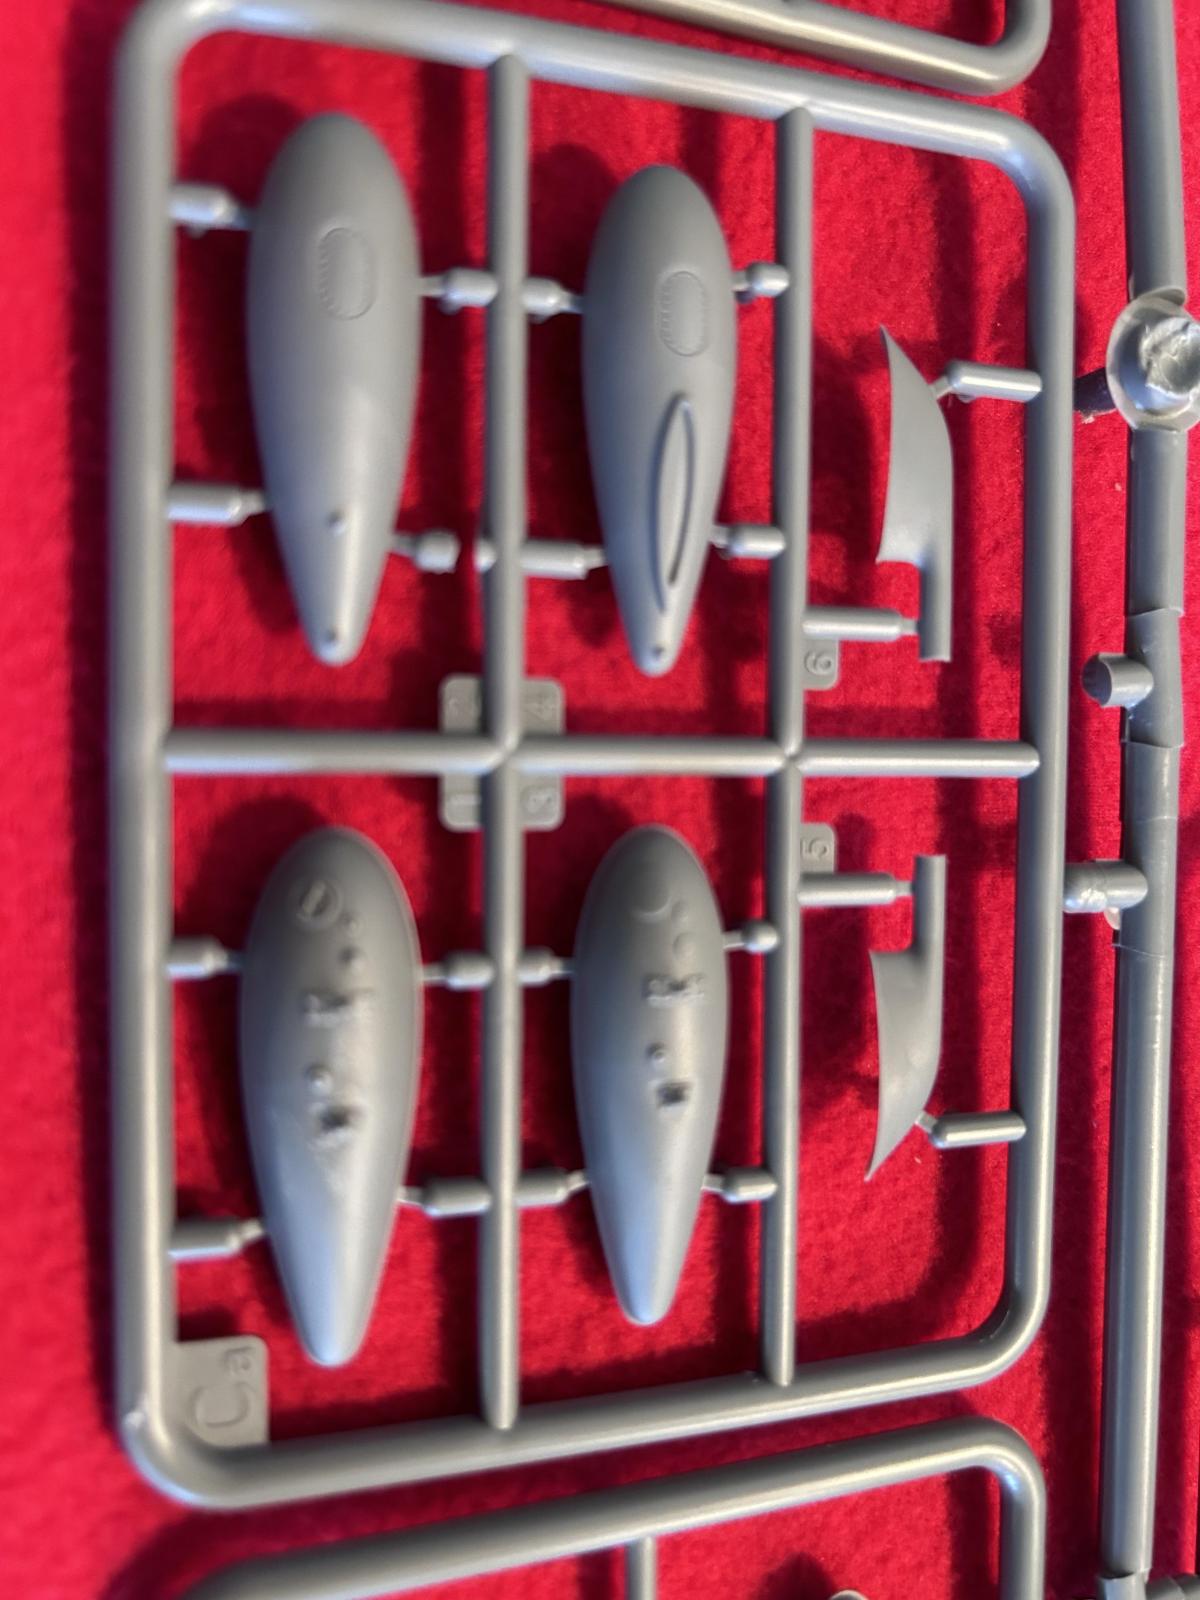
ranging from the small ones,
This kind I have never seen available in plastic before... turns out it is a smoke dispenser used for laying down a smoke screen. At first glance it looks like the kind of drop tank that was used on the Grumman F4F Wildcat and FM-2's.
-

- 1. pressed paper / resin drop tank
- 2. flat style drop tank
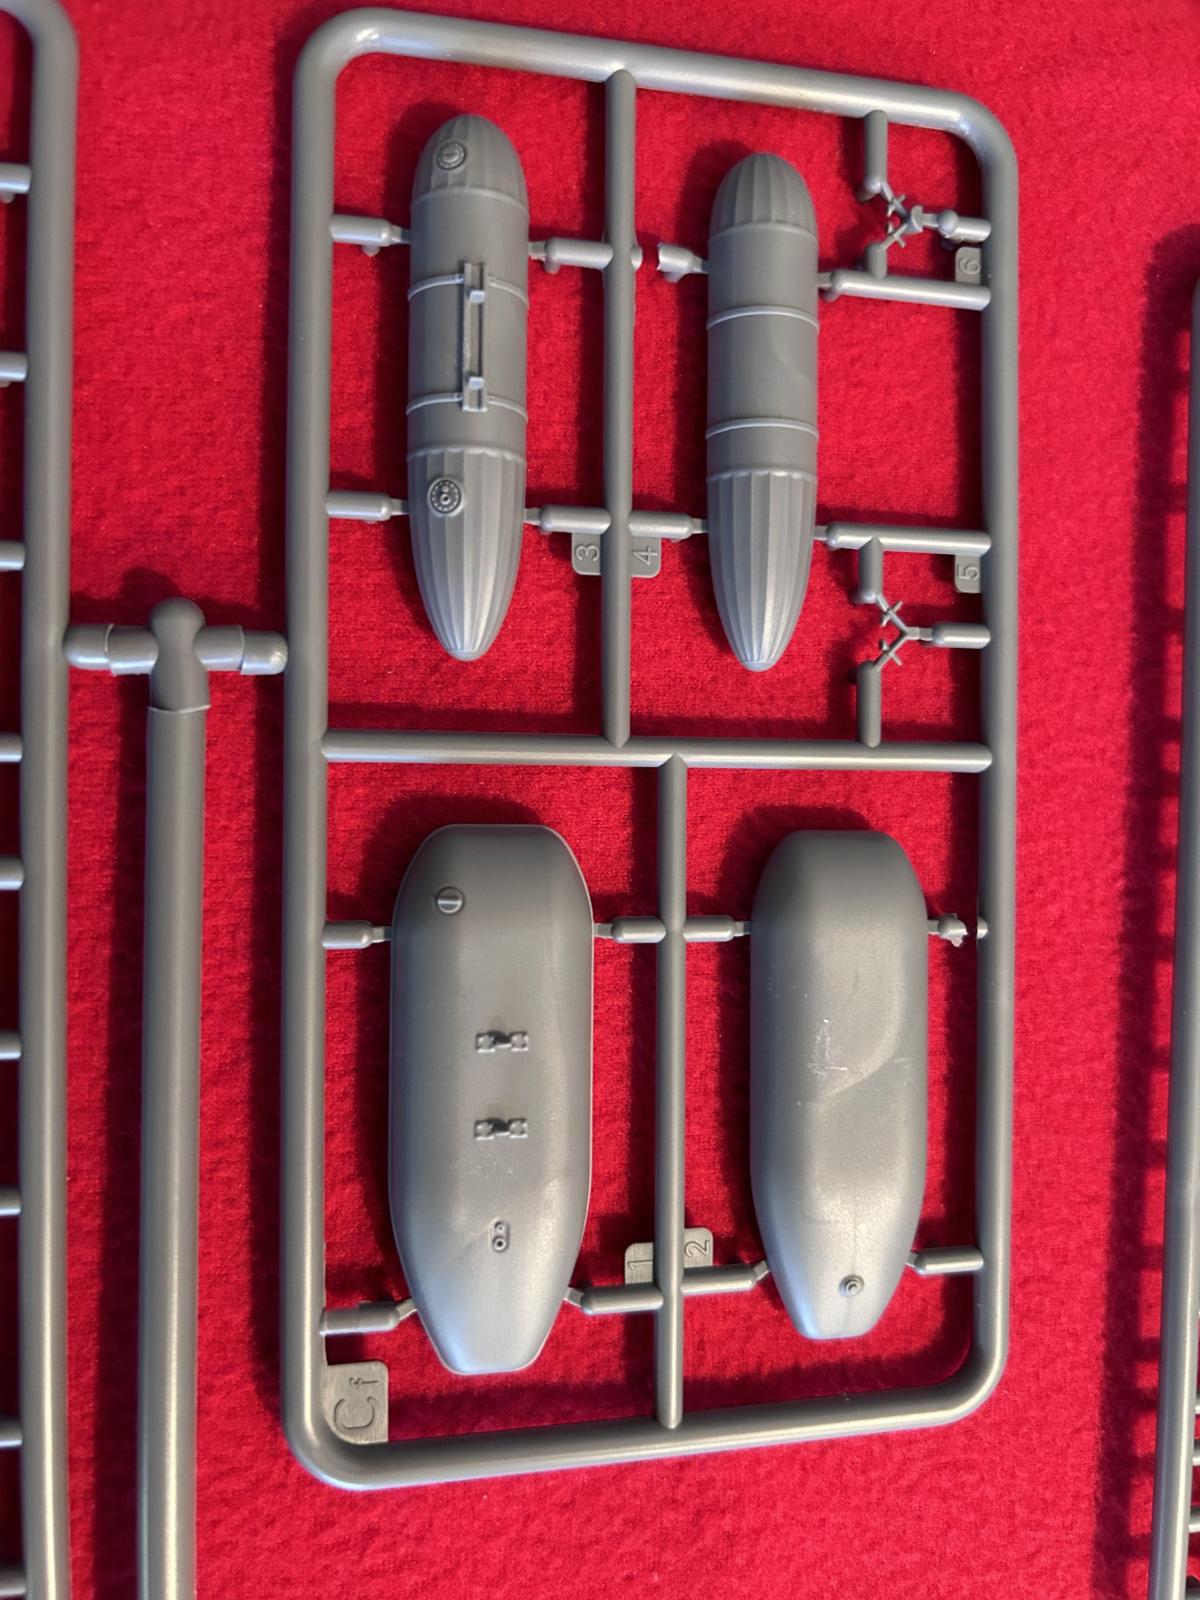
to the pressed paper / resin kind, and the flat ones,
-

- 1. Lockheed style

The larger Lockheed style that was similar (if not the same as) the ones found on PV-1 Ventura's and P-38 Lightning's.
Keep in mind we get the stencils and various other decals for these parts too.
Your spare parts bin is going to get a lot more cramped after this kit is done... You get a LOT of stuff to hang under this Thunderbolt...
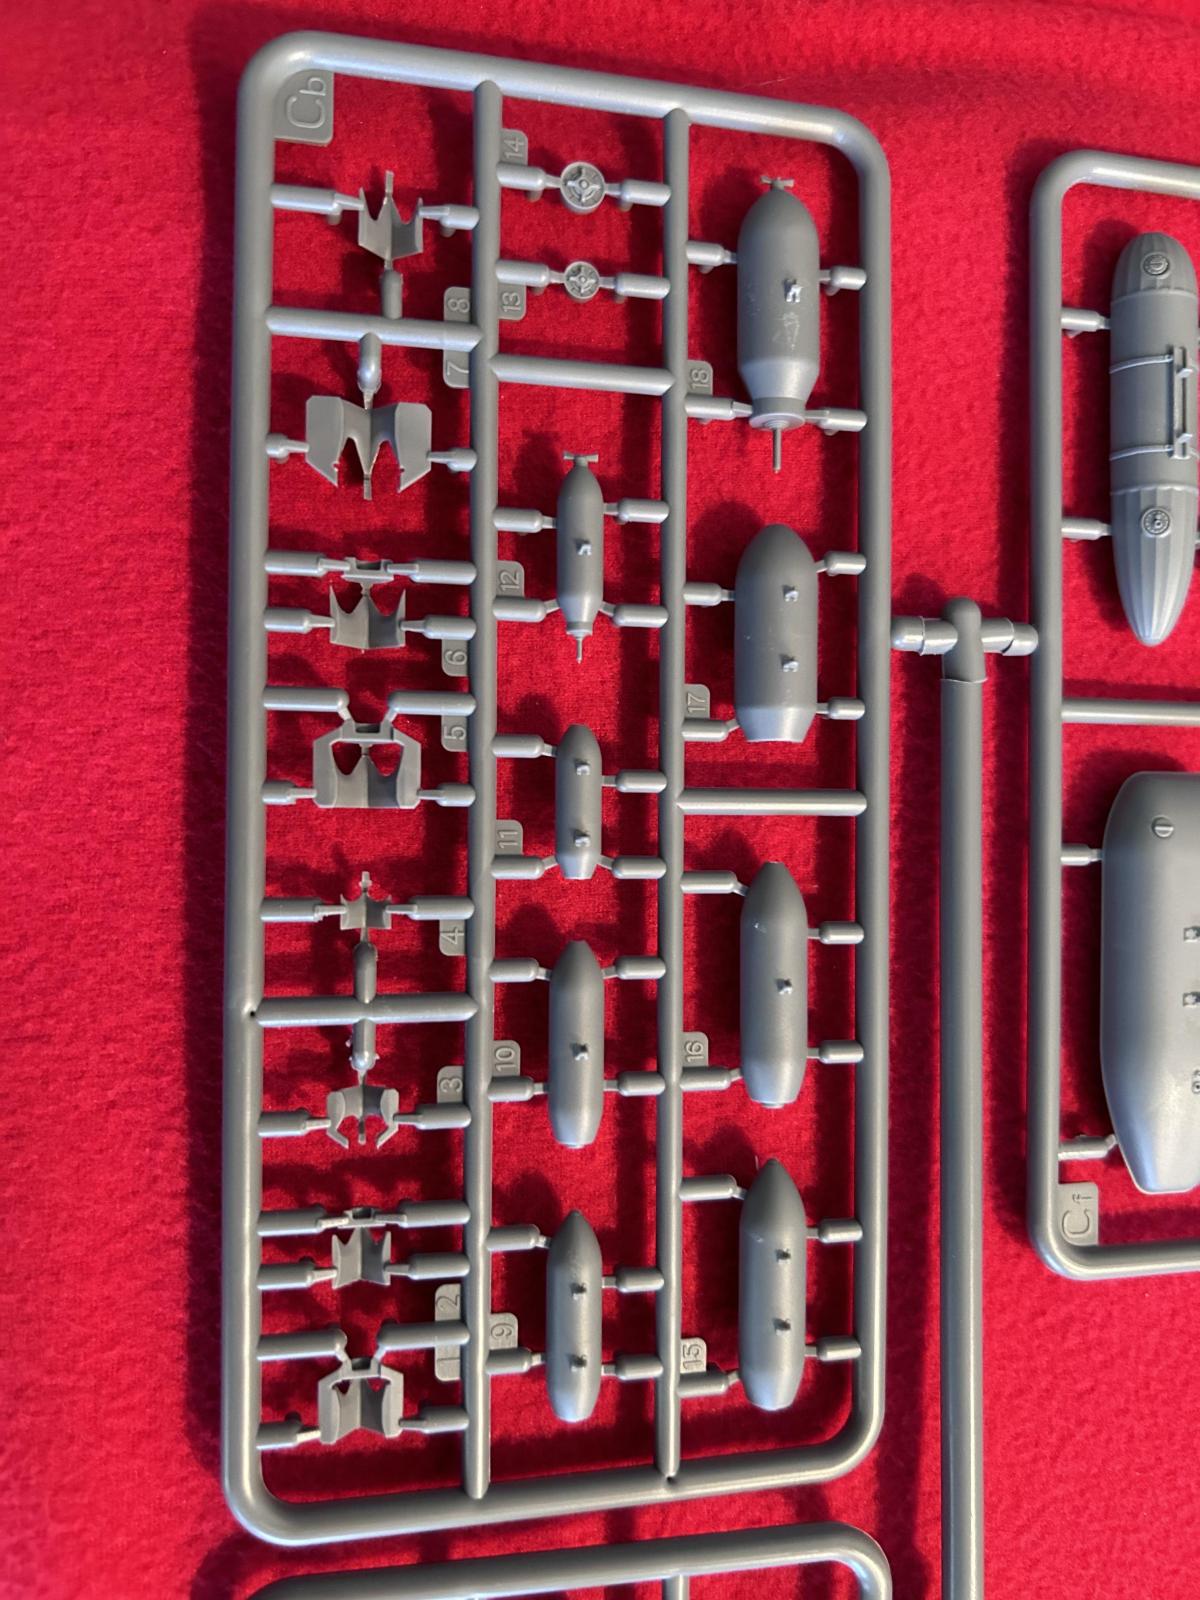
There are FOUR different sized bombs included. This thing is loaded with extra stuff...
Score another "Good" for Mini Art..
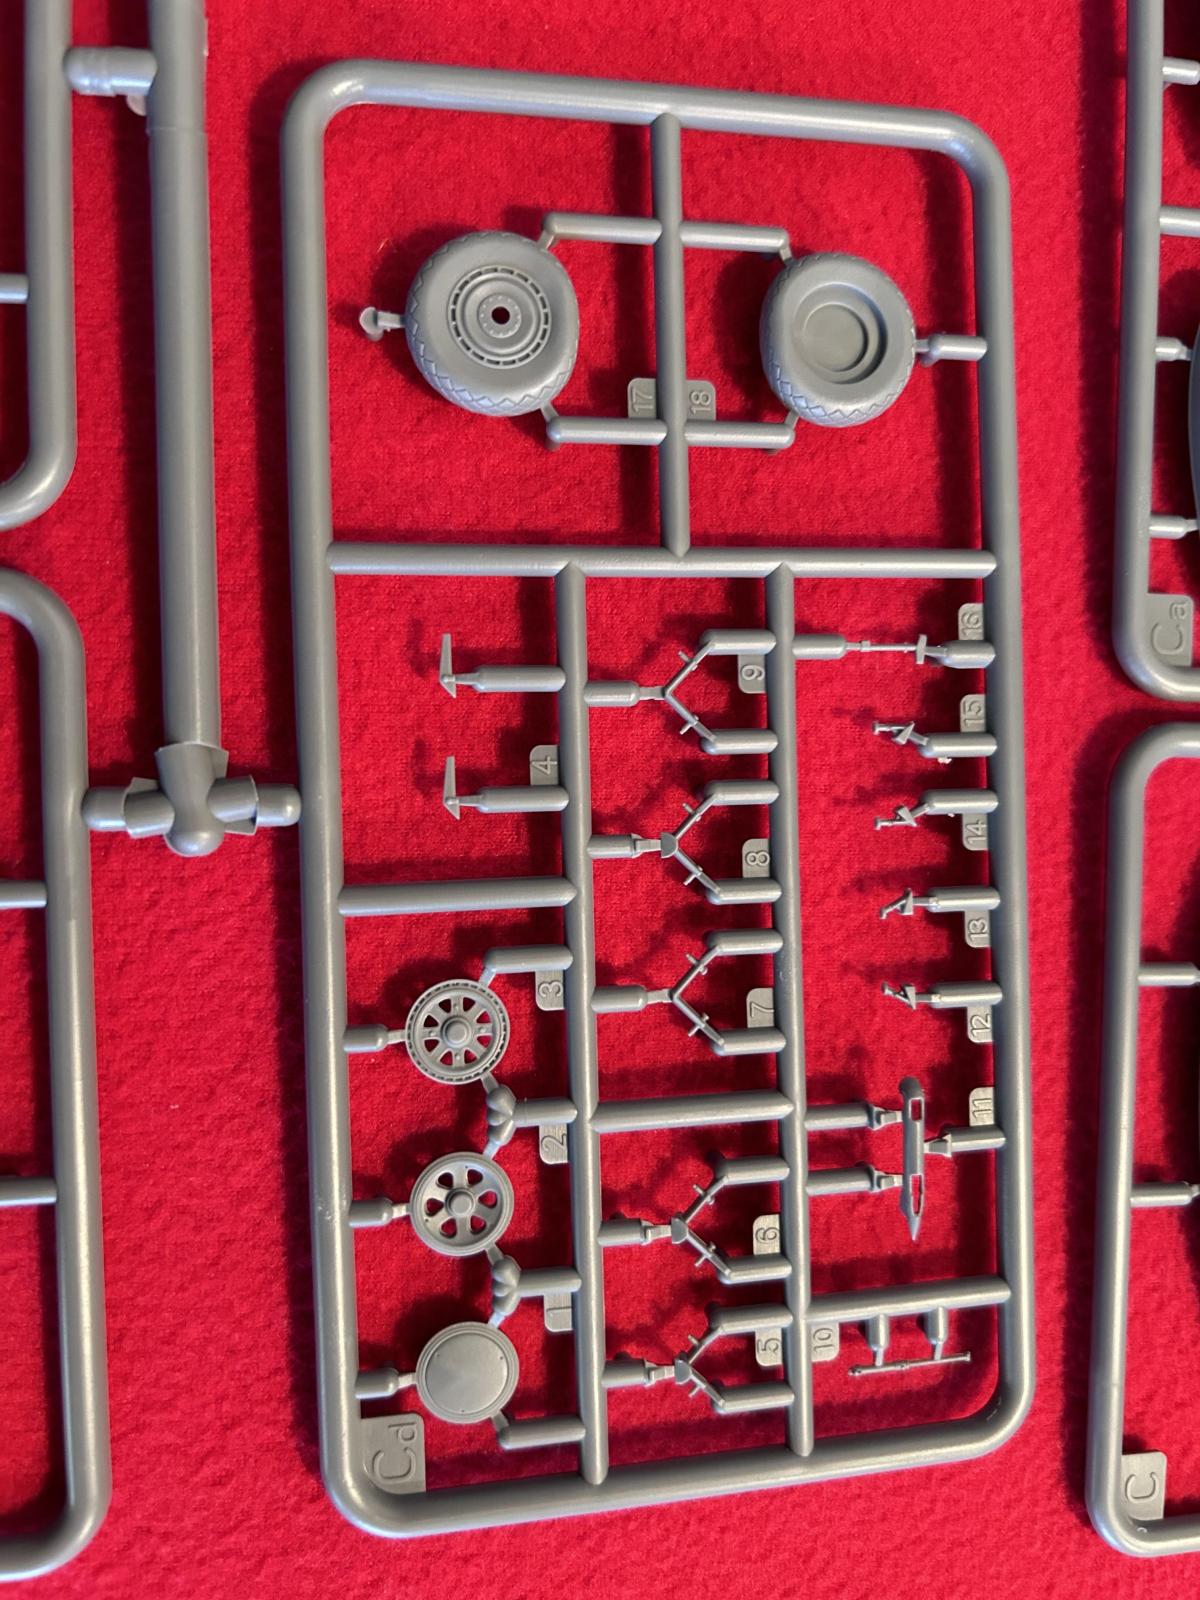
Now we shift gears, and go check out the tires and wheels this bad boy has...
These are the bulged ones. There are two different style of tread patterns included in the box. One is a "Square with Hole" pattern... and I'm using these bad boys on my Tamiya P47 "Gabreski" plane soon. This is part # D1 and # D3
The other is the typical Diamond pattern and this is what we see used on the bulged / flattened set of tires. The third set also appears to be a variation of the Diamond pattern.
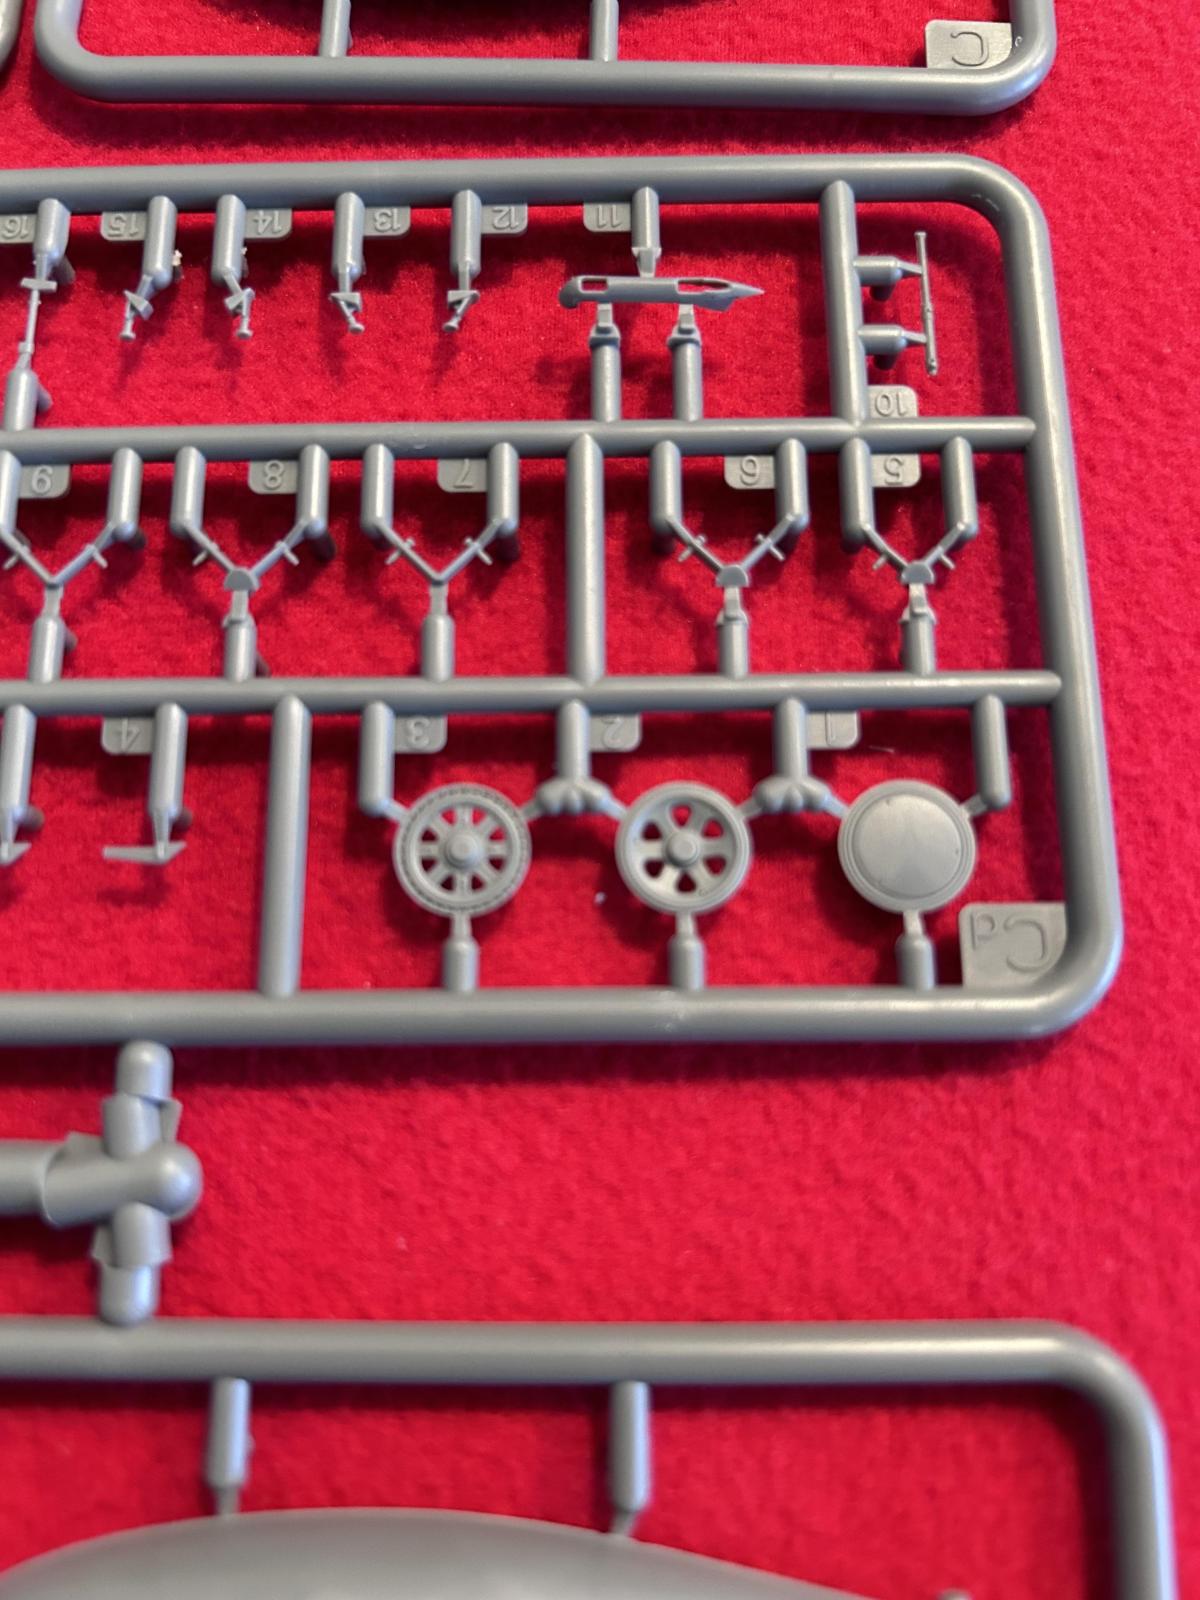
Which brings us to the wheels and tires. No it doesn't have a set of Centerline or Drag Lite racing wheels on it.
But it does have this: You get three different style of wheel hub.
One is the standard "Flat" wheel cover. These could be removed on the real plane. They were held in place by fine threaded AN screws.
The next type is the Six Spoke wheel. This is what you would see when the Flat wheel cover was removed.
Then things get interesting, and may actually point to a future release... There are a pair of Eight Spoke wheels.
These were used on the P-47N ! One of these could be in the future, but only time will tell.
If so, I'll take three please ... 😉
Remember earlier when I was talking about the landing lights ? This shows the wing parts tree. They used a construction style very similar to what Tamiya did with their bubble tops, and went with inserts. As long as these inserts fit well, I don't think it will be a problem. I hope to find out soon ! (as to how they fit that is)...
-

- 1. Landing light insert
- 2. Unloaded landing gear struts
This next photo shows how they went about using inserts for the proper landing light position. Depending on which variant you are building will determine which location the light was installed.
Since this is a P-47D-30 plane, it uses the insert that places the landing light outboard near the wing tip. This change happened somewhere around the D-27 or D-28 models.
-

- 1. Compressed LG struts
- 2. Firewall
- 3. "Early" style Landing light insert
On the earlier D-25 Thunderbolts, the landing light was located near the main landing gear.
This is why we get a flat blanking plate to use as a cover in this spot on the wings...
Tamiya used the same principle, and it makes sense as long as everything fits well.
There is another "Good" thing that I should mention here. It's in regards to the main landing gear. Mini Art has provided two different sets of main gear struts.
One set is compressed, as it the plane is loaded with a full load of ordnance, ammunition, and fuel. Remember the P-47 could have weighed as much as 7 TONS when loaded. So this is quite accurate.
Then they give us another set of main gear struts that are not as compressed. I would use this set if the plane was being built "clean" without anything hanging under the wings or fuselage.
I call this option as another "good" for Mini Art.
This kit was not checked as far as dimensions or the proper location of the panel lines. I didn't even try to do this because it still looks like a P-47 bubble top to me. Your mileage may vary.
I'm not part of the rivet counting crowd... instead I build kits. I hope to get this one on the bench soon. I have a killer set of decals I have had for a few years to build Major Glen Eagleston's P-47D-30. His plane has a solid Yellow Cowling with a huge Black skull and cross bones on it...
So if things work out as planned, look for it to show up in the headlines, sometime soon in the future.
So here is how I scored the kit:
First we have the "Good"
I am very impressed by the P&W R-2800 engine. It looks incredibly well detailed.
The number (and quality) of the various parts to hang under the wings and fuselage.
It's cool to see another tire tread style too, with the addition of the "Square with Hole" tread pattern included as an option.
Having a choice of compressed or unloaded landing gear struts is a nice call too.
Molded in intercooler doors is nice, as is the one piece fuselage that doesn't require inserts.
Now for the "Not So Good" things...
It would have been great if several kinds of propellers were included like how Tamiya does it... Curtiss electric paddle blade, Curtiss electric standard blade, (not the early "pencil" ones). A Hamilton Standard prop would have been nice too.
Packaging the plastic parts in individual bags would have also been a nice touch, but that didn't happen.
I can't complaint though, because all of my parts look great as delivered. If you are planning on keeping this one in your stash and not building it, I would recommend placing the parts in separate bags, especially if you're moving and taking your stash with you.
This kit was provided courtesy of my wallet.
Get one (or two) of these. Build it and have fun. It looks like a great model to me in the box. I will soon see how it builds. That will be the final call.
If you have a kit or aftermarket part or decal set that you would like to see a fair and honest review on, please contact me. You can look at my other reviews.
I don't bash things, but instead I show the reader what is provided, and let them make up their own mind.
As always, comments are encouraged.
Thank you for stopping by.

Awesome review, Louis!
Thanks!
Spiros Pendedekas (@fiveten)
Thank you my friend !
Mine arrived this week also. Here are my observations:
Everything is in the kit to make a P-47D-30, a P-47D-40 (there's not a lot of visual difference between the two, the differences were equipment) or a late version P-47M-1 (use the alternative parts for the different mags that go for the C-series R-2800). There are ample aftermarket decals for any of these three versions at decent prices up on eBay.
The asymmetric prop the kit provides was not specifically for any particular subtype - there are photos of it on razorbacks up to late D-40s. Fighter-bomber units liked it in Italy and NE Europe 1944-45, because it improved low altitude performance. You should check photos of the specific airplane you are doing as to what prop was used. The Curtiss-Electric paddleblade prop from the Tamiya bubbletop kit can be used with this kit. (You would definitely want it for a P-47M)
I recommend you read my review of doing the first kit (everything applies regarding the second kit), and you will have a hassle-free project and a good result.
https://modelingmadness.com/review/allies/cleaver/us/usaaf/47/m47.htm
Tom Cleaver (@tcinla)
Yes Tom, Your comments about the props are basically what I stated in the review above. I will be taking your advice on the building of this kit. It looks to be a very nice model. I read your build over at MM, and if I read it correctly, you didn't install your exhaust system ? Was this done out of necessity because you had the basic kit, or simply your preference ?
Please let me know, as I am getting ready to start cutting plastic on this one... Thanks in advance.
The engine looks to be a kit by itself ! Now I see why you said what you did about it in your review / build.
This is what I found out on a dedicated Pratt and Whitney data base. This screen shot shows the differences between the various magnetos, the gear reduction cases, and how they were installed.
I believe the other set that was included in the kit's part is the earlier style, similar to what we would see in a P&W R-2800-8 series like what was used on the early Corsairs.
The P-47D -30 used a R-2800-59 and it had the "horse shoe crab" looking magnetos. I took some excellent pictures of the P-47D-30 that is currently at American Aero, and the restoration is just starting. This thing is a treasure trove of original information, because it has never been restored. I was amazed by the various colors I found inside this plane.
https://en.wikipedia.org/wiki/Pratt_%26_Whitney_R-2800_Double_Wasp
There is a lot of wonderful information here on this Wiki website about the R-2800. It covers the types, A, B and C, as well as the differences between them. Up until a few years ago, I never knew there was so many changes made to this engine during it's production run.
What lead me into doing the research on it, was when I read about how "Corky" Meyer was flying a glider version of the prototype F6F Hellcat when his engine shut off. It turned out the ignition leads were not pressurized, so at higher altitudes the ignition system was not able to deliver proper spark to the spark plugs.
When this happened, it was the same thing as if you had shut off the master power switch and effectively killed the spark going to the engine. No spark , no burning fuel, no power, no nothing but a rapid decent back to the terra firma.
So when Corky ended up in a lower altitude where the air was more dense, he was able to restart the engine and fly the prototype back to the Grumman plant.
Once he landed, Corky had a "conversation" with the Pratt and Whitney representatives, who told him that all of the pressurized ignition leads were being used by the Army in the P-47. Once Grumman got one and installed it, they were able to continue with the time to climb testing and were able to determine the altitude the Hellcat could reach... with the proper ignition system installed that is.
Prior to learning about this pressurized ignition system, all they were able to get out of the Hellcat was around 32,000 feet. Yet the Army was routinely flying well over 40,000 feet in the P-47, with the same engine ! This had the Grumman crew stumped for a while.
I became interested and started digging into the history behind the R-2800 at this instant.
I didn't use the exhaust system because there is no place to use it on the "basic kit." That and the other detailed engine parts are used in the "advanced" kit, which is set up to have the cowling and accessories area open, as well as the gunbays.
Tom Cleaver (@tcinla)
Thank you for the speedy reply. Now it makes sense about the exhaust parts. Mine is the "basic" version, so chances are it will not be used on mine either. I have not yet looked at the instructions, but I will be soon, as I want to get going on this one.
Thank you Louis @lgardner for a comprehensive and detailed review!
David Mills (@davem)
Thank you my friend, for the wonderful feedback. I'm glad you enjoyed it. Take care.
Thank you Louis! Great review. Looking forward to building this one. The Collings Thunderbolt is at American Aero. They found a "Rosie" signature in the fuselage and the airplane is all apart for color reference. She's never been "restored" so it's a unique time capsule.
J
Jim Harley (@jimh)
Hey Jim,
Yes I have been over to check out the Collings Thunderbolt. I sent you a few pictures of it in a text message earlier today. Did you get them ?
It is an unbelievable and very historical time capsule. I was amazed at what I saw there, but I missed the Rosie signature. I was told about it though. I found some pristine samples of the original paint in numerous places. Needless to say, I took a TON of photos ! It is complete with all of the turbo and associated duct work still there.
Louis, @lgardner, thanks for the review. I would definitely like one of these kits but just can't justify the purchase since I have a very nice Tamiya P-47 kit to build in my stash. I like what I see in this kit though and it is nice to see another quality model manufacturer creating 1/48th scale aircraft. I was pretty much unaware of this company because I don't build 1/35th scale armor.
Walt (@luftwaffe-birdman)
Hey Walt. I'm glad you enjoyed reading the article, and I sincerely appreciate you taking the time to respond. I am currently working on several Tamiya P-47's as part of a project. They are a dream to build, and so far the fit has been spot on. These Tamiya kits are very nice, and I'm interested to see how this new tool MiniArt kit will compare to a Tamiya. Maybe I should do a build off between the two, and post it up in a build journal.
This is my first ever kit purchase from MiniArt. I was not aware that they even made aircraft, until just recently. Like you said, they were primarily an armor model company previously. From what I have seen in this kit though, I am very happy they decided to branch out into the aircraft field. They couldn't have picked a better subject either.
Have you seen the new tool 1/48 Hobby Boss B-24J is about to hit the shelves ? Oh boy... my wallet is already crying over this one. I would really like to get one of them, but with a price tag set at over $100, I'm not so certain it will ever happen. Time will tell. That is a huge investment.
Louis @lgardner - there are so many problems that have been pointed out in regard to the HB B-24J that you will be happy to save your $140 - spend it on kits worth building.
Tom Cleaver (@tcinla)
I was not impressed with the engines, and I noticed a small gap on the outer engine nacelle on the model they built and painted overall gray (or left in natural bare plastic).
But the interior photos of the completed model looked to be very well detailed, and looked to be what I remember seeing on the inside of the real Colling's Foundation "Witchcraft" on the numerous times I have been inside it.
Thank you for the heads up. My wallet will appreciate it too.
Geez Louise ! I never realized how old I look now... 🙂
Another great enthusiastic review from you, Louis, a great read even though I will never buy the kit.
George Williams (@chinesegeorge)
Thank you for stopping by and commenting. It's always good to hear from you. Take care, and stay safe my friend.