Extra EA300L by Brengun
This build was all about the decals. The airframe is just the foundation for their application.
Courtesy of Skytamer.com
The Extra Flugzeugbau EA-300 is a two-seat aerobatic monoplane capable of Unlimited category competition. It was designed in 1987 by Walter Extra, an award-winning German aerobatic pilot and built by Extra Flugzeugbau. Design of the Extra EA-300 was based on the Extra EA-230, an early 1980's monoplane having a wing made of wood. The Extra EA-300 has a welded steel tube fuselage covered in aluminum and fabric. The mid-set wing has a carbon fiber composite spar and carbon composite skins. A symmetrical airfoil, mounted with a zero angle of incidence, provides equal performance in both upright and inverted flight. The landing gear is fixed taildragger style with composite main legs and fiberglass wheel pants. The powerplant is a fuel-injected Lycoming AEIO-540 which produces 300 hp (224 kW).
The first two-seat Extra EA-300 made its maiden flight on 6 May 1988, with German type certification following on 16 May 1990. The single seat Extra EA-300S flew on 4 March 1992.
The Extra EA-300 is stressed for ±10“g” with one person on board and ±8Ig with two. Some Extra EA-300's are certificated in the Experimental Category in the U.S., while others are certificated in the Aerobatic category.
Extra EA-300L is also a two-seat version with low mounted wing and shorter fuselage. More Extra EA-300L aircraft have been produced than any other model. Its wing is mounted at the bottom of the fuselage, with its span reduced from 26 ft 3 in (8.00 m) to 24 ft 3 in (7.39 m). Improved ailerons boost the EA-300L's roll rate to 400 degrees per second. All EA-300L's are fully certified under FAA and European Joint Aviation Authorities regulations.
The Kit
Unlike most of Brengun's products, this is an injection molded kit. It comes in an end-opening box and consists of two sprues of blueish-gray crisply molded sprues that look similar to Airfix's offerings. The backside of the box has color information. Sidewall detail is molded into the fuselage halves. Overall detail might be a bit overstated, but with a flashy paint scheme, that may not be an issue. A four bladed prop is included, but not for use with this airframe.
The instructions are on a bi-fold sheet and includes a parts map. The only text is generic color call-outs in Czech and English. Assembly starts with subassemblies for the cockpit, prop, and wheels. The cockpit gets trapped in the fuselage halves, followed by attaching the wings and stabs. Underside details come next and the canopy is added last.
To model an acrobatic aircraft, one can either scratch build the reference rods for the wing tips, (clearly in view in the cover photo) or buy the photo-etch fret. The fret also includes an instrument panel with acetate dials, seat belts, and a few other details.
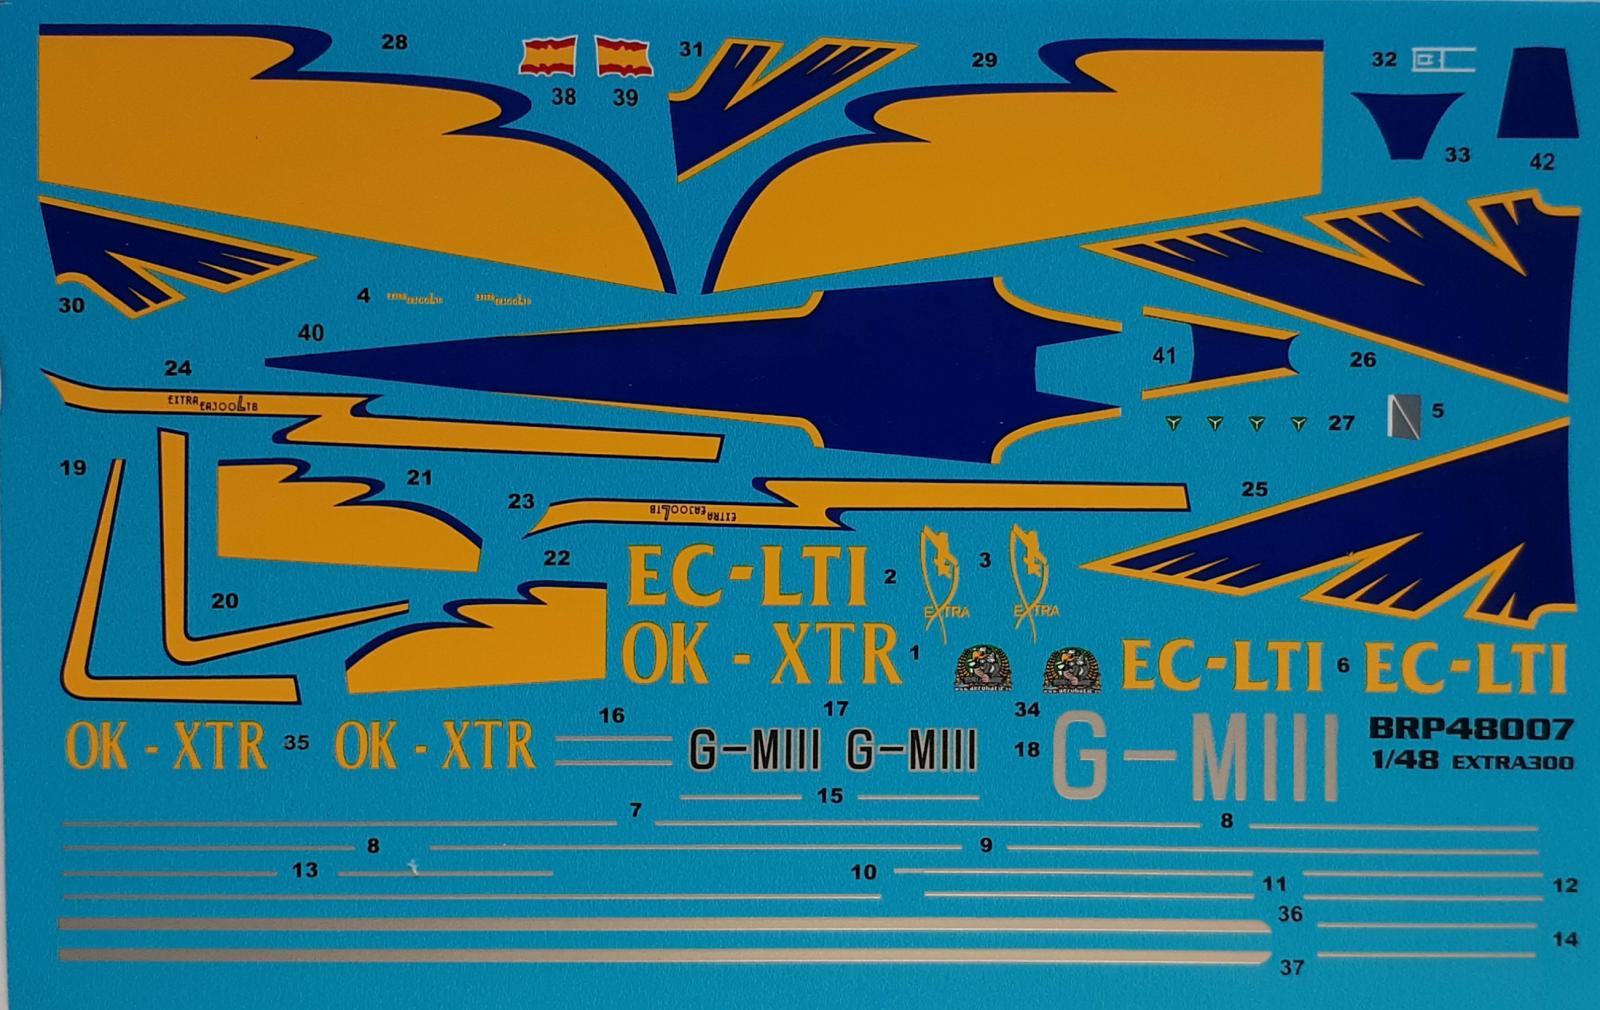
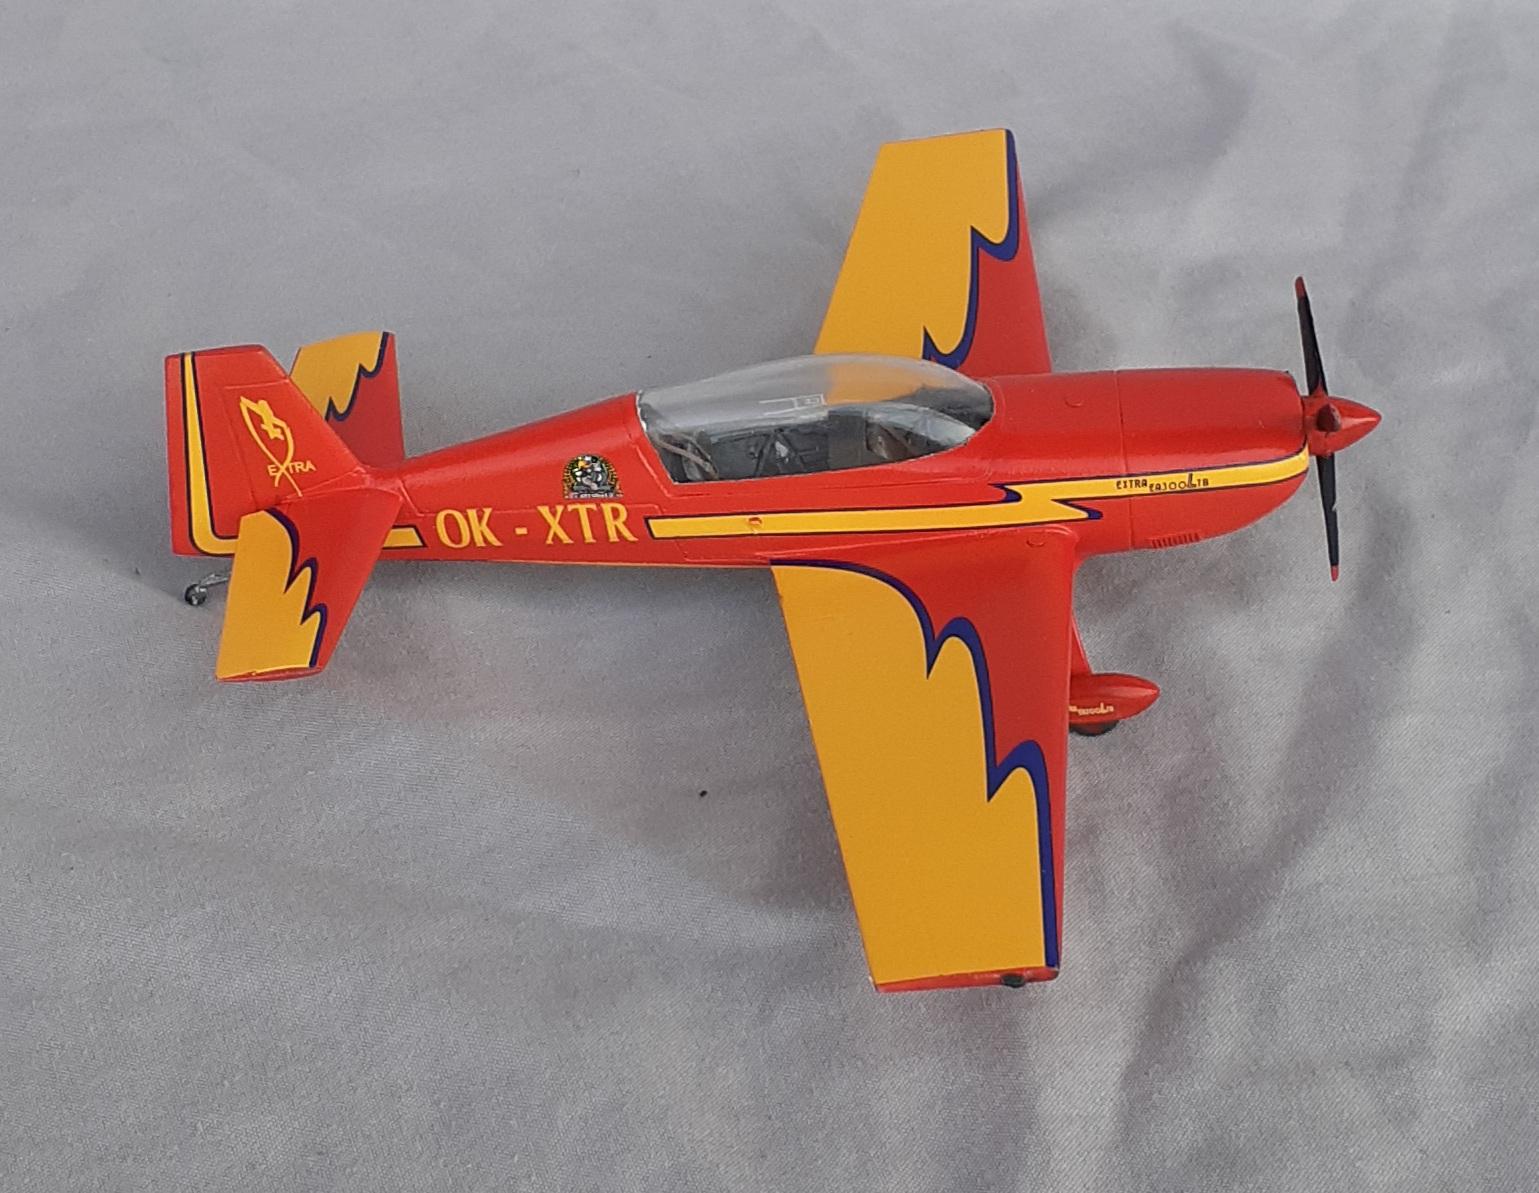
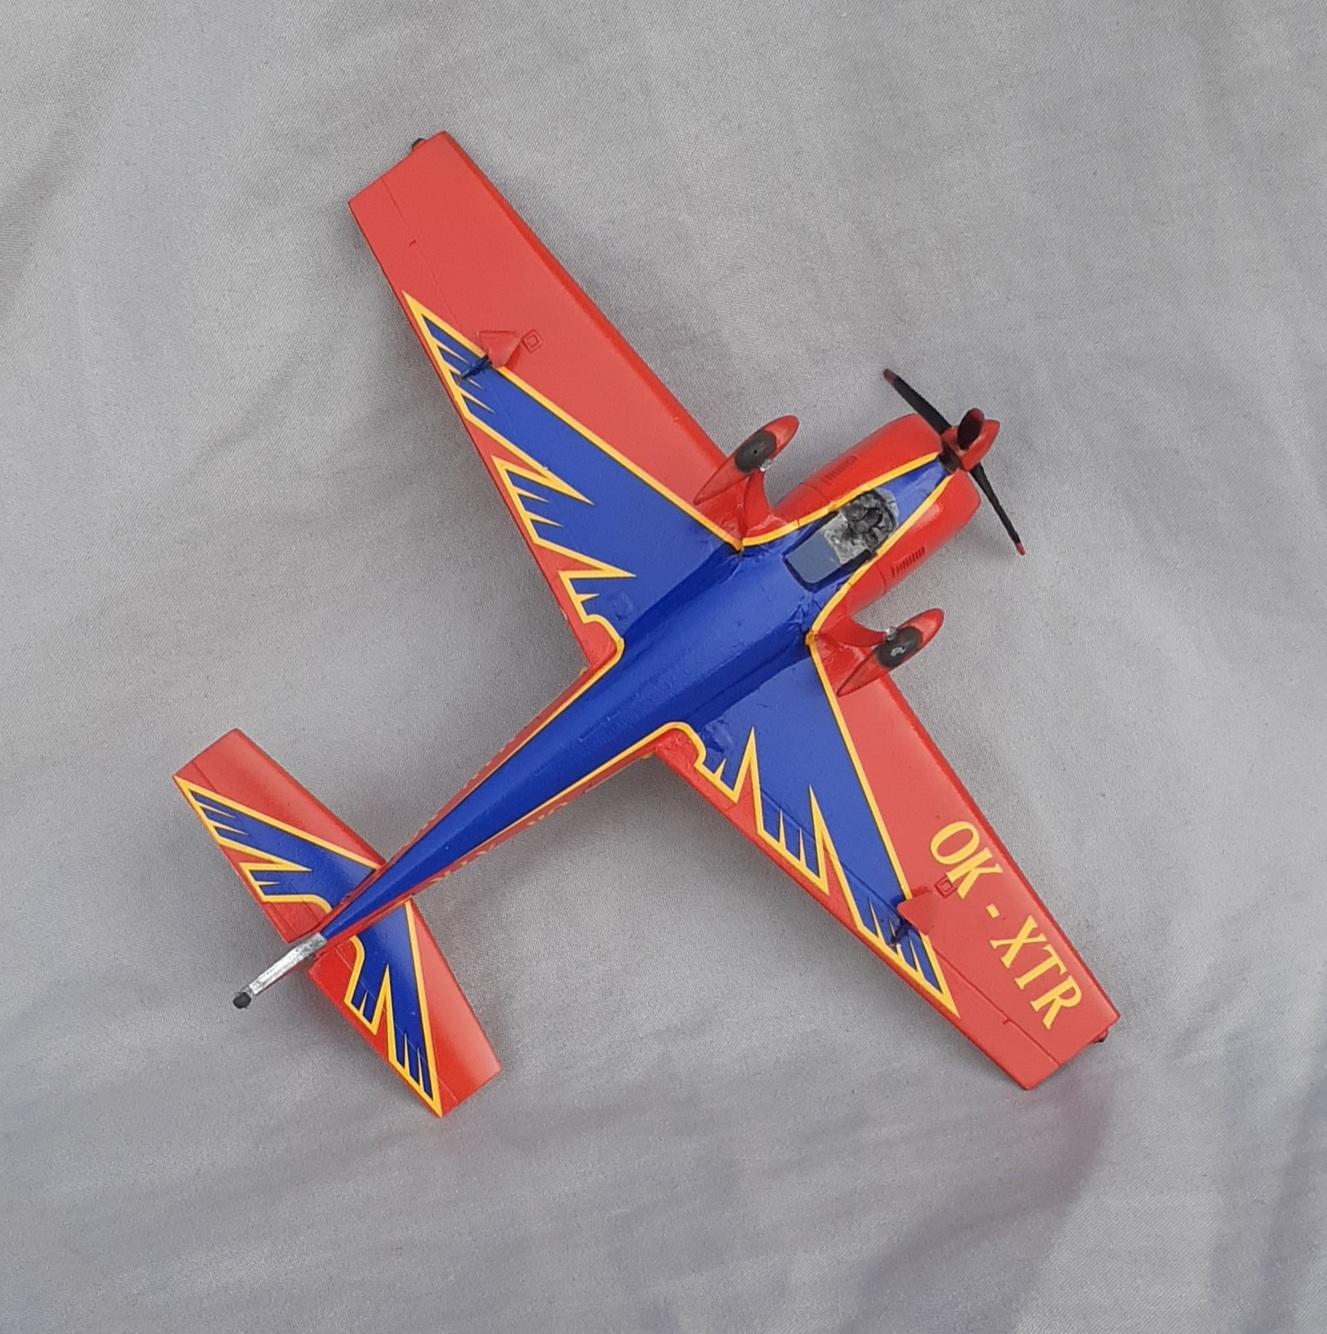
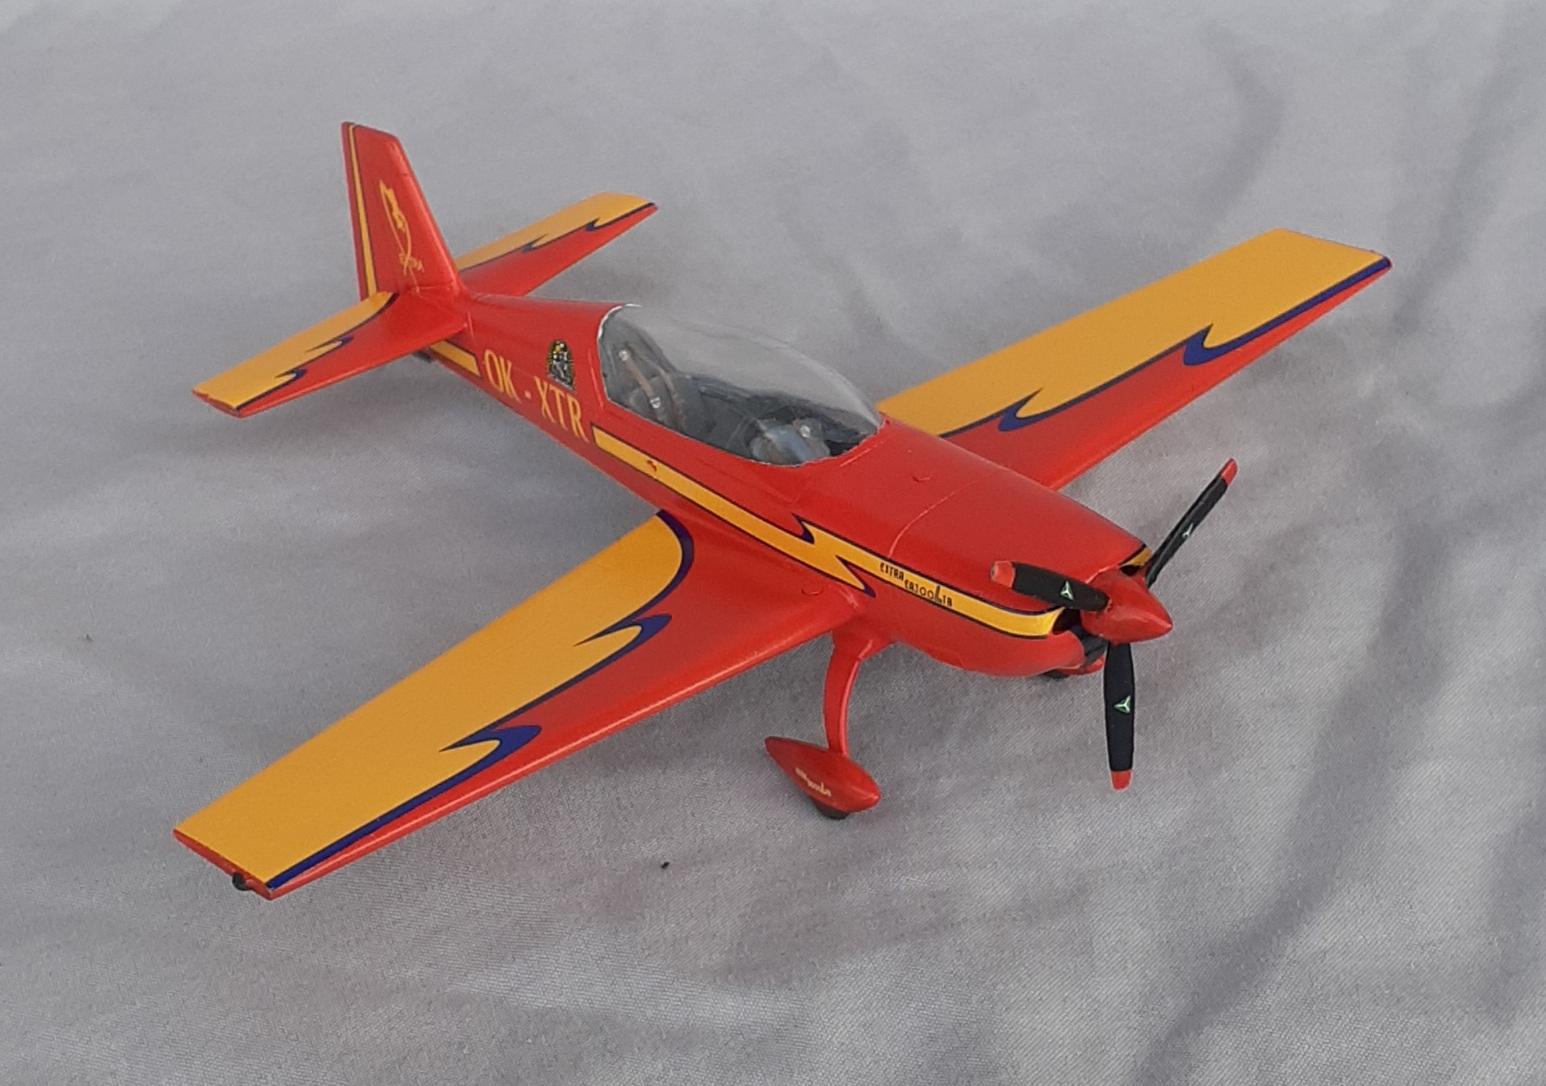
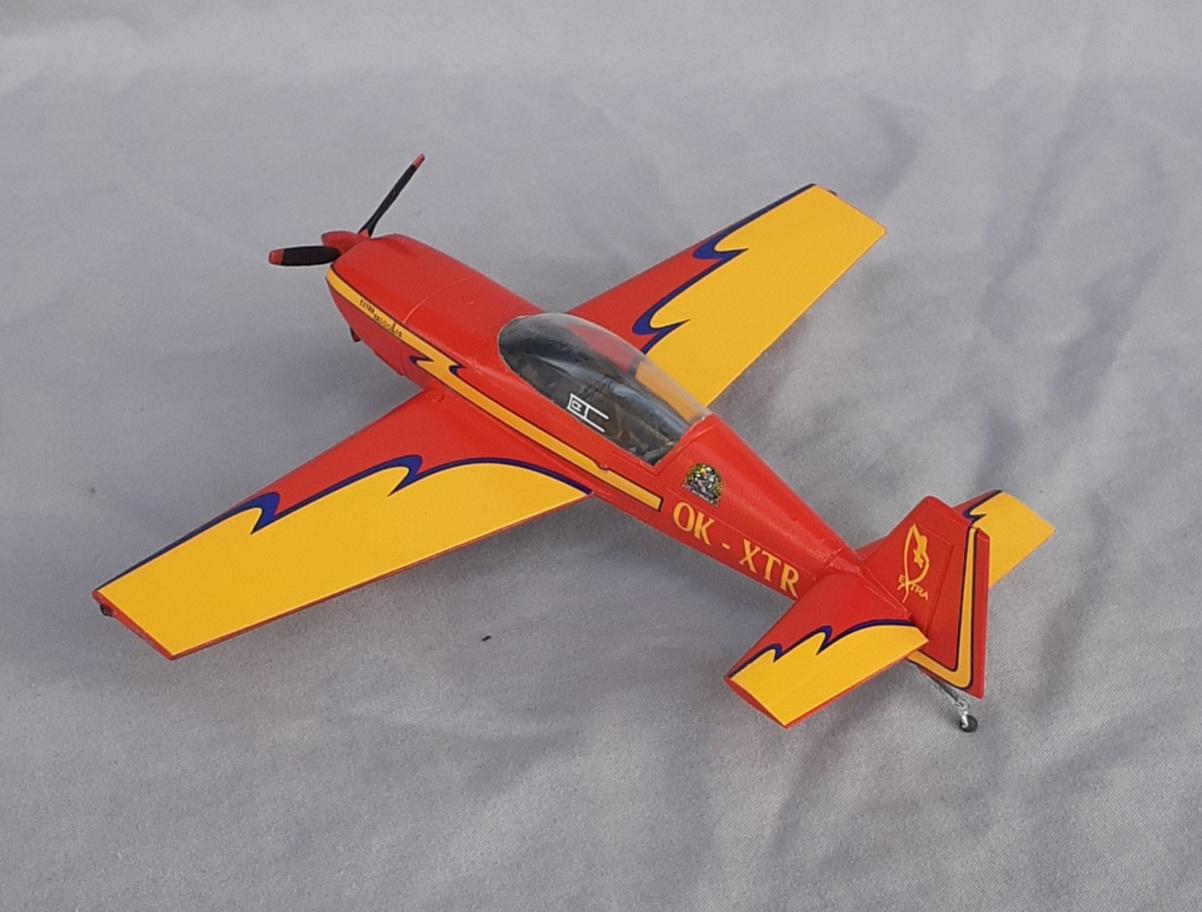
Decals are provided for two aircraft. Trim lines and ID lettering are provided for an English plane painted black and yellow that the modeler will have to reproduce. The aircraft seen on the cover is a red Spanish plane with yellow and blue markings and is the second option. Those markings are provided as decals.
The Build
A coat of primer was sprayed over the interior parts, and the photo-etch fret. Detail painting was done before any parts were glued together. The cockpit assembly was routine except for the rear bulkhead part. It does not have any tabs or gussets to align it properly to the floor. That was discovered when installing the floor/seat subassembly to the right fuselage half. After removing material with a saw blade at the back side of the join, the correct angel was achieved.
Before completing the cockpit after the fuselage halves were mated, the seam was addressed. After that, the instrument panel and frame bracers were installed.
Alignment tabs are molded into the wings and stabilizers and worked well enough to leave small seams to fill, however, it is unclear if a small amount of dihedral should be induced.
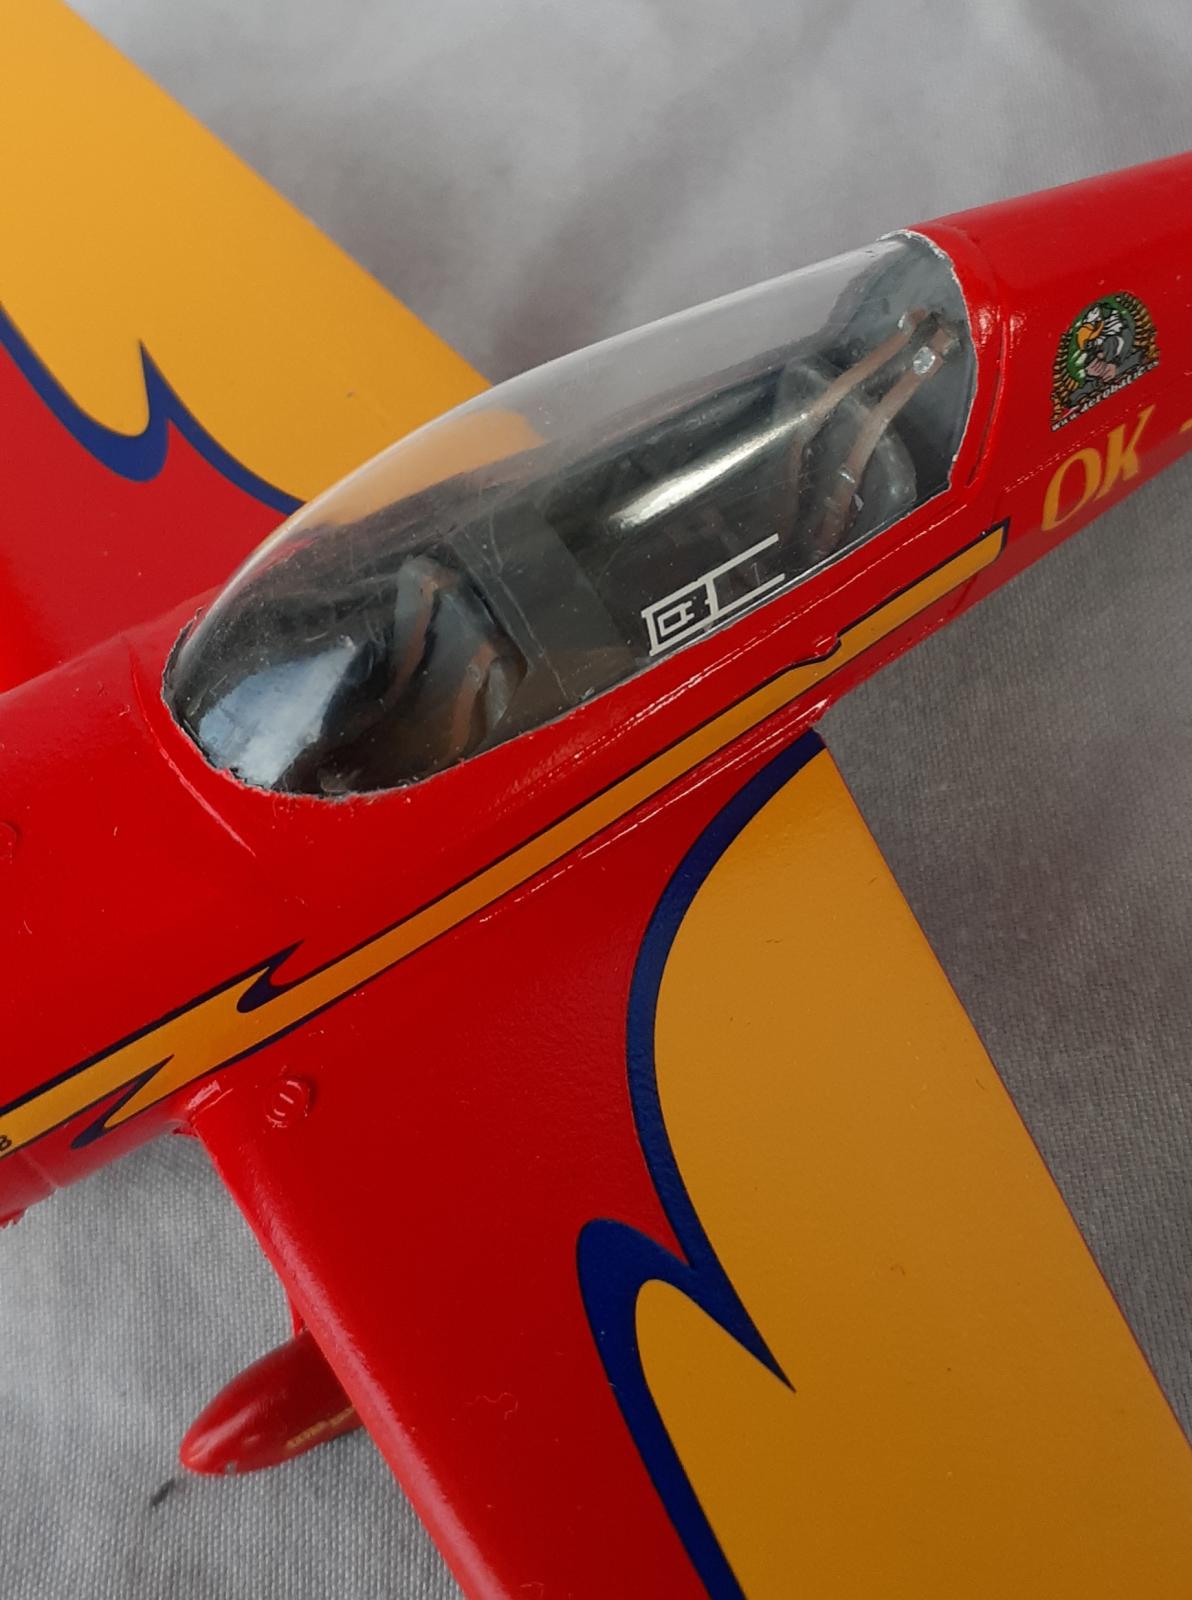
To get a good fit with the canopy, about a millimeter was removed from the rear edge. The front edge stood proud of the nose and, after masking, was carefully scraped and sanded flush.
Perhaps the most amount of work was done filling and sanding the exhaust area of the cowl and the landing gear. A couple of sessions were spent on those parts. When everything looked good, it was time for painting.
Paint and markings
Alclad Clear Base was sprayed over the canopy frame followed by a coat of Dark Ghost Gray. As seems usual for me, the first coat of primer that was applied to the rest of the model revealed that the seams, particularly around the landing gear fairings, needed much more work. After the second primer coat, Insignia Red from MRP was used as the base color and a gloss coat applied.
Four sessions of decaling followed. Thankfully, the colors are opaque and they handled fairly well. The most difficult areas were the fairings around the main legs and at the nose. Some slicing with a razor blade then touch-up paint was brushed around the fairings and Solv-A-Set took care of the nose. None of the decals needed any trimming.
When the decals had settled down, another gloss coat was sprayed over them.
Final Bits
I often think of the TWILIGHT ZONE episode of a woman's head having the bandages removed after plastic surgery as I unmasked the canopy. Unlike the story, my result was successful. Being as the rest of the parts are delicate, progress was slow so that the glue could cure on one piece before moving on to the next.
The tail wheel was added, then the main wheels. There is a set of servo plates for the ailerons in the photo-etch fret. My hat is off to you if you can attach them permanently without large blobs of cyano. I didn't even try. Instead, I thinned the styrene pieces and used liquid cement.
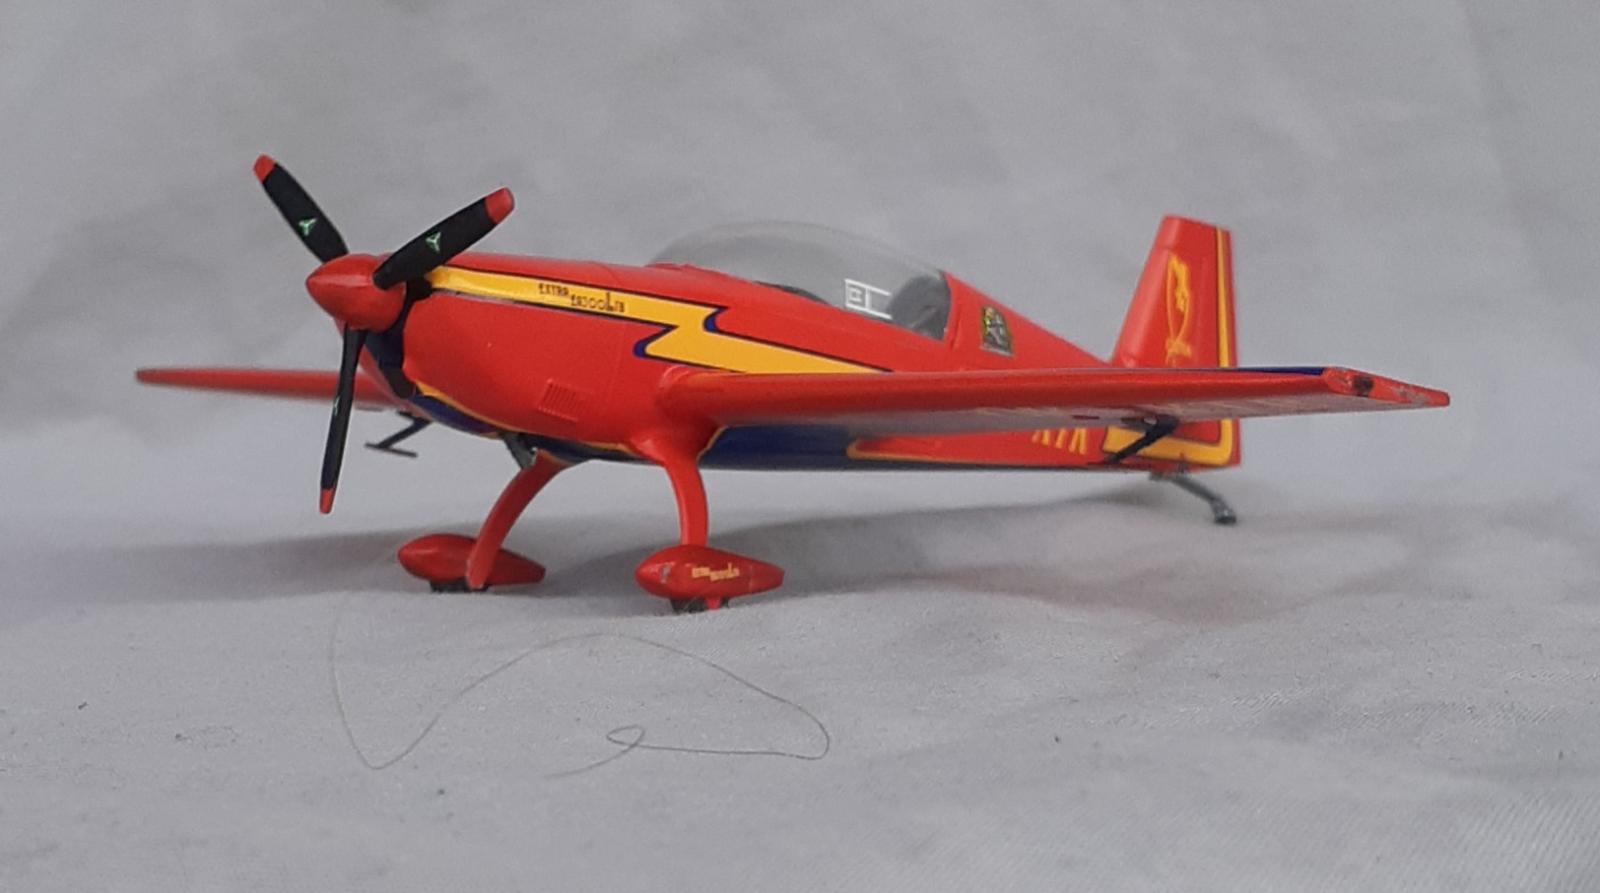
I did try to install the reference rods at the wingtips. Unfortunately, they proved to be too fiddly for me, so I omitted them and completed the build by installing the prop.

Fantastic job, John! Decal job is impressive!
Thanks. The decals were easier to work with than I was expecting
Nice and colorful, John @jsummerford
The decals did turn out wonderful.
Thanks. It is definitely and eyecatcher.
That's some brilliant work, @jsummerford. I like it a lot.
Thanks. I don't know if I can claim "brilliant work", more like dogged determination.
Nice work, John. 1/72?
No, I should have noted that it is a 48th scale model. The yellow decals for the upper wings are about 4 inches long.
What a fabulous model of a well known and loved aeroplane.
I saw one yesterday at Cosford airshow being put through it's paces(really "wrung out"!)by it's
French pilot.
Hats off to Brengun too for taking the plunge and releasing a kit of it.
I'm envious that you saw one performing.
Looks sharp, and those decals really went done nice!
Thanks, I have not as much time decaling a model as I did this one.