The other Vildebeest
Introduction
In my Vincent review I mentioned the Spanish Vildebeest and how I had decided not to bother. Unfortunately, I had been bitten and a nagging desire slowly crept up on me. The challenge of trying to build an accurate model was too much and so I decided to buy another Azur Frrom Vildebeest kit knowing full well just how terrible it is. The inline Vildebeest is an attractive build having a strange charm to it.
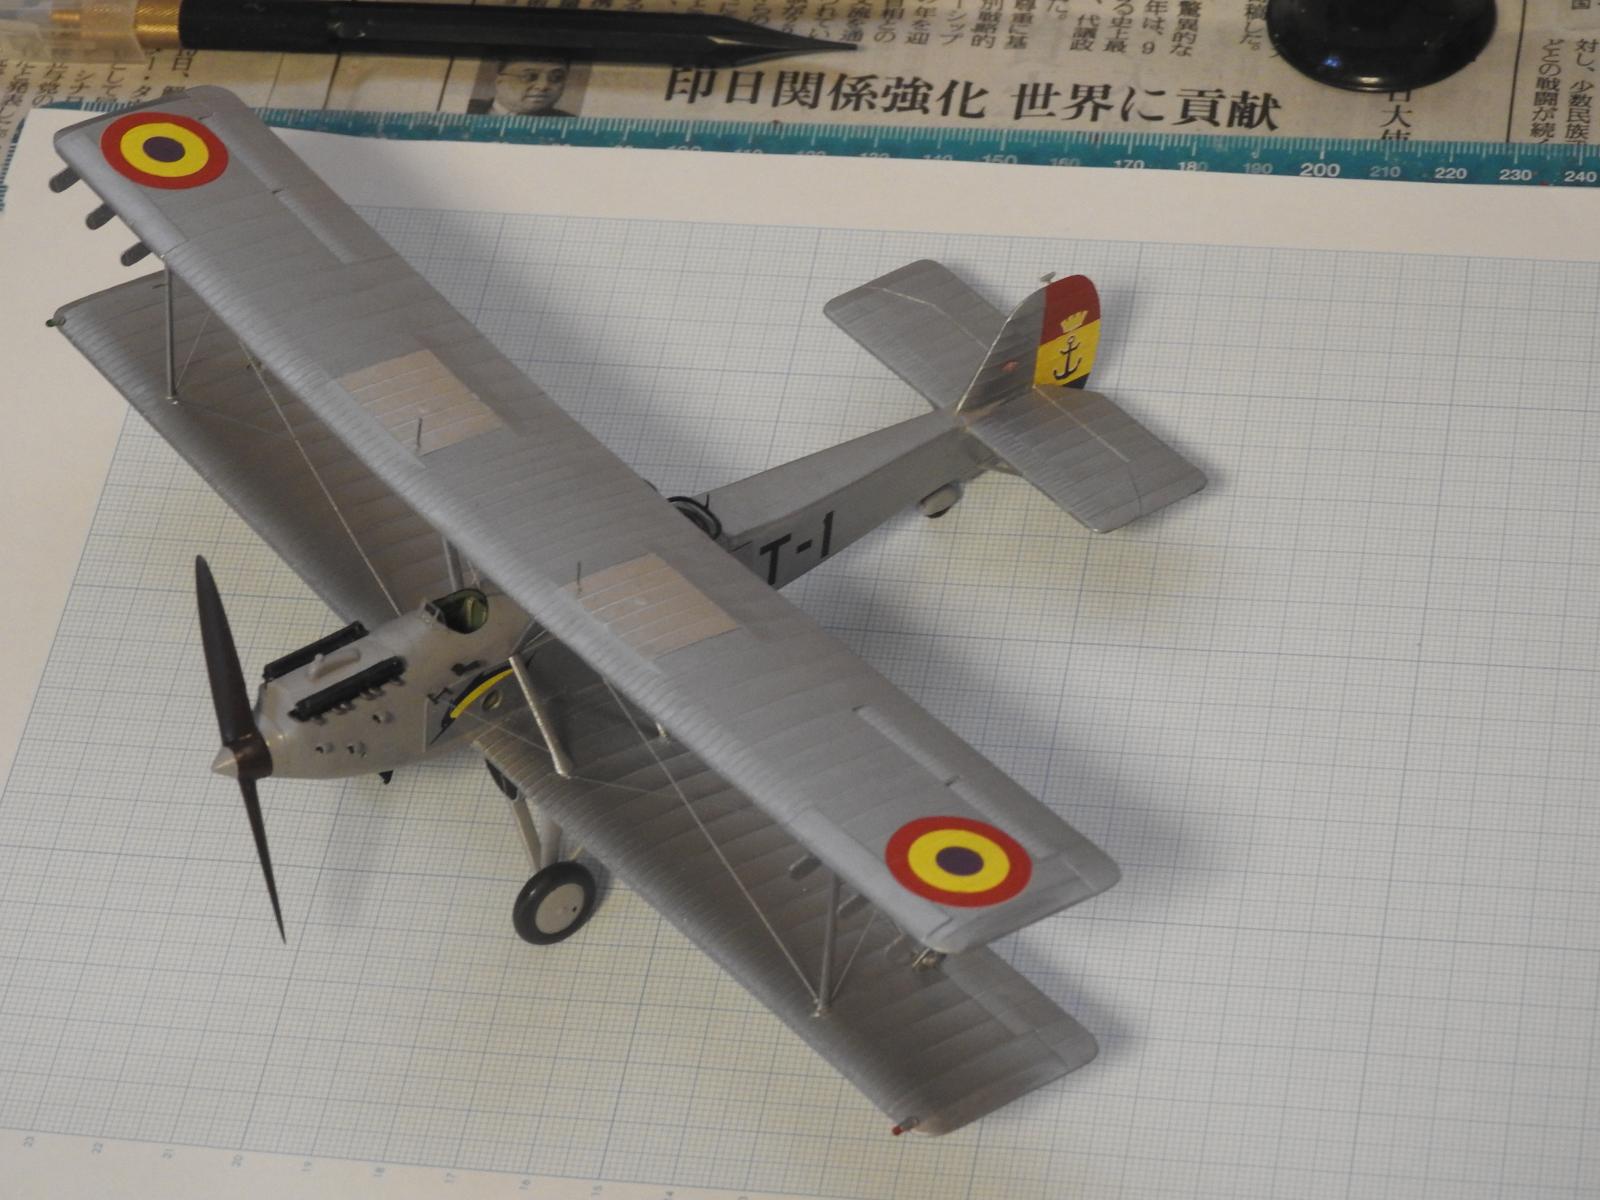
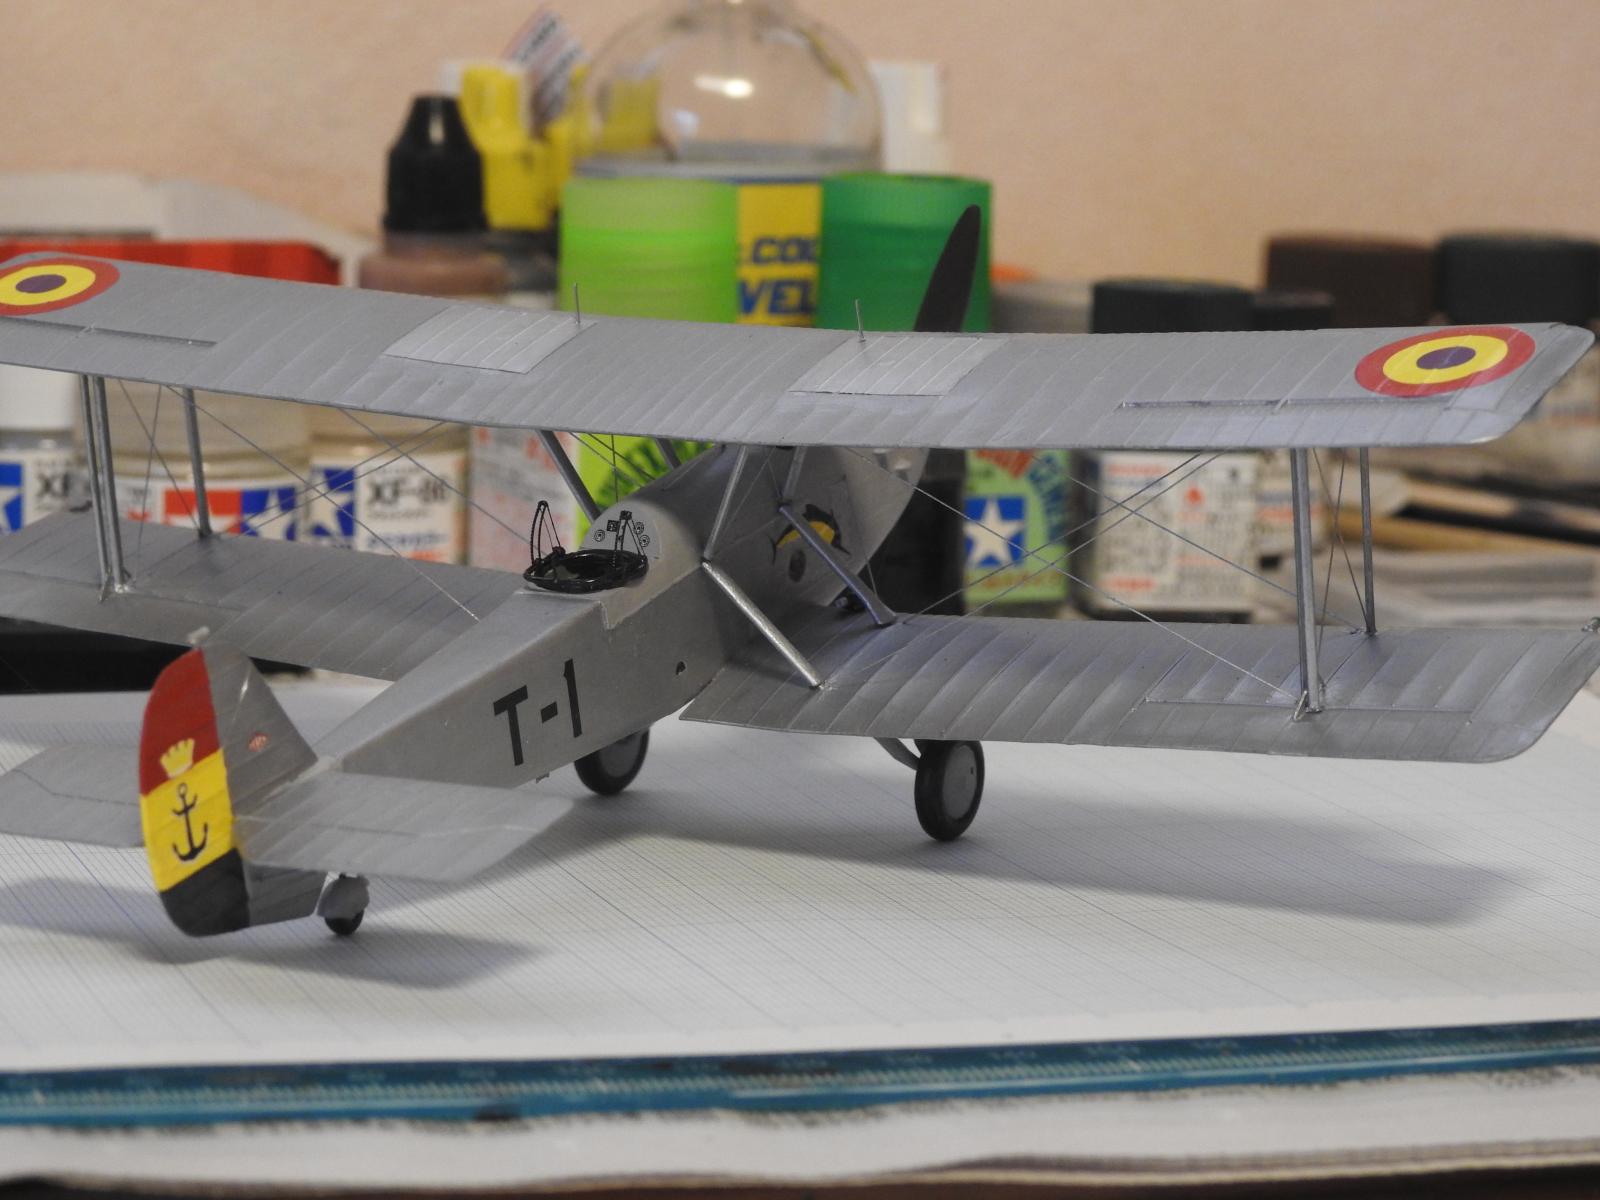
Spanish Vildebeests were developed directly from the Vickers prototype N230 which had been fitted with a Hispano-Suiza 12Lbr inline engine. Thus they were basically Vildebeest Mk.1s with a different engine. Like all Vildebeests they were coastal torpedo bombers and the Vickers prototype actually demonstrated that this was feasible with a Hisapano-Suiza engine. Interestingly, any photos one sees of a Hispano powered Vildebeest carrying a torpedo are of the Vickers prototype. The Republican Spanish Navy in particular was very interested in the aircraft and after trials ordered 25 aircraft powered by Hispano-Suiza HS 600 inline engines in 1932 (T-1 to T-25). Apart from the first one, they were all license built by CASA which took a long time and they only started to enter service in 1935. The Spanish bought two extra aircraft (T-26 and T-27), the prototype and one more which was assembled from Vickers supplied parts making a total of 27 aircraft. Armament was supposed to be one torpedo, underwing bombs and two machine guns, a Lewis in the rear cockpit and an externally mounted Vickers E under the pilots cockpit on the left. The Lewis gun would be carried during the Spanish Civil War but the Vickers E was very rarely seen. In addition, CASA delivered the Vildebeests without underwing bomb racks or torpedo mounts and these weren't available throughout the service life of the Vildebeests.
The Vildebeests were well liked and served in the coastal patrol role until the start of the civil war. However, they were Vildebeests - mediocre and with a poor performance especially without the requisite bomb or torpedo dropping equipment. Crews were reduced to shoveling bomb loads out of the torpedo aimers hatch. Of course they were fighter fodder and suffered very heavily in action. Sources differ but it is likely only two survived to be taken over by the Nationalists in 1939.
The Model
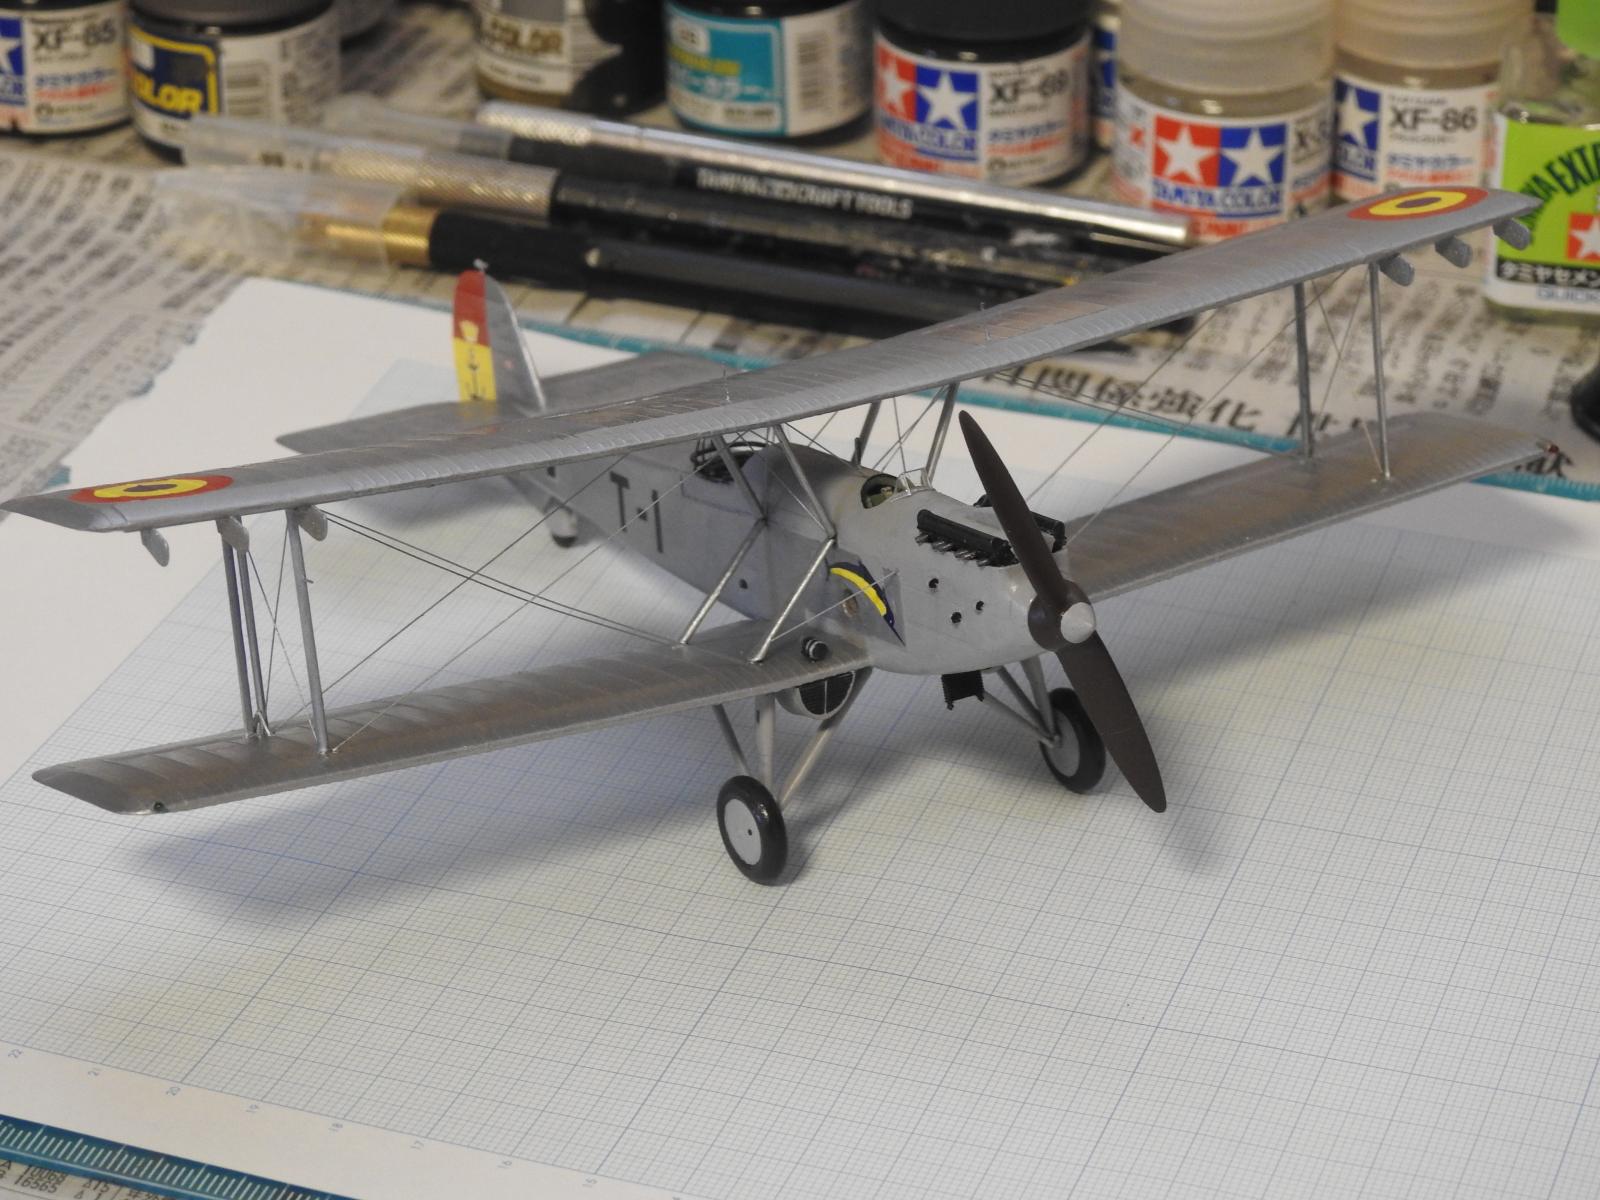
Special Hobby/Azur do two versions of the Spanish Vildebeest - one with floats and one without. They have made some attempts to address the differences and one can safely apply the term 'Curates egg' to both models. Some of the features are good but some are dismal. The chief issue on top of the usual SH/Azur brainfarts (and in this case we're justified in talking about a brain meltdown) is the fuselage. As I mentioned the Spanish Vildebeests were based on the Vildebeest Mk. 1. These aircraft had flat smooth sided fuselages without the bulged fairing running along the side that the kit has. This fairing was introduced on the Vildebeest Mk. III and despite creating a totally new fuselage for the Spanish Vildebeest, SH/Azur have left this feature in place. The fuselage itself is an example of doing the minimum one can get away with and of course including the previous errors we know and love from the Vildebeest Mk. III. There are other corrections which will be discussed in the building stage. The decal sheet is nice - it includes 3 variations of the Marlin emblem (but watch out, the tail should be blue NOT yellow). The tail flash is better replaced by paint but the range of aircraft that can be modelled is quite something. With simple cutting and rearranging of the decals one can build, T-1, T-2, T-3, T-5, T-6, T-9, T-12, T-13, T-15, T-16, T-19, T-21, T-23, T-25 and T-26 (T-26 though is different and needs even more conversion work), an impressive range of aircraft. The decals are thin and fold easily so one has to be careful but they do go down well. The etched brass sheet is excellent and contains some very useful parts but why did SH/Azur include the 3D tail position light on this sheet? This is a super brain fart. The usual seam lines need to be removed but the instructions are quite well done. They are crowded so careful study is essential as they contain a lot of useful information. I bought the Steelwork de improvement set which is essential for those building a Spanish Vildebeest.
Building the model
I'm going to change my format a little and number the corrections from front to back
- The propeller - the orientation of the blades is reversed - one would have thought that this kind of was a thing of the past but companies still manage to do it. I replaced this with the excellent resin propeller from the Steelworks set.
- A nice resin engine is included but is uncovered. Thus one needs to scratch build a cover for the engine and blend it in. One also needs to add front to the engine.
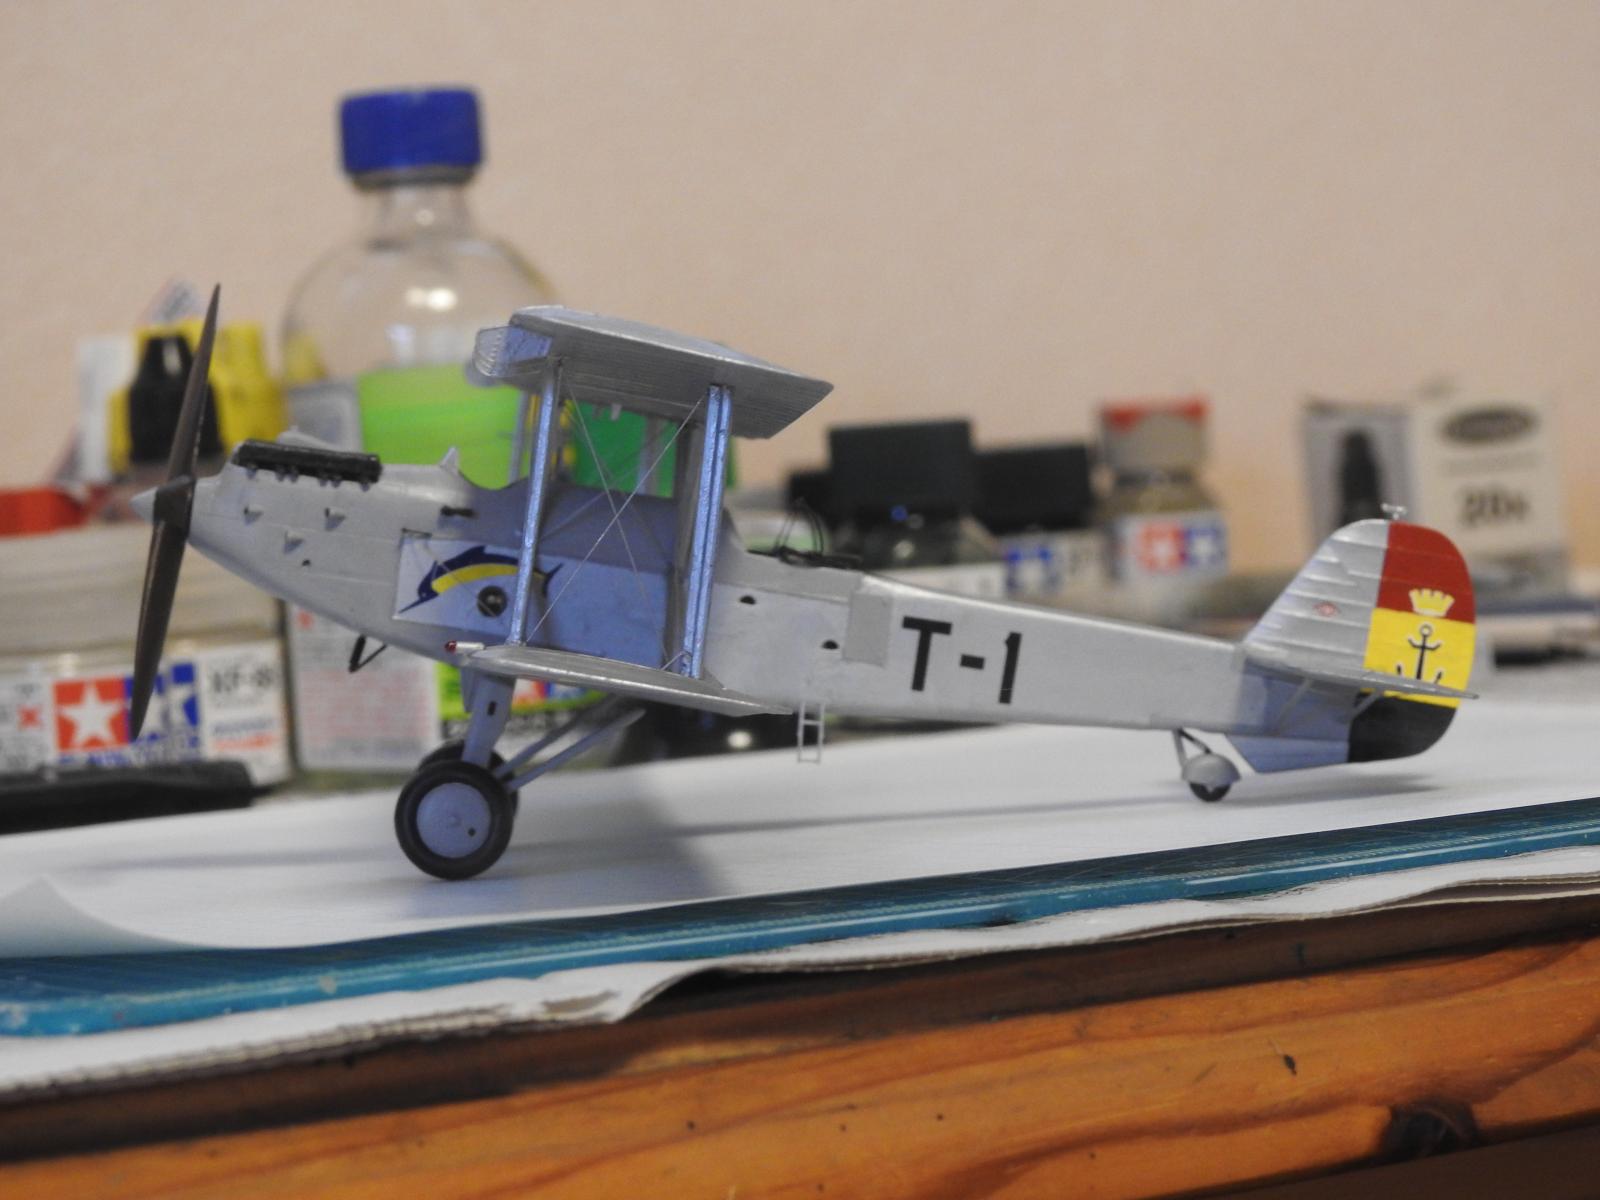
- The observers hatch behind the pilot has been included. Spanish Vildebeests didn't have this and it needs to be filed off. This at least is an easy correction.
- The cabane struts need to be moved in one wing cell and reduced in length.
- Removing the bulged fairing. This is a difficult task. The fairing needs to be cut out. I found doing it in two stages worked best. Then the resulting gap needs to be filled with thick plastic sheet and blended in. The interior will also need to be restored as cutting out the fairing means removing a portion of this. Then the external detail needs to be redone.
- The portholes in the fuselage are too large. They need to be lower and around 3.5 mm in diameter. I fitted the kit porthole transparencies, blended them in and then redrilled the portholes to 3.5 mm.
- I replaced the kit rear instrument panel with a cover piece filed to fit the rear fuselage. These instrument panels were flush and the end result is much more appropriate. The rear fuselage decking needs to be filed down to assume a flatter profile.
- I also added a floor to interior. This is optional but if one does it should be aluminium and corrugated. The corrugations should run lengthwise not across the fuselage.
- The panel lines need rescribing and filling. The footsteps need to be repositioned and a new one added on the right side.
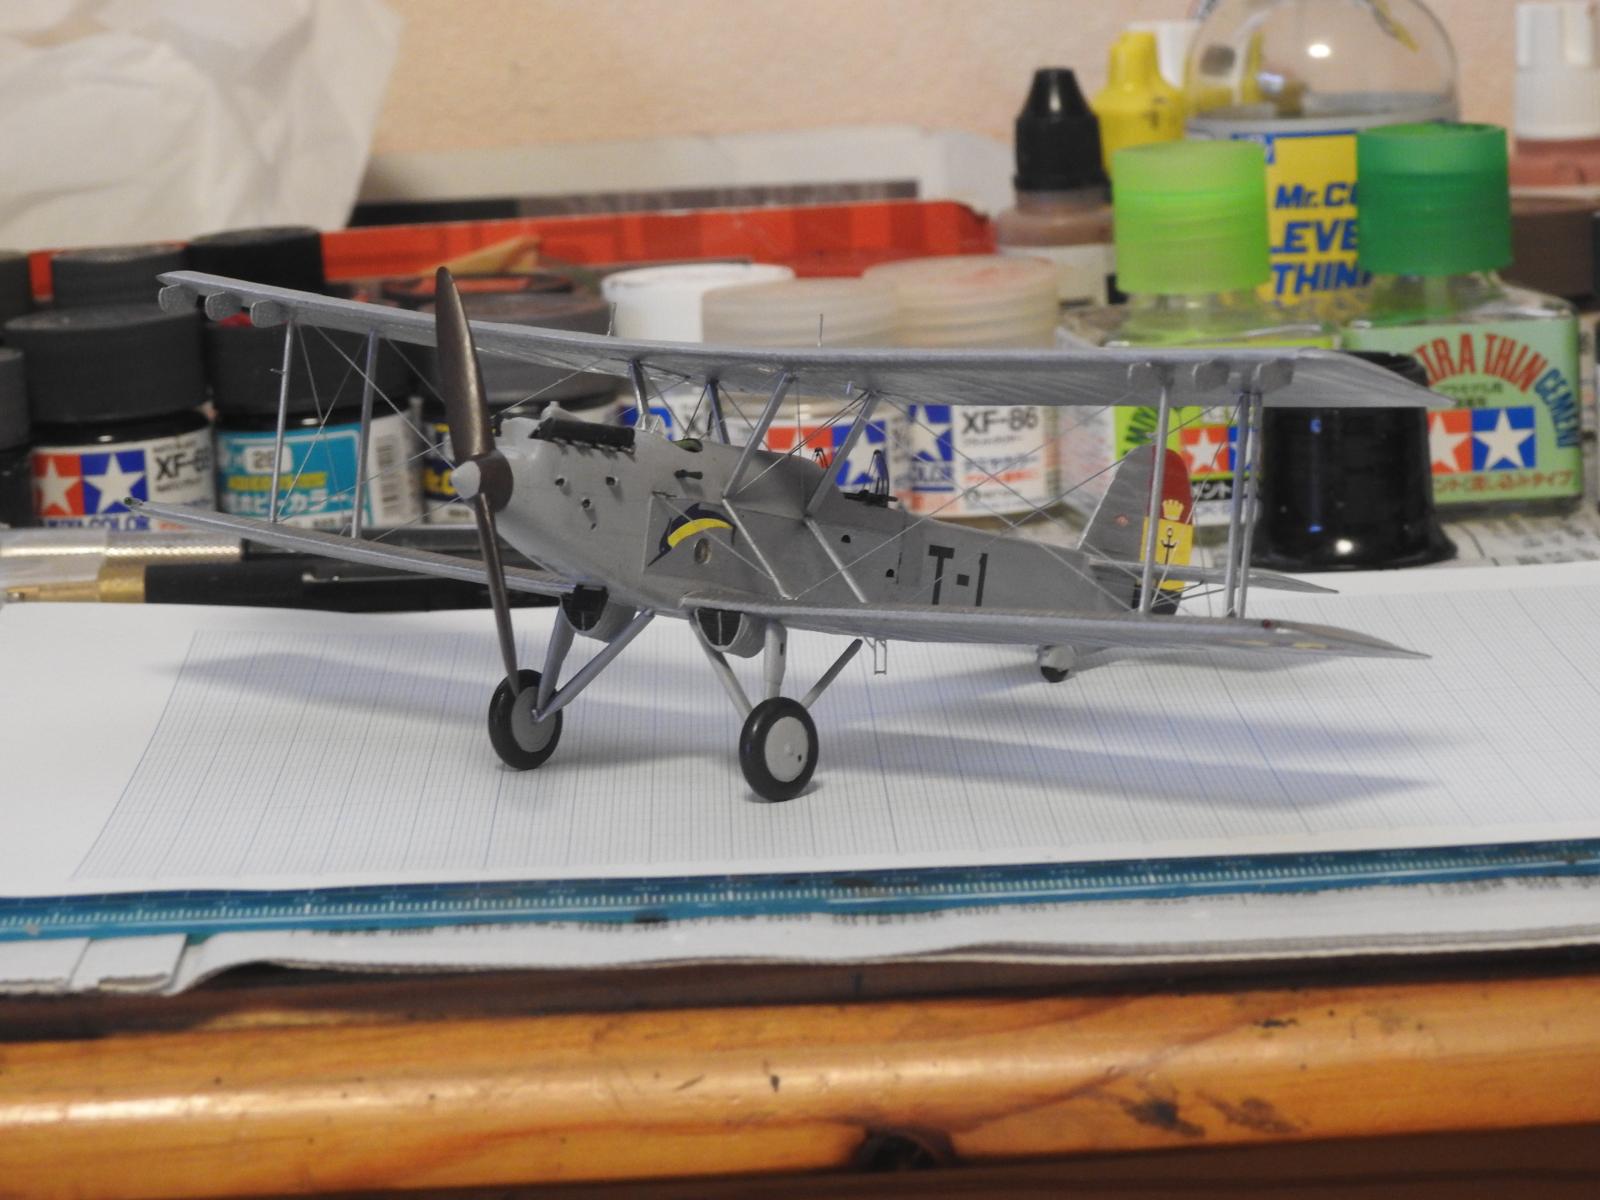
- The tail fin needs to be moved forward and the elevators need to be replaced (they are the later kind and don't include the correct balance horns). The Steelwork set included a corrected elevator piece. The process is as follows. First cut out a V-shaped notch in the elevator so the rudder moves forward (on all Vildebeests the leading edge of the tail fin was slightly in front of the horizontal tailplane). File a groove in the Steelwork fin so that it can accomodate this move and cut the location tab off the rudder. Next file down the mating surface on for the elevator until the tailplane is level with the rear fuselage. Cut about 1 mm off the end of the fuselage and if everything goes right the rudder will slide smoothly in and importantly the ventral fin will also fit nicely (see pic 4).
- Don't use the kit pitot tube, Spanish Vildebeests had a single tube pitot tube on the right strut.
- The instructions rigging diagram is wrong. This is for a loaded aircraft and as Spanish Vildebeests never carried underwing bombs they never carried this rigging. One omits the middle wire.
For paints I used Tamiya X-11 chrome silver and XF-19 both satin varnished. The fuel tanks were done with Mr Color SM-208 super duralumin and the engine MC-214 Dark Iron. The propeller was finished in Mr Color C131 Propeller Colour which matches the colour of the early service propellers very well. Later service aircraft had grey propellers with brass edging. Rigging was the hated 0.2 mm Infini brass wire (the only kind I can currently get) which resisted straightening fiercely. However, I was able to roll it into submission and it looks appropriate. The kit would have you use 0.3 mm wire but 0.2 mm actually looks better and more in scale.
Conclusion
This was a lot of work but I'm rather pleased with the end result. It's not a kit I would recommend but I can safely say that of all the Special Hobby/Azur Vildebeest/Vincent range. I'm very pleased I completed it and I did enjoy the challenge but I knew what to expect. If you do choose to build one of these make sure to consult the photographs and take your time. A good model can result but it will entail a lot of effort. An accurate model is even more of an effort.


Your hard work paid off. Well done, Christopher
Thanks ever so much Gary - you're very kind.
Now I know 100 percent more about Spanish Vildebeestes than I ever did. A very nice looking model, your hard work paid off, beautifully done.
I have the Singapore 'Beeste sitting in the closet for 10 years now. I'm scared of it. 😊
Hi Bill
Thanks very much for the very kind comments.
A Singapore Vildebeest is a different set of corrections - not so many though (my Vincent article covers them but at least you don't have to rescribe the fuselage).
Christopher
Pretty 'wild' regarding the challenges building this kit, but this is another great example of skill and patience.
Excellent build , Christopher!
Many, many thanks George - I agree it was challenging but it worked out OK in the end.
Your perseverance on this challenging kit definitely paid off, Christopher @christopher
Thanks a lot for sharing the historical background of this aircraft and the building process of it.
Well done.
Thanks for the very kind comments John (@johnb). The history is interesting though a bit obscure.
Fantastic Vildebeest, Christopher! Your excellent research and equally excellent skills resulted in a truly excellent model! Thanks for posting this important historical background.
Congratulations!
Thanks ever so much - your encouragement and warm praise are always extremely welcome.
Christopher
Excellent effort, and it all paid off in a beautiful model!
It's very kind of you to say so Greg. Many thanks.