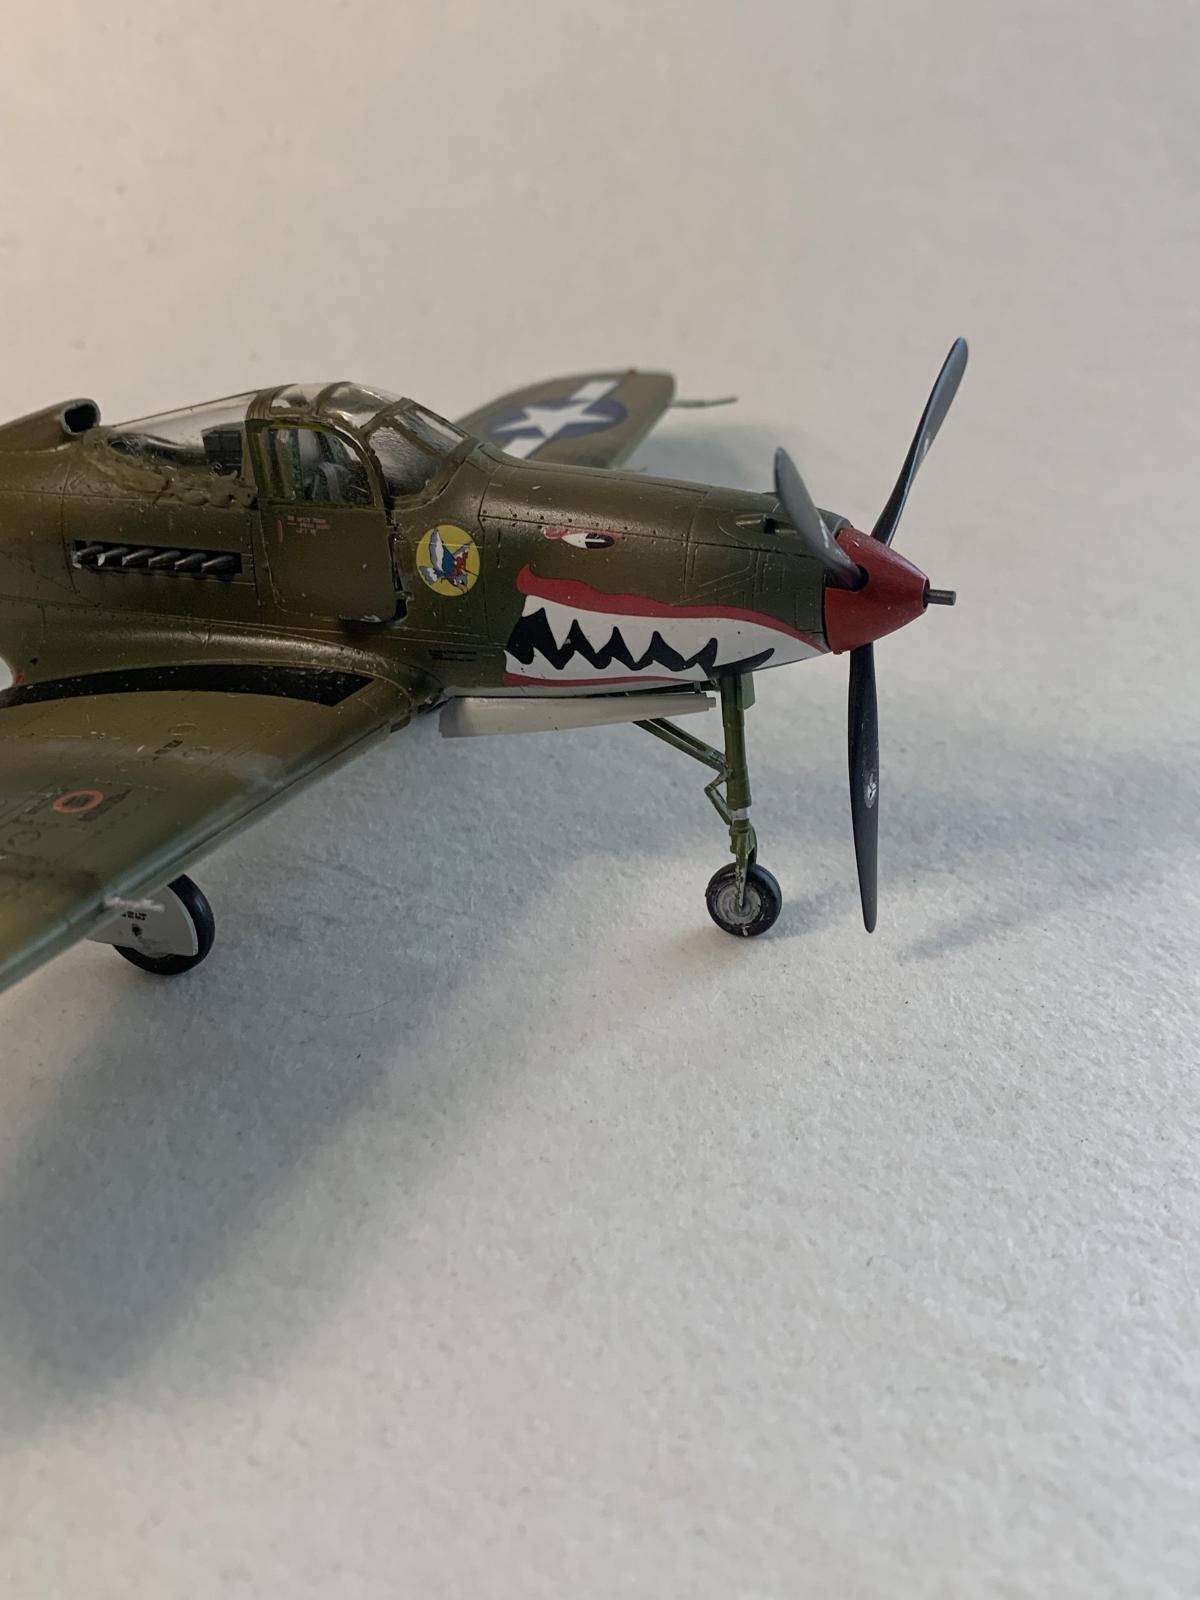
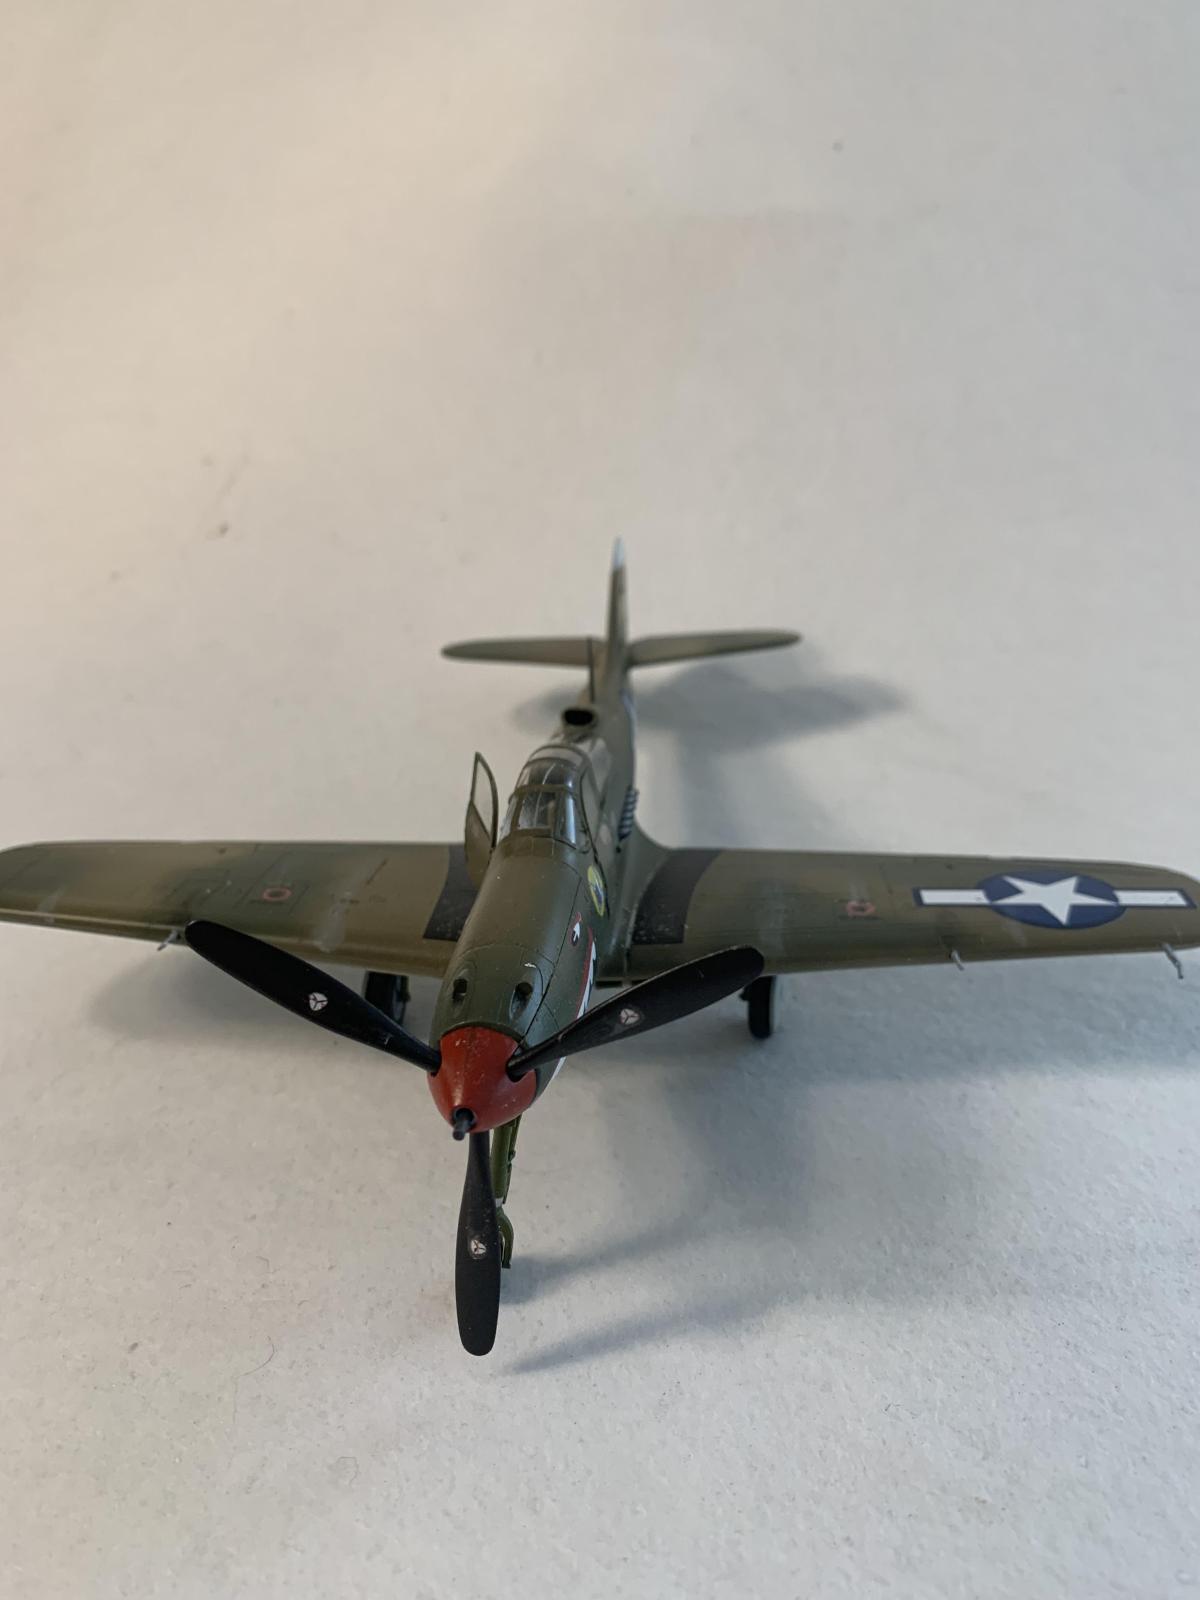
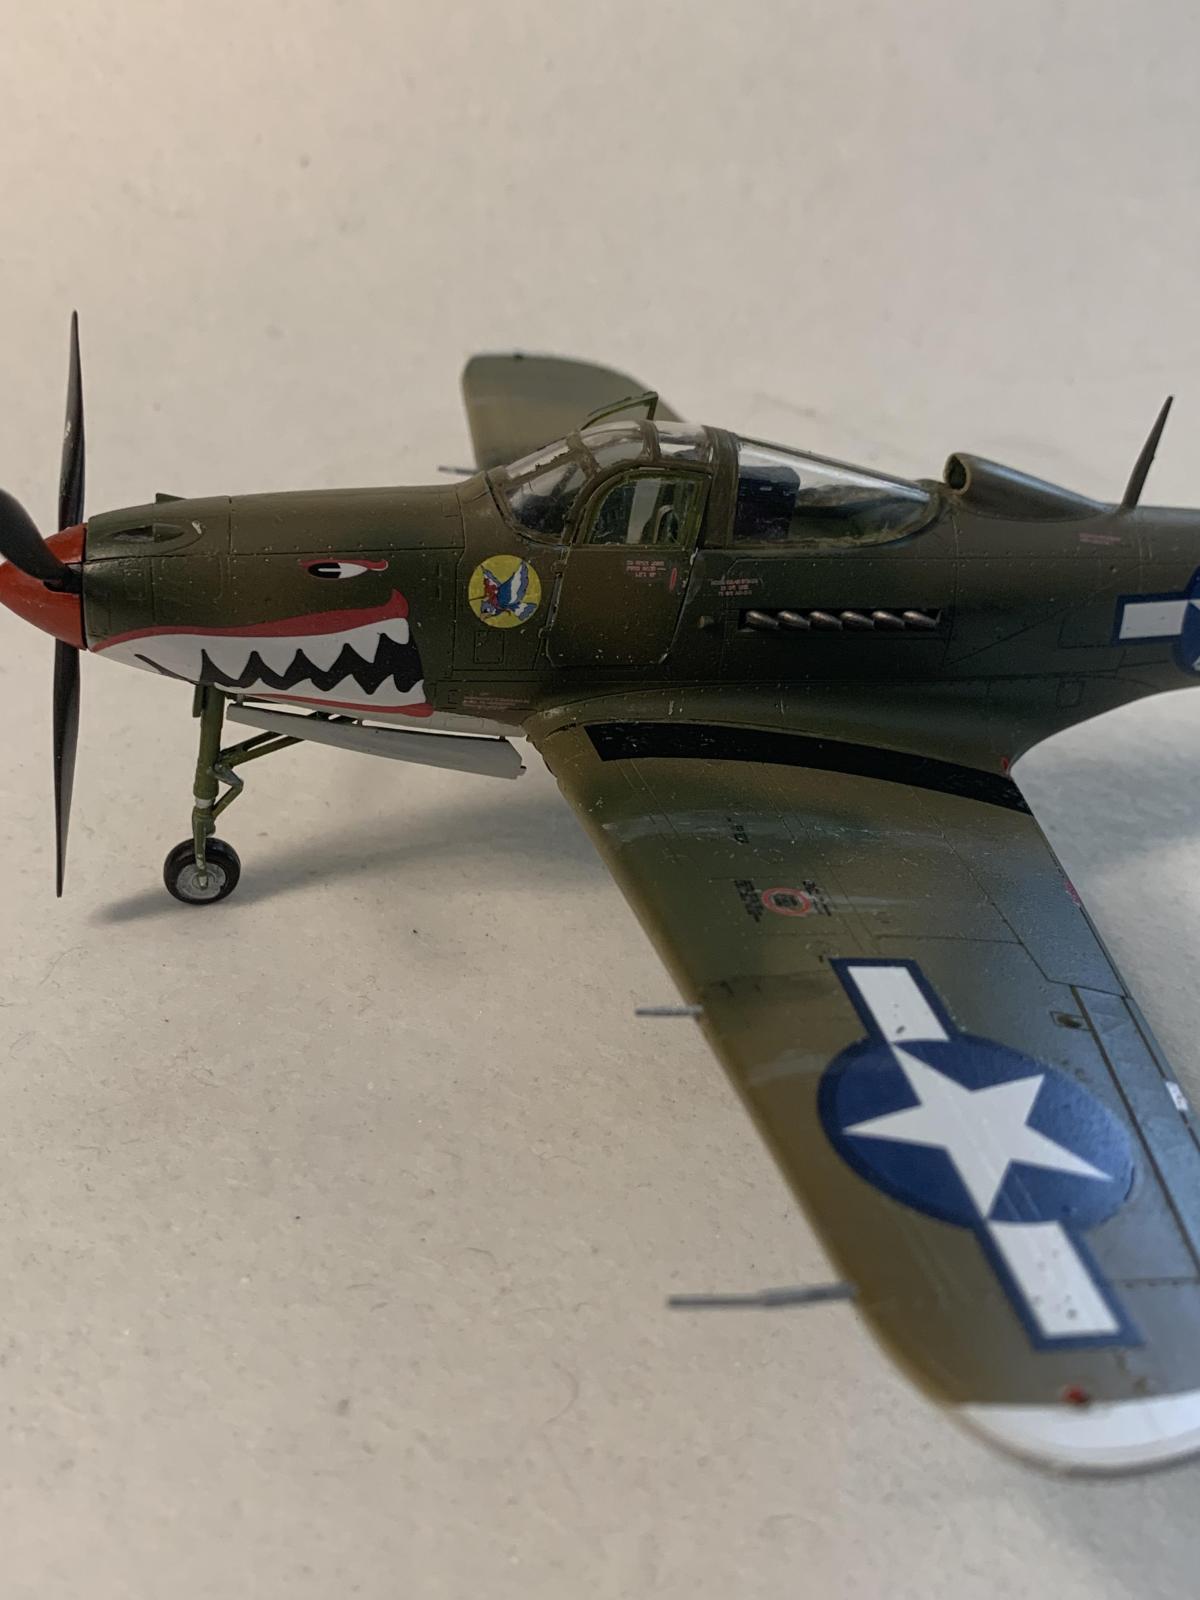
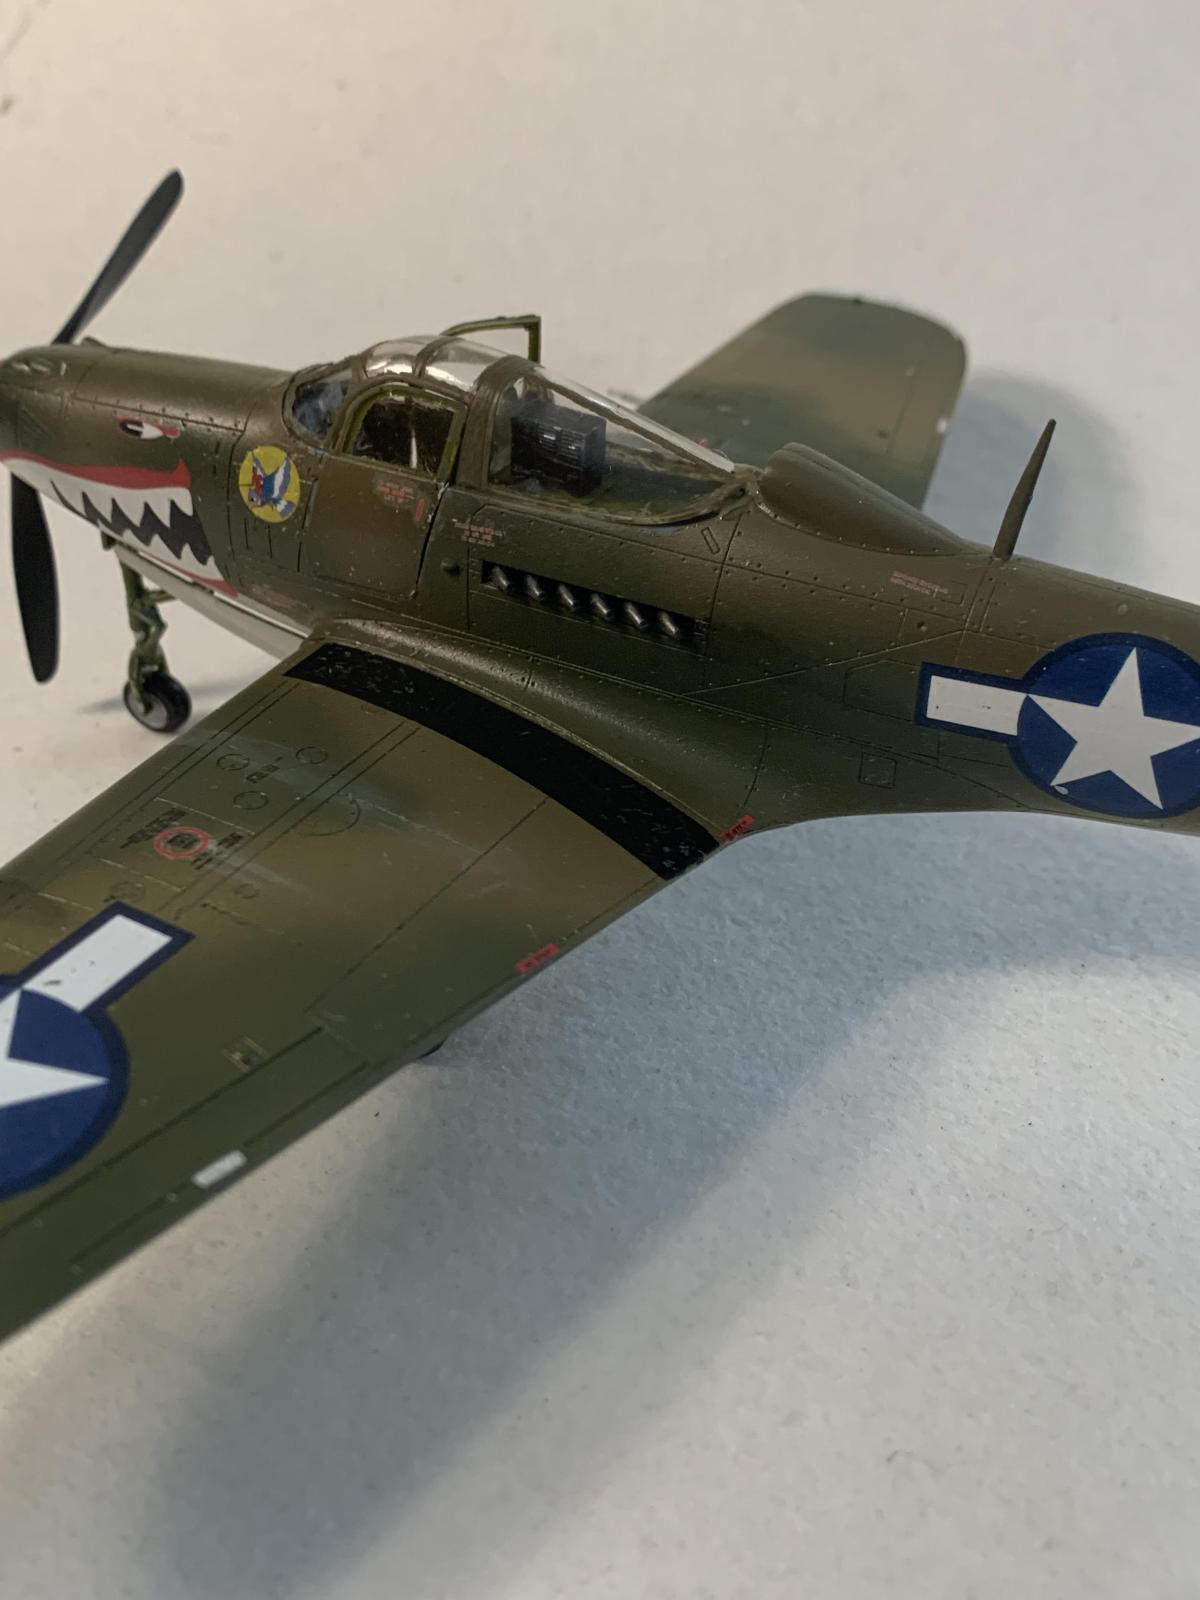
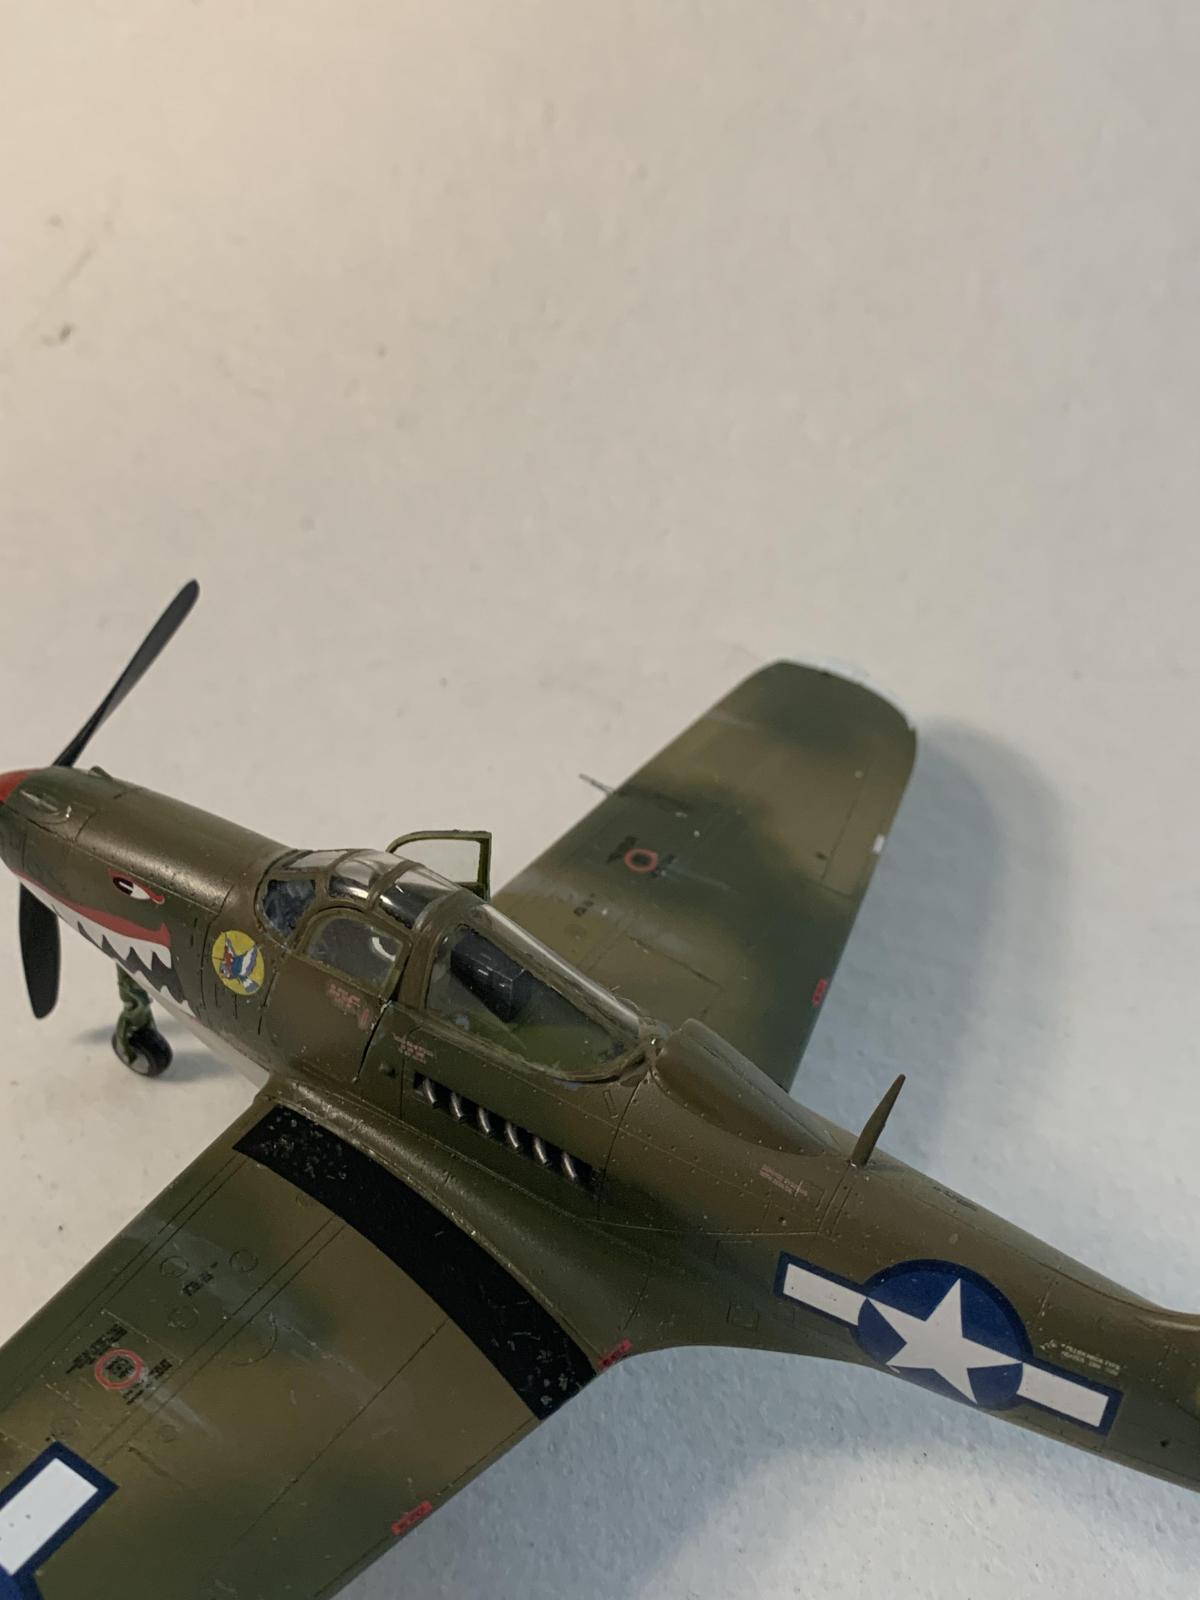
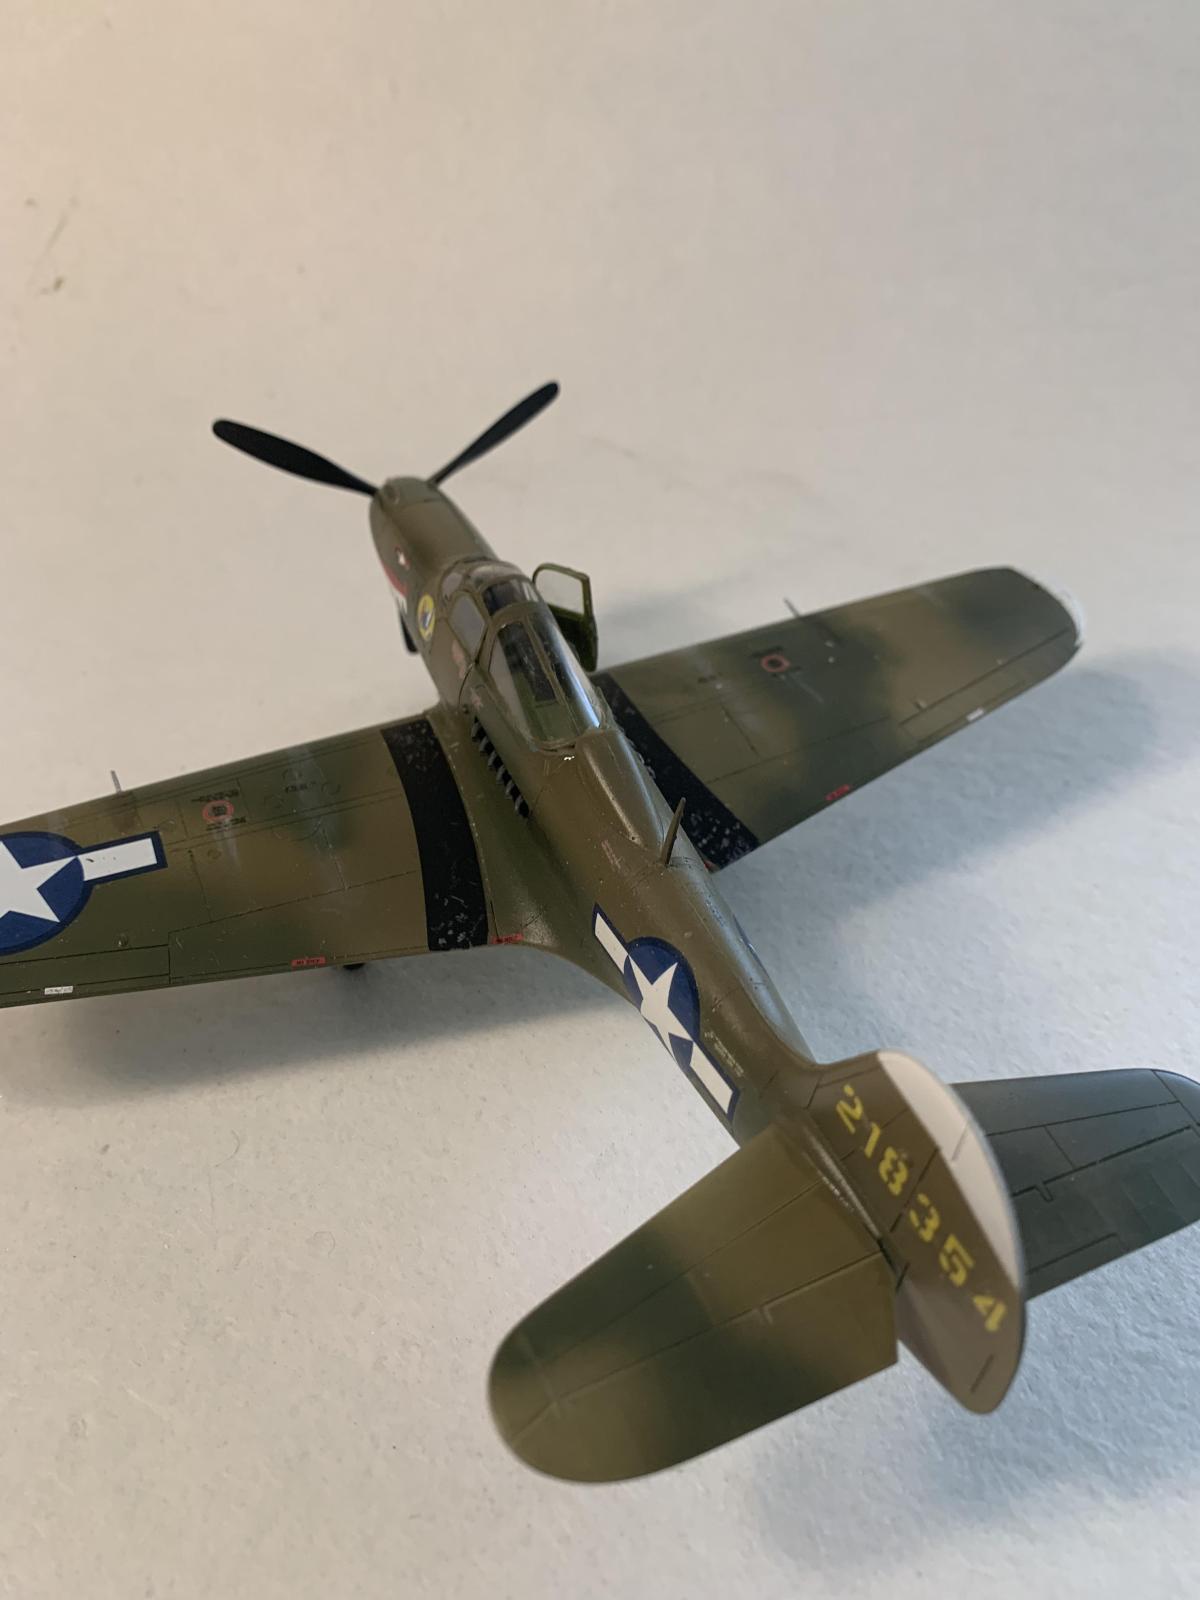
Eduard 1/48 P- 39N
Since I restarted modeling in retirement this is my 25 model. It is the first one I reached total frustration with and am embarrassed about the result. I came close to junking it in the trash.
This model had the worst fits and required the most cutting, filing and sanding of any I have done. There are almost no locator pins on the body or the wings. But the two worst things are how the interior with the front wheel well assembly fits into the fuselage (very poor) and the fit of the canopy. The canopy is warped or misshapen so that if the front is down well the back is up on the right side. I filled that gap (huge) with resin that hardens by UV light then touched up the paint. It looks horrible. And with the canopy fit the right door must be fitted open or else it won’t fit without a big gap.
The instructions call for weight in the nose but no clue how much. I fit flattened small lead weights where I could but it turned out not to be enough so I had to add more in the wheel well itself.
I am so glad to be finished. I will say the decals are excellent. Overall very disappointing.
I wanted a P-39 but maybe will try again with a different one.
Despite the challenges, the result is excellent, Mark!
I admire your perseverance with this project. I would have dumped the @#€&*( thing.
Unfortunately it cannot be always success stories on this site, thanks for sharing despite the fact you are disappointed with the result.
You’ve tried to make the best out of a poor kit, and that is what counts eventually!
I count it as a learning experience and I will continue on. It looks ok from 3 feet away😃
Hi Mark!
I have done at least 8 of these and did not have your issues. The kit you built must have been pulled from the mold early, or it was stored where it got very hot. I had similar issues with a Tamiya Corsair, it gave me fits! But the next one I did fit perfectly.
Every so often, we get that "bad kit".
It is when you do several which make you nuts...
Nice job on the P-39
Bruce
I actually fixed the canopy a bit using a hot hair dryer but it was beyond making perfect. Thanks to all for your comments.
This is such a unique aircraft I would like to have a better example down the road. This one is already on the back of the shelf behind two ME 109s.
If you want a good P-39 kit, get the Hasegawa kit, which is easily available on eBay. Even the still-good 1969 Monogram P-39 is superior to this kit.
Nice work, Mark. That’s a fiddly kit and you made it look great. The thick wing is what I can’t past on Eduard’s Airacobras. Another vote here for Hasegawa and Monogram.
The thick wing is actually the easiest problem solved on this kit: before assembly, sand down the interior of upper and lower trailing edges to what it should be. Overall fit of the wing to fuselage will be the same.
Despite the challenges you faced, this result is really nice, Mark @markhedrick
Glad you did not bin it.
Despite the challenges, nice work on your P-39!
The wing to fuselage joint was also bad and requires filling and sanding.
Worst kit I have built so far.
But again I learned a great deal.
I think you managed to build it despite all the problems. I definitely like it. Some models sometimes require a lot of determination to not end up in the trash. I know that feeling well.
Wow - and here I was thinking the Arma kit was the most challenging 48th scale P-39 out there! No matter what, I am sure you came away with some more skills despite the kit's shortcomings.
Wow, these P-39s seem to come with an x-rating! Great recovery, the hours and the agony don’t appear in the final subject! It looks superb!
Well - looks ok in the end! Way to stick to it!