Profile Photo
Louis Gardner
176 articles

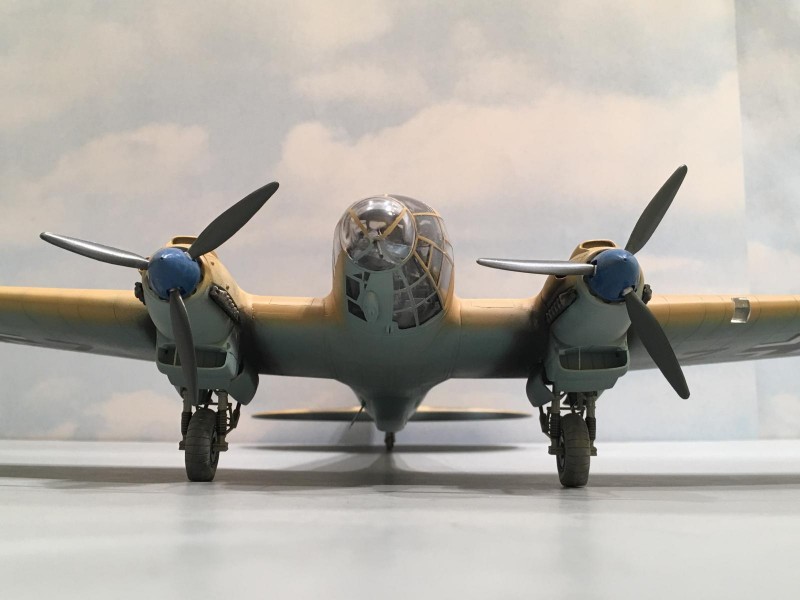
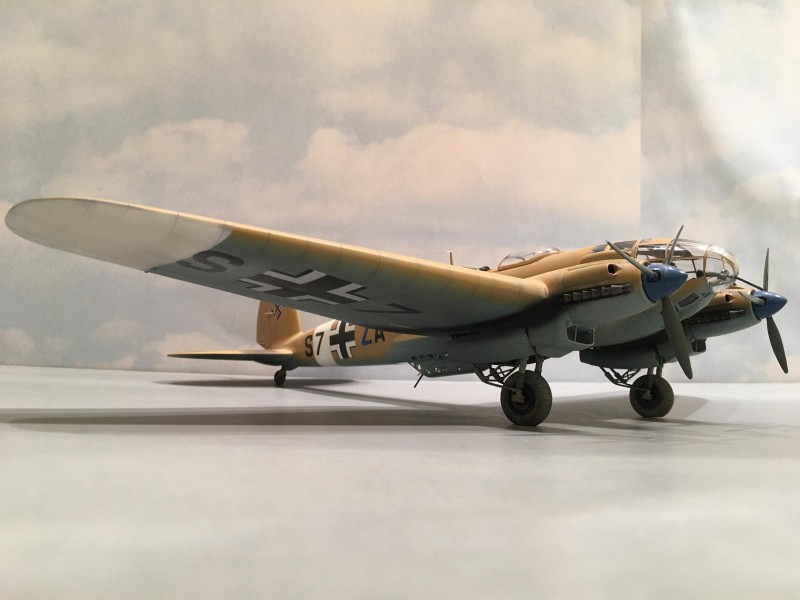
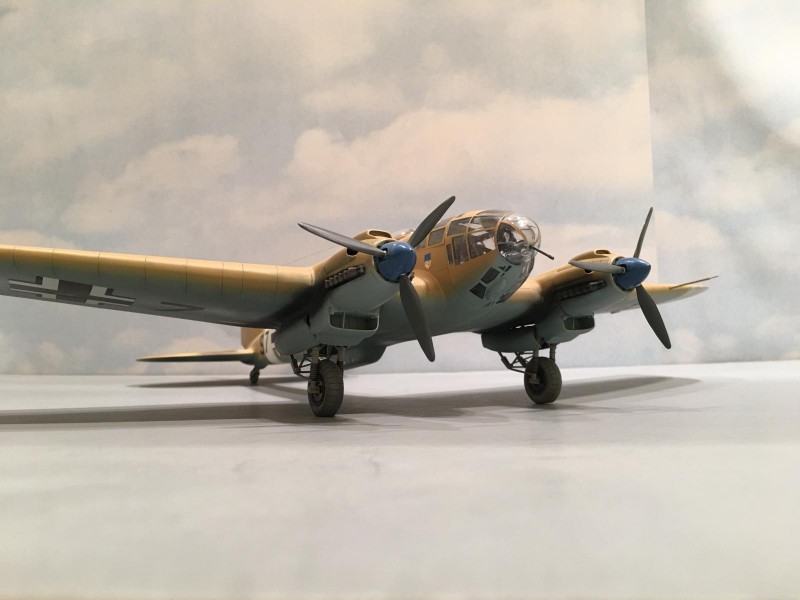
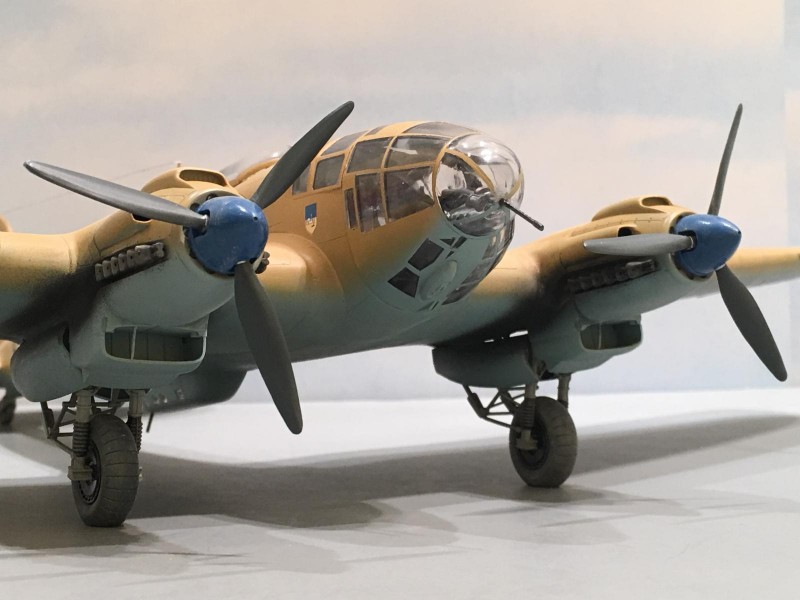
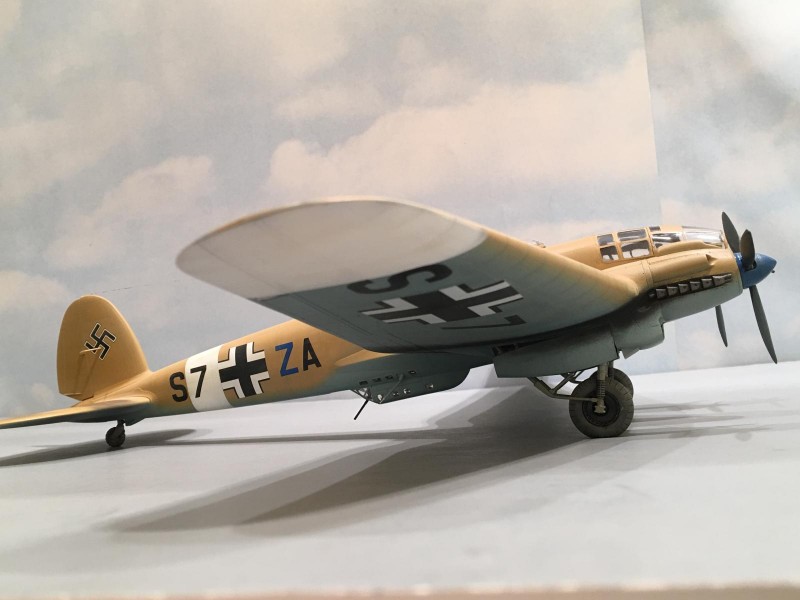
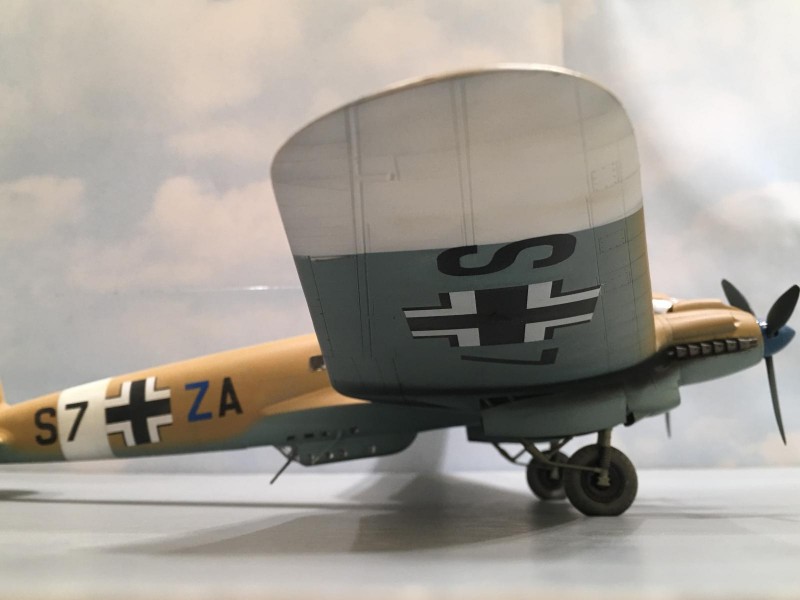
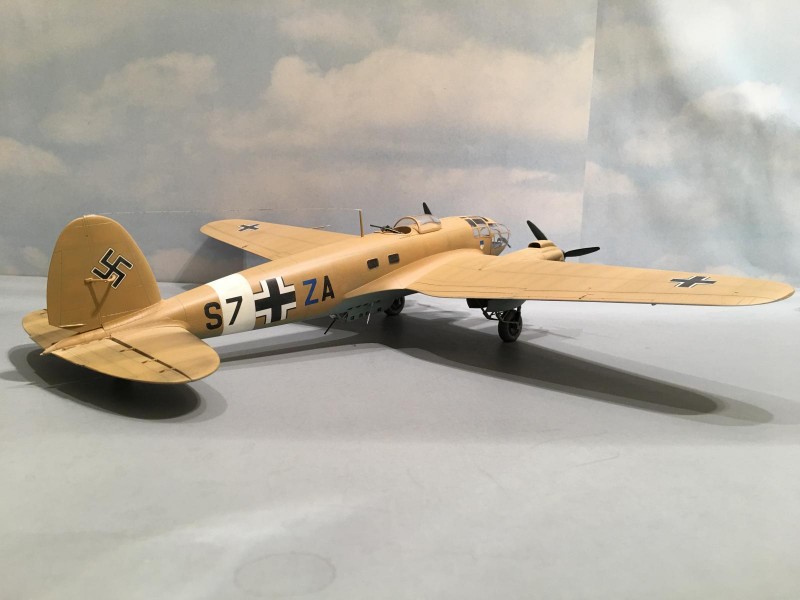
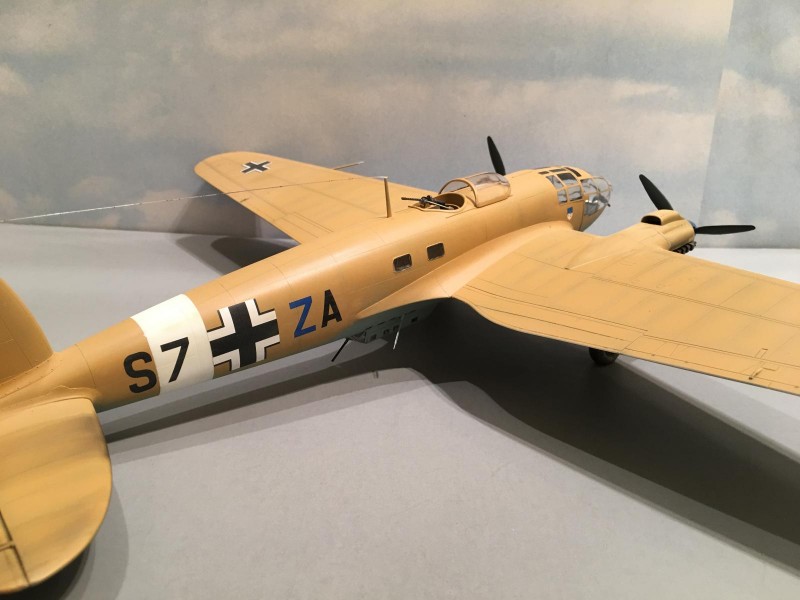
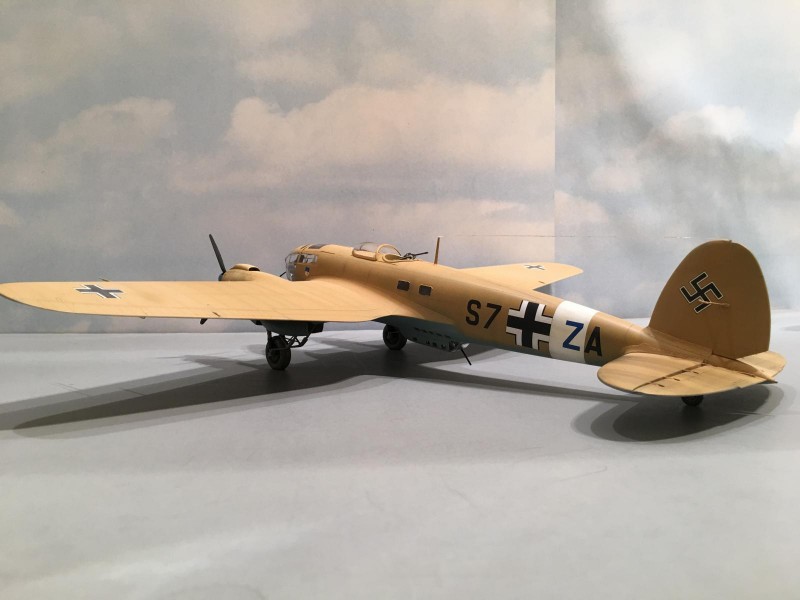
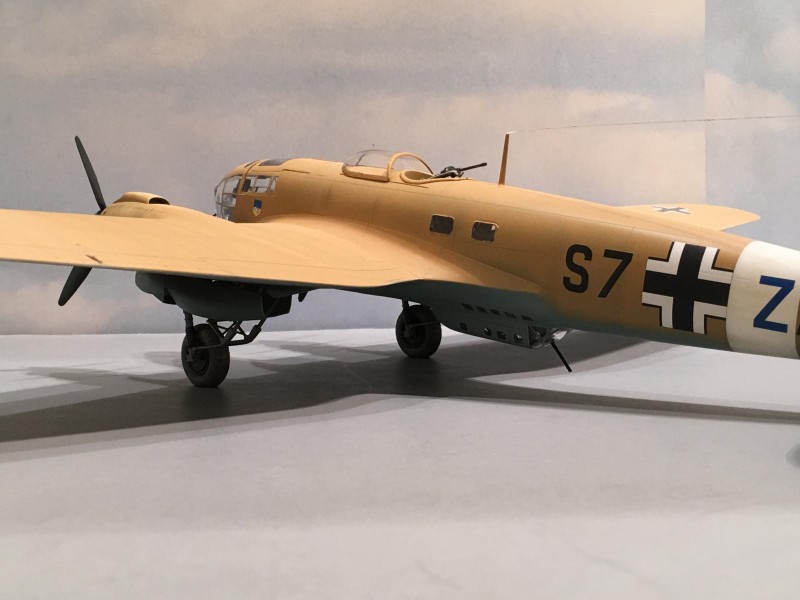
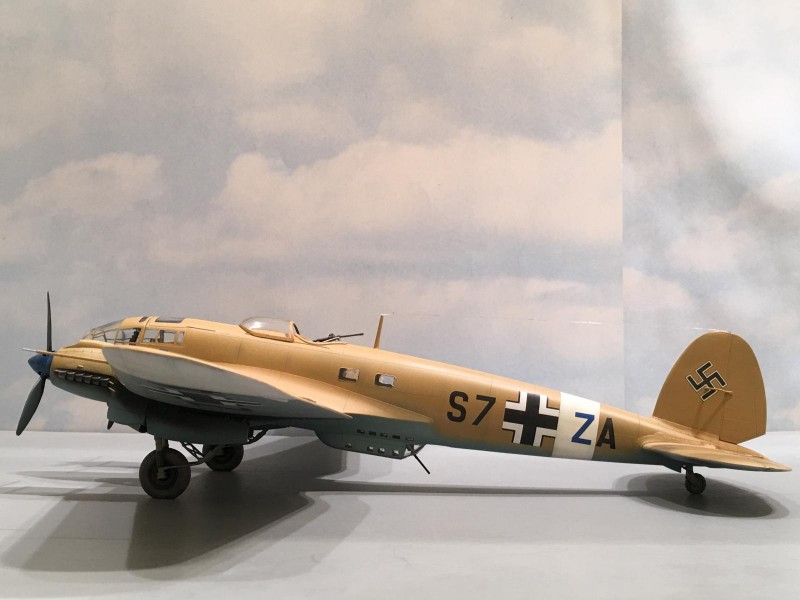
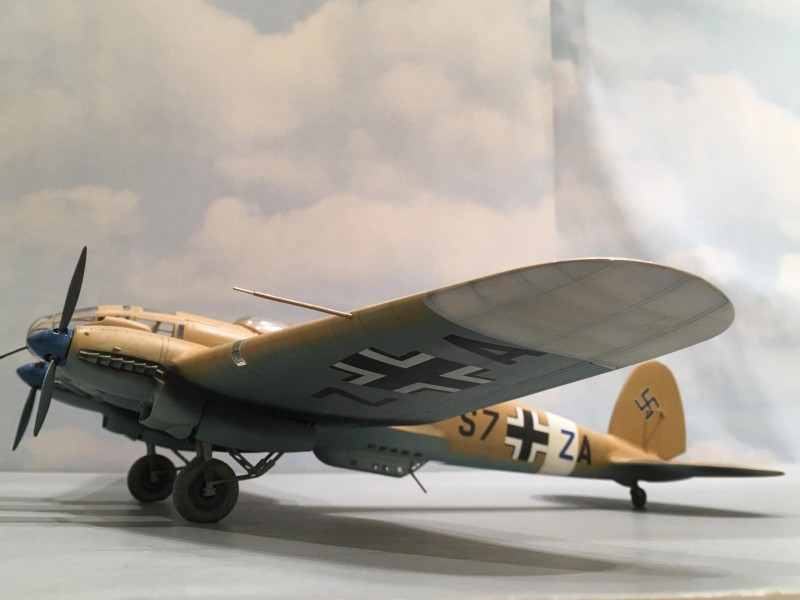
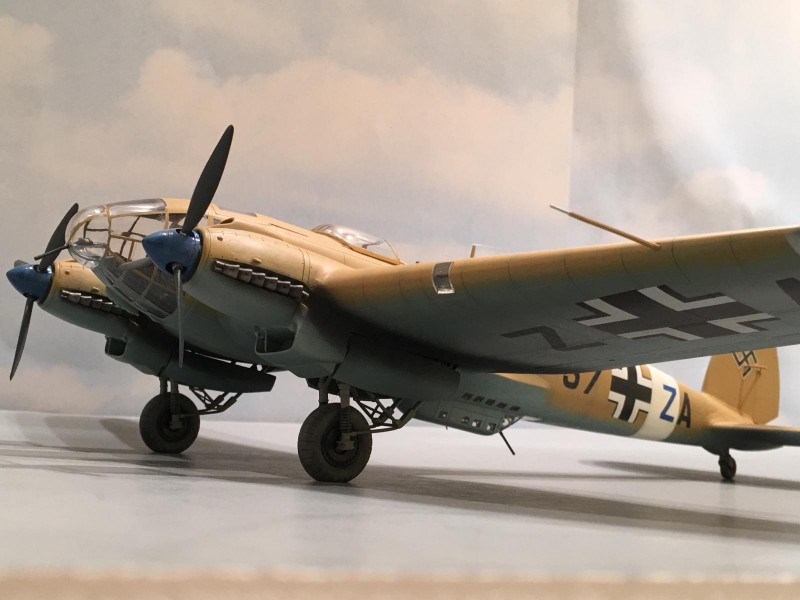
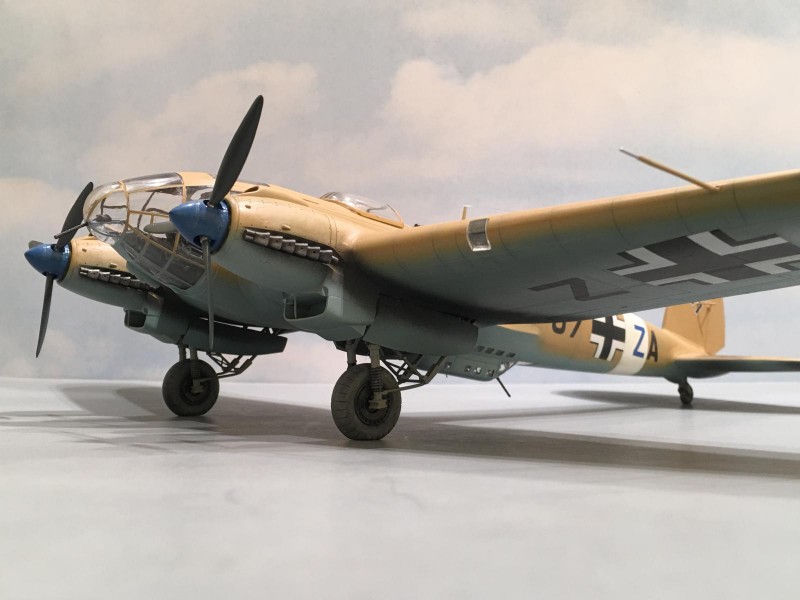
Kasserine Pass Group Build, Monogram 1/48 scale He-111-H, “S7 + ZA” Stab / St.G. III North Africa 1942

I would like to start off by stating the Kasserine Pass Group Build was very enjoyable for me. David A. Thomas, (the founder of this group), was there with guidance and words of encouragement throughout the building process. I wish to thank David, and the staff from Imodeler, for the opportunity to post this model. If not for the Kasserine Pass GB, I probably would not have built this one just yet, but the timing was perfect.

I also wish to thank all of you who contributed to the comments section during this dual Heinkel 111 build journal, with a special mention for our late friend, Bernie Hackett Jr., who passed away recently.

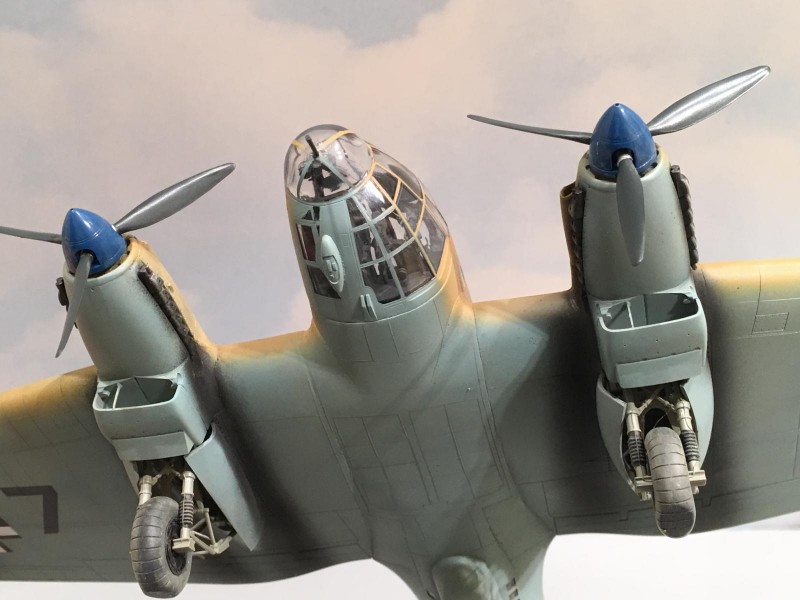
The Heinkel 111 is one of my favorite WW2 Luftwaffe bombers, right up there with the Dornier 17, and the Junkers 88. I think this is in part due to the streamlined glass nose.

Initially, this project was started as a completion build of a similar kit that was 75 percent built by a friend many years ago. I wanted to build an overall RLM 79 "Sandbelb" He-111 every since I obtained a set of "Eagle Cals" decals a few years ago that depicted the model I eventually built here.

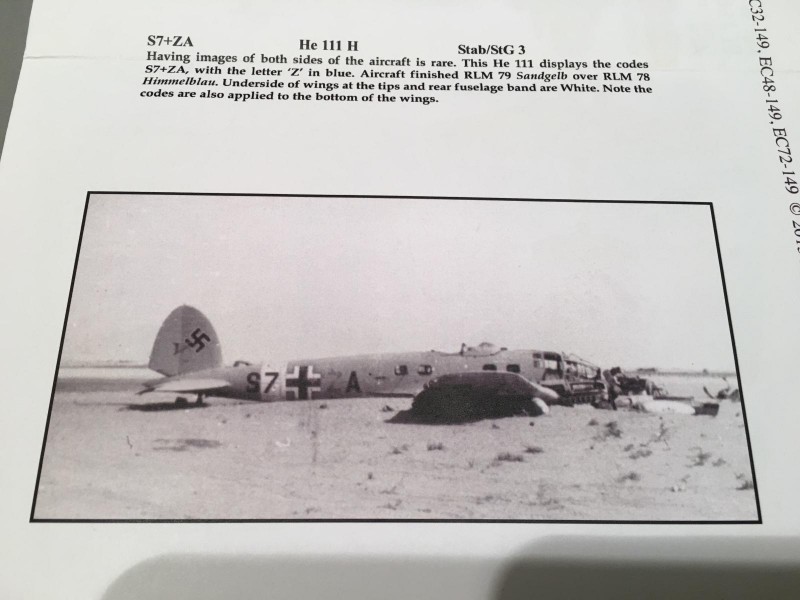
Having pictures from both sides of the subject you are building is a great place to start with. It even says so on the decal literature !


These photos were included with the decals, which are excellent by the way...

However I decided against completing the original He-111 started by my friend, as it was requiring considerable putty to fill in the gaps. So I ventured off the road, and started building my own Monogram kit, along with the new ICM He-111 as a comparison build.

The new tool ICM 1/48 scale kit is still under construction, and details of that build can be seen by following the link provided. It will continue to be updated regularly. I have found it to be a really awesome kit, and it is very detailed. The fit has been spot on, other than the few problems I caused along the way, which have been documented in case you are building one for yourself.

Here's a link if you're interested...

http://imodeler.com/groups/battle-of-kasserine-passtunisia-campaign-build-group/forum/topic/1-48-scale-monogram-he-111-h-stab-stg-3-north-africa-1942-43/

Little did I know that I was heading into a build that was going to require just as much filler as it would have if I simply finished up the model that was given to me by my friend... Most of these older Monogram kits are this way, but they are fun to build and look pretty good once completed. I cut my model building teeth on Monogram and Revell kits, but have never built up another He-111 since my first one many years ago as a child. Up until this Monogram 1/48, the only other He-111 model I completed was the ancient Lindberg (1/64 scale ?) kit, and it hung from my childhood bedroom ceiling for many years...

The Heinkel 111 was initially built as a passenger plane, at least on paper. In all actuality, it was a way for the newly formed "Luftwaffe" to get around the Treaty of Versailles, which was in place after the end of World War One. Limits had been placed on the Germans with producing or developing new weapons.


Ernst Heinkel wanted to build the worlds fastest production airliner. The He-111 was partially based on some features found in the company's earlier He-70, which was a single engine 4 passenger transport plane. The He-70 broke numerous speed records during it's initial reveal in 1932.

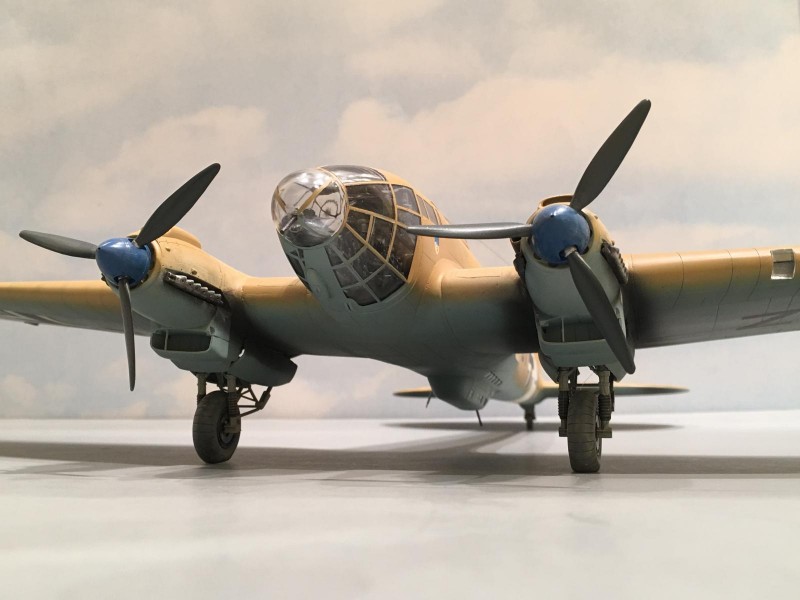
In 1935, the prototype He-111 was flown and the reports from the test pilots were very good. The plane was fast, and the low speed handling characteristics were outstanding. The initial He-111 planes had a typical stepped nose, like found on the B-17. It wasn't until later on during the development of the "P" type, that the rounded glazed nose appeared as seen on this model. The "H" model was built after the "P" version. The main difference was the power plant.

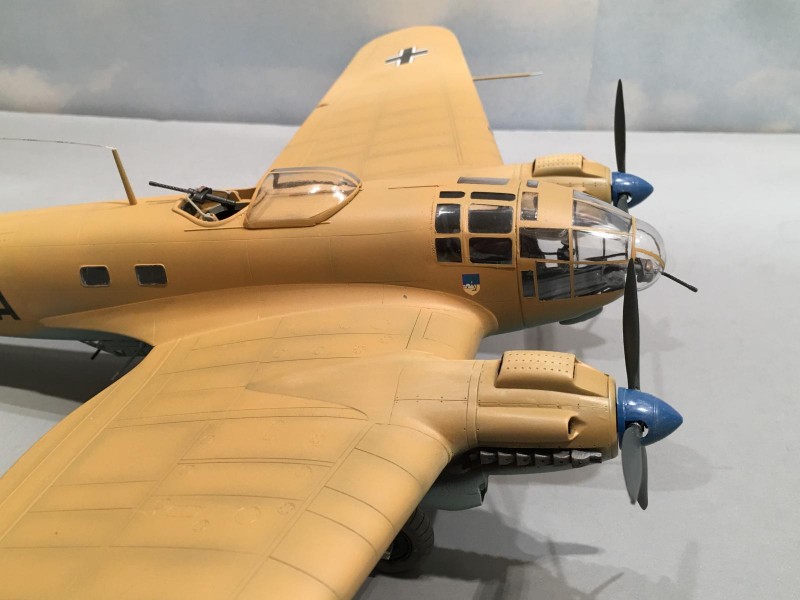
The He-111 "P" series used the Diamler Benz DB-601 with the air intake for the supercharger on the "Port" side. The He-111 "H" series was the most widely produced version, and used the Junkers Jumo 211, with the air intake on the opposite side. This is the easiest way to tell a "P" model from the "H" version.

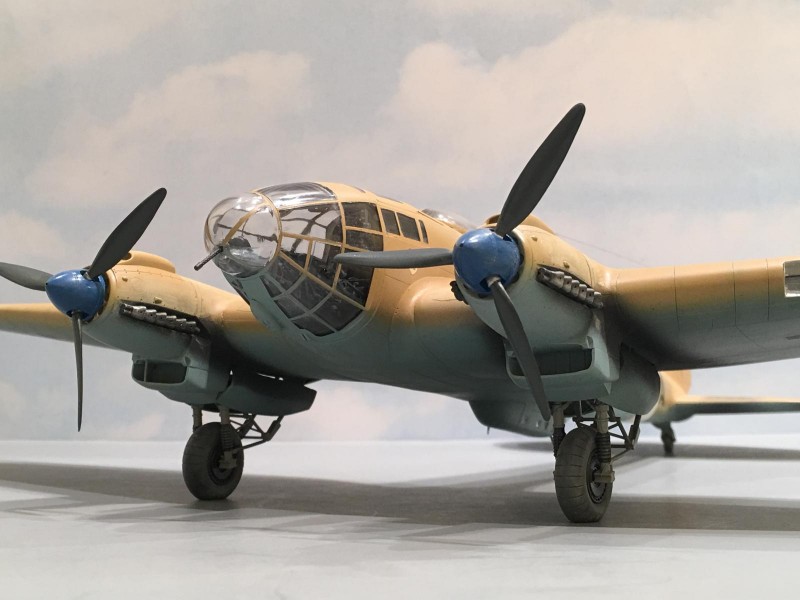
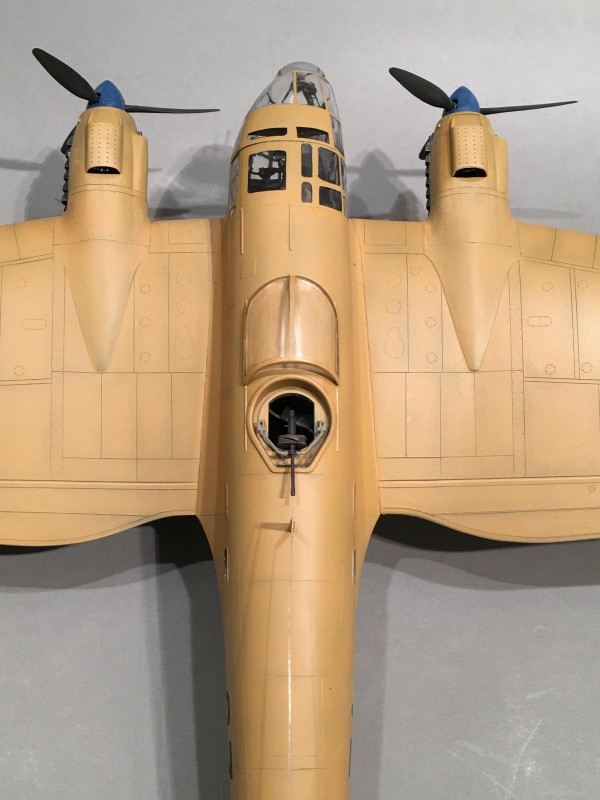
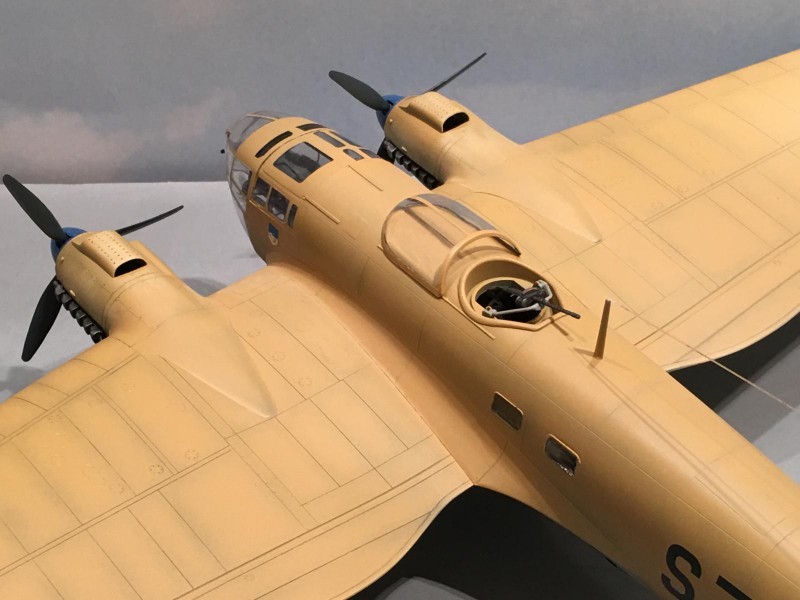
Here in this next photo shown below, you can see the air intake which is partially obstructed by the propeller. It is located just above the exhaust. One other interesting note. The engines were interchangeable between the Port and the Starboard side. Also the earlier "P" and "H" versions (up to the H-3) used a metal VDM propeller blade that was fairly thin when compared to the later marks, which had a wider propeller that was made of wood.

The "P" model was used during the initial attacks on Poland during September, 1939. Experience gained form combat over Poland caused an increase in the number and positions for the crew served MG 15's. Both the "P" and the "H" versions served during the Battle of Britain, alongside the Dornier Do-17's. The Ju-88 was present over Britain, but was still experiencing problems since it had just became operational, and was available in limited numbers.

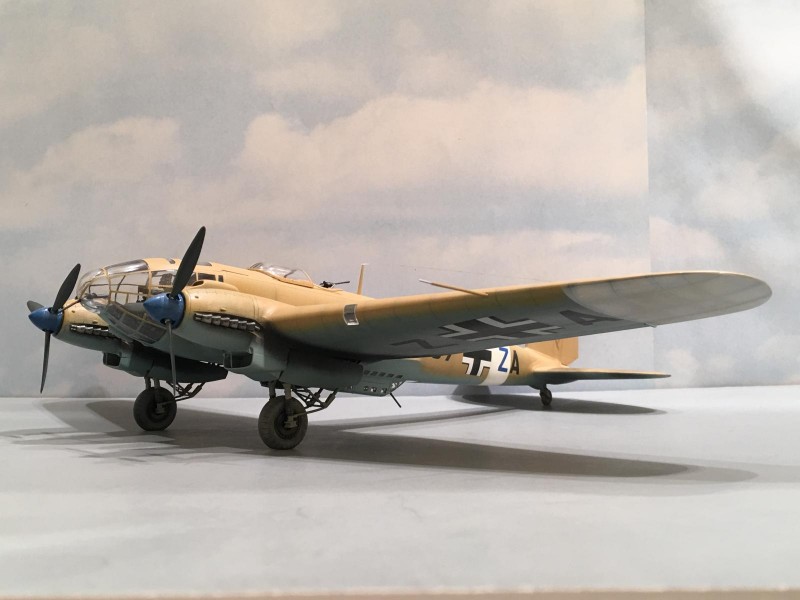
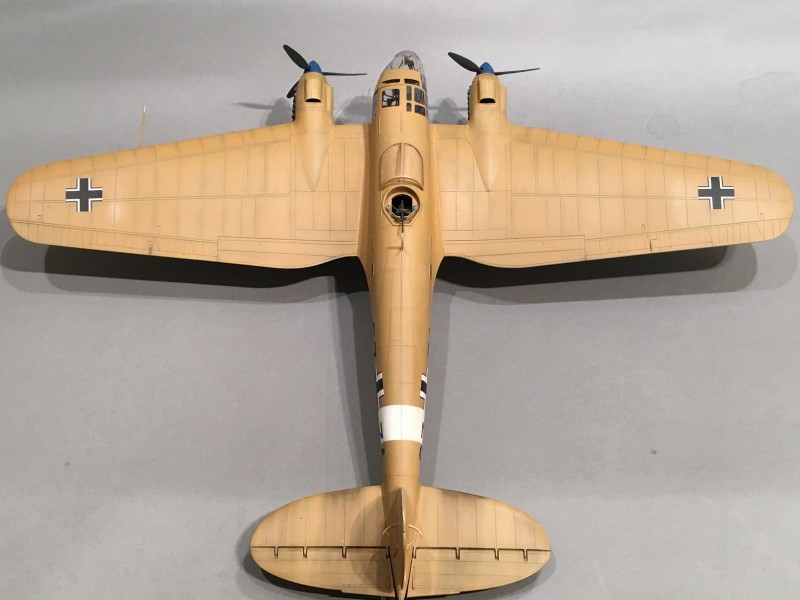
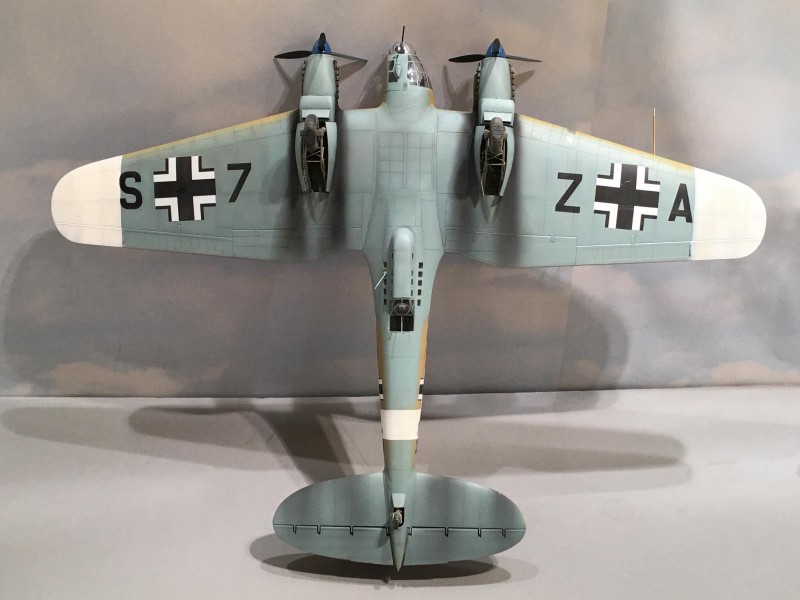
Once other distinguishing feature appeared with the introduction of the "P" and "H" models. That was the ventral gunner's "Gondola" as seen in this next photo. The position was a retractable "Dust bin" on earlier versions, similar to the type used on the Junkers Ju-52 over Spain. On later versions, more powerful weapons were installed here and were facing fore as well as aft to help protect the bomber from incoming fighter attacks. This photo also shows another modification done during the production of the He-111. Starting with the earlier "F" model, the type went to a straight leading edge wing as seen here. Prior to this, the He-111 utilized an elliptical wing like the one found on the Spitfire and Aichi D-3A "Val" Japanese dive bomber.

The decal sheet has the plane shown in the photos as an unidentified "H" model, listing it as an unarmed "Officer" transport plane operated by Stab / StG. 3. I have found several other He-111's listed as "officer transports". Field Marshal Irwin Rommel is reported to have had one at his disposal.

St.G. 3 operated mainly Ju-87's and some Bf-110's when they were stationed in North Africa.

My research online has found a single plane listed as operational with Stab / StG III from February 1942, to July 1942. It is listed as an H-5 version, and was apparently lost in July of 1942. This could very well be when these two pictures were taken that are shown on the decal sheet.


My research has also shown that the "Stab" section normally used a Blue or a Green color to designate the section. Eagle Cals has it a blue, so I went with that. I have recently found a "LIFE" color photo that shows another He-111 with a Green color on the spinner. This color would also probably be used as color for the fuselage identification letter too, and since it's a green color, chances are this new photo I found is of a "Stab" machine too... I may post this photo when I post the article on the ICM He-111 once it is completed.

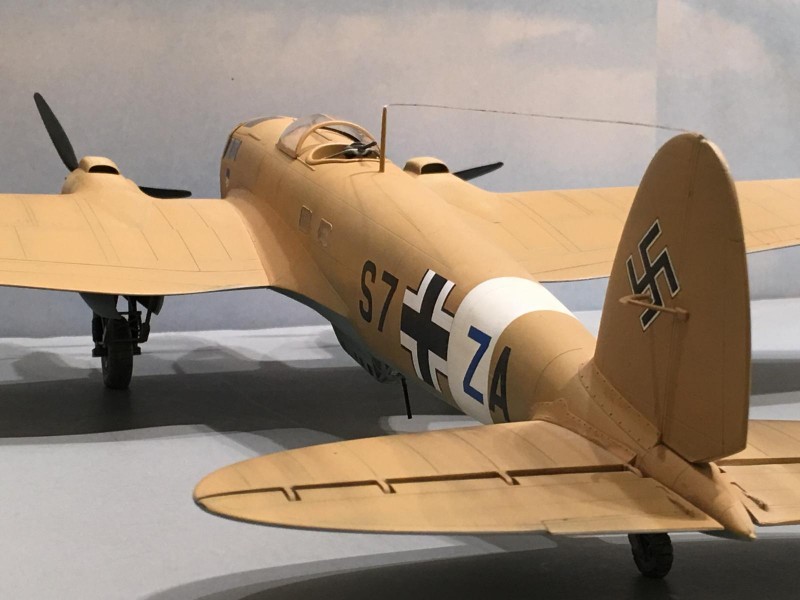
I wanted to pose the dorsal gunner "B Stand" canopy in the fully open position as it is seen here. It is shown that way in the two photographs provided with the Eagle Cals, and since this plane operated in a very hot environment, I'm sure that it was probably open more often than it was closed.

The whole canopy section slid back and forth and provided some protection for the gunner from the elements. Later H" models would have a folding section that covered the rear opening. The H-22 version would have a turret...

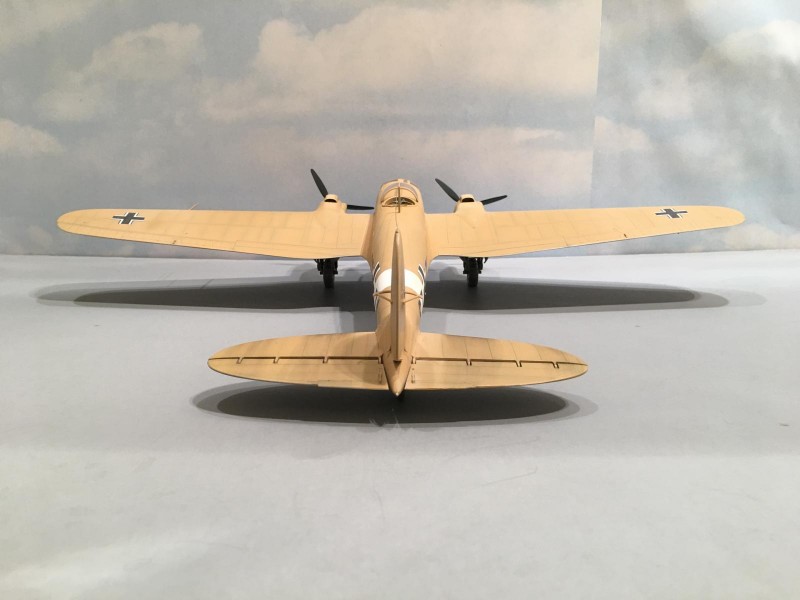
Another thing I did differently this time, which was a first for me, was that I did some "pre shading" on this build. Up until now I have never done this. I must say it does help with the overall look of this plane, as it breaks up the monotone look of the single upper color. Model Master enamels were used throughout the build, with the exception of some pastel weathering from the Tamiya decks.

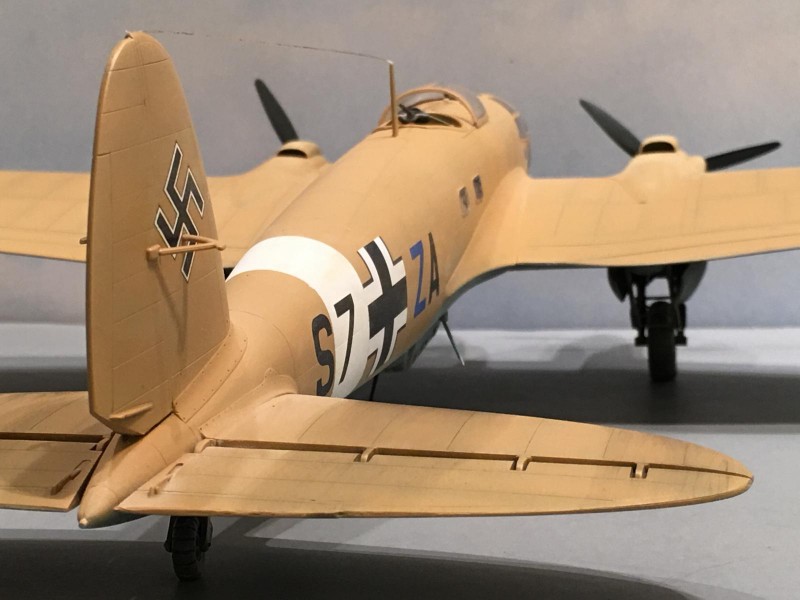
The German planes typically had a huge amount of exhaust staining that was caused by the type of fuel used. I tried to replicate this look, and extended the staining to go over parts of the elevator / stabilizer assemblies.

It is very prominent on the undersides of the model. I used several photos that I found online to use as a guide.

These stains were made by air brushing highly thinned flat black paint onto the surface. I then went back with the Tamiya weathering deck, using the color "Soot" to touch things up as needed.

Here you can see where the "soot" from the exhaust has extended onto the top sides of the elevators too...


The "Stab" unit or Headquarters as the Allies would have referred to them as, was commanded by a man named Karl Christ, from April 1st, 1941 through September 1st of the same year. This man held the rank of "Oberst" which was the equivalent to a Colonel in the US military. Oberst Christ was also a First World War Ace, who flew bombers at first and then later transferred to Jasta 28 flying Albatros D-III and D-V fighters. He is credited with scoring six victories, including the last victory claimed by JG 28 during WW1.

Oberst Christ was succeeded in Command by a man named Walter Sigel, who also held the rank of Oberst. He was the Commanding Officer of St.G. 76 and leading a flight of Ju-87's on a pre war dive bombing training mission on August 15th, 1939, when disaster struck. There were low lying clouds present in the area on this day. The cloud layer were believed to be at an altitude of 3,000 feet (900 meters), when it was actually at 330 feet (100 meters).

The clouds affected the judgment of the Stuka pilots as they pulled out from the dive after releasing their bombs. Many pilots recovered from the dive too late, and flew into the ground. Thirteen Stuka crews were killed because of this. It was called the "Neuhammer Stuka Disaster" because this was the name of the town near where the crews flew into the ground.

Oberst Sigel managed to pull out of his dive in time, but just barely. He reportedly had almost 300 feet of altitude as he recovered from the dive...

Oberst Sigel was in Command of a unit of Ju-87's from St.G.3 flying over Poland on September 1st, 1939. This unit was the one that was reported to have dropped bombs on a Polish city called Wielun, before Germany "Officially" declared war. This City was later found not to have had any military targets, and is now considered the first "War Crime" committed by Germany during WW2. Part of the blame was believed to have been caused by incorrect intelligence, as some of the Stuka crews reported dropping bombs on Polish Cavalry.

Unfortunately, there was also a hospital in this Polish city that was bombed by the Stukas from this unit. They say it was clearly marked with "Red Crosses" but it was attacked anyhow. There were even reports of some patients running out of the hospital, which by now had caught fire, only to be strafed by the Ju-87's as they left the building.

Oberst Sigel died later on in the War, when the plane he was piloting crashed into the water. He died on May 8th, 1944, exactly a year to the date, before the War in Europe ended. He was flying a Feisler Stork, and crashed into the Trondheim Fiord. He was the Commander of St.G.3 from Spetmeber 1st, 1941, through April 1st, 1943. The unit was stationed in North Africa during this time, so it is quite possible he could have flown on this very pane that I built a model of...
Reader reactions:
7  Awesome

1 additional image. Click to enlarge.


45 responses

  1. Hell of a Heinkel, Louis. Lovely clean build and beautifully presented. Having tagged along for the work in progress, it's been a great journey with plenty of fun, a lot of learning, and great entertainment.

    The greenhouse at the front is very impressive and combined with the color scheme, looks terrific. The whole model has a real sense of scale and presence, feeling big. Great job, Louis.

    • Thanks David ! I sincerely appreciate the compliments my friend.

      I have been following along with your Franz Stigler / Charlie Brown B-17 build, and it will be a show stopper when you present it here. I'll be looking forward to seeing that one ! You just have to love these Monogram kits... the B-17 being one of them.

      The greenhouse nose is what has always attracted me to the He-111. There's a real life "F" version sitting in a museum in Spain. I would like to see a main stream model kit company come to our rescue and release an early "step nosed" version.

      Thanks again my friend for the kind words... 🙂

  2. Simply beautiful Louis, awesome Heinkel, I was blessed to see one fly here in So Cal, though it was a Hispano Suiza powered He.111, it was beautiful to see it in action. Sadly it crashed heading back to it's home in Arizona if I remember correctly, I saw it at the last air show held at USMC Air Station El Toro. You have captured the character of this unique looking med bomber. Like the Dinah, the glass nose, sleek look of it's air frame. Always liked the desert camo. As I will hope to build one in this similar scheme. Very inspirational, noted all the issues you encountered and how you solved them. Thanks for sharing this with us outstanding work my friend.

    • Hello Chuck,
      You Ki-46 Dinah build reminded me of the He-111 with it's "almost" shared nose glazing. Yours turned out wonderfully and I really enjoyed watching your progress during the build journal...
      I'll bet seeing a real life He-111 in flight must have been a sight to behold. I have had the good fortune to have been around many Warbirds, have seen many different types in flight, (and had a little "stick time" in a T-6), but having the good fortune to see a Heinkel in the air must have been something special.

      Too bad it crashed. I hope that no one was hurt, but more than likely that's often not the case.

      Like you I have always been drawn to the Luftwaffe North Africa desert paint schemes. The Fw-109 A4 I just completed was another one of those that I just couldn't resist.
      Good luck with your future He-111 build, and if there's anything I can do to help you out along the way, please don't hesitate to ask...
      Thanks again for the compliments.

  3. Profile Photo
    said on July 1, 2018

    Great looking build Louis.

  4. Outstanding job Louis. Really a spectacular model. Well done!

  5. Wunderbar Louis! Like the subtle weathering.

    • Thanks Gary ! I didn't want to go crazy with weathering this one. Other than being a quite dusty and hot / cold place, the desert is actually a pretty clean environment... If anything, the sun fading the paint would be the majority of the weathering.
      Thanks again.

  6. Fabulous final result, Louis: clean, subtle, dramatic, and fully doing justice both to its inspirational historical iteration and the the KP GB on a whole This is a feather in your cap and also helps complete that story beautifully.

    I am very grateful for the step-by-step WIP thread you've graced us with, and how you've presented this dramatic aircraft in all her glory. Well, done, my friend!

    • David,
      Thanks for taking the time to start this fantastic Group Build. I have learned a lot about things that happened here, and have built up a few kits that I normally would not have. Eventually I would have gotten around to building them, just not as quickly.
      I sincerely appreciate the compliments, and I'm glad to hear that you have enjoyed the work in progress journal too. Please continue to follow along as I complete the new tool ICM kit. I plan on doing regular updates on it as well.

      Your legacy build ambulance is an amazing build and article. I enjoyed that one a lot. Your grandpa would be very proud of you. That was a story worth capturing and one of my all time favorites. It's right up there with the Piper Cub and the "Yellow Bee"...
      Take care my friend...and thanks again.

  7. Excellent build and presentation, Louis.

  8. This is beautiful Louis, an exemplary build of a plane you don't see too often - especially in these colours. These articles are now a trademark and one we all look forward to immensely. I can't wait to see the two bombers next to each other and to hear your final views on the old and new Heinkels - for now this is masterful handling of the older kit, and the article, the WIP thread and the presentation here are something for us all to aspire to!

    • Thank you very much Paul.
      I am very pleased now that this Monogram He-111 is completed. In fact, it's one of my favorites and is right up there with the Monogram TBD Devastator I built for the Midway GB. It was trying at times, especially with all of the filling and sanding, but in the end it was worth every minute of it.
      It pleases me to see that several of you guys have mentioned the "Work in Progress" build threads. I write them to help out our fellow builders, and include the problems I encounter along the way "just in case" it should happen to others...

      Please stay tuned for future updates on the ICM kit. I will continue to update it regularly. It's a lovely kit and has been very enjoyable to build, even with the "glue gate" misfortune... 🙂

      Take care my friend, and I'll be looking forward to seeing your next Lizzie, Spitfire and Hurricane updates in the 100 Years of the RAF Group build... and thank you for the idea of using little plastic cups to keep parts separated... I shamelessly took your idea and ran with it... It works great too.

  9. Excellent build ,Louis! Great color scheme/marking choice. Nice back round info too.

  10. Louis, I too always liked the He 111 and remember how much I also enjoyed the old Monogram kit. Your build here looks great. I really like the desert scheme. Well done !

    • Thank you Terry. This is a model I have been wanting to build for quite some time. For some reason I have been drawn to this overall RLM 79 over 78 color scheme for a while. Like you, I have enjoyed these old Monogram kits, since they are what I cut my modeling teeth on... along with some Revell kits back in the day. You still get a lot for your money with them.

  11. This is a WINNER! I like everything about this build. You did an amazing job on the finish and weathering! Well done!

    • Thanks Morne for the compliments. It sincerely means a lot to me.

      I am watching how your Beaufighter has been coming along, and that one will definitely be a show stopper. It still amazes me how much scratch building details you have added on yours. It's a real beauty... You guys that scratch build details, or even a complete model (like Marc Barris) are the true masters.

      • Thanks Louis. I am relatively new to the scratch building scene. I just like adding details to make the model that more realistic. The Beaufighter build is by far the most ever I have added to a model. I am trying to see how much I can add without using expensive resin or PE parts.

  12. Well done Louis. I've been following your build and it's nice to see the old girl turned into a show stopper. Really looks good in the desert camo my friend and a great addition to the GB. Hand salute.

    • Thanks Tom ! I am glad it's done now, (so I can build some Spitfires) and I have to admit it, the Heinkel looks pretty good in the display case sitting next to "Yellow 1", it's Tunisian Fw-190 brother. Please continue to check in on the build journal, as I'm going to continue regular postings on the ICM kit as it goes. Next up are the engine builds on it.
      I really liked the last P-40 you posted up in the headlines section, as part of the GB. All of your P-40's are works of art...

  13. That turned out great, Louis. I’m surprised it needed so much filler. I always thought that this was the first of Monogram/Revell’s modern kits. I’m ashamed to admit that my Monogram 111 has been sitting in the stash since 1994 when it was purchased. Thanks for the inspiration.

    • Honestly John, I was surprised that it needed this much filler too. The main reason I decided to build this kit instead of finishing up the one given to me by a friend, is that I initially believed that I could do a better job assembling it, eliminating the need for as much filler. It turned out that I was wrong. The kit I built needed filler in the same places as the one built by my friend. The areas needing filler were the nose glazing / canopy where it joins the fuselage, the underside of the wing / fuselage joint, around the engine nacelles where they join the wing, bomb bay doors, and the fuselage center seam, on both the top and the bottom sides. The top side seam was much worse.

      I hope this He-111 does inspire you to build yours. Overall it was a fun kit to build, once I got past the sanding of the seams. It is among my favorites on display now...
      I must warn you however, it's a big plane and takes up some real estate in the display case ! I hate to admit it but mine has been sitting for about the same length of time as yours... and I have three more in the stash still waiting.

      Thanks for the compliments.

  14. Hey Louis, What a great piece of modelling my friend, I have been following your posts with interest, I have been drooling here in the DRC, and I cant wait to get back to the work bench. Thanks for the inspiration. Well done.

    • Hello Marc,
      It's good to hear from you. I can only imagine how it must be in the DRC. I went through a spell of several years without building a thing due to work and other things that came along. Hopefully you can get back at it very soon.

      I am honored to be called an inspiration by someone like you that is a master when it comes to scratch building. Anyone who can build up an entire airplane from scratch, has a serious set of skills... almost anyone can glue some parts together.
      The true craftsman makes his own parts, then glues them together... and they fit ! 🙂
      Thanks again, I am honored...

  15. Great looking Heinkel Louis, can’t wait to see the ICM completed. Will it be the traditional 70/71 camo or are you preparing another treat? Good work!

    • Hello Pedro,

      It's good to hear from you. The ICM kit is much better in many ways, but it should be considering the age of this Monogram kit. I am starting to build the engines now on the ICM Heinkel. I really want to build the ICM model as a Battle of Britain plane in typical RLM 70 / 71 over 65, but there's a few other options I have with other decal sheets. To answer your question, I'm about 75 % sure it will be a BoB machine, but I'm not 100 percent sure just yet... 🙂

      Thanks for the compliments, and please stay tuned for updates on the ICM kit. It's a real beauty...

  16. The 111 is a real beauty! I love the desert scheme on these birds and the one I built is similar, just with the green splotches added. Of the 3 primary German early-war bombers, the Heinkel is my favorite - just the unique look of the glazed nose with no canopy protruding into the slipstream other than the gunner's cover. Always being a suc*er for desert schemes, I couldn't resist! You did a great job with this one.

    • Thanks Greg !

      I found a picture of a He-111 that was supposed to be Rommel's personal transport and it was painted exactly how you described.

      The He-111 is one of my favorites too. Like you, once I saw the decals by Eagle Cals, I knew then and there I had to get a set as someday I would build a desert version. Believe it or not, I also have a much older "Super Scale" set that has the same plane. However they listed the colors for the spinners and the aircraft letter as a red color. I knew right away that was wrong so I dismissed it. Other than the wrong Staffel colors, and having the wrong RLM numbers listed as the primary colors, they didn't have the Unit Insignia shield or the under wing codes.

      I'm glad that I decided to wait until now to build this one since back then I didn't have internet access.

      You're correct that the He-111 looks "high speed/ low drag" ! It's a sharp looking plane.

      Thanks again for the compliments my friend. Good to hear from you.

      Take care !

  17. Very nice work on this Louis, and a very realistic-looking result. That old Monogram kit is better than people give it credit for.

    I had the chance to get inside the CAF's Spanish He-111 once. A very tight fit inside!

    • Thanks Tom.
      I appreciate the compliments. The older Monogram kit is still an option for those who don't want all of the little details provided by the new tool ICM kit. It is a less expensive option for those who don't want to spend the extra money on the new ICM kit. The trade off is the need for filler on the Monogram version, and fewer details. So far the ICM kit has been very good for fit / finish. The problems I had were more than likely caused by me and not a fault of the kit.

      It must have been very cool to get inside the CAF's Heinkel. The closest thing I have done is that many years ago I had the opportunity to crawl around inside a Ju-52 that was owned by your "buddy" Martin Caiden. I believe that he sold it to Lufthansa a few years later. When I was around it, he had it painted up with your typical Luftwaffe splinter scheme and yellow cowlings.

      Thanks again for the compliments.

  18. WOW, very cool, congratulations Louis!
    I esp. like the grade of weathering (not to much). Also the blue prop spinners and the very clean build.

    • Thank you Andreas... The blue was a very close match to the aircraft "Z" letter. I was wondering how it would look once the paint dried. I didn't want to go crazy with the weathering, since the original photos didn't show too much on the real plane.
      Thanks again !

  19. Great looking aircraft Louis. Weathering is very subtle, just right in my books

  20. She came out great Louis! Very nice in desert camo. And Monograms can still hold there own.

    • Thanks Robert ! It's good to hear from you.

      I sincerely appreciate the compliments... one of these days I'll get working on the 1/48 scale ICM Ju-88. I just finished assembling the engine blocks for the ICM Heinkel... Hopefully it will not take too long to get it done.

      Hope you had a great 4th of July Holiday...

Leave a Reply