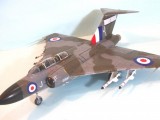
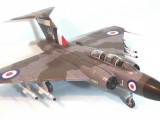
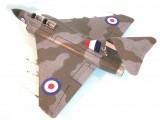
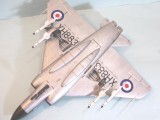
iModeler Review: 1/48 Airfix Gloster Javelin FAW 9
Gloster Aircraft, having developed and produced the only Allied jet aircraft to be operational during the war, the Gloster Meteor, sought to take advantage of its expertise, and responded to a 1947 Air Ministry requirement for a high-performance night fighter under Air Ministry specification F.44/46. F.44/46 called for a two-seat night fighter that would intercept enemy aircraft at heights up to at least 40,000 feet, it would also have to reach a maximum speed of no less that 525 kts at this height and able to perform rapid ascents, it was expected to attain an altitude of 45,000 feet within ten minutes of engine ignition.
By the end of 1956, the Javelin was up to a FAW 7 variant, which was the first to actually meet the specifications of the original Air Ministry requirement, becoming the only jet aircraft equipped with an afterburner to remain completely subsonic even using afterburning. The FAW7 became the definitive version of the aircraft, with most of this mark later altered to the FAW 9 standard. The Javelin was evolving so quickly that deliveries of the FAW 8 began before FAW 7 production had ended. As a result, the final 80 FAW 7 aircraft went straight from the factory into storage, eventually flying after being re-manufactured as FAW 9s. A total of 427 Javelins were produced in all variants, plus seven prototypes.
The closest that the RAF's Javelins came to combat was during the Malaysian Confrontation with Indonesia from September 1963 until August 1966. Javelins of 60 Squadron, later joined by 64 Squadron operated out of RAF Tengah, Singapore flying combat patrols over the jungles of Malaysia. In 1964, an Indonesian Air Force Lockheed C-130 Hercules crashed while trying to evade interception by a Javelin FAW 9 of 60 Squadron. During June 1967, following the disbandment of 64 Squadron, 60 Squadron was deployed to RAF Kai Tak, Hong Kong because of unrest in the colony during China's Cultural Revolution. Javelins were also deployed to Zambia during the early stages of Rhodesia's Unilateral Declaration of Independence, to protect Zambia from any action by the Rhodesian Air Force.
This reviewer actually saw Javelins at Kai Tak during visits to Hong Kong in 1964 and 1965 while in the U.S. Navy; the airplane was as interesting-looking in person as I had thought it was when I first saw pictures of the prototype in William Green's "All the World's Aircraft, 1954", my first "serious" airplane book.
The last of the type was withdrawn from service with the disbandment of 60 Squadron at RAF Tengah at the end of April 1968. The Javelin was the last aircraft to bear the Gloster name.
Previous to this release by Airfix, the only other 1/48 kit was a very good vacuform by Dynavector, which is no longer available.
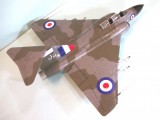
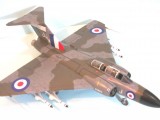
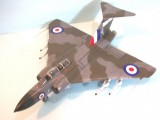
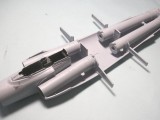
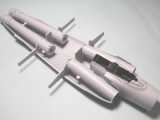
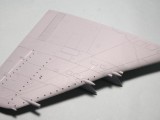
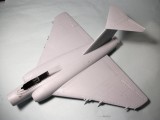
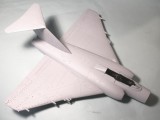
The kit brings Airfix kits to the Hasegawa/Tamiya production and design standard. Engraved detail is petite and accurate looking, while all parts are clean and crisply molded. The kit allows construction of either a Javelin FAW9 or FAW9R with inflight refueling capacity, of which 60 were operated by the RAF. All joins are on panel lines, and if a modeler takes care, no putty or other filler is needed. The kit is listed at skill level three by Airfix; any modeler of moderate experience should have no difficulty with it. I had the kit assembled over several hours in an afternoon.
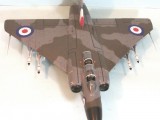
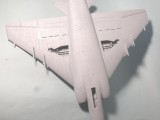
The kit offers the option of dropped flaps and open air brakes, but I have yet to find any photos of Javelins parked in that configuration, so I closed things up. Unlike many kits, where such "options" are really the only way the model can be assembled without a lot of additional effort, the flaps and brakes fit in the closed position without trouble. I also opted not to use the intake and exhaust covers, since it is dark enough inside that one doesn't notice any seams in the intakes or exhausts. A boarding ladder is also included, which I may use later in displaying the model.
One thing to take note of is that only the FAW 9R variant carried drop tanks, though both versions carried the under-fuselage slipper tanks.
Decals are by Cartograf. The upper wing roundels are printed with openings for the air fences, which makes application much easier. I used the kit decals for the national insignia and the stenciling.
Hannant's has released two decal sheets for the kit in their Xtradecals line. I used Xtradecal 48125 to do an FAW9 of 25 Squadron flown by Wing Commander J.H. Walton in 1960. The sheet includes markings for an FAW 8 Javelin, which could be made from this kit by shortening the nuselage about 1/4 inch immediately behind the radome.
Perhaps the only place where aftermarket items would really improve things is to get resin ejection seats. I used the kit seats, which are acceptable if one doesn't look at them too closely.
Overall, the kit is accurate and easy to assemble. It is easily the best Airfix kit yet released in any scale, and bodes well for future releases. It's a fact: Airfix is back!
Highly recommended for anyone who likes 50s jets.
Thanks to our editor for providing the review copy.
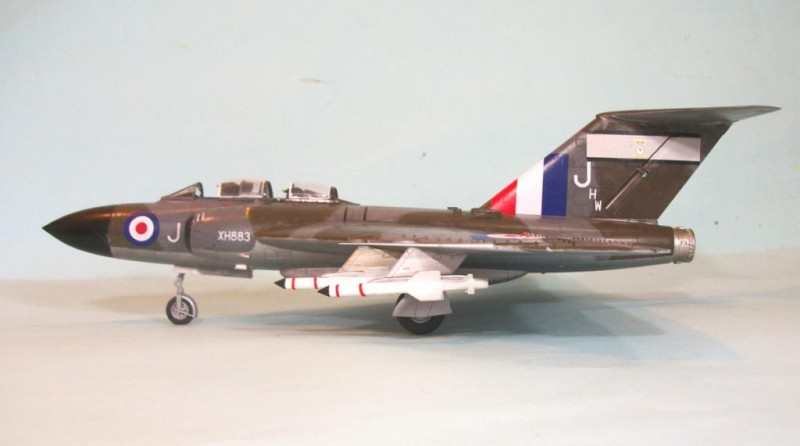
wow...good to see some movement...that's nice
What a beastie and what a monster the Javelin must have been. The wing looks a bit thick for anything super sonic and it must have been a transonic a/c. Given the time period early to mid fifties it would have been world class of course folks were learning about the area rule principle and learning to thin out the wings ... engines with new metals such as titanium were in the works ...things were evolving rapidly and yet the Brits were still on the cutting edge of technology. I'm also, thinking of the Lightening being a world beater in the speed department. Excellent build and review, saving the pennies for this one.
That is one sick build TC.
Actually, the airplane was 100 percent subsonic. That wing had everything in the world to do with it. It was also a bit crazy to have a tailed delta, since with any pitch-up, the elevators were blocked, with significant negative impact on controllability - in fact several of the early ones were lost that way, dropped like a rock when that happened.
tone the shine down...
Actually, the Javelin comes from the period of glossy paint on RAF aircraft. It is finished with Xtracrylix Satin varnish, rather than Gloss, which is too glossy in scale.
gottcha...kind of figured you'd have it right
Informative history & review Tom.
Thanks
Very nice looking, Tom. Was there much of a "weighting" problem, and if so, how did the landing gear hold up?
I put three fishweights in the radome. Landing gear is holding up just fine.
A nice review and history there Tom. Having seen other reviews of this plane, it was nice to see that someone was not bothered by the seams in the intake/ exhaust area. The finish is spot on, scaled right.
You can't see the seams. I was prepared to use the covers and once you paint the exhaust a dark color it's dark in there and you can't see more than a half inch into the intakes. I think most of this business about seams in the intakes is from people who want to hold the model up and stare at it from 2 inches away. Not me!
I agree there Tom, the type who will use optic fibre cameras to inspect everything!
Classic RAF 50s heavy.
I saw this kit built up on the Airfix stand at Telford (but not painted) - nice size in quarter-scale. There's a small aircraft museum here in Norfolk (about half hour's drive from me) - on the site of a former WWII US bomber base - and there's a Jav plonked on the grass near an old MIG.
The Jav has a commanding profile and a real presence. Bear in mind these airframes are not maintained as in a cash-rich US environment, all bells and whistles. They are pushed back on the grass with the air of ballroom dancers from another era, both mournful and majestic.
Oh how I wish there was a "cash rich US environment" for museum airplanes. Outside of a few, and mostly for ww2 airplanes, it's not that different.
I think we're used to the pristine airframes we see in magazines and perhaps assume it's the common demominator across the US scene. As here, I guess there's the highly subsidised headline airframes - P51s, B17s, Sptifires, and the like, and those behind the barn mantained with an old 4" brush and a bucket of paint.
the tank museum in aberdeen md makes me want to cry...weeds growing up through tiger tanks...none authentically painted...disgraceful
dang if the thing doesnt look like a precursor to the f4 phantom?
You mean big, brutish and ugly? 🙂
Tom, beautiful job on what happens to be one of my favorite aircraft, though I especially like the early marks, with the "pen nib" exhaust fairings. I wonder if there are (or will be) some aftermarket sets that will allow this to be done? I have done it in 1/72, combining the Frog front fuselage/cockpit area with the Heller T.3. Great subject. Thanks for posting!
Actually, Alleycat is doing a whole series of resin conversion sets for all marks of Javelin, so you should have no trouble getting the particular sub-type you want now.
Great job Tom
I agree on all points especially the fact it is most likely their best 1/48 scale kit released to date...still to paint mine , i will finish mine as the only natural metal beast that existed
Cheers
Nice looking Javelin, Tom.
Actually the slight semi gloss of the finish is prototypical; its the folks spraying theirs with clear flat who are getting it wrong.
Umm... Last time i checked the F-89 Scorpion had afterburning Allison engines but was decidedly subsonic.
Running for cover now...
-d-
Yeah, you're right. The F-89 is one of those airplanes I haven't paid much attention to. Even more thoroughly subsonic than the Javelin. Both used afterburning because they were underpowered.
Real nice job, Tom, you gotta' love those delta winged aircraft. Nice narrative as always, I learn quite a bit from your postings.
Great build Tom. I have one on order & I'm most encouraged by your comments. Great to see Airfix getting better & better.
Glad you built the version without the refuelling probe.
Cheers,
Tony
great review and excellent results - thanks for sharing!
I'm working on this kit now! I'm deciding the best way to paint it. Seeing as the fit of everything is fantastic I think I will be painting the upper and lower halves of the wing before assembly in order to deal with the hard demarcation line along the leading edge. (That would be a bear to mask, although I've seen photos where the camouflage wraps around the leading edge on some Javelins. Here's my real problem though! What color is the bottom? The one at the Jet Age Museum (one of the subjects in the kit) has a light grey underside. The instructions say silver (or maybe even bare metal as I've seen two tone Lightnings that way). Do I model how it is now or as it was in service? Any help/comments?
You don't need to do the painting that way. Just paint the underside, which was aluminum lacquer on the real thing, called "speed silver" - I used Alclad White Aluminum under a coat of Xtracrylix Satin varnish. Then aply some drafting tape under the wing sticking out a ways, push it up so it's running along the leading edge. You won't get a lot of overspray anywhere, and it will have the hard line you want. The demarcation between the BSC Dark Green and the Dark Camo Grey is not totally hard-edged. Paint the grey, then draw the camo pattern on with a pencil, then freehand it with the paint thinned 50-50 and the airbrush tightened down to make a nice narrow line about the thickness of a wide pencil mark. Then fill it in. Oh, paint the radome gloss black before all else and mask it, then start with the underside, then the topside. Like I say, use low-tack drafting tape (NOT MASKING TAPE!) to mask off the lower area,
Hope this helps you.