Mitsubishi G4M1 “Betty” – Tamiya 1/48
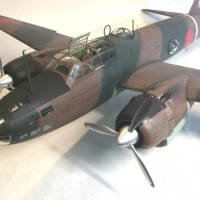
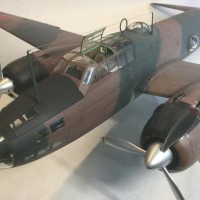
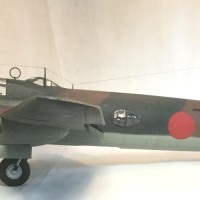
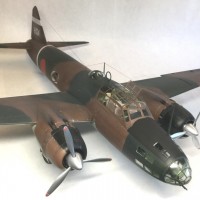
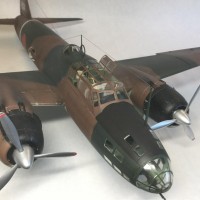
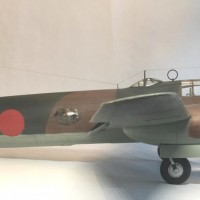
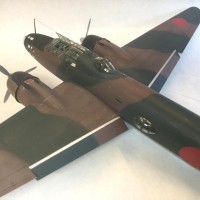
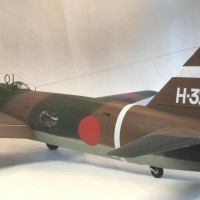
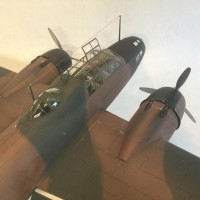
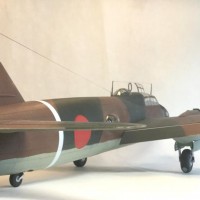
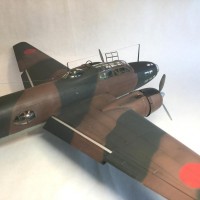
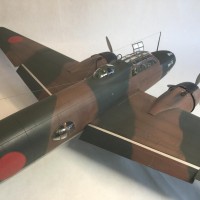
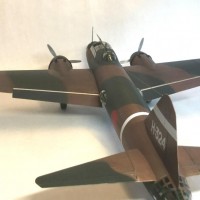
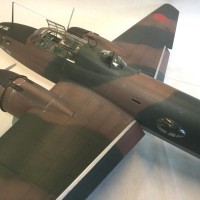
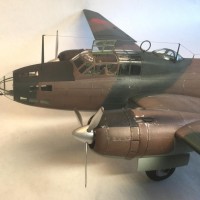
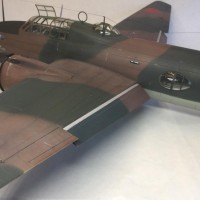
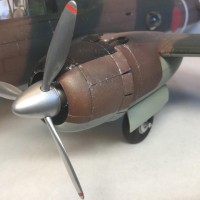
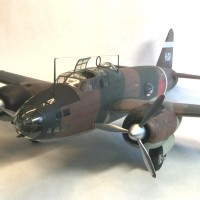
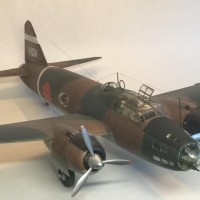
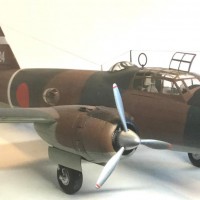
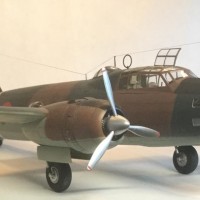
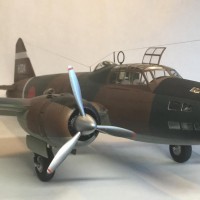
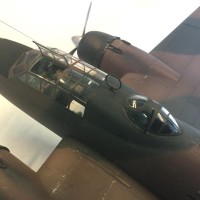
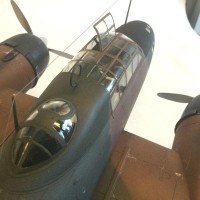
Here is my Tamiya Mitsubishi G4M1 "Betty". This was a fairly long project, partly documented in the Empire of Japan Group Build (so I will keep description here to a minimum). It is finished in Tamiya XF-11 JN Green, XF-64 Red Brown and XF-12 JN Grey and kit decals to represent an aircraft of the Misawa Kokutai, Saipan in the Mariana Islands, July, 1942. I went for a very weathered look to the paint but not as much chipping as is usually done on the Betty by other modelers. I used pre-shading, post shading with Tamiya Smoke and an oil wash for a layered approach to fading and varied wear to panels. Using a variety of close up and overall photos of this aircraft found on the Internet, I decided to simulate paint loss around the engines and in parts of the wings and fuselage subjected to prop wash. I used a silver pencil and Rub n Buff to gradually build up chipping from small dots. I actually overdid it in places at first but carefully removed some of my work without scraping any paint off. I'm quite happy with the final result.
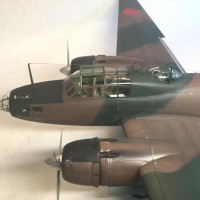
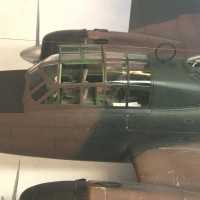
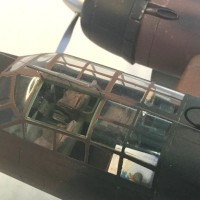
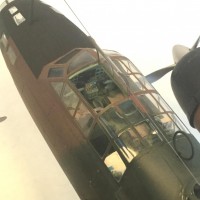
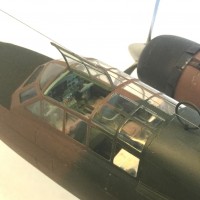
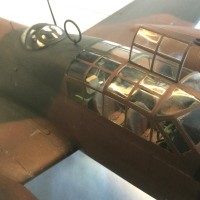
I detailed the cockpit with all seats completely rebuilt with sheet styrene and seat covers built up with styrene, paper and Tamiya tape, and Eduard seat belts. I used a fairly simple Eduard set for the instrument panel, and one radio panel. I also scratch built two more R/T sets in the radio operator/navigator's position. Addendum: I actually spent a long time on the cockpit and realized that I hadn't included detail shots of how it came off in the end. i just added a few extra pics to show the radios and the neat little Japanese navigation maps I added on the navigator's table. They are printed by a company called Duplicata and I strongly recommend them. With regards to the radio trapeze, distortion from the clear plastic makes some of the bracing look bent. although it is all quite straight!
Overall, the fit is not great for some components of this older Tamiya kit. I had to do some careful fitting and filling around the main canopy and other clear parts, among other challenges. I am kind of glad it is done. I hope you like the results.
Comments welcome.
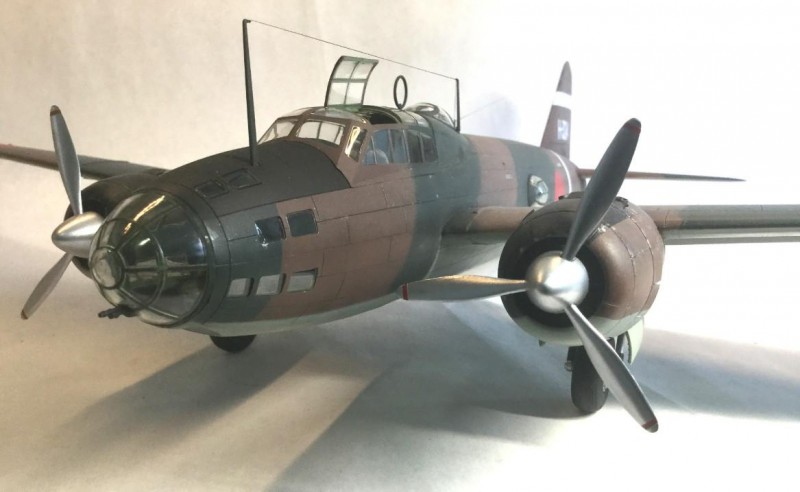
Great looking build.
Thanks, George. Glad you like it and great to hear from a fellow EOJ Groupbuilder!
Hi Colin!
This is an excellent build and a pleasure to have followed it through the GB.
Well done!
Thank you, Spiros. Your encouragement on the build as a work in progress was really helpful. Looking forward to your finished Jake.
A beautiful "Betty", congratulations to this remarkable model!
Thank you, Roland. I have long admired your work on-line on this site and others. I have taken inspiration from your craftsmanship and modeling approach, particularly when getting through more challenging builds.
Your words delight and inspire me - thanks for this comment!
Very nice build. I like what you did with it, nice overall finish without going too far. I have one in my stash, I just don't generally like Japanese aircraft enough to build them. Nice build though and makes me want to reconsider.
Thanks, Walt. I had the Betty for some time before working up the energy to tackle it. Historical pics of G4M1s with the paintwork mostly intact convinced me I could finish it without having to commit to a lot of ugly paint chipping. Overall, I think the Betty has quite pleasing lines when seen from the right angle. It certainly had enough historical significance in the Pacific War to justify adding it to my shelves.
Nice and clean build.
The chipping did come out very well.
Thanks, John. I am glad to hear it looks right to you. There are pictures to confirm that not all aircraft deteriorated at the same rate, especially those painted in the earlier two color upper-surface camo.
Beautiful Betty there. Looks about right IMHO. Masking was the best part, right?
Thanks, Bill. Masking was a challenge. Although I used Eduard masks to save time, I had to reshape some of them to cover all panels properly. The real challenge for me is at the stage of removing the masks and cleaning up the clear panels without damaging the ribbing. I re-did some ribbing/bracing with painted strips of decal.
Very nice Betty and excellent masking on all those transparencies.
Thanks, Haslam. I find greenhouse canopies like the Betty's are worth an extra careful masking effort since they really draw the eye. Likewise adding detail to the cockpit/cabin was essential.
Well done Colin great work with that paint job. In 1/48 she's rather big, hey?
Thanks. Tom. Yes, the Betty is huge in 1/48. The wingspan in particular is striking. My guess is that is was practically a glider, enabling it to cruise great distances while burning less fuel. I can barely fit it into my largest cabinet at any angle.
Very sharp work Colin!
Thanks, Dale, I'm very pleased you like it.
Very nice Betty, this is a sweet kit from Tamiya. Colin can I ask you colour is that on the inside of the flaps?
Thank you Pedro. The contrasting area of each flap is bare metal as it was unpainted when on the real aircraft.. I used silver Rub n Buff to simulate the bare metal (and also used Rub n Buff on the props and hubs). I have never been able to get as smooth a metallic surface with ordinary silver or aluminum color acrylic paint, which looks too patchy or pebbly-surfaced when airbrushed.
Thanks Colin! I would never guess it’s plain aluminium tbh. I can suggest AK Xtreme metal as a paint option that doesn’t give you those pebbly surface look when airbrushed. I found them better than Alclad and odourless
Great-looking Betty! That 2-tone upper camo scheme has more character than the typical mono-green scheme. Well done.
Thanks, Greg. I agree. I also like the rich tones of the Red-Brown and the dark tone of Tamiya's IJN Green for this scheme.
A lot of work went into the model, it looks great!
Thanks, Walt. I appreciate that you noticed the work. Glad the final effect looks right.
This is a magnificent looking Betty you have completed. It looks fantastic ! I will definitely be using your build journal when I get around to finishing up the two that I have started.
Thanks again for participating in our Empire of Japan group build. I have really enjoyed reading your adventures with building your kit.
Well done my friend and I pressed the liked button too.
Thank you, Louis. Thanks also for urging me to complete it in the EOJ forum in spite of particular painting challenges. The Group Build has been most helpful in getting things done.
Beautiful result Colin. I really like it.
Thanks, Ben. I really appreciate your feedback.
Colin, I've heard this is a great kit, and you've done a marvelous job on the build and paint work. Well done !
Thanks, Terry. It is a very good kit, with more than adequate internal detail for most modellers. I went a bit further in detailing it but it could be an easy build. The one thing I was most concerned with was the fit of the canopy - just a bit of careful work to get it to fit snugly all around.
She's a beauty, Colin - absolutely fantastic - well done on a brilliant contribution to the EOJ group! The paint job is stunning!
Thanks, Paul. I am really glad you like it. The EOJ Gorup has been fun so far. Nice to see your Okha on display as well - very fine work.
Very sharp looking model. Nicely done Colin!
Thanks, Robert. I am glad you like it. Thanks for commenting!