Hasegawa 1/48 Hawker Typhoon Mk.1b (late) - finished!

Started by Eric Berg · 165 · 1 year ago · Hasegawa, Hawker, Hawker 100th, Typhoon Mk 1B
  • Profile Photo
    Eric Berg said 1 year, 4 months ago:


    Thanks Erik @airbum for the group invite. I have had this Typhoon in my stash ever since Hasegawa repopped it with new decals in 2003, that are still in fine shape so I will use them. Upon opening the box, I realized I have been acquiring a small stash of resin aftermarket parts all along in the last 19 years so I have a lot of goodies to work with. However, I won't be starting this until button up Eduard's Tempest Mk II in Pakistani markings I've been building that is now ready for the paint dept. A couple of weeks to go before it's finished. You can see it behind the box photo.

    This should be a great group build with all the various Hawker subjects to work with. Great idea Erik.

  • Profile Photo
    John vd Biggelaar said 1 year, 4 months ago:

    Excellent choice, Eric @eb801
    A beautiful Hawker aircraft and with all these goodies it will for sure result in an amazing kit.
    The boxart is very nice, are you going to build the 'Betty' as well?

  • Profile Photo
    Eric Berg said 1 year, 4 months ago:

    @Johnb. Not sure if I will do "Betty". Visually it seems unexciting. What do you think?

  • Profile Photo
    John vd Biggelaar said 1 year, 4 months ago:

    @eb801, indeed not too exiting, Eric. How about this one.
    Did find it on the following website with some interesting schemes, http://www.cbrnp.com/profiles/quarter2/typhoons-1.htm

  • Profile Photo
    Eric Berg said 1 year, 4 months ago:

    Thanks for that link John. Those schemes offer lots of possibilities.

  • Profile Photo
    John vd Biggelaar said 1 year, 4 months ago:

    @eb801, just noticed that your kit is a bubble top while the profile I shared is a car door variant.

  • Profile Photo
    Eric Berg said 1 year, 4 months ago:

    @johnb - I didn't notice that either but it doesn't matter. There are lots of schemes out there and I can probably pull everything I need out of my decal dungeon once I settle on a scheme. If you come across anything else interesting out there, let me know,.

  • Profile Photo
    Pedro L. Rocha said 1 year, 4 months ago:

    @eb801
    Well, there’s not much else when it comes to Tiffies camo, though I remember reading something about a couple of them used in trials in N.Africa, likely in the MTO scheme. Just don’t ask me what version, car door or bubble top, were they

  • Profile Photo
    Erik Gjørup said 1 year, 4 months ago:

    @eb801, if your Eduard Tempest Mk II in Pakistani markings is not started elsewhere on iModeler it will be very welcome here, as I have not set any demand for entries being fresh builds - any hawker-related item is most welcome, no matter if it is a new build being started or something already finished and anything inbetween.

    Anyway, I shall be strapped in on this one too when it commences - sounds interesting with all the AM parts you have stocked for it!

  • Profile Photo
    Spiros Pendedekas said 1 year, 4 months ago:

    Amazing entry, my friend @eb801! Looking forward to it!

  • Profile Photo
    Eric Berg said 1 year, 4 months ago:

    @airbum - I'm so far along on the Tempest II to write up a WIP, that I think I will just post it after I finish. I appreciate your suggestion.

  • Profile Photo
    Eric Berg said 1 year, 4 months ago:

    @airbum, @fiveten, @johnb,@holzhamer:

    Let the Build Begin
    I forgot that Hasegawa likes to get the most out of their kits by producing irritating fuselage inserts that raises the difficulty of constructing this Typhoon. If you are building the early Typhoon 1B you get the car door inserts and the late model gets the bubble top pieces. Hasegawa could have made life a whole lot easier if they had just gone the extra step and produced separate early and late fuselage halves with everything molded in place instead of this impending headache.
    But no...

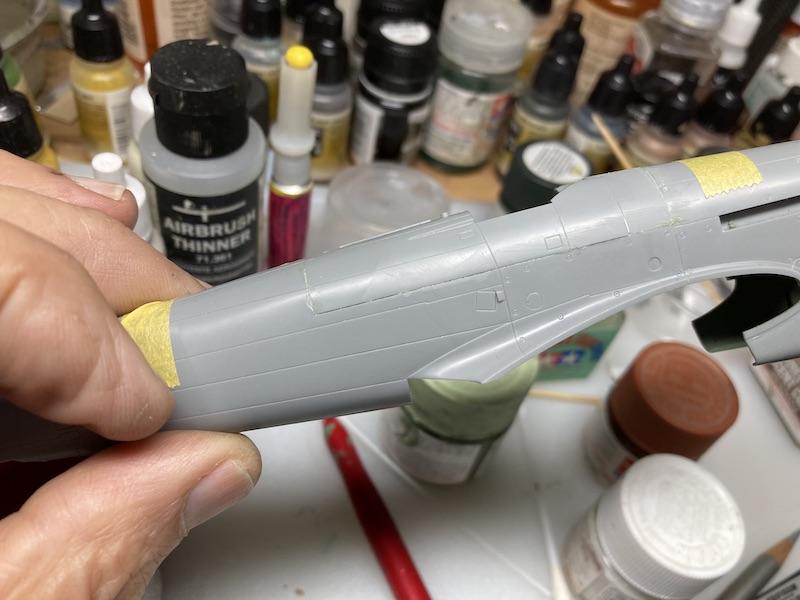
    Here's the fuselage halves taped together with the starboard bubble top insert already glued in place. One has to take their time here lining everything up while the glue sets or you will be sorry later.


    Now here's the port insert taped into place for testing:

    Now it's time to get out the Mr. Surfacer 500 and a scribing tool. Here's what I'm in for. This is the starboard fuselage with insert glued in place:

    Here's what it looks like filled with Mr. Surfacer prior to masking off the area to prevent damage prior to very careful sanding.
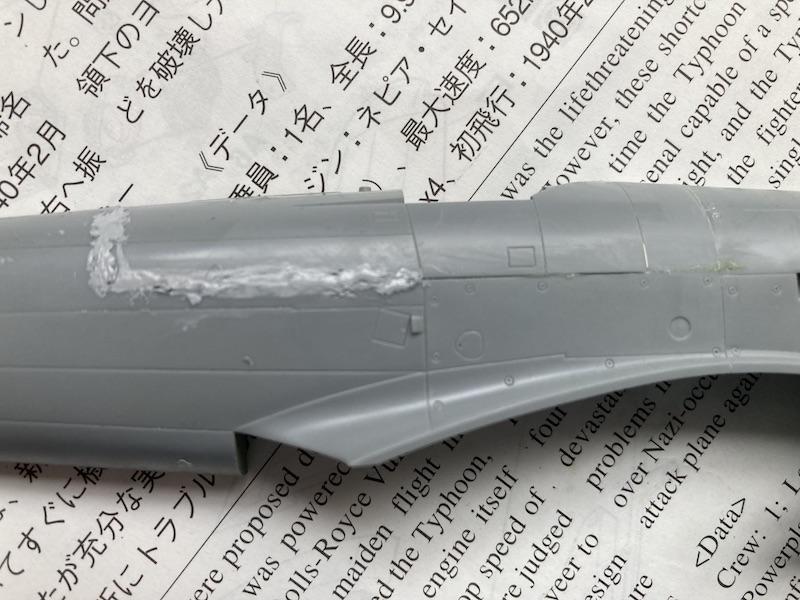
    Cockpit
    Meanwhile - I did manage to knock out the cockpit which is really awful and all wrong for the most part. BarracudaCast's resin replacement is magnificent but that's another $30 out the door counting shipping and sales tax, so the kit one will have to do.

    I used Airscale instrument dial decals right over the raised kit dials. I will set all this assembly aside until the fuselage sanding is done.
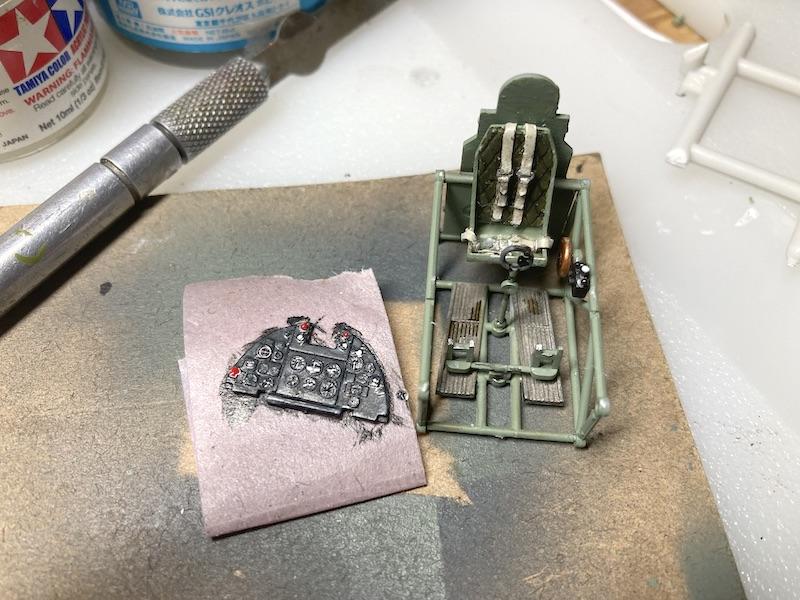
  • Profile Photo
    Spiros Pendedekas said 1 year, 4 months ago:

    Great progress, my friend @eb801! Indeed, these Hasegawa inserts can be notorious.
    Cockpit looks superb!

  • Profile Photo
    Erik Gjørup said 1 year, 4 months ago:

    Strangely the only Hasegawa kit I recall having built was a 109 that was to be used as a paintmule, as some of the parts were to be used for another build. It does indeed seem like a strange way to make these - but I'm certain that you will get it done in the usual fashion, making it look great.

  • Profile Photo
    John vd Biggelaar said 1 year, 4 months ago:

    Very good progress, Eric @eb801
    The cockpit does look great. The way Hasegawa has chosen to build the CD or BT is definitely not the easiest one.