During the hurricane I was able to almost complete this model. Here are some pictures, and description of the work that was done.
The propeller was assembled and glued in place, trying to mimic the position found in the photos.
-
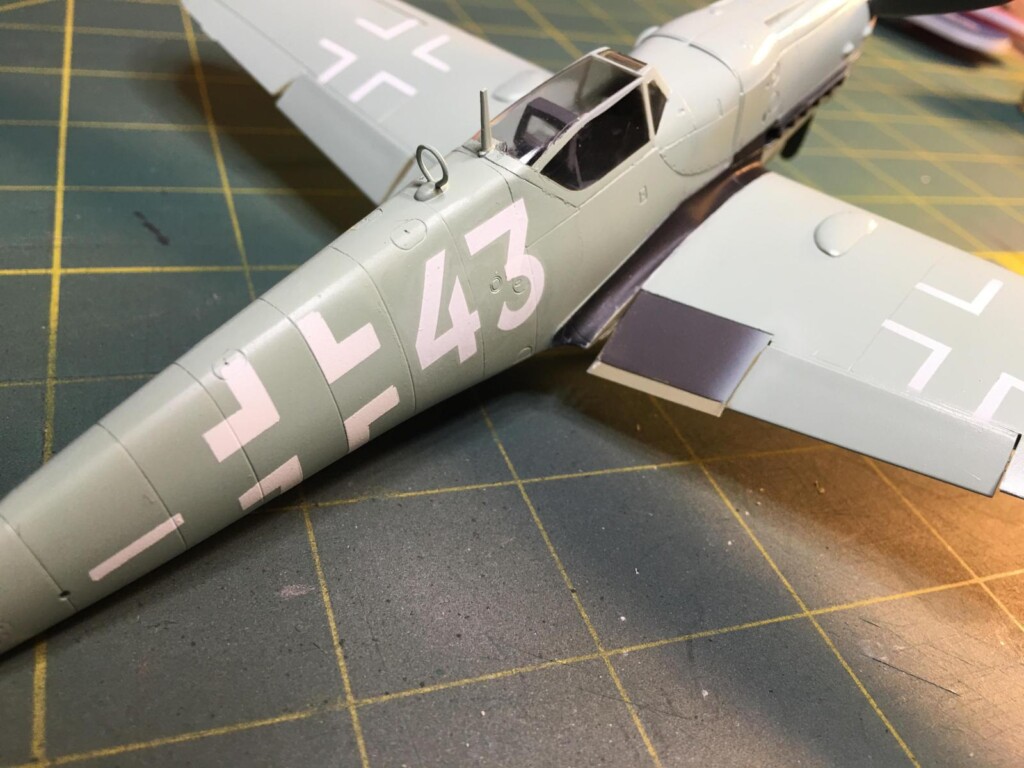
1. Flap is painted RLM 75
-
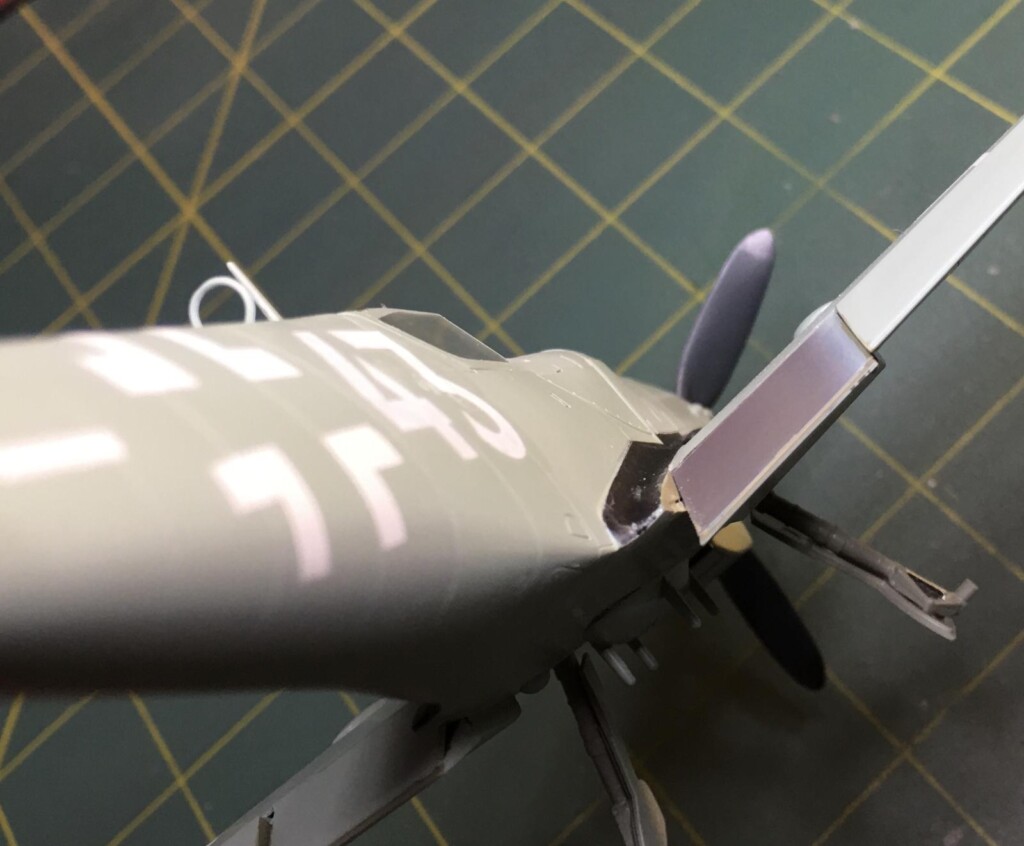
1. Paint eroded on prop tips
I used a #2 pencil lead, and colored in the outer tips of the propeller blades. This makes it look as if the paint was worn off the tips of the propeller blades, being eroded by operational use in a dusty / dirty airfield condition.
The upper half of the radiator flap was painted using RLM 75. Then I carefully airbrushed the edges using RLM 76, being careful to conserve what air I had stored in the compressor tank, since we were without regular electrical services during the hurricane. Thank God we had a generator, or none of this work could have happened.
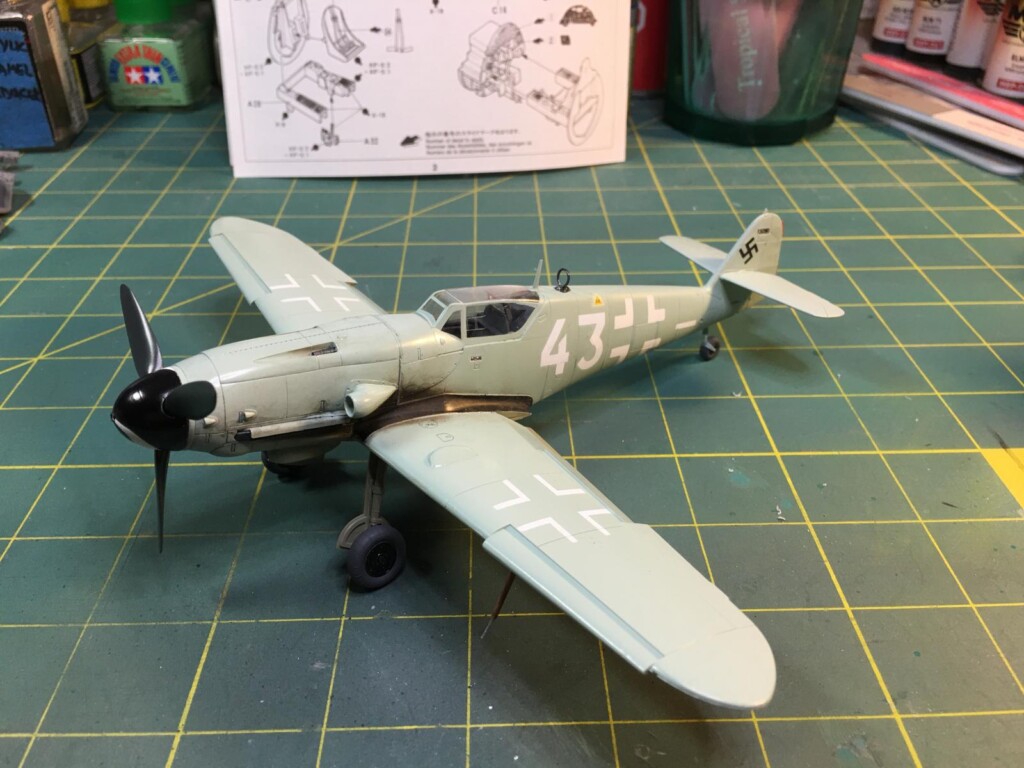
This is what the Gustav looked like at this point.
Next I painted the wheel hubs by hand, using a Semi Gloss Black color for the wheels. The tail wheel / strut assembly was painted too. I also applied Ultra Bright Chrome color Bare Metal Foil on the oleo portion of the tail wheel strut.
The wheels were glued into position, and allowed to dry overnight.
The following day I used a Tamiya weathering deck and a cotton bud / Q-tip swab to apply the black / dark brown exhaust stains on the sides of the fuselage and upper wing portions at the wing root.
Taking a clue from our very own Martin / administrator here on Imodeler, I brush painted wood grain colors to the Morane Mast that is located under the Port side wing. According to what Martin has posted, these masts were supposed to be left in a bare wood finish, using only a clear protective varnish on them. I tried to duplicate the wood grain look here, using various shades of brown and white paints.
Next I mixed up some Windsor and Newton oils, using turpentine as the base. I mixed some Lamp Black along with some Burnt Umber colors to replicate the look of used leaking oil. This mixture was carefully brushed on under the oil cooler radiator, and "blown" back under the fuselage.
-
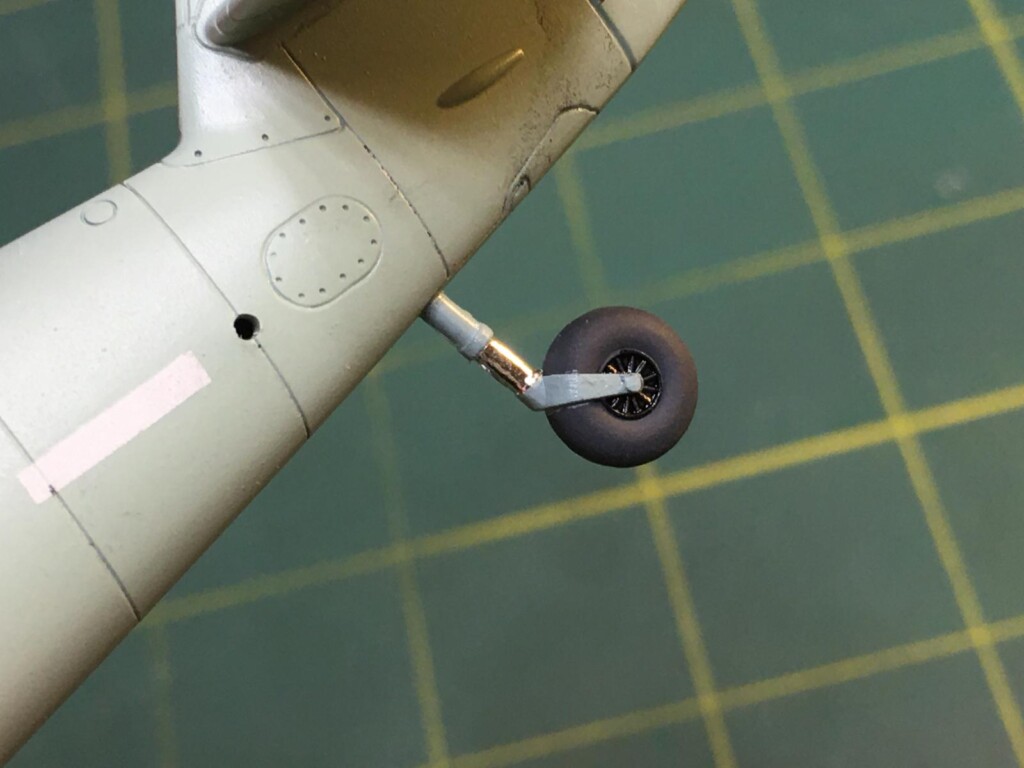
1. dirt added to fuselage
Here's a close up showing the tail wheel strut and tire. The Bare Metal Foil looks pretty good I must admit. If you look even closer, you can see how I added a little dirt and grime on the fuselage, as if it was splattered up there by the tail wheel.
Here you can see how the Tamiya weathering deck and a cotton bud Q-tip was used to create the look I was after for the exhaust stains.
-
1. RLM 66 used
2. Note the RLM 76 overspray
The radio loop mast and base was painted using RLM 66. After this picture was taken, I carefully touched up the base using RLM 76 since the edges looked way too sloppy for me.
However, I am not sure if this RLM 66 is indeed the correct color. It looks much darker in the original photos here. I have seen some model Bf-109's that were finished here using a reddish brown color for the loop's base, as if it might have been made from a Bakelite material.
It's also entirely possible this loop antennae unit was simply removed from another regularly camouflaged 109, thus making it look much darker on this particular aircraft since it was painted in overall RLM 76.
If any of our 109 Experten know the correct answer about this, I would like to hear from you please.
Erik, @airbum
Pedro @holzhamer
The ground adjustable trim tabs on the rudder were painted Red.
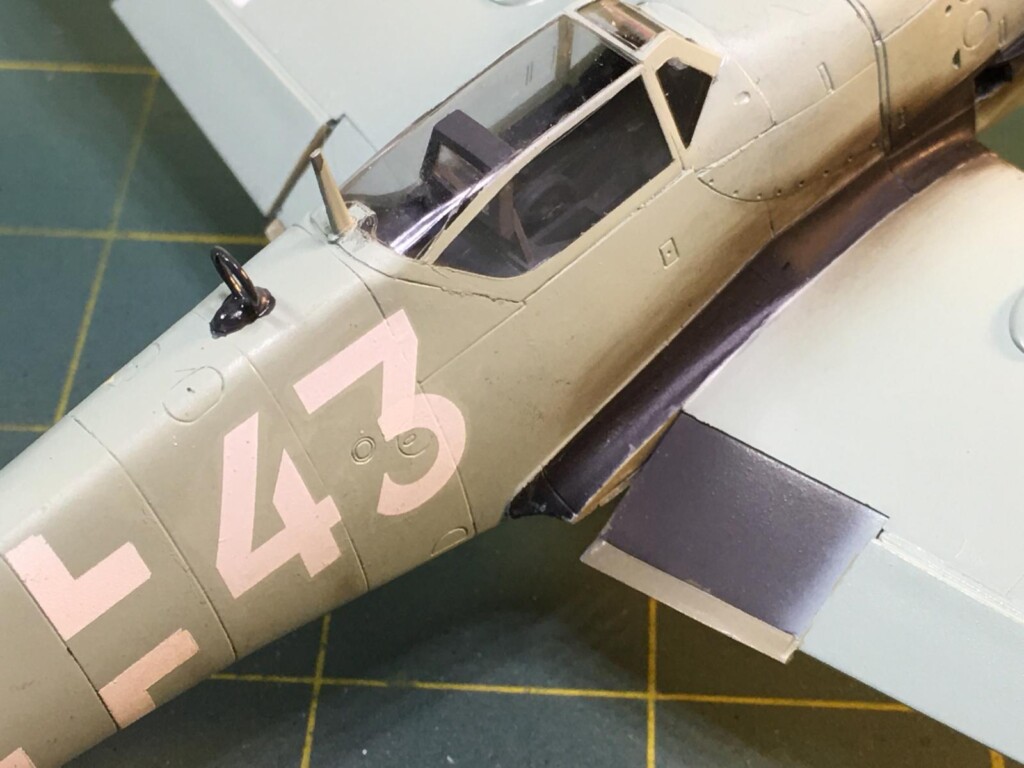
The 109 is standing on her own feet now, shoes and all !
I carefully drilled out the cowling barrels, using a #76 drill bit. Once drilled out and painted, I carefully glued them in position.
-
1. Sliding window scribed on here.
Here is how the Gustav looks now. If you look very close, you can see how I carefully scribed in the sliding side window on the canopy. I made it look as if the window was closed. I was too afraid of shattering the canopy if I attempted to cut this portion open as it is seen in one of the original pictures.
All I need to do now is add the antennae lead cable, dirty up the tires some and this one will be done.
-
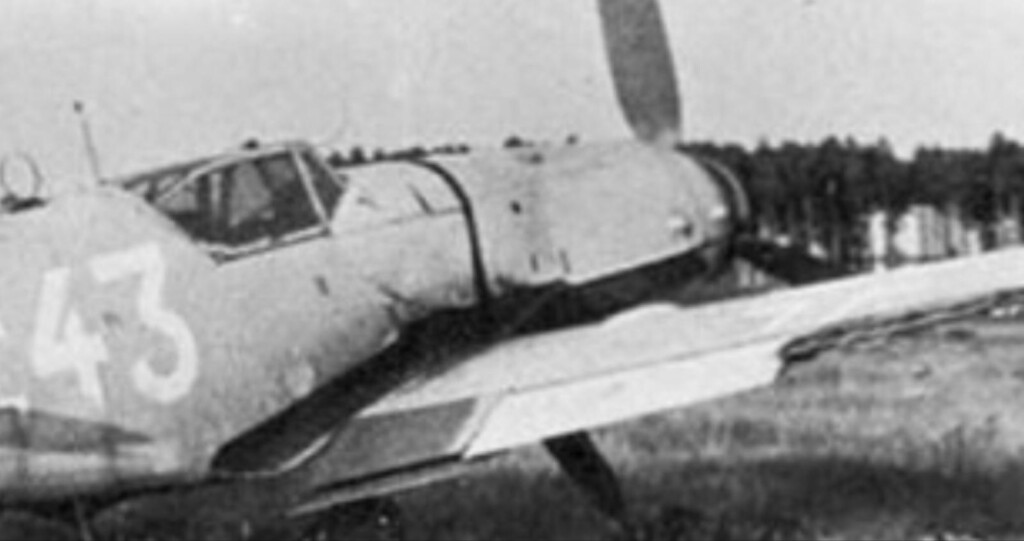
1. Possible RLM 76 overspray at the propeller base ?
I'm thinking the base of the propellers on the back side were likely covered a little with some RLM 76 overspray paint.
I don't know if I will attempt this feature or not, especially now that I have the spinner glued on. Had I thought of this earlier, it would have been much easier to do.
So please watch out for this one to show up in the headlines section soon.
As always, comments are encouraged. Thanks for stopping by.