ICM B-26C Invader, 1/48th scale USAF

Started by Chuck A. Villanueva · 102 · 1 year ago
  • Profile Photo
    Chuck A. Villanueva said 3 years, 7 months ago:

    I did my typical prepainting of the interior green components with in the air frame of the Invader as I will forego showing for now. Also with some flat black in the airbrush while working on another project went ahead and went over the engines and props.

    .
    Next to start working on the kit, starting with the pilot seat.

    The instruction sequence used by ICM is similar to an Airfix build in style. This is my first ICM kit ever to build so I am going in with both feet and looking forward to any challenges along the way. Using Tolga's recent build of the "B" as a guide. The grey plastic is soft and so far reacts well with the Tamiya and Squadron adhesives that I will use to build her. The seat is of 3 pieces, pedestal, seat bottom and back.
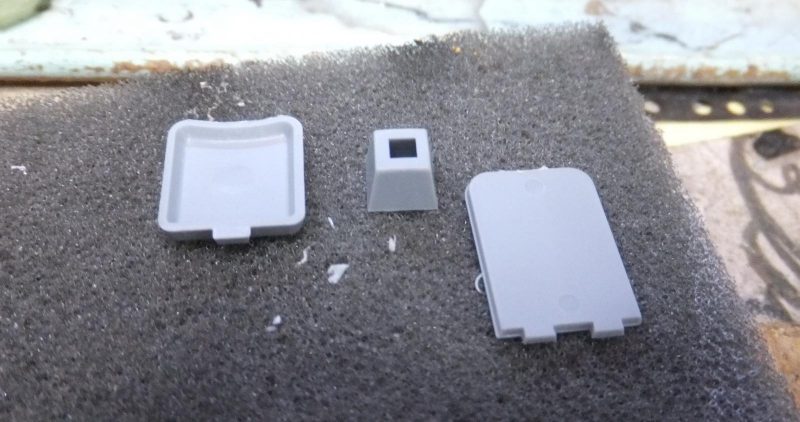
    Start with attaching the seat pan to the pedestal. Then the seat back to the seat assy. Off to a good start. Will add the seatbelts later.

    Step 2 is to build the nicely detailed center console. Made up of 3 parts. The Monogram console is molded as one piece on the flight deck. ICM has it as a separate part.
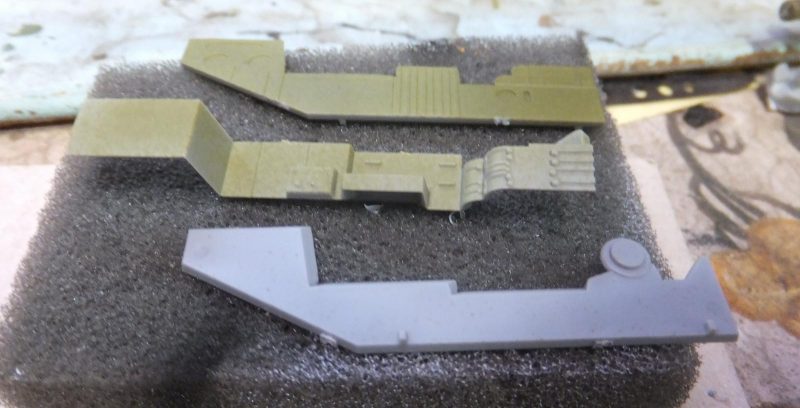
    Before assembly, a portion is removed on the RH outer edge for a PE replacement part.
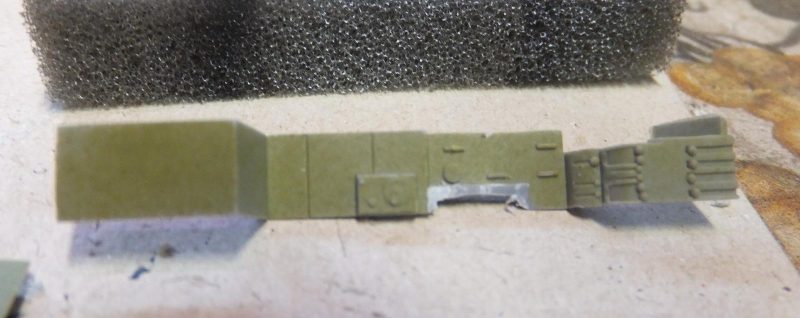
    Then the 3 parts are assembled to build the center console.

    Step 3 is to attach the console and seat to the flight deck floor.

    Both completed sub assemblies are cemented to the floor. And then once set airbrushed Mission Models Interior Green.
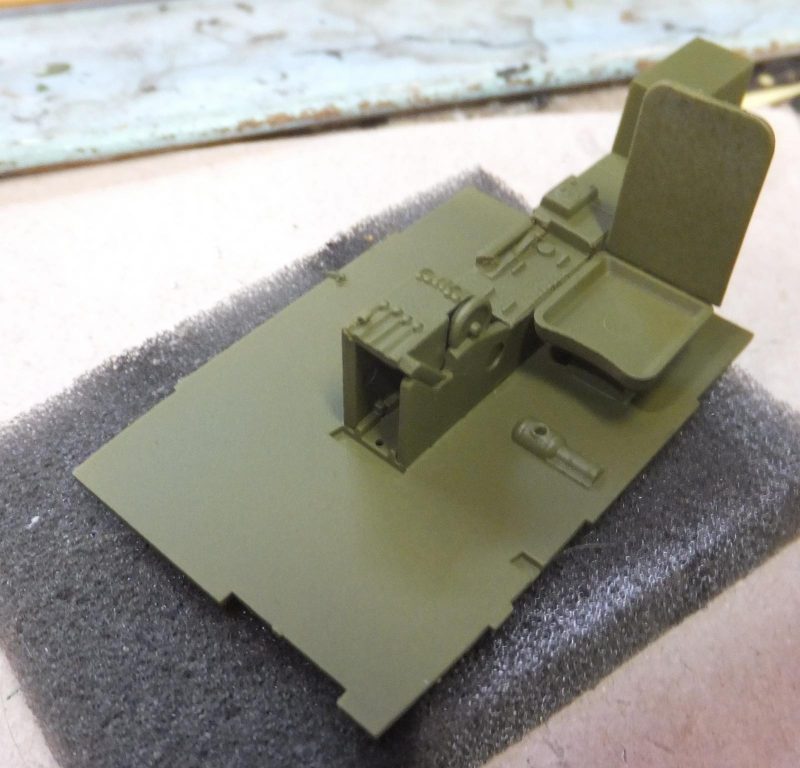
    Next to prepare the center console for the PE enhancements, by removing the details on the top panel.

    This will really enhance the console. The main panel is placed in the center.

    The rear part of the console has some more details added.

    I know not everyone is a fan of PE. There are resin replacements as well. Which are great to use on some instances. My dilemma is I do not have the steady hand as I once had. Eyesight is still 20/20 not an issue as I can still work with 1/72nd scale. So using PE is my way to really get the most out of the cockpit these days. The PE for this kit is just right for me. And it fits so far. The console looks pretty good now with what I have attached so far.

    More to follow as I complete the console and add the seatbelts. Then start working on the other interior compartments. There is a bit more to do.

  • Profile Photo
    Spiros Pendedekas said 3 years, 7 months ago:

    That's fantastic progress, Chuck @uscusn!
    I love the cockpit, PEs make it really standing out. I love PE! Hated them in the past but, the more I worked with them and acquired a deeper understanding, the more I loved them.
    As usual, EXCELLENT pics-tutorial, Sir.

  • Profile Photo
    Chuck A. Villanueva said 3 years, 7 months ago:

    Spiros, PE can be a love hate relationship at times. That is why I do it in sections as it is tedious. But worth while in the end. The zoom set for the ICM kit has quite a few parts involved. So much that the seatbelts are not included and need to get those separate. Will be getting a set for the Monogram kit which I will start on soon.

  • Profile Photo
    Erik Gjørup said 3 years, 7 months ago:

    The office is coming along nicely. And with more to come. . .

  • Profile Photo
    Chuck A. Villanueva said 3 years, 6 months ago:

    Thanks Erick, yes there is a lot going on and much more to go. So keep those belts tight and please keep your hands on the bar in front of you!

  • Profile Photo
    Chuck A. Villanueva said 3 years, 6 months ago:

    Next up is to modify the IP with the PE bits from Eduards. The details from the kit are nicely represented and a steady hand could do their magic on this IP. Mine aren't so steady so hence the PE.

    The details are sanded off and ready for the gauge/dials PE panel.

    The gauge/PE panel is placed over the IP with Testor's clear cement.

    After the cover panel is placed over the gauges, ICM will have me attach a side panel to the IP.

    Next a 3 gauge panel is added to the RH outer part of the main instrument panel.

    Next the PE center console panel is attached and the steering column and wheel is also attached to the flight deck.

    Now that the PE is set on the IP, the panel assembly is placed on the floor of the flight deck.

    Starting some work on the Monogram kit, there are clear differences. The ICM kit is devoid of any details, rivets and conduit piping on the flight deck floor. Whereas the Monogram kit is well detailed on the cockpit floor.

    Not a nit pick just making an observation, the ICM is coming along very well and so far enjoying the build despite some lack of minor details.

    More to follow...

  • Profile Photo
    Erik Gjørup said 3 years, 6 months ago:

    The PE IP looks very busy!

  • Profile Photo
    George R Blair Jr said 3 years, 6 months ago:

    It was painful, Chuck (@uscusn), to see all of that detail removed. The photoetch certainly looks great and is easier than hand-painting all of those details. I have reached an age where detail-painting has become a challenge.

  • Profile Photo
    Spiros Pendedekas said 3 years, 6 months ago:

    Very nice cockpit, Chuck @uscusn!
    The ICM kit looks great indeed (though I have a soft spot for the Monogram one...)

  • Profile Photo
    Chuck A. Villanueva said 3 years, 6 months ago:

    Spiros, thanks I have a soft spot for all the Monogram kits

  • Profile Photo
    Chuck A. Villanueva said 3 years, 6 months ago:

    With the basic cockpit completed, now to work back to the forward bulkhead.


    The backside of this bulkhead is also the forward wall of the weapons bay.

    Some PE details will be attached to the wall as well.

    A meter and a extra control box is added to the bulkhead.

    Next to assemble the radio rack/stack.

    The radio sets and shelving.

    Attaching the radio set stack, the angle seems wrong, and this where the instructions are a bit vague. Referred to others who built this kit for the correct fit for the assembly.

    With the Pe bits in place, I attach the radio set on the bulkhead. It should be straight up and down not at any angle. Will work on that when I get installed into the LH fuselage half.

    Next is to work on the fuselage halves and bomb bay.

    More to follow.

  • Profile Photo
    Erik Gjørup said 3 years, 6 months ago:

    very nice PE details, giving that "instant busy" look to a compartment.

  • Profile Photo
    Eric Berg said 3 years, 6 months ago:

    Looking really good Chuck. Based on Tolga’s suggestion and your comments, I plan on purchasing a metal landing gear set from Scale Aircraft Conversions. I used the set they make for the Revell Invader and all worked perfectly - absolutely no sag.

    Do you know why ICM blocked out the grim reaper skeleton nose art on the box art or is that the way this plane really looked?

  • Profile Photo
    George Henderson said 3 years, 6 months ago:

    Very nice looking innards Chuck

  • Profile Photo
    Rick Wilkes said 3 years, 6 months ago:

    Looking great Chuck!