Excelsior-Henderson Super X 1:8 Scratch Build

Started by Matt Minnichsoffer · 102 · 2 months ago · 1/8, Excelsior-Henderson, motorcycle, Scratch Build, Super X
  • Profile Photo
    Matt Minnichsoffer said 2 months, 3 weeks ago:

    The biggest issue with my own printer is waiting 3-4 hrs and then witnessing a failed print. So, I have to reset the parts and try again. It really makes one appreciate the model companies and how much work it takes to put something in mass production.

  • Profile Photo
    Matt Minnichsoffer said 2 months, 2 weeks ago:

    Greetings fellow modelers. I made some great progress over the weekend. The rear fender and tire/swing cage assembly and the front end are installed.

    For the rear fender I was able to press fit the fender in place with the struts, so I didn't have to try and get CA glue in the attachment points. The swing gage fit rather well, but I did need to add some spacers to set the tire in the middle of the fender.

    I knew the front fork assembly would be a challenge. Since the Super X front forks go through the fender and the forks are a two part assembly. I began by gluing the to spring forks to the rigid fork. Once that was set up, I had to thread the forks through the fender, press the fragile fender UP on the forks until it hit the correct position. At this point was able to attached the front wheel assembly and glue the rocker arms in place. This also needed spacers to center the wheel. I knew this going into it, but now that I know the correct dimensions of the spacers, I can build those into the print model for the next one.

    I also set the exhaust and mufflers in place. At this point tragedy hit! While trying to align the rear muffler to the bracket it snapped off! Problem for another day.

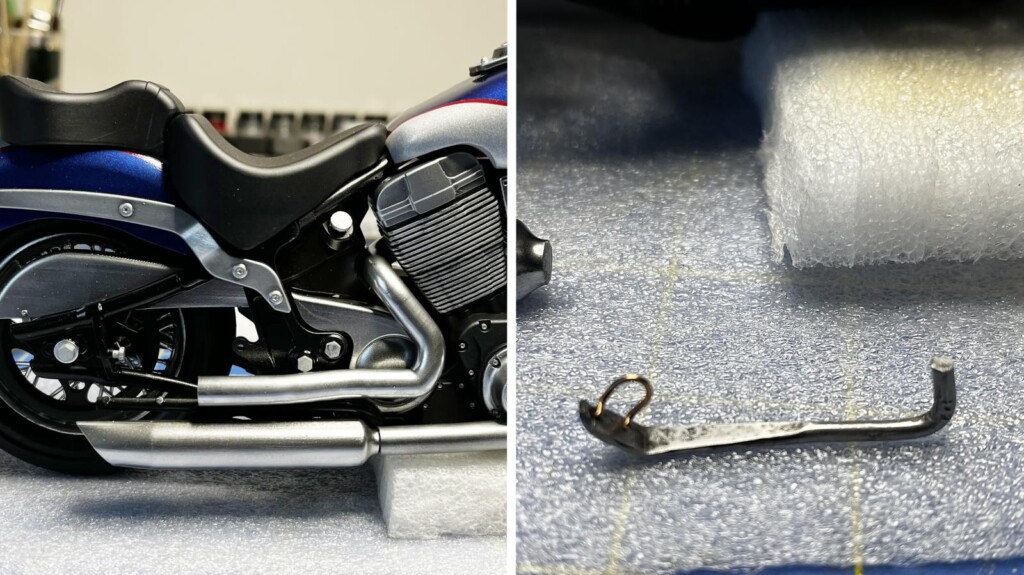
    Lastly, I really want the bike to sit on its kickstand. I've built a stand that will hold the bikes frame so it sits upright, but there's just something so cool about it leaning on it's kickstand at a real angle. However, the bike is so heavy that it will break the resin kickstand, so I fabricated a metal kickstand out of a 8 penny finishing nail. A little blacksmithing and file work and it's pretty close. Just need chrome it.

    Next up, I need to print some clear pieces for the light lens…printing clear…a whole new set of challenges awaits. So close…

  • Profile Photo
    John vd Biggelaar said 2 months, 2 weeks ago:

    Wow, this is impressive work, Matt @coondog
    This is indeed great progress.

  • Profile Photo
    George R Blair Jr said 2 months, 2 weeks ago:

    This continues to amaze, Matt (@coondog). Your 3D printing is rising to a very high level.

  • Profile Photo
    Spiros Pendedekas said 2 months, 2 weeks ago:

    Really, really, really awesome work, my friend @coondog!
    I am sure you will solve beautifully "The muffler situation".

  • Profile Photo
    Cricket said 2 months, 2 weeks ago:

    @coondog those are GREAT updates, love the finishing nail kickstand I need to make one of those for my Ninja H2R as mine keeps breaking off. Are those tires 3D cast as well or rubber?

  • Profile Photo
    Matt Minnichsoffer said 2 months, 2 weeks ago:

    @bikequeen the tires are 3D printed as well. It took a few tries to get them right. We probably printed 4-5 sets of rims before I got those to come out correctly.

  • Profile Photo
    Cricket said 2 months, 2 weeks ago:

    @coondog I would have never guessed they look great!

  • Profile Photo
    Matt Minnichsoffer said 2 months, 1 week ago:

    Well Gang, here we are at the final post of this WIP. Honestly, back in April of 2023 I didn't think I'd be able to pull this off. The journey has been so fulfilling. I don't want to think about the money invested in this build, but It was worth it in the end as I'm currently printing parts for the second Super X.

    Anyway, what you see today are the finishing touches. Lights and controls—all the little parts that break off easy. The lights were a challenge. I printed them with clear resin which comes out crystal clear and then dulls as so as it's dry. And since it's clear it also yellows if you cure it too long under the UV lights. Both of which I learned. So, what do we do? Read on the internet. I shortened the cure time to a mere 30 sec and also placed the parts in a cup of water during the curing process. Once dry, I polished them as smooth as possible and them hit them with a few layers of gloss clear. That got them good enough for me.

    Thanks so much for following along. Look for the official build post on the home page soon. Best to all and—keep building.


  • Profile Photo
    Cricket said 2 months, 1 week ago:

    @coondog Absolutely amazing Matt! Are you going to do some full shots of the whole bike? Hope so! And the Tamiya clear red, blue, yellow and orange paints are great for lenses, I paint the inside of the lens with silver then the outside with red or orange, but your method is much quicker 🙂

  • Profile Photo
    Spiros Pendedekas said 2 months, 1 week ago:

    Fantastic result, my friend @coondog! Really impressive! Looking forward to see her at the headlines!

  • Profile Photo
    John vd Biggelaar said 2 months, 1 week ago:

    A perfect finish and well deserved headline article, Matt @coondog