Avro Vulcan – ”Operation Black Buck” – 1/72 Airfix

Started by Colin Gomez · 21 · 3 years ago
  • Profile Photo
    Colin Gomez said 3 years, 1 month ago:

    I was chatting with Spiros about maybe pulling this abandoned build out of storage and finally finishing it up. I did ALOT of work on it years ago, having completely re-scribed it on all upper surfaces, filling and sanding the intakes, etc.

    I also did a complete bomb bay from scratch, which I shared with Spiros on his Victor build thread. Here it is again.

    Anyway, I had another look at the model and figured the underside rescribing is doable. There are about 60 distinct lines for each wing but I feel I can do it after all the riveting on my Shiden Kai a short while back!

    I started to think that even if I were to get the new Airfix kit it would still be a bear to do the intakes. I am having this experience on my new tool Airfix Valiant now in the works. So, the plastic on this is actually yellowed (!) with age and there are some stress cracks but I will repair them and finish this in the course of this Group Build. I really love the lines of the Vulcan. I also remember so clearly the beautiful howling sound they made in low level passes with the bomb bay open, way back when I attended the Abbotsford Airshow as a kid in British Columbia.

    The build will be to represent a Vulcan of the Operation Black Buck missions. These were the longest bombing flights ever undertaken (over 12,200 kilometers [6,600 miles]) in seven separate attacks to bomb Port Stanley Airport and prevent its use by the Argentinians - particularly for fast jets. Attacks 1,2,4,5,and 6 were completed and two others were cancelled.

    The model looks a little sad now but I should soon have it in shape. I have a back-up kit in the MPC boxing so I will have all the parts to get this done one way or another. I hope it will be worth the final push.

  • Profile Photo
    Spiros Pendedekas said 3 years, 1 month ago:

    Wow, what a great decision to drag your Vulcan at the production line again, my friend @coling!

    You've done a master class rescribing job there: kudos to you, Sir! I have built the Airfix Vulcan, no rescribing, and i can tell you rescribing makes all the difference in the world: my Vulcan's surface looks toy-ish, compared to yours.

    Your bomb bay, as I stated in my Victor thread, is a typical "Colin Gomez" work of art.

    Looking forward to this beauty to come along!

  • Profile Photo
    Erik Gjørup said 3 years, 1 month ago:

    Splendid! - I shall be strapped in here too.

  • Profile Photo
    Eric Berg said 3 years, 1 month ago:

    Me too.

  • Profile Photo
    Colin Gomez said 3 years, 1 month ago:

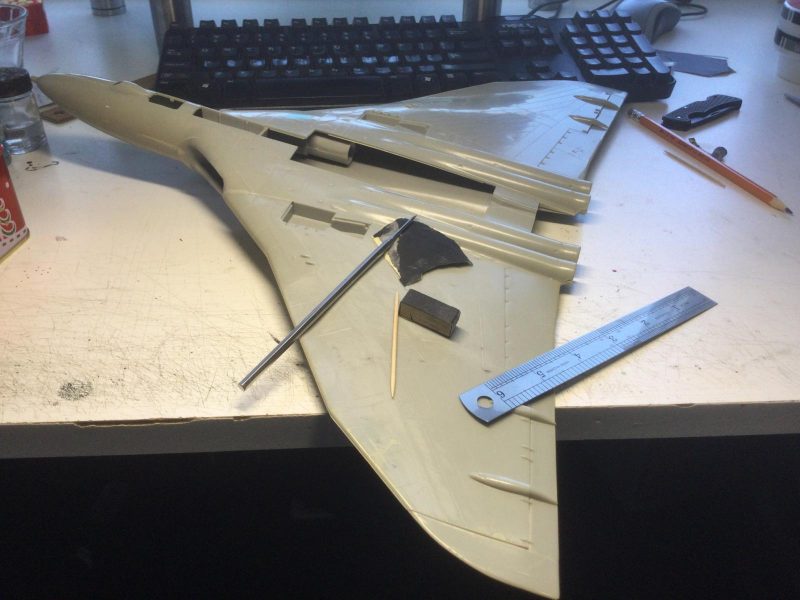
    Thank you, Spiros, Erik and Eric. Great to have you participating in this GB. I am in a bit of a state of shock. I had this model almost literally kicking around for at least 15 years with major work done (as I already shared with you). Now I am finally getting it completed and moving along surprisingly quickly . Over the years, I actually deliberately had it out of the box for awhile, trying to get up the gumption to finish it. That's how it got yellowed in the sun sitting on top of a display cabinet! All that time, I got hung up feeling reluctant to do the underside re-scribing. By the dymotape method, I thought it would take me a ridiculous amount of time and effort to do. Now that I have a better skill set and more patience I have done more than half the work in a single afternoon! The key was to trust a simple flexible steel rule for almost all of the work with the scriber rather than fussing with dymotape.

    By pressing really hard with the ruler and watching my work very closely and carefully with my visor I sped through the 60 + lines on one side. I also worked out how to do the complex shapes between lines by leaving them to last and then using a needle in a pin vise and my photo-etch scribing template to carefully craft each shape.
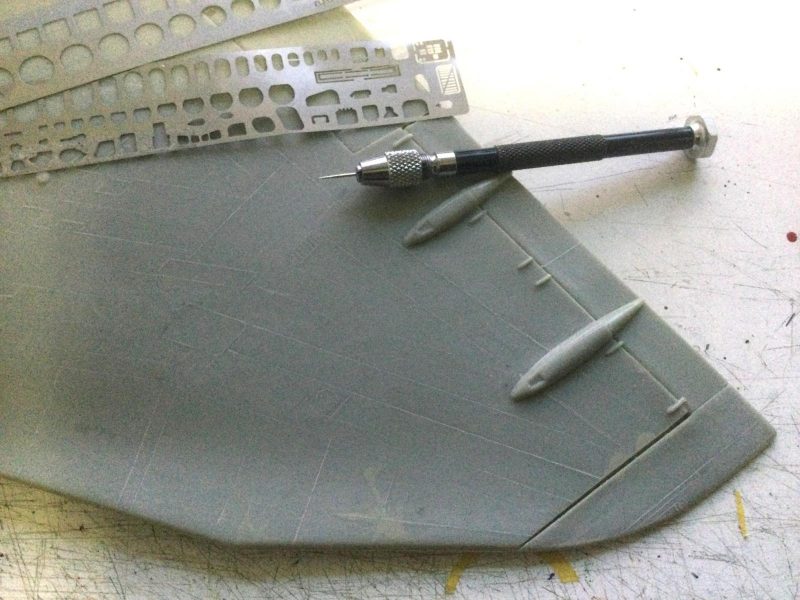
 I did use some dymotape but only at the end for very curved parts of the engine fairings.
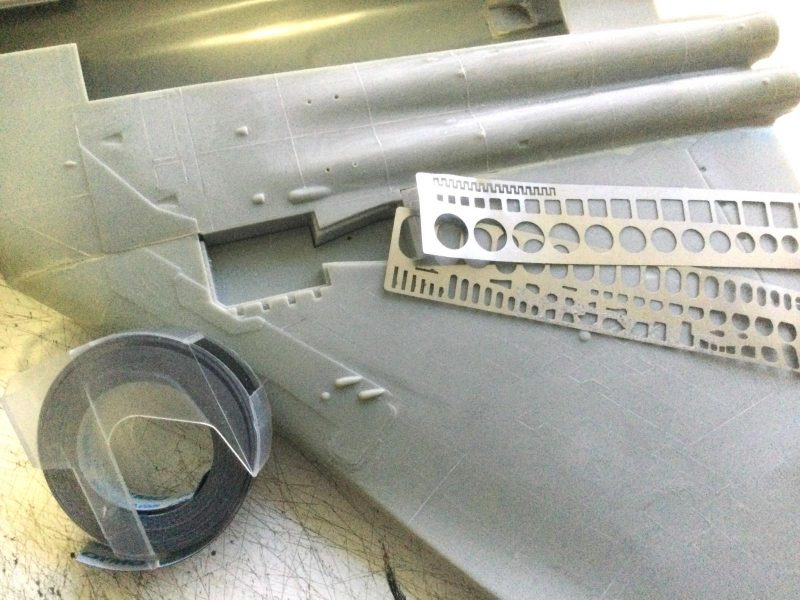
 In general, my method is I think the standard one. I simply lightly sanded down the raised lines until just a ghost of them was left, then used those impressions as a guide to scribing new lines right through the old ones.
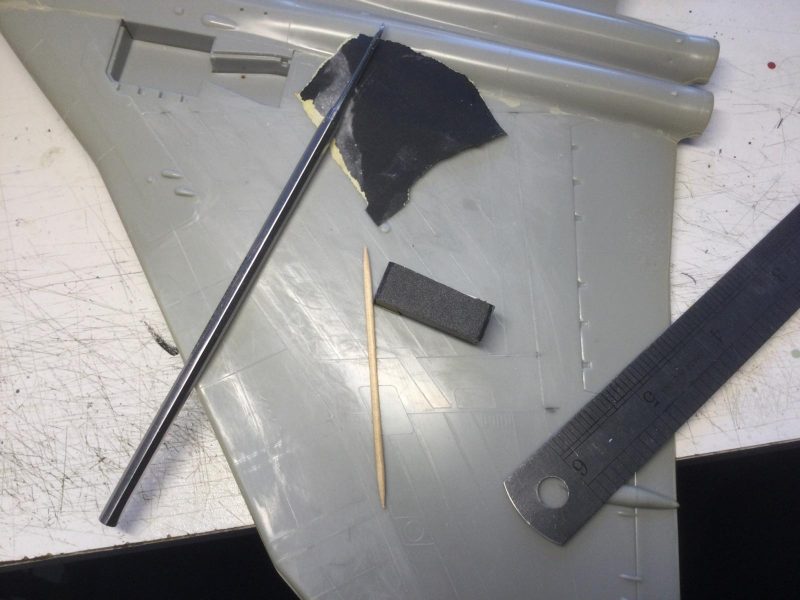
 Here are the results for one whole side. I had to use low light to catch the scribed lines as they are so subtle in 1/72 and disappear in bright light. So that's a huge amount done.
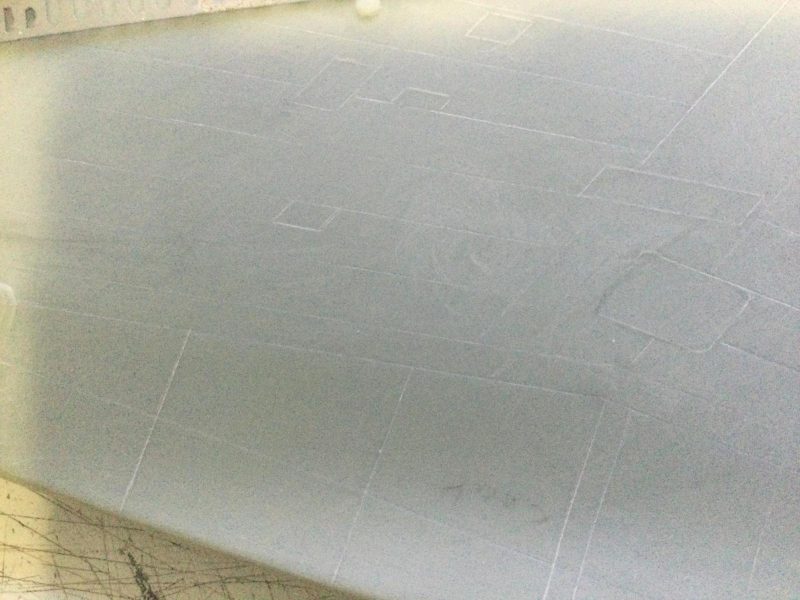
 I will certainly finish the scribing up completely tomorrow. Right now, I need to give my eyes a rest.

    Meanwhile, I have dug up my references for the Vulcan and will motor ahead with detailing the cockpit (ie. mainly the seats, since the instrument panel is already done and nothing much can be seen through the windows anyway) and prepping for painting.

    At this rate, I might even catch up to Spiros on the Black Buck Victor tanker!

  • Profile Photo
    Tom Cleaver said 3 years, 1 month ago:

    The Valiant ain't that "new," and definitely isn't a "new Airfix" production design effort. Let me assure you, the intakes on the actually-new Victor are EASY. Looking at the CAD illustrations of the new Vulcan in the Airfix newsletters, it's also going to be easy.

    But if you did that bomb bay then you must finish the model!

  • Profile Photo
    Colin Gomez said 3 years, 1 month ago:

    Hey Tom. Thanks for your insight. I guess you mean to look at the CAD drawings for the new Vulcan, rather than the "new Valiant" in the catalogue. Unless they are also making yet another Valiant (?). I have the Airfix Victor in my stash and it is indeed very impressive. The fact that the Valiant is already "old" makes me feel a bit old (sigh). Still, I guess that is the reason I couldn't get a replacement part from Airfix when i lost the whole top section of the port aileron! After much searching and cussing, I finally crafted a new one from sheet styrene. Anyway, I think the Valiant can look pretty good with TLC. Here are some WIP views, including my completed cockpit.

    One of the face curtain firing handles on the ejection seats (port) got detached but I just need to stick it on again before sealing up the pit. I did the seats from scratch but the instrumentation is Eduard. Here is the "salvaged" aileron. Yep, the intakes were a bear. But that is not just down to design. Painting (especially airbrushing) inside any of the intakes of the V-Bombers is tricky after assembly and next to impossible before assembly. Anyway, they are largely done on my ancient Vulcan and a WIP on the Valiant. Right now, I feel like my old Vulcan model matches the actual Black Buck airframes in being pretty rickety and low tech but impressive to see in the end. Or at least I hope so. Thanks again for your contribution.

  • Profile Photo
    John Healy said 3 years, 1 month ago:

    Great progress on that Vulcan, Colin. I built one when it was new in the mid-80s. The fit of everything was pretty dodgy and it seemed crude and rushed. They probably rushed it out after the Falklands. Also, thanks for sharing your Valiant. I need to get one of those.

  • Profile Photo
    Colin Gomez said 3 years, 1 month ago:

    Thanks for commenting, John. The one thing about the Vulcan is that Airfix really got the shape right. There is nothing quite so graceful and menacing as a Vulcan and all the proportions look dead on in the model. At this point I can do the work to get the details right. I am glad I am finally building the thing. it will also nudge along the Valiant build as well - much simpler to paint in solid anti-nuclear flash white. Do you have pics of your old Vulcan build?

  • Profile Photo
    Morne Meyer said 3 years, 1 month ago:

    Hi Colin. I am a BIG fan of the V-bombers and eagerly awaits the new Vulcan from Airfix. My 'old' Vulcan is also languishing in the stash and seeing your incredible work done on your Vulcan proves again that a new tune can be played on an old fiddle. I am definitely following your build.

  • Profile Photo
    Spiros Pendedekas said 3 years, 1 month ago:

    What a master's job on the scribing, Colin @coling! Nice and petite!
    The Valiant looks great, too.
    Of course (!), I have the Mach2 kit in my stash to build one day... 🙂

  • Profile Photo
    Erik Gjørup said 3 years, 1 month ago:

    I sense there is a V-force assembly line going on here 🙂
    Great stuff with all that scribing, well done!

  • Profile Photo
    Colin Gomez said 3 years, 1 month ago:

    Thanks, Morne, Spiros and Erik. The second wing is finished, as promised. This time I Ieft the sanding dust in the grooves so the lines would be more visible for photography.

    These will be cleaned with a toothpick later. Not too exiting to look at but at least I have kept up the momentum and have some proof of progress. 🙂 I did make one error in the position of a panel line but I fixed it by filling it with superglue and accelerator and sanding it. Then I re-scribed it correctly. As a tip, this works very well, but it is quite a bit of work getting the cyano to sand down smooth. The error is pretty much invisible in the photo and will be absolutely gone when paint goes on, being only a faint visual mark and not a tactile trace.

    I will deal with further minor fuselage sanding and repairs topside now and the last work on the intakes before painting. I also have more work to do on my Buffalo meanwhile plus an update on the Harrier. Happy modeling!

  • Profile Photo
    Spiros Pendedekas said 3 years, 1 month ago:

    Love your meticulous job on the Vulcan, my friend @coling!

  • Profile Photo
    Paul Barber said 3 years, 1 month ago:

    Agree about the shape Colin and love the detailed scribing.

    I remember these flying past my home in London the 70s and 80s - mostly on the Queen's Birthday (!). We lived in a high-rise block looking south-west towards that part of the city - the views of these were awesome!

    And of course XH558 was often aloft at the airshows my dad took me to, and that I later took my kids to! I think we will be queueing up for the new Airfix offering come the middle of the year! But boy are you making a great show of this kit!

    https://youtu.be/DvFvBbsQVI4