Hello again everyone. Welcome back to the party... Today I made some progress, but since it's getting late, this will be an abbreviated posting. I will respond to you all hopefully tomorrow.
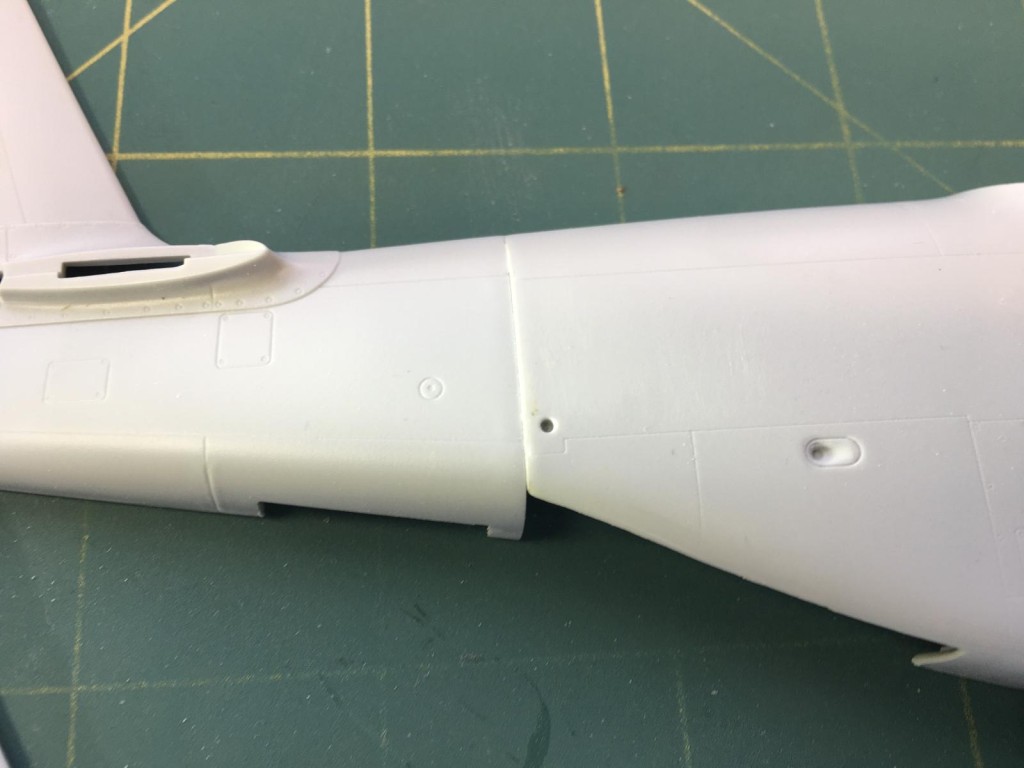
When I first started working on these two Revell Mustangs, I wanted to make sure the separate tail section fit well. So I glued it in place first. It has had well over a year to dry now, so it should be OK 🙂
There is a small "step" where the tail section joins the fuselage.
-

1. Highly visible step joint.
Here is what it looks like after a few minutes with some quality time and a sanding stick. The good fit is evident, and it looks very nice once the step is sanded down smooth. In this next picture you can see the upper fuselage half has not been sanded level, while the lower section has.
This is a good close up photo showing the joint. It is a very good fit other than having the step. I restored some of the panel lines afterwards, and now you can't tell this was two different parts.
On the real Mustang, there is a hole that passes through the fuselage. This is used for hoisting the airframe, or securing it down. So out came the pin vise, and a #62 drill bit... Voila ! we have a set of nicely drilled holes.
This is how the two right hand fuselage halves look like now the holes have been drilled. One of these still has to be sanded down smooth to eliminate the step.
In case you are wondering which version this is, here's the box art.
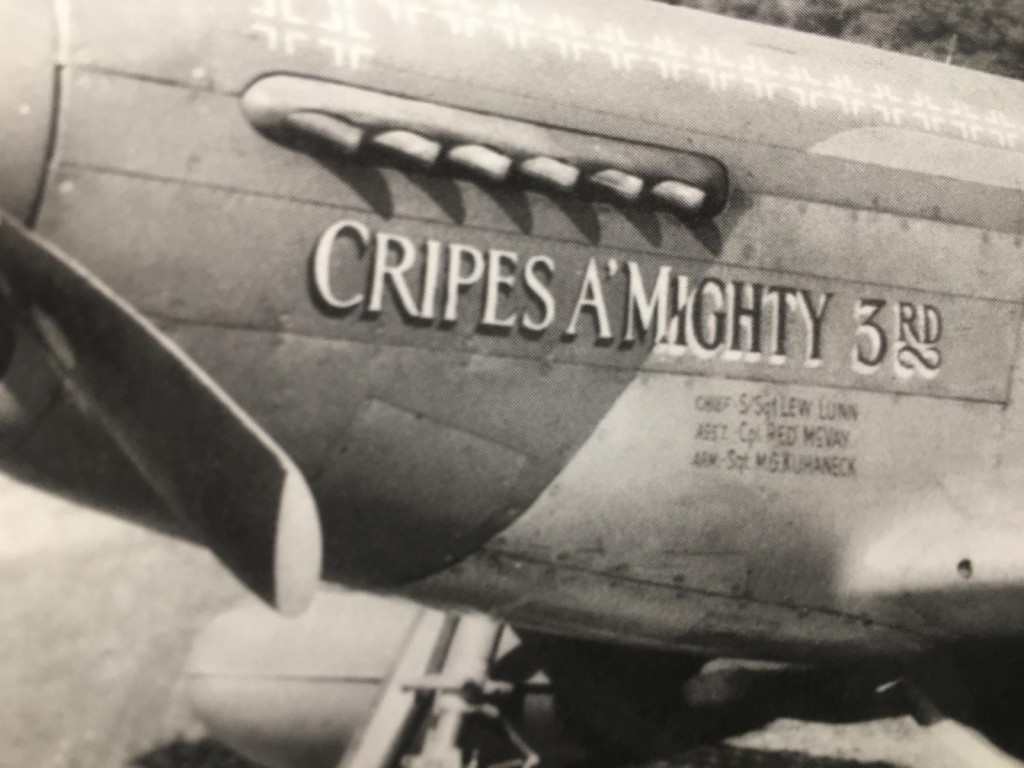
Now I have a question for you, and I hope that someone knows the answer. They used 3 different types of covers on the lower nose section of the Mustang. Here are the three examples. One style is a flat blank plate. Next is one with a series of small holes. The last type was a mixture of holes and ridges.
I know for certain the "Cripes A Mighty III" had the blank / smooth style. It can clearly be seen in the cover picture.
-

1.
2. Smooth access plate
I have glued the smooth style plate in place on the fuselage sections that are going to eventually be Cripes A Mighty.
This is the opening where the cover fits. I have been doing a bunch of scrounging around on the Internet, trying to determine exactly which style of cover was used on "LOU IV".
I am about 75 percent sure this aircraft could have had the style with the small holes in it. What makes it so hard to determine, is the lighting when these pictures were taken, as well as the cover appears to be dark possibly even a Black color.
-

1. Smooth or with holes ???
If anyone knows for sure, please don't hesitate to reply about it.
As always, comments are encouraged.