1/48 Revell F-86D Sabre in Hellenic Air Force Colors

Started by George R Blair Jr · 45 · 3 years ago · 1/48, F-86D, Hellenic Air Force, Revell
  • Profile Photo
    George R Blair Jr said 3 years, 10 months ago:


    I have wanted to build a model in Hellenic Air Force colors for a long time. They have a very interesting collection of aircraft types to choose from, and the Mediterranean sun gives some interesting weathering challenges to the modeler. I had an F-86D Sabre in my stash, which had some interesting paint schemes available. I like building Revell and Monogram models, but I was surprised to find that the molding in this kit is a cut above the usual that you might expect from the old Revell kits. The surface of the model featured finely cut panel lines and rivets, and was full of some finely detailed parts. It also included a really nice pilot figure, but I looks like his gear might be from the early Korean
    conflict ear and might be a little dated for the late model F-86D.
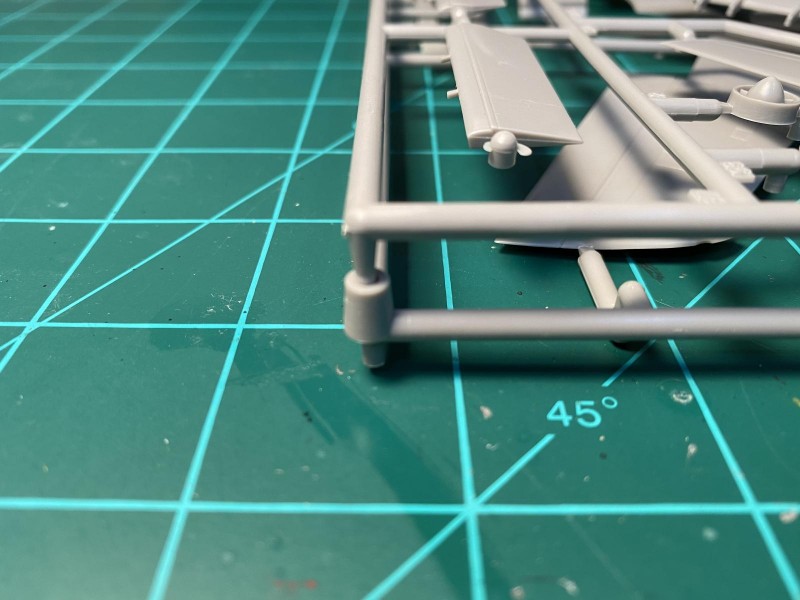


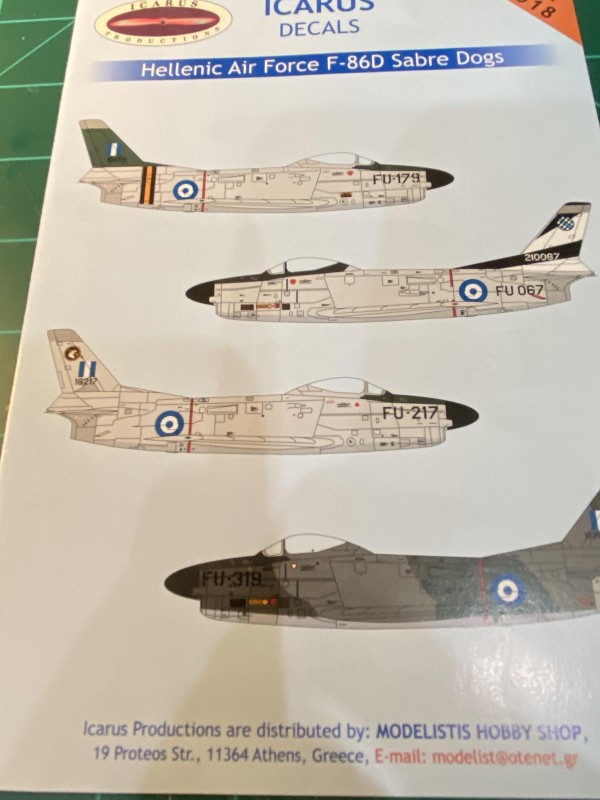
    The cockpit, in particular, looked like it would be a realistic representation of the real thing (if my skills could keep up with it). I was also pleasantly surprised to find that I had purchased the Eduard photoetch set and masking when I first bought this kit. It appears that this kit came out in 2000 or 2001, so the kit and Eduard goodies were only 20 years old. The kit decals looked like they are in pretty good shape and very complete, but I sourced some HAF decals from Hannants in England.


    I first had to do a little research on the plane's history and some paint schemes in the Hellenic Air Force. The F-86D is descended from the F-86 Sabre used so brilliantly in the Korean Conflict. The Sabre was a great dogfighter, but it was effective only in daytime and clear weather. The Air Force wanted an all-weather interceptor that was also effective at night, and settled on the F-89 Scorpion. When it became obvious that the F-89 was going to take a while to perfect, the Air Force approached North American aviation and asked them to build a an interim interceptor based on the F-86. By the time they were done, the F-86D was almost a completely new airplane. Not only was it an all-weather interceptor, but it was also the first American interceptor that carried only missiles as an armament. Although the F-86D had a fairly short service history with the regular Air Force, it lasted longer in the Air National Guard and in several foreign air forces.

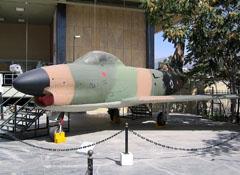
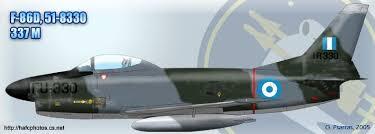
    From here I started searching the internet for some good photos of the F-86D in Greek Service. The decals I had were for either an all-natural metal paint scheme or a "NATO" camouflage that consisted of gray and green over light gray. The problem was that most of the photos I found featured a camouflage that consisted of tan and green over light gray. It looked a lot like the SEA scheme used in Vietnam. I decided to contact Spiros Pendedekas (@fiveten) to see if he had any insight into the problem. He told me that apparently the HAF would take obsolete F-86D's, repaint them in tan and green, and park them on their airfields. This was apparently done to convince potential adversaries that they had new and different aircraft in their inventory. The photos of tan and green aircraft are either these repainted obsolete aircraft or museum aircraft, which seem to be all painted in tan/green. Spiros found some references that said that active duty F-86d's were either natural metal or gray/green. OK, problem solved...I'm going with the NATO scheme.


    It was then that Spiros threw in the next problem when he asked if I knew that the Revell model was different than the one used by the HAF. He said that the F-86D's they used had a braking parachute that hung out in a housing in the tail. The Revell model doesn't have this parachute housing. Some more research and I discovered that all of the original F-86D's were built without the braking parachute. The long landing distance required by the jet necessitated a braking parachute, which was retrofitted to most of the F-86D fleet. The Revell model I had was an early version without the parachute housing. Once you have compared photos of early and late planes, it is very obvious that the housing is missing. I thought I might scratchbuild the housing, but the contours are complex and change the whole area under the rudder. While I was trying to figure out what to do, I decided to take a look at the Eduard photoetch. This set included a door for the parachute housing. I didn't think that Eduard would include a part for a feature that didn't exist on the kit, so I figured that Revell made a late model F-86D with the parachute housing.

    This is where a week-long search for a late model F-86D kit by Revell. I tried all my online sources, and found a couple of late model F-86D's by other manufacturers, but they didn't appear to be as detailed as the Revell kit. I found dozens of Revell F-86D kits available on Ebay. It turns out there are 5 or 6 different releases of this kit, all with different artwork. Since the box doesn't tell you if it it a late or early version, you have to look carefully at the artwork to determine if the model has a parachute housing or not. I was on the third page of F-86D's on Ebay, when I found one whose box art looked like a plane with a parachute housing. The model had a reasonable price, so I decided to take a chance. Well, to make a short story long, the model arrived and had a parachute housing. Aside from that, the model appears to be exactly the same as my original kit.


    As you might guess, work started with the cockpit, which was very detailed and complete. When I looked at the Eduard cockpit parts, I was disappointed to find that the cockpit instruments, which are normally printed on clear acetate or film, was printed on paper in this photoetch set. I couldn't conceive of using them and getting the sort of results that I wanted, so I decided to use the kit parts for the instrument panel.
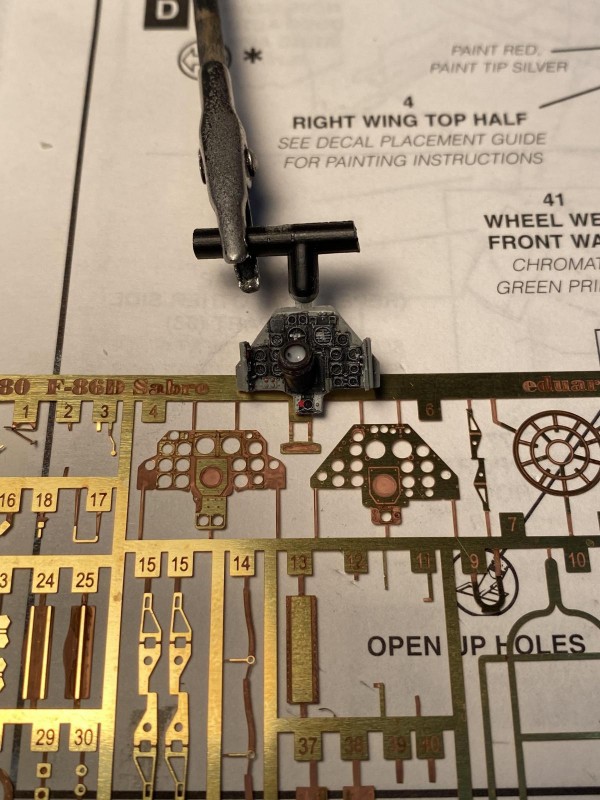


    This was going to be a big test for my sometimes shaky hands. So, I used a few of the smaller pieces of the photoetch set, including the seat belts, and built the cockpit. Using the photoetch seatbelts required me to remove the molded-on seatbelts from the kit seat, which left some hard-to-remove marks on the seat. I used some paper-thin plastic sheet to build a new back for the seat, and then used some putty to create a more textured seat bottom.
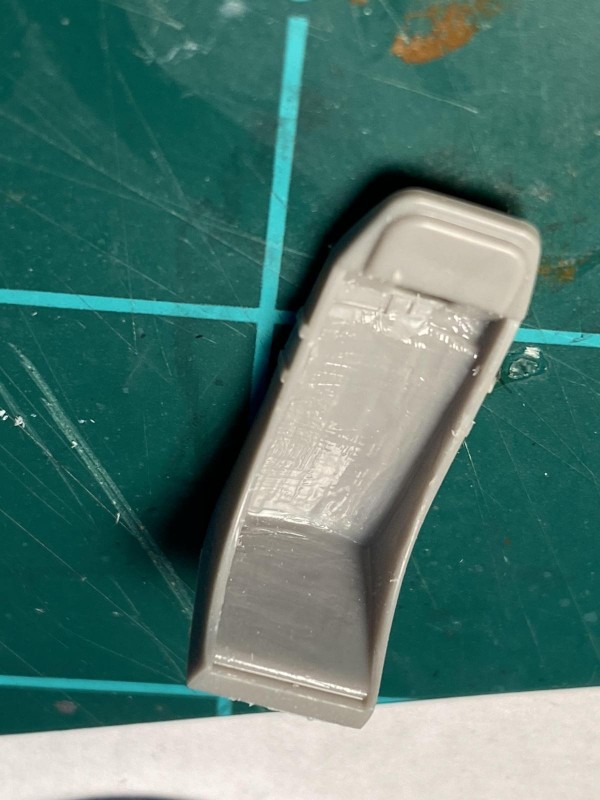
    Everything else was fairly straight-forward. I added some weathering with some oil colors and mineral spirits. Considering my basic skills, I am fairly satisfied with the way the flight deck came out. The rest of the innards are up next, and then the fuselage will be ready to close up.

    4 additional images. Click to enlarge.

  • Profile Photo
    Andrew H said 3 years, 10 months ago:

    Looks great so far George! Though not perfect for the rivet-counters, that kit is a pleasant surprise, especially given its availability and price. Can't wait to see more!

  • Profile Photo
    Spiros Pendedekas said 3 years, 10 months ago:

    Hi George @gblair!

    Your Dog Sabre looks great and is a definite winner from the beginning.

    The cockpit is fantastic.

    Though NMFs are flashy (and, of course, beautiful), I confess I have a soft spot on NATO camoed F-86s (and other "Greek" types). NATO camo looks very cool and, being somehow darkish, adds interest and aggression to the planes.

    "Worn" by the Hellenic Air Force for just a while, makes it even more exquisite, so I am very happy you decided to paint it like this.

    Waiting eagerly for your posts, my friend.

    All the best!

  • Profile Photo
    Erik Gjørup said 3 years, 10 months ago:

    @gblair, even though it is not a RDAF version you are building I will be tuned in here 🙂

    • no really, I like the choice of colors you have made. looks promising right from the start.
  • Profile Photo
    George R Blair Jr said 3 years, 10 months ago:

    Thanks everyone.

    Spiros (@fiveten) You are right about the camo versions of the Hellenic planes. The camo, along with some sun-fading, gives them a lot of character.

    Eric (@airbum) I have looked at the camo on some of the RDAF planes that are no longer around and may give one a shot. I have another F-86D (early version), so maybe that will be our candidate.

  • Profile Photo
    George R Blair Jr said 3 years, 10 months ago:

    I managed to get some work done today in preparing the various sub-assemblies. The sprues are looking a little bare as I finished the intake, exhaust, gear wells, fuselage, wings, and external fuel tanks. The more I work on this kit, them more I like it. It has lots of detail, everything fits perfectly, there is zero flash, and all the parts have positive locating points. So, here is the summary of work:

    The tailpipe has a piece that is added to the bottom that simulates the back end of the engine. The Eduard set has a piece that really adds to the detail.


    With that complete, I painted the inside of the intake aluminum from a spray can. The cockpit attaches to one side of the intake, and the other side is the top of the nose gear well. You add the sides to the gear well, and you end up with a nicely detailed home for the nose gear.


    Everything attaches to the left fuselage side, and then you seal it all up with the right side. The instructions call for opening some holes in the bottom of the fuselage, but they are for the missile tray and a plastic rod that keeps the plane from sitting on its tail. I wouldn't be using either one, so I ignored the instructions. The location points for the sub-assemblies are firm and positive, making this step almost foolproof. I say "almost" because I was almost ready to glue the fuselage together when I realized that I hadn't added any nose weight. I also added a photoetch metal rail to each side of cockpit cutout in the fuselage, but later discovered that the cockpit wouldn't fit with the rails installed, so I removed them.


    The last thing I did today was build the wings and external fuel tanks. Several well-detailed parts go together to form the main gear wells, and then the top and bottom wings go together. Once again, the gear well has lots of detail. This kit has separate slats, as well as separate flaps that can be shown up or down.


    That's it for today. Everything is taped and the glue is drying, so it's off to watch some old movies. Cheers to everyone, and stay safe.

  • Profile Photo
    Spiros Pendedekas said 3 years, 10 months ago:

    Hi George @gblair!
    You've done a fantastic progress on the Sabredog.
    With your great pic coverage and notes, your progress is a joy to follow.
    Waiting for your next installment!

  • Profile Photo
    Erik Gjørup said 3 years, 10 months ago:

    That is one busy cockpit @gblair. Thank you for the thorough description of the process. Now, just a teaser:


    This is one of the more boring RDAF F-86D's, they came with a lot of color too.

  • Profile Photo
    George R Blair Jr said 3 years, 10 months ago:

    Thanks for the photo, Erik (@airbum). I don't think I am brave enough to do an all metal scheme, but perhaps I am getting closer. The ones I did in the past I didn't really think looked realistic, but some of the new metal paints out now might make me want to give it a try. You don't see many D Models in museums, so thanks again for sharing.

  • Profile Photo
    George R Blair Jr said 3 years, 10 months ago:

    Today was one of those days that life interfered with model building, but I did get a little done. I thought I had a really good reference on the F-86D, but I couldn't find it. My wife and I don't get rid of anything, and I firmly believe that everything we have ever owned is in the house...somewhere. I searched through my bookshelves for 20 or 30 minutes, and finally gave up. As we were walking out of the house to go to the supermarket, I found it staring at me from a shelf I had searched twice. Oh, well.

    I found some really interesting info on the Hellenic F-86D. Not only did I find some photos to guide my build, I also got some info that allows me to add some interesting stuff to the model. According to my reference, Air Force Legends Number 211, the Sabre Dogs that were provided to foreign countries in the Military Assistance Program, or MAP, were also armed with Sidewinder missiles on pylons just forward of the main landing gear. I found some good photos of the pylons on Greek aircraft, as well as some ideas for fading and wear on the camouflage. If you have a 1/48 model of an F-86E with non-American markings, you will probably find that it contains the pylons and Sidewinders you can rob for an F-86D build. I took mine from an Italeri F-86E with German markings.

    I added the wings to the fuselage and found that they mated almost perfectly. I added a little putty to a small area on the nose where I created a divot when I removed the nose from the sprue. Tomorrow I will hopefully get the model ready for paint and add the landing gear. I am trying to plan ahead as I plan to do a little chipping as seen in some of the photos.

    Cheers, and stay safe.

  • Profile Photo
    Spiros Pendedekas said 3 years, 10 months ago:

    That's a wonderful progress, George @gblair!

    I can see your Sabredog coming together very quickly.https:

    Regarding the wing pitot, I always go brave and cut it from the start! (learned my lessons - lol!)

    FU-067 is restored in early "NMF" finish (actually is aluminum lacquer) and is exhibited in the hangar of Tatoi HAF Museum, half a mile away from my office.

    Here's a pic of it, extracted of my May 15, 2020 quick visit article:

    Hellenic Air Force Museum – A quick visit
    If you'd like, I'd be more than happy to take as many as you like detail photos for your build. All the best, and please let me know, my friend.
  • Profile Photo
    George R Blair Jr said 3 years, 10 months ago:

    Thanks for the pictures, Spiros (@fiveten). Thanks for the photos! It must be great working so close to the museum. The only thing I can't find for this build is color of the inside of the wing slats. I suspect that when they are open, it is natural metal underneath, but I can't find any color photos showing this area with the slats open. The pitot on my model has survived for almost 48 hours, but I usually lose it when I am handling the plane during painting. I will need to go look at your article on the museum so I can see which planes are there. I have decals for a Greek F-104 and F-84 that I am interested in building, but those are farther down the line. Thanks again for the photos and stay safe.

  • Profile Photo
    Spiros Pendedekas said 3 years, 10 months ago:

    Hi George @gblair!
    Will pay a visit hopefully this Monday and try to figure out the slats inner area colour.
    It is truly great to work near this place!
    All the best!

  • Profile Photo
    Erik Gjørup said 3 years, 10 months ago:

    @gblair, nice steady progress even with limited time. Know the feeling of trying to find a book that is litteraly staring you in the face. Might I mention that my office is 200m away from the museum here in Stauning 🙂 - sadly they are open when I am, and closes the same time as I do, so not many visits. I do not recall any RDAF F-86D in camo, but will check for your other kit!

  • Profile Photo
    Spiros Pendedekas said 3 years, 10 months ago:

    Just came across this Japanese Sabredog pic @gblair, which is actually used by Hasegawa for a limited edition Sabredog.

    You can see that the inners are NMF (or silver/alu anyway). I would strongly believe that HAF Sabredogs were as such.

    Also, upon their receiving the NATO camo, I really believe they retained the above NMF silverish colour. Why would someone bother to change it?

    Anyway, let's see what any research will bring up.

    Cheers again!