1/72 Phantom double build!

Started by Magnus Fridsell · 27 · 10 years ago · Phantom
  • Profile Photo
    Magnus Fridsell said 11 years ago:

    I've started two Hasegawa 1/72 Phantoms, one is a USAF F-4C flown by Robin Olds in Vietnam, the other one will be an Israeli RF-4E!


    Those are the kits. The F-4C is spot-on for the purpose and the RF-4C is remarkably well suited for an Israeli RF-4E since they all seem to have had the "hard" wing (at least during the early seventies which is the era I go for) and un-slotted tails. If I am wrong, please tell me! The difference is in the longer engine exhausts for the E but that matters less since both types are included with all the Hasegawa Phantom kits.

    I got myself a bunch of after-market goodies (without going over-the-top...) in Moson two weeks ago in the form of resin seats and engines and two sets of Eduard zoom etch. Pre-painted...


    Decals from PrintScale and Cutting Edge.

    Regards

    Magnus

  • Profile Photo
    Magnus Fridsell said 10 years, 12 months ago:

    Doing a bit of work here and there on these! I am not sure it was such a good idea to build both at the same time, no synergies yet! It seems as if I spend most of the time sorting through a multitude of sprues 🙂 !


    Interior parts ready for primer, a C-fuselage already closed up and a set of parts for the RF's wings.

    It pays to be careful when building these, with slight adjustments fit is almost perfect and with glue applied from below very little sanding is needed. And I don't feel like sanding that seam between the inner and outer wing!

    Best regards

    Magnus

  • Profile Photo
    said 10 years, 11 months ago:

    Great start Magnus - I look forward to seeing these two progress.

  • Profile Photo
    Magnus Fridsell said 10 years, 11 months ago:

    Gregor! Thanks!

    Something of special interest arrived at the post office today:

    I have only just leafed through them but they seem to be packed full of photos, interesting history and beautiful profile artwork!


    Cockpits using Eduard's prepainted photo etch. Beautiful!

    Regards

    Magnus

  • Profile Photo
    said 10 years, 11 months ago:

    looks awesome!

  • Profile Photo
    Erich Goldbach said 10 years, 11 months ago:

    Magnus, you are a busy bee! the interiors look beatiful, look forward to more posts

  • Profile Photo
    Magnus Fridsell said 10 years, 11 months ago:

    Gregor and Erich! I'll do my best to keep you entertained 🙂 !

    Regards

    Magnus

  • Profile Photo
    David Hansen said 10 years, 11 months ago:

    So uh Magnus,

    When during construction did you realize that these kits are over engineered by half? 😀

    Seriously though, the Eduard photo etch looks like it does wonders for the kit instrument panels.

    -d-

  • Profile Photo
    Magnus Fridsell said 10 years, 11 months ago:

    David! Since you mention it: I knew it right when I opened the boxes but it gets more and more obvious the more time I spend on them 🙂 !

    It's been a while since I last built a Hasegawa kit from the eighties: these kits really consists of a horrendous lot of small bits of plastic (Yes, I know, it's the definition of a plastic model but it is still way over the top in this case 🙂 !), which all need their rather substantial amount of filling, sanding and adjustment.


    State of affairs right now, I installed the splitter plates last night. I've spent a lot of time on the small parts lately but they don't make any good photos 🙂 !


    Things that hang below the wings... That will need to be thinned, filled, sanded, primed, painted, masked (horror of horrors) and painted again... I'll be busy with those birds right through the summer!

    Regards

    Magnus

  • Profile Photo
    Magnus Fridsell said 10 years, 11 months ago:

    Slowly forward...


    Wing-to-fuselage joint worried me a bit, it is tricky to fill and sand and I want it more or less press-fit to avoid it if possible. I had an idea that I could glue a plastic strip along the edge and then sand it flush before fitting the wing, then my friend @rickard-malmborg suggested attacking the fuselage instead!


    I cut along the seam (roughly 🙂 ) and pressed in a few shims of thin plastic until it was wide enough. A few drops of plastic cement and everything was fixed in place!


    And now the wing fits! Magic!

    Regards

    Magnus

  • Profile Photo
    Editor said 10 years, 11 months ago:

    Following your progress with great interest &/ big fan of the Phantom. I also used to spend whatever time and effort necessary to make the wing roots to fit perfectly on my models. It easily pays off as this area is a dog to fill, sand and - heaven forbid - rescribe. Great work so far.

    What's your second choice of paint scheme, beside the Israeli one?

  • Profile Photo
    Magnus Fridsell said 10 years, 11 months ago:

    @editor : I never knew you were a Phantom-guy!

    The C will be finished as a Vietnam-war machine in the colours of Robin Olds.

    Regards Magnus

  • Profile Photo
    said 10 years, 11 months ago:

    Good work Magnus. Its great to see the progress you have made with these. Mostly contributers to the WIP page only post one or two updates so its good to see your models build up!

  • Profile Photo
    Magnus Fridsell said 10 years, 11 months ago:

    Gregor! I wrote to @editor the other day and asked him to try and put the limelight on the forums, I think that should breathe a bit of life into them and make people more inclined to post more of their builds!

    Regards

    Magnus

  • Profile Photo
    Magnus Fridsell said 10 years, 11 months ago:

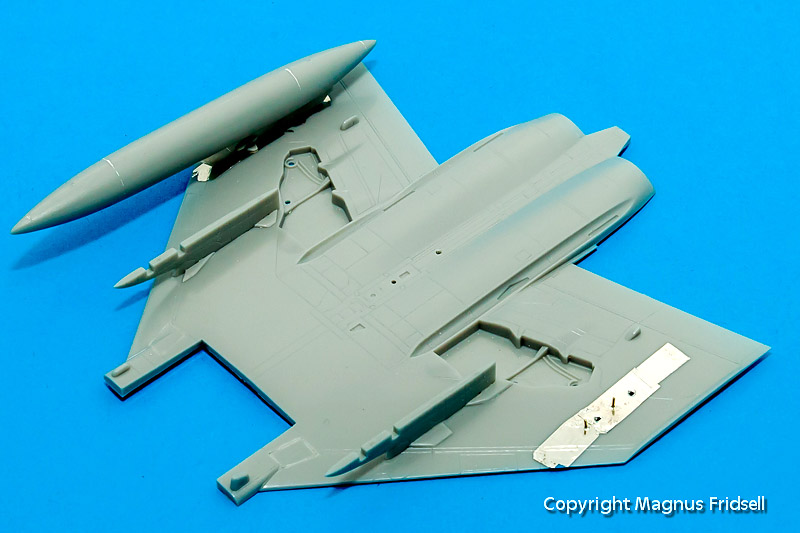
    Some more work done...

    One thing that I have learnt the hard way is the importance of preparing the installation of external loads so that it is easy and safe to attach it after painting. I've had a bad history when it comes to fuel tanks especially...


    Holding tank and wing together, I drill two holes from the inside of the wing into the tank pylon. This way I get matching holes in the wing and the pylon. After this I bend a wire into an U-shape and insert it from the inside of the wing into the holes, securing it with super glue. Cut to length, these make ideal attachment points for the tank at the end of the project!

    And now onto the subject of picking up ideas... This all started with a discussion on Tempests over at the IPMS Stockholm forums, one link led to a build by Californian dentist/master modeller Paul Budzik where he used this trick... The fit of the tank pylon to the wing surface could have been a lot better and it is tricky to get the shape right. Paul uses CA glue to fill out these kind of gaps with Bare Metal foil attached to the opposite surface to avoid the super glue to stick.


    Preparing the wing with foil...


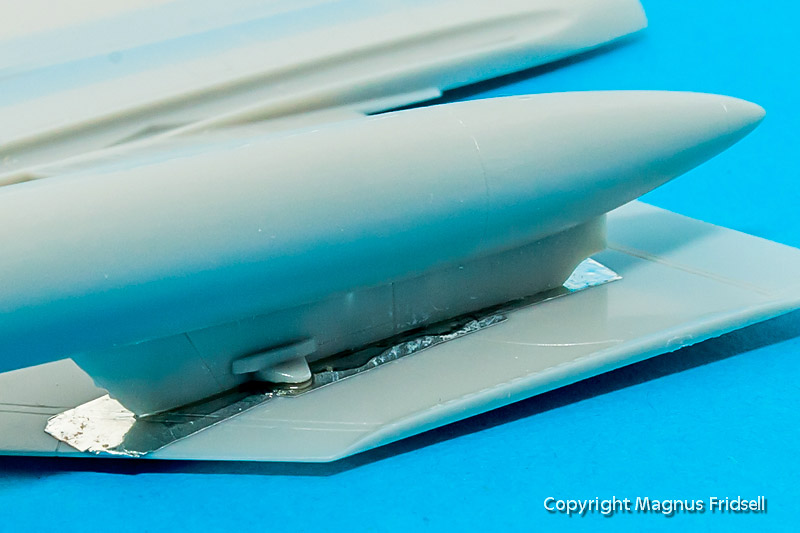
    ...filling with super glue...


    ...and a perfectly fitting tank that only needs a bit of sanding around the edges!

    Finally, I need some advice! There is no separate centerline pylon in the Hasegawa kits even if there are two different tanks included for this station, both with their rather special looking integrated pylons. I plan to hang a MER with M-117 bombs on the centerline but in the Hasegawa weapon set from where I source both the M-117s and the MER there are no pylons either... Can anyone confirm that I can use the same kind of pylon as used for the Vulcan pod? I have a redundant pod from a Fujimi kit that I can use the pylon from... I know that Scat XXVII at the USAF Museum is loaded this way so if someone has photos I'm all smiles!


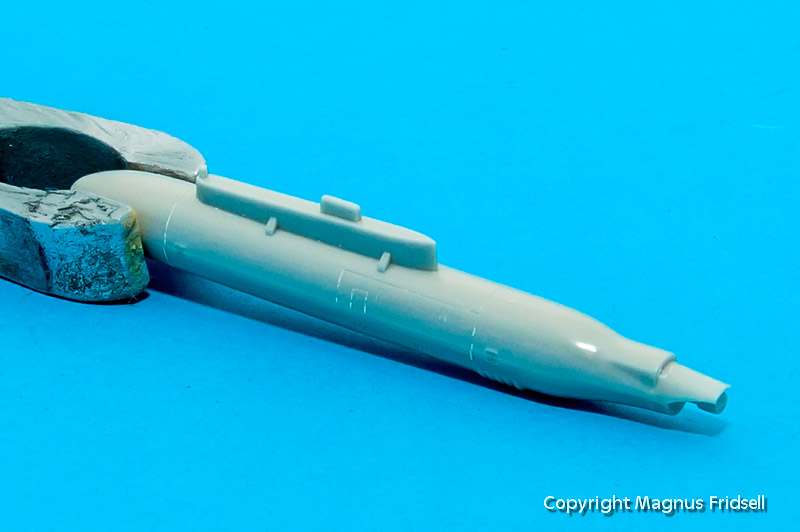
    Last photo of the redundant pod. It has already succumbed to the razor saw...

    Regards

    Magnus