Academy 1/72nd B-24D Liberator MTO

Started by Chuck A. Villanueva · 72 · 1 year ago
  • Profile Photo
    John vd Biggelaar said 1 year, 4 months ago:

    Great to see this one back on the bench, Chuck @uscusn
    Quite some serious masking up ahead.

  • Profile Photo
    Chuck A. Villanueva said 1 year, 3 months ago:

    Thanks Spiros, not my favorite part is masking, not just the glass.
    Thanks George, one of my new year resolutions was to complete any older builds before starting any new projects.
    John, thanks in more ways than just the glass to look forward too.

  • Profile Photo
    Chuck A. Villanueva said 1 year, 3 months ago:

    Getting back to finish off the masking. First starting on the nose and then the canopy. For the first time ever I had issues with Eduard's masking set. Seems like the cut outs were not totally sectioned on the sheet. When I started to peel off each panel from the sheet, there would a small section that would not separate from the sheet, so I would use a knife to cut it them out. Every panel was this way. I managed to finish the nose and partial on the canopy. But already a tedious task, I also had a EZ mask set available with the kit, so I ended up using that masking set to complete the task. These will be the ones in black.

    Next to mask off the lower rear window panel

    Next was to assemble the rear turret.

    Once assembled it was masked off and then airbrushed the interior color of Dark Dull Green.

    The rest of the framing was painted the interior color as well.

    Now it to mask off the de-icer boots on the leading edges of the wings, horizontal stabs and rudders. The rudders are a blast to do, right! Then the rest of the pre-shading was completed.

    Next to apply the MtO scheme of Desert Tan over Azure Blue, though I think Neutral Grey is more accurate.

    More to follow ...

  • Profile Photo
    Spiros Pendedekas said 1 year, 3 months ago:

    Some serious masking and painting job, my friend @uscusn.
    Pity for the Eduard masks, maybe it is an isolated case.
    Superb results so far!

  • Profile Photo
    Erik Gjørup said 1 year, 3 months ago:

    Yellow tape masks usually rocks, but every now and then you get a set that is not cut all the way through. Great job on the enormous number of masks Chuck!

  • Profile Photo
    John vd Biggelaar said 1 year, 3 months ago:

    Luckily you had the EZ masks available, Chuck @uscusn
    Doing all those curves with masking tape is far from easy, but it turned out great. This should work well.

  • Profile Photo
    Chuck A. Villanueva said 1 year, 2 months ago:

    Thanks Spiros, not my favorite part of any build is masking, especially bombers with all that glass in this scale.

    Eric, first time ever an Eduard's set that was defective, already a difficult task, even more so with masking panels not cooperating coming off the backing.

    John, yes so happy I still had the Cutting Edge set bought so long ago. Being old I thought they would not stick, but they performed very well. Now lets hope when they get pulled off they will not leave residue on the glass.

    This session I will assemble the rear turret.

    A 2 piece unit with a nasty seam in the center though not so prominent.

    Once assembled, I masked it off and then air brushed the interior color of Dark Dull Green.

    Then airbrushed the canopy and nose framing as well with the interior color. The top turret was masked off completely as the framing is clear.

    Now before painting the scheme, first to mask off the leading edges of the fly surfaces for the de-icing boots. These were already painted Tamiya Flat Black. Just when ya think your done masking, yeesh, the Rudders were particularly fun to edge.
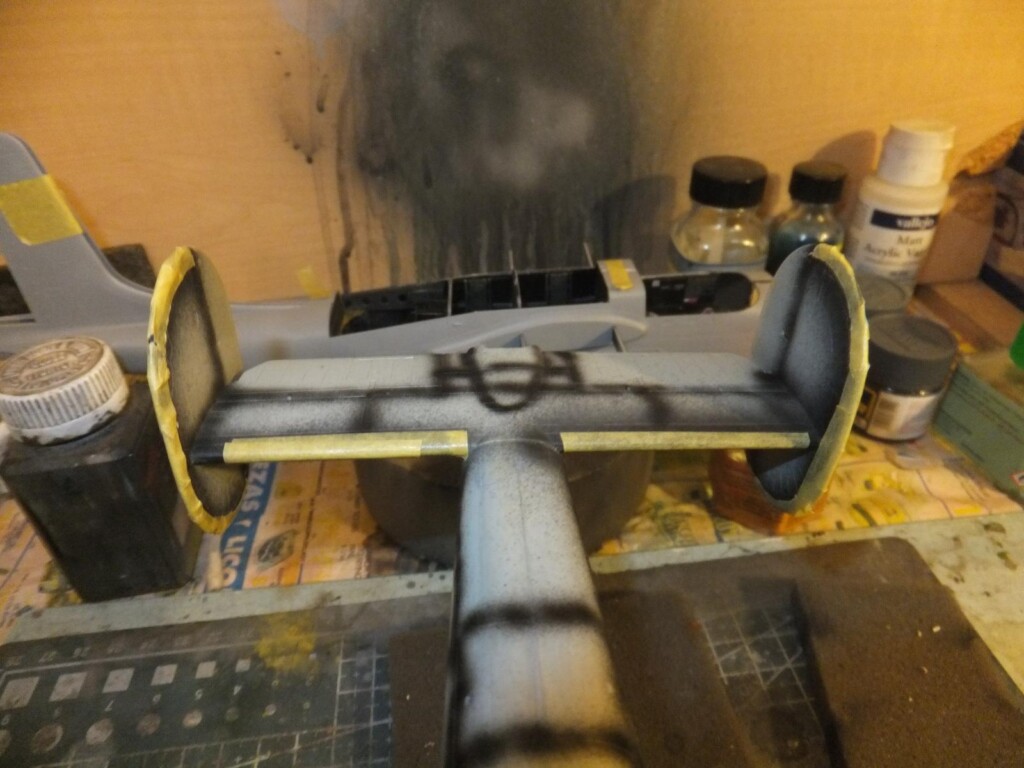
    Once the masking was done, I airbrushed Aeromaster Acrylic Azure Blue over the lower surfaces.

    Finally again masked off the wing to fuselage, horizontal stab to vertical rudder areas before airbrushing the Desert Tan.
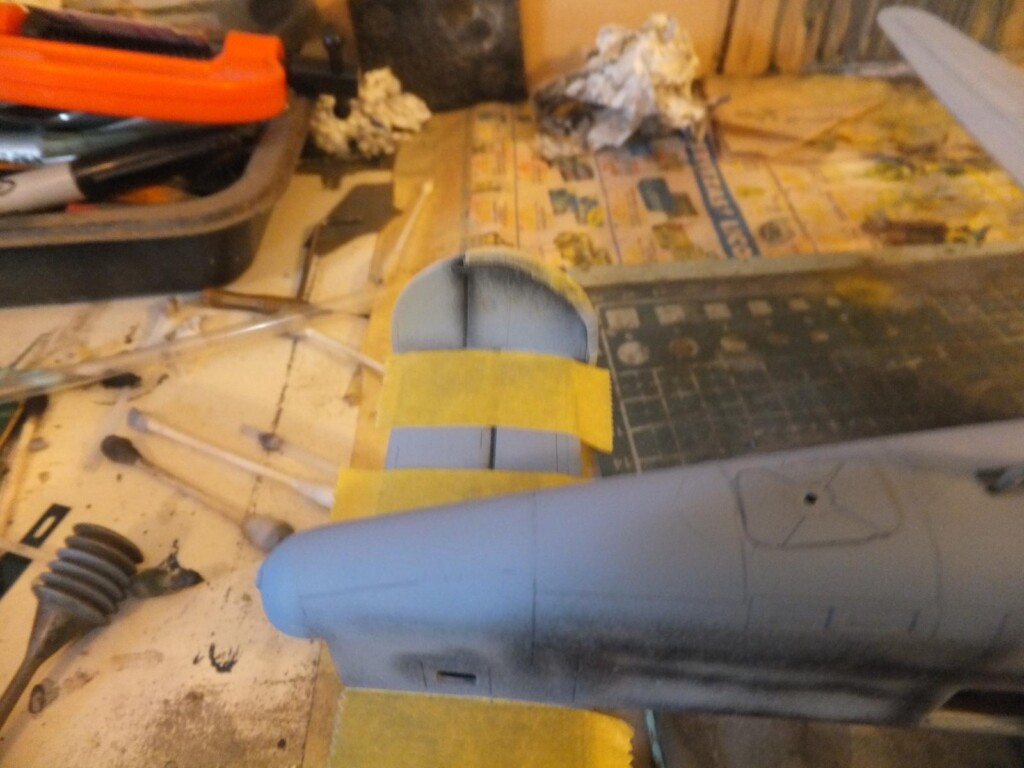
    next up to paint the upper and side surfaces.

    more to follow.

  • Profile Photo
    John vd Biggelaar said 1 year, 2 months ago:

    Very nice progress on the lower surface, Chuck @uscusn
    Looking forward to the desert tan being applied.

  • Profile Photo
    capt. R said 1 year, 2 months ago:

    @uscusn fantastic build!. I will use your experience for sure. How did the front part of the nose consist of the fuselage? I was able to read that you should weight the Academy model with three US ounces of lead.

  • Profile Photo
    Spiros Pendedekas said 1 year, 2 months ago:

    Great progress, my friend @uscusn!

  • Profile Photo
    Christopher C Tew said 1 year, 2 months ago:

    Chuck, this is great looking work, mastering some really challenging issues. One problem that all the Academy B-24s have in common is that the elevator hinge line is much too far forward. It should be only slightly forward of the rudder hinge line. With its deep abrupt separation at the rear edge of the stabilizer and the smooth tapering of the elevator front edge, establishing the correct hinge line by filling and rescoring would be almost impossible. Quickboost or somebody should have made an aftermarket correction long ago, but I know of none.

    3 attached images. Click to enlarge.

  • Profile Photo
    George R Blair Jr said 1 year, 2 months ago:

    Looks great, Chuck (uscusn). I love bombers, but the tedious masking has to be my least favorite part, right along with masking the de-icing boots. I have had similar problems occasionally with Eduard mask, and have used EZ masks as a replacement. The problem with EZ masks is that they are made of the thicker vinyl and tend to pull up where they go around curved pieces. Trying to mask around the machine gun barrels is a real pain, but it looks like you managed to do it without breaking them off like I did. Looking forward to your desert paint.