This is the start of a new build I am doing along with Greg Kittinger @gkittenger and his World of Phantoms. I always seem to be the first one at the party, so I figured I would kick off the party (group build?), (challenge?). The F-4 Phantom was the primary fighter when I entered the Air Force in 1973, so it has always been a favorite of mine. I have a bunch of F-4's of various types in a variety of scales, but I found this kit at Hobby Lobby on sale for $9. I couldn't resist.
I have friends who have dismissed this kit, mainly because it is advertised as a model you can build without glue. It is also molded in three colors so that it can basically be build without glue or paint. This makes the kit seem like it is designed for kids, not "real" modelers. But I have built a previous kit in this series, a 1/72 F-35, and have found them to be well-detailed & build into a great model. It was also molded in three colors, but once you spray some primer and paint on the kit it looks like any other model.
-
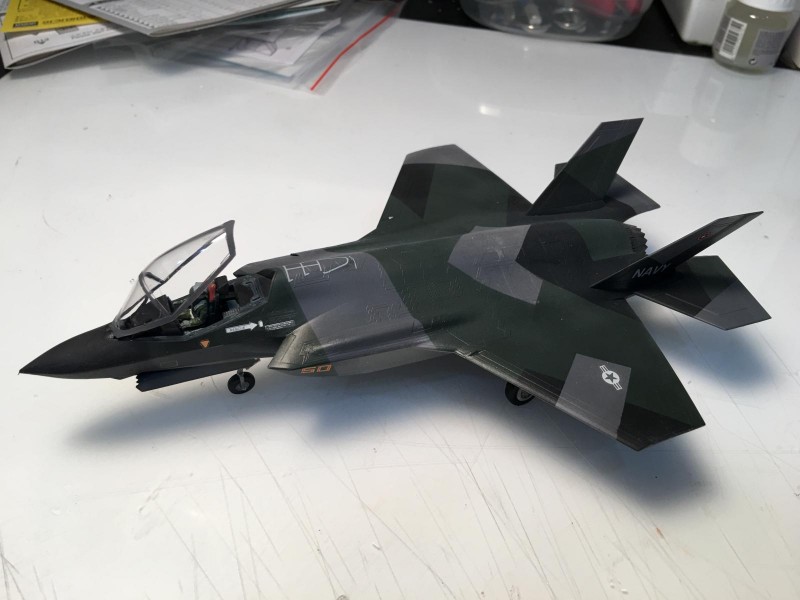
1. This is the Academy F-35 kit. I completed it in a fictional aggressor scheme.
-
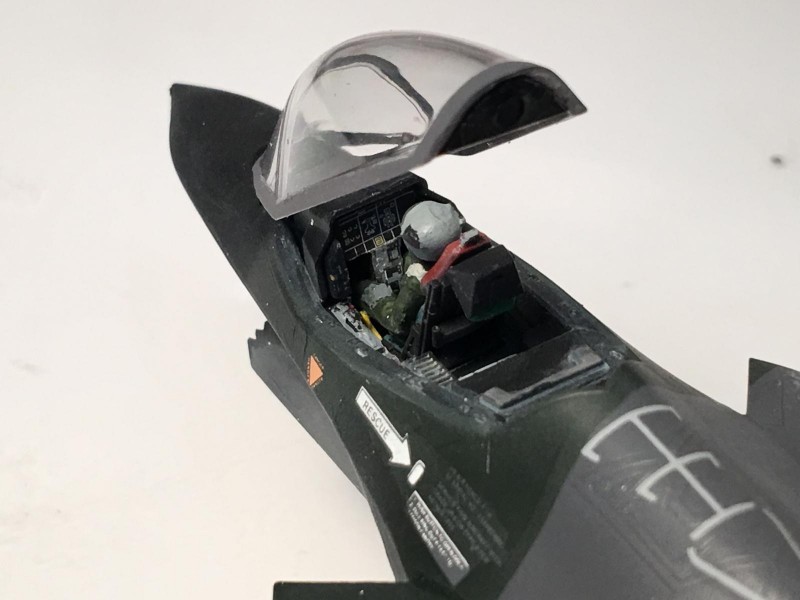
1. The cockpit of the Academy F-35 is detailed out-of-the-box.
There are a number of positive aspects to this F-4J kit: first, it is well-detailed. Second, the attachment points for the various parts are very firm. No need to worry about parts that just don't seem to stay in place. Third, the parts are divided in such a way that it makes painting easier. For instance, the seat frame is one part, and the cushion and headrest is another part. Fourth, from my experience with my previous build of the F-35, the parts fit very precisely. In fact, many of the parts fit so precisely that a thin layer of acrylic paint was enough to make them too tight to fit without removing the paint.
Well, enough prologue. I plan to build this kit in one of the Ferris schemes that was applied to various F-4's. I already had the decals.
I gathered some of the resources that I had on the F-4, and then ordered in some paint masks and Eduard photo-etch for the kit.
-
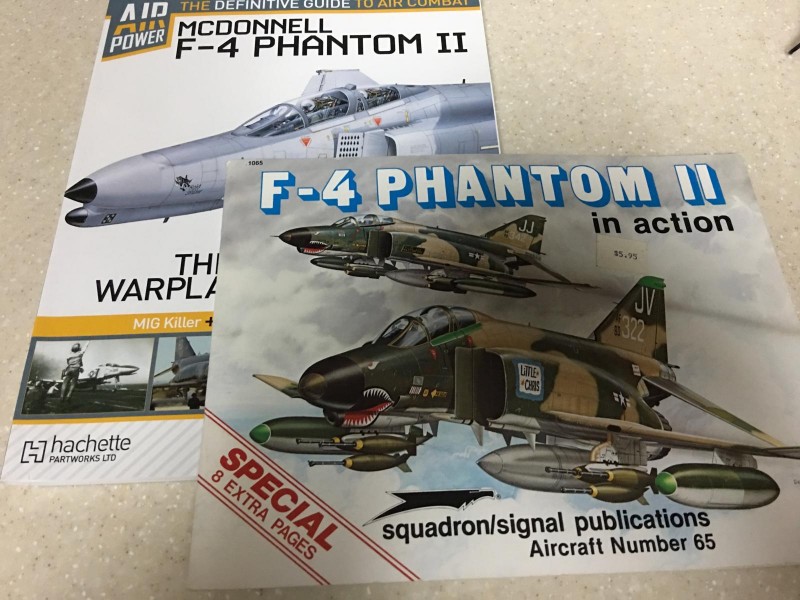
1. You can tell how long I have had this reference from its price.
I also have some resin seats for the F-4. I am not sure if I will all of these goodies, some of them, or none of them during the build. The kit seats look pretty good, and will look even better after I add the seat straps from the Eduard set. I have reached an age where I really, really, really like to have the pre-cut masks for my build, so these are a given.
I hope to start the build early this week, and will post some updates as I go. I am looking forward to seeing the other Phabuous Phantoms the rest of you are doing.
20 additional images. Click to enlarge.