Academy F-4J 1/72

Started by George R Blair Jr · 66 · 4 years ago · Academy, F-4J, Ferris, Greg Kittenger, Phantom, World of Phantoms
  • Profile Photo
    Robert Royes said 4 years, 9 months ago:

    Looking good! Those holes you filled on the intake curve are for ECM antenna added later on "J"bird.

  • Profile Photo
    Greg Kittinger said 4 years, 9 months ago:

    Looking good - I like where you've got the interior now!

  • Profile Photo
    George R Blair Jr said 4 years, 9 months ago:

    You are right, Robert. Although the instructions have you fill the holes in the upper intake, the parts to build the later version seem to be in the kit. So I suspect you could build the later version with the unused parts in this kit.

    1 attached image. Click to enlarge.

  • Profile Photo
    George R Blair Jr said 4 years, 9 months ago:

    Got some good work done today. The plane is coming together and is starting to look like an F-4.
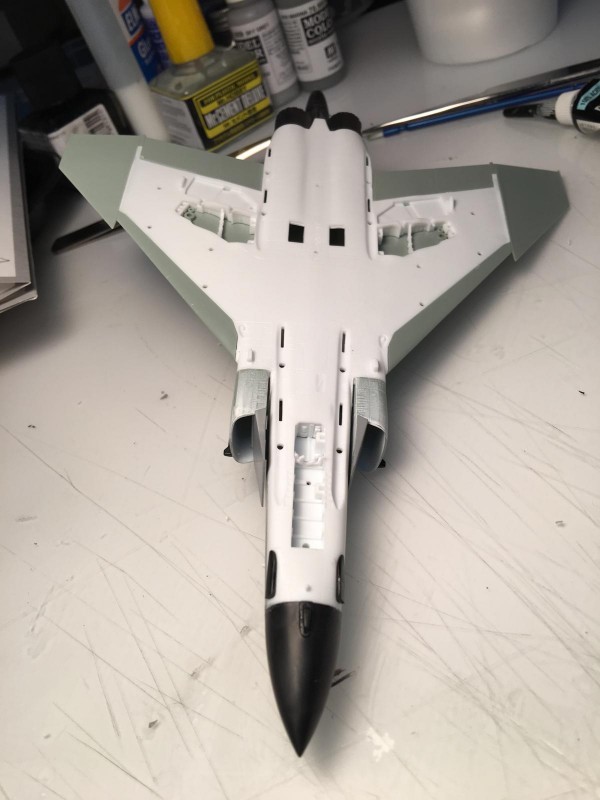
    I added the intakes to the fuselage, along with the top of the wings. On other F-4 kits the intakes are usually an area that need some work with some sandpaper and filler to make everything fit, but these went on almost perfectly. No sanding required and just a wisp of filler at the bottom of the joint.
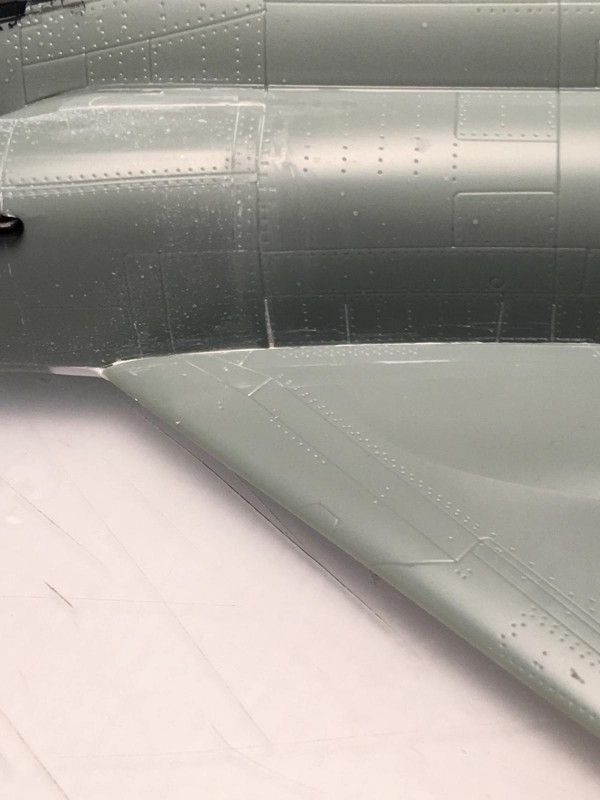
    The wings were the same, with no filler needed on one wing and another wisp of filler on the other side.
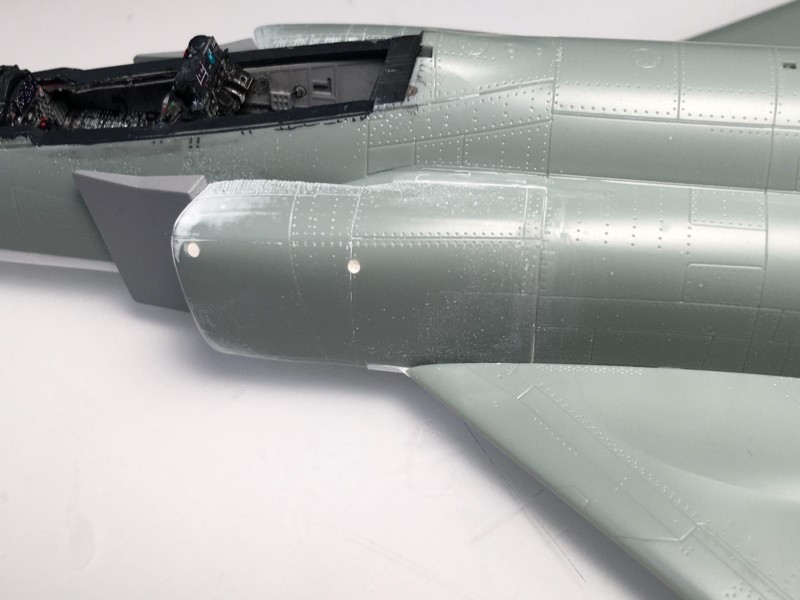
    The only part I have found that didn't quite fit was the small cover over what I think is the braking parachute housing at the extreme aft end of the fuselage. It was a little high on top, but some quick work with a sanding stick brought everything together.
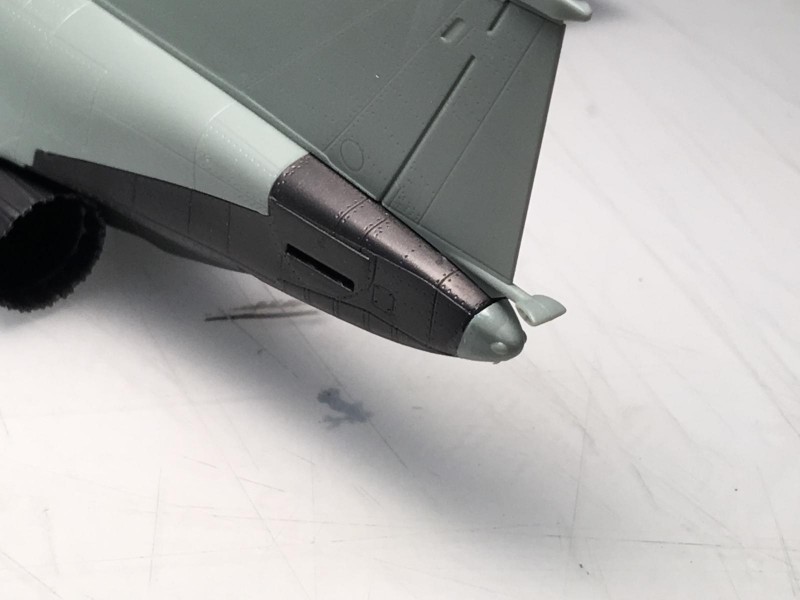
    I was a little skeptical about the arrangement to add the tail fin, which was just three small pins that fit into the fuselage. I figured it would take some work to make sure that the fin was perfectly vertical. Well, I was wrong. The pins fit so tightly into the fuselage that the fin is absolutely vertical with no side play at all.
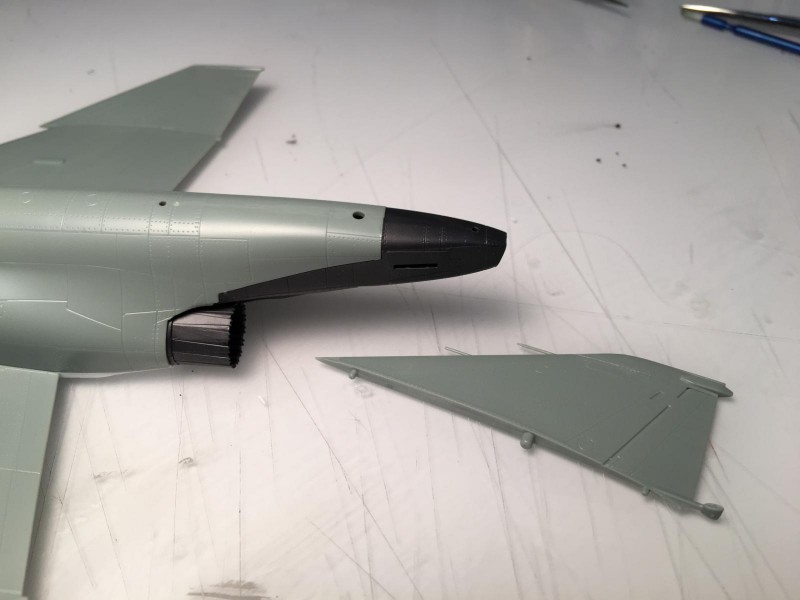
    I also found some thoughtful design with the gear doors. For instance, for gear down, the nose gear door parts are split into two sections, as you would expect. But if you want to depict the plane with the gear up, there is another kit part with the doors molded all in one piece. Great engineering.
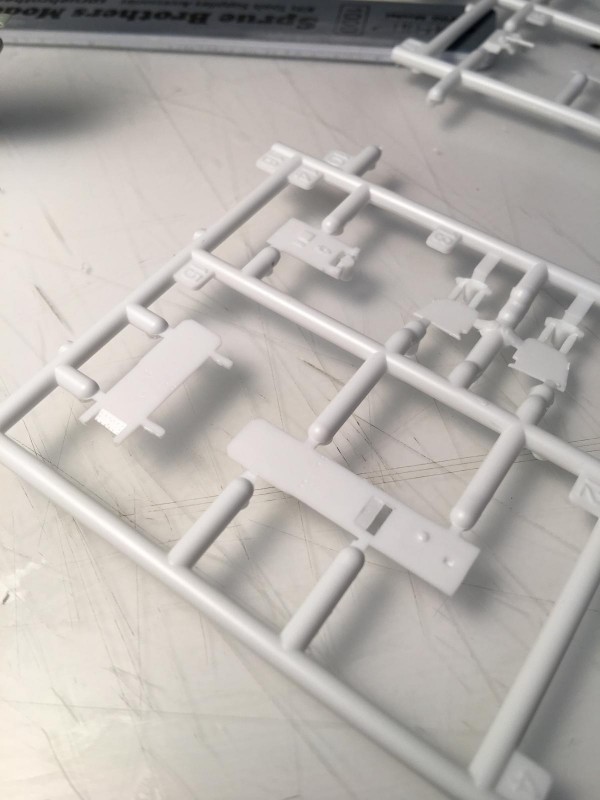
    I should have checked my references sooner, because I discovered that the plane I want to model is a later "J" with the ECM pods on the sides of the intakes. So I took the filler out of the holes I had previously filled and added the required parts. Thankfully these were included in the kit, although the kit instructions have you fill the holes in the intake and not use the extra parts.

    The last thing I dealt with today was sorting out the blue-tinted windscreen using some diluted clear blue from Tamiya. I think I will be close to being ready to paint tomorrow.

  • Profile Photo
    Robert Royes said 4 years, 9 months ago:

    Those ECM thingies are bugging me, all my references mention them but don't date them. I got my F-4 squadron in early 1975 and our birds had them. I'm thinking that they were installed post Vietnam, as aircraft went in for rework and updates.

  • Profile Photo
    George R Blair Jr said 4 years, 9 months ago:

    I suspect you are right about the ECM pods. I plan to put a Ferris paint scheme on my model, and a reference I have said the Ferris schemes were used in the late 1970s and early 1980s. I wish I had taken a good look at the references for my paint scheme since it would have saved me filling the holes for the pods and then un-filling them to add the pods. In my defense, the instructions said to fill the holes. That's what I get for following the instructions.

  • Profile Photo
    Greg Kittinger said 4 years, 9 months ago:

    Yeah - seems my modeling life is one big back-and-forth between 1) reference material, 2) kit instructions, and 3) decisions about which model or options I had decided to build! I haven't figured out the perfect solution yet, as sometimes I'll hang onto references for one aspect of a build (like weathering) that don't apply to something else (like antenna positions and styles). There's rarely a build where I don't have to backtrack on something!

  • Profile Photo
    George R Blair Jr said 4 years, 9 months ago:

    Got some more done today and it is actually starting to look like an F-4. I added the seats to the cockpit. I tinted the windscreen blue using Tamiya clear, diluted with alcohol, followed by some Future. Yes, I still have a bottle of the original Future. I then glued the canopy in place.

    Deep down inside I was thinking that the canopy wouldn't fit over the seats, but it all went together fine. I added the landing gear at this point. I know a lot of modelers prefer to leave the gear off until after painting, but I always like having something for the freshly painted model to sit on. The gear was fairly detailed and went on perfectly.

    I cleaned the plane with some alcohol to avoid the painting problem I had with the intakes, and then rolled in to the first gray color. I used Vallejo Model Air, and it seems to have gone on to the plane without a hitch. I have had a lot of trouble with Model Air before, so I am always surprised when it works.

    As the paint was drying, I started looking at the camouflage and the decals. The scheme doesn't look all that complex, but then I start thinking about the masking involved and decided to let everything dry for a day before I tackled the next color.

  • Profile Photo
    George R Blair Jr said 4 years, 9 months ago:

    Got some more painting done today. After placing a ton of Tamiya tape on my plane, I added the 2nd of the camouflage colors.

    This time I added the darkest of the 3 camouflage colors, listed as FS 36118, or Medium Gunship Gray. I had heard some good things about AK Real Colors, which is an acrylic lacquer. My go-to paint back in the day was always lacquer, and when this became unavailable I began a love-hate relationship with acrylic paints. I really like using Tamiya paints, which is a hybrid acrylic, similar to the AK paints. The biggest problem I have with Tamiya paints is the limited selection of colors. So, armed with the appropriate colors and a bottle of AK thinner for the AK Real Color paints, I starting painting my airplane. I thinned the paint by about 20% and sprayed them on with 20 psi on the compressor.

    I found this paint to be pretty amazing. It sprayed beautifully, covered well, and left absolutely no ridge where it was sprayed against the masking tape. There was no bleed under the tape at all. I have heard that you can use Tamiya lacquer thinner on these paints, but haven't tried that yet. Since these paints were so much like Tamiya, I thought I might be able to begin my airbrush cleanup using water, then alcohol, which is how I cleanup after Tamiya. Well, water instantly solidifies the paint and makes it very difficult to clean. Luckily I started with the color cup and eventually got it clean using the AK thinner. Maybe someday I will try alcohol, but I will experiment with something other than my airbrush first. I suspect that alcohol with also be unusable, but that will be for another day. The other thing I like about Real Color is the impressive range of colors that are available. After letting the paint dry for about 30 minutes, it was dry to the touch and it was time to remove the yards of tape I had applied. The tape came off without a hitch and I decided to to let the paint harden for 24 hours before I start masking for the last camouflage color. After examining the camouflage pattern, I think I will need to adjust the darker color slightly in a couple of places and then it will be time for the last color. Hopefully the last of the camouflage will be posted soon.

  • Profile Photo
    Robert Royes said 4 years, 9 months ago:

    Your a better man then me Gunga Din! That scheme would be a real challenge for me. We had one F-4 In this scheme in VF-74 back in 1978, it drove the Corrosion control crew crazy with the different paint, they were used to the lt.gull grey and white.

    1 attached image. Click to enlarge.

  • Profile Photo
    George R Blair Jr said 4 years, 9 months ago:

    Great photo. You never think about what it takes to maintain these paint schemes in real life. Thanks for sharing.

  • Profile Photo
    George R Blair Jr said 4 years, 9 months ago:

    Added the final camouflage color today, which was the middle tone of the three colors.

    I was very lucky in that I have had no paint bleed under all of that masking tape, and none of the paint pulled up when I removed the tape. I'm liking these AK Real Colors more and more.

    Now I have to deal with all of the fiddly bits, like painting the gear doors, speed brakes, and so on, many of which have two camouflage colors on them. I also need to mask and paint the interior of the wheel wells white, along with the inside of the gear doors. If I had been smart and thought ahead, I could have used the inflight gear doors as a mask and simply pre-painted the wheel wells before I painted the camouflage. Obviously I wasn't smart and didn't plan ahead. No problem, I just bought some more Tamiya tape, so I am ready for the next round of masking. The last painting I plan to do is the metallic aft end of the fuselage, which will wait till last so I don't need to worry about damaging the metallic paint. Tomorrow will be spent sorting out the small parts, dealing with the weapons and their racks, and so on. Sometimes I think the end is in sight, but then I remember the thousands of small decals that will adorn the surface of my F-4. :o)

  • Profile Photo
    Greg Kittinger said 4 years, 9 months ago:

    Nice to hear your version of using the AK paints. Since I'm just getting into airbrushing, I'm devouring such reference material!

  • Profile Photo
    Don Mk1a said 4 years, 9 months ago:

    My goodness, what an epic tale of challenges and triumphs! Hats off to you, George for your persistence.

    Also, good to know that AK paints are as good or better than Tamiya. I've been wondering if they lived up to the advertising.

  • Profile Photo
    Erik Gjørup said 4 years, 9 months ago:

    WOW - speedy build here - I'll have to catch my breath.. - Great info and all. I really are not good friends with Tamiya (or Valejo), and foung Testors Acrylics to work fine - now I hear they will be discontinued, so I'll head out to get me some AK. Keep the good stuff comi'n!