Bf-109 J / Ha-1109 conversion, SBS-model 1/48 FINISHED

Started by Erik Gjørup · 125 · 1 year ago · airbum, Bf109, Ha1109, sbsmodel, Tripala
  • Profile Photo
    Erik Gjørup said 4 years, 9 months ago:

    Converting a Bf 109 to a Ha-1109 K.1L Tripala

    Where do we start?

    First off, the kit to convert needs to be found. The starting point will be the SBS-model resin conversion kit mentioned elsewhere on iModeler. It is designed to use Tamiyas new Bf109 G-6.

    The Ha-1109 initially were to be the Bf-109 J, and was based on a supply of 109 G-2 (or G-4) fuselages to Spain in 1944. That means that there are some minor differences on the hatches to be addressed on the Tamiya kit.
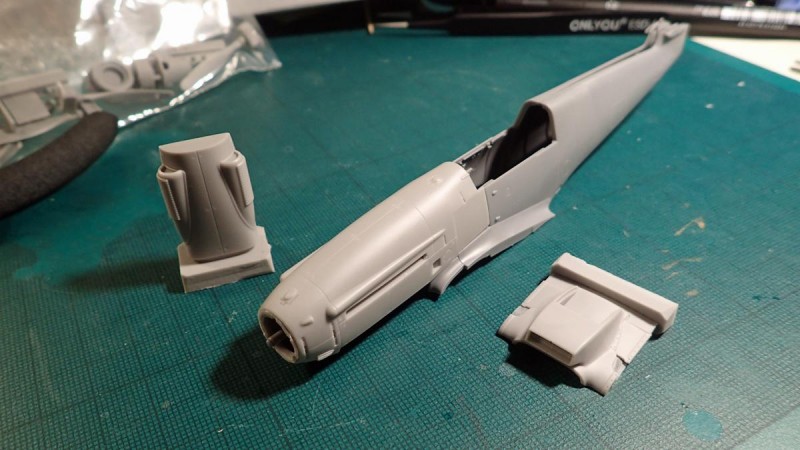


    Perfect fit. (Though you still have to modify the windscreen part of the kit)

    Another option to consider is the Zvezda range, but they do not have an G-2/G-4 available (yet). They have an F-2/F-4 offering, and that kit has been updated with a new tree to make an G-6.
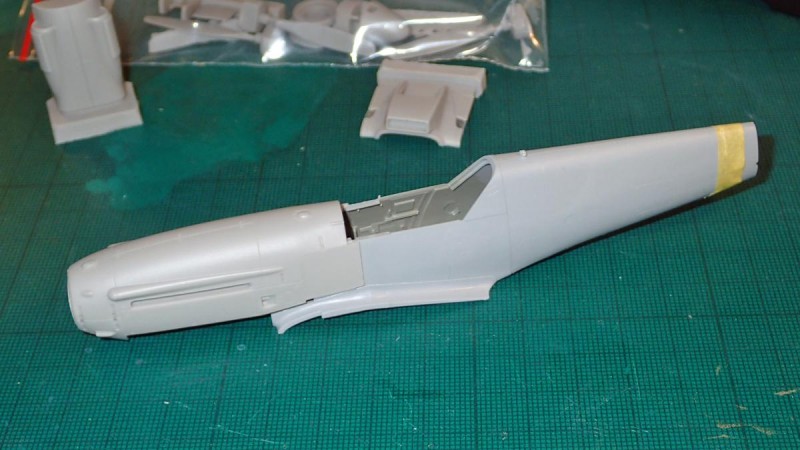


    The F-2/F-4 fuselage has the advantage of a separate tail – more on that later.

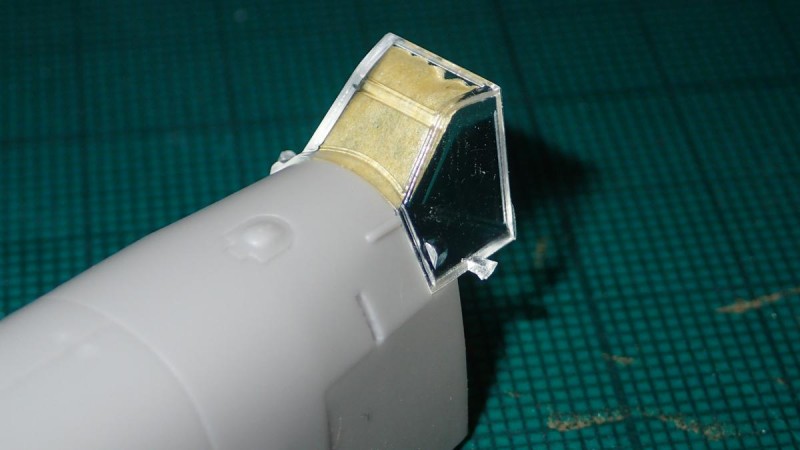
    The fit of the windscreen is close, but needs work
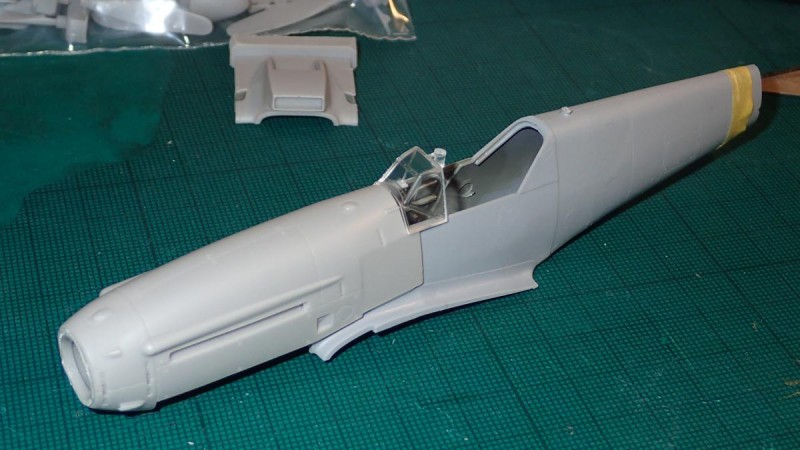


    One way to get around that, will be to modify the resin, as the area in front of the screen in the kit is a separate item.

    So far that leaves three kits that may be used. The Eduard Bf-109 G-2/G-4 kit is also an option, but that needs major surgery – I will check that in a later post (have so far just held the windscreen against the resin – very bad fit!

    next up I shall be addressing other issues with making a correct Ha-1109 – your thoughts and comments are encouraged

  • Profile Photo
    Don Mk1a said 4 years, 9 months ago:

    Good luck, Erik! Actually, having seen your building skills already, you won't need much luck at all. I'll be fascinated to follow this conversion in detail.

  • Profile Photo
    George R Blair Jr said 4 years, 9 months ago:

    I assume there is a reason you don't want to just go with the Tamiya kit? I don't do many conversions like this, but I have done a few with kits other than those the parts are designed for and I always have a bunch of problems. But with your skills the result will probably come out perfect. The only question is how much work it will be?

  • Profile Photo
    Erik Gjørup said 4 years, 9 months ago:

    Don, George - really, you are far too kind, but being good at pictures covers up lack of build-experience 🙂

    @plasteekgeek, it may take some time before progress on this one.

    @gblair, not really WANTING to use another kit, but the Tamiya is so well done it is almost a shame to change it, and this is one more step in the learning curve for me - I have not decided yet, but the Tamiya kit leads the contest at the moment, just checking options here - thank you for commenting on this, I appreciate it!

  • Profile Photo
    Pedro L. Rocha said 4 years, 9 months ago:

    Erik, I’ll be following this build with keen interest. I had the impression this resin conversion was fit for Eduard 109, which it seems not to be. Tamiya will be a fantastic but expensive base to work. Eduard would be a cheaper base no doubt

  • Profile Photo
    Erik Gjørup said 4 years, 9 months ago:

    The other end

    One of the reasons that I consider my options is the fact that the engine runs the other way!

    And with the engine running opposite to the DB, the vertical stabilizer has to be corrected! These high-powered propeller equipped planes has quite a bit of torque from the propeller, and to keep it straight on take-off the 109 has the stabilizer offset. Not much I know, but enough for the kits to incorporate it.

    These pictures are of a Zvezda G-6 - with the F-2/F-4 thrown in for comparison;


    It is a bit hard to see, but with the left side hollowed, it is thicker, and thus canted to the left.

    The root of the tailplane also exhibits a difference;


    Not much, but it is there.

    Now – is that too much to incorporate? Will anyone notice? (apart from the “I know it is there”-factor often found in details on a model you made)

    As for the choice of base-kit, Pedro has a point in his comment above. All your comments will be taken into consideration – as I said, this is a long-term project.

    Your comments are welcome, no matter what!

  • Profile Photo
    Pedro L. Rocha said 4 years, 9 months ago:

    Having built those 3 brands, my opinion about Zvezda kit is a good one, though I rank it bronze medal in the podium. Perhaps the most demanding as far as assembly, very accurate but the plastic and its surface sharpness is a bit inconsistent at parts. It also has the price advantage vs Tamiya. Question for you Erik is how good do SBS parts fit that kit?

  • Profile Photo
    Erik Gjørup said 4 years, 9 months ago:

    Pedro - check the first pictures in this topic - they have the Zvezda fuselage. The trim there will be the small square panel on each side (I think I would trim the resin to keep the cockpit), and then I would probably do some surgery to the zvezda topcover in front of the windscreen to move the SBS bulge over. That may overcome the fit-issue with the windscreen, and if not, is easier to fit with filler etc., and I have heard that resin is bendable by hot water if need be.

    I have a few other projects going before this one gets going for real (fingers itching though - would be great to have a moviestar next to my girlfriends F-4 of Hans-Joachim Marseille)

    Thanx for watching @holzhamer

  • Profile Photo
    Erik Gjørup said 4 years ago:

    9 months has passed since I last had this one out of the box. During this time I have come to the conclusion that it will have to be the new Tamiya kit as the conversion is designed around that one. The plastic has been washed, and a "build-box" has been freed up. I'm in other words out of excuses, and will have to start this one soon. Stay tuned!

  • Profile Photo
    Greg Kittinger said 4 years ago:

    Man, you are one for chewing through 109 kits! Especially in that you often mash several of them together 🙂 . Always a fun ride though!

  • Profile Photo
    Erik Gjørup said 4 years ago:

    I aim to please @gkittinger, I aim to please. Thank you for the most kind comment - I appreciate it!

  • Profile Photo
    Spiros Pendedekas said 4 years ago:

    Hi Erik @airbum! Just came across this build. Have to agree with Greg @gkittinger: you are the 109 man! I love your affection to research and implementation for this model (and your others too!). Eagerly waiting to see it proceeding. As for the fin offset, I think that if you leave-as-is, "a many will see, a mere - if any-(penlight police) will notice".

    So up to you, win-win guaranteed.

    All the best!

  • Profile Photo
    George R Blair Jr said 4 years ago:

    Hi, Erik @airbum. I agree with Spiros on the tail offset. This seems like high-risk to the model for very little payoff. You would know the off-set is missing, but I doubt anyone else would. If you plan to enter it in contests then perhaps you could consider doing it to appease the "rivet counters".

  • Profile Photo
    Erik Gjørup said 4 years ago:

    Thanks @fiveten and @gblair - will take your comments into consideration. The jury is still out though, as it is gonne be the new Tamiya kit it is rather costly and I think that if I am able, I have to get it right, but as you say, who will notice?

  • Profile Photo
    Erik Gjørup said 3 years, 10 months ago:

    Tamiya it is

    I take the easy route and go with the Tamiya kit

    That makes it easier to fit everything, and as it is my first major resin surgery, it will be valuable experience.

    I cleaned up some of the resin-parts to start trimming them and some testfitting took place. I used a knife for some parts to avoid dust, and had it all on a wet tissue.


    It is said that resin-dust is very harmful, and should be avoided. I made the parts wet, then a saw was brought into play, making sure it too was wet. All the paper and resin remains were then packed in a tight plastic bag, and I had a dustfree table.

    I cut off the propellershaft and engine mount of the styrene, and testfitted the initial results.


    It all looks to be fitting, and just needs some trimming now. I only just discovered that I must have broken the side of the inner left side of the resin-part, so there will be some surgery there, but it is a smooth plate, so that should be possible.

    now I have to figure out how to make a proper instrument panel – it is very different from the 109G – more like a 109K, and some more AM etch has been ordered for that.