Combo build: Ilyushin Il-2 Stormovik (Accurate Miniatures / Revell in 1/48 and Tamiya in 1/72)

Started by John vd Biggelaar · 680 · 1 year ago · Accurate Miniatures, Il-2, Ilyushin, Revell, Stormovik
  • Profile Photo
    Sebastijan Videc said 2 years, 4 months ago:

    Thanky you very much, Spiros! Unfortunately the progress will be slow from now on as I'll start with riveting.

  • Profile Photo
    John vd Biggelaar said 2 years, 4 months ago:

    This is excellent modelling, Sebastijan @inflames
    So much detailing on this interior, especially for 1/72 scaling.
    Looks great.

  • Profile Photo
    John vd Biggelaar said 2 years, 4 months ago:

    After mounting the front and rear canopy pieces, I applied the interior grey color.


    After that the first round of primer was applied, this, like most of the time, revealed some areas that require a touch up.
    Especially where the wheel covers are mounted to the upper wings.

  • Profile Photo
    Spiros Pendedekas said 2 years, 4 months ago:

    Nice progress, my friend @johnb! Looking great already, will look even better after your corrections!

  • Profile Photo
    Eric Berg said 2 years, 4 months ago:

    Man, it’s hard to keep up with all the daily progress you guys make, but I have to say it’s all looking impressive! It already is the ultimate Ilyushin Stormovik tutorial!

  • Profile Photo
    George R Blair Jr said 2 years, 4 months ago:

    Looks great, John (@johnb). I think we will both cross the finish line at the same time. This has really be a great small group build. :o)

  • Profile Photo
    George R Blair Jr said 2 years, 4 months ago:

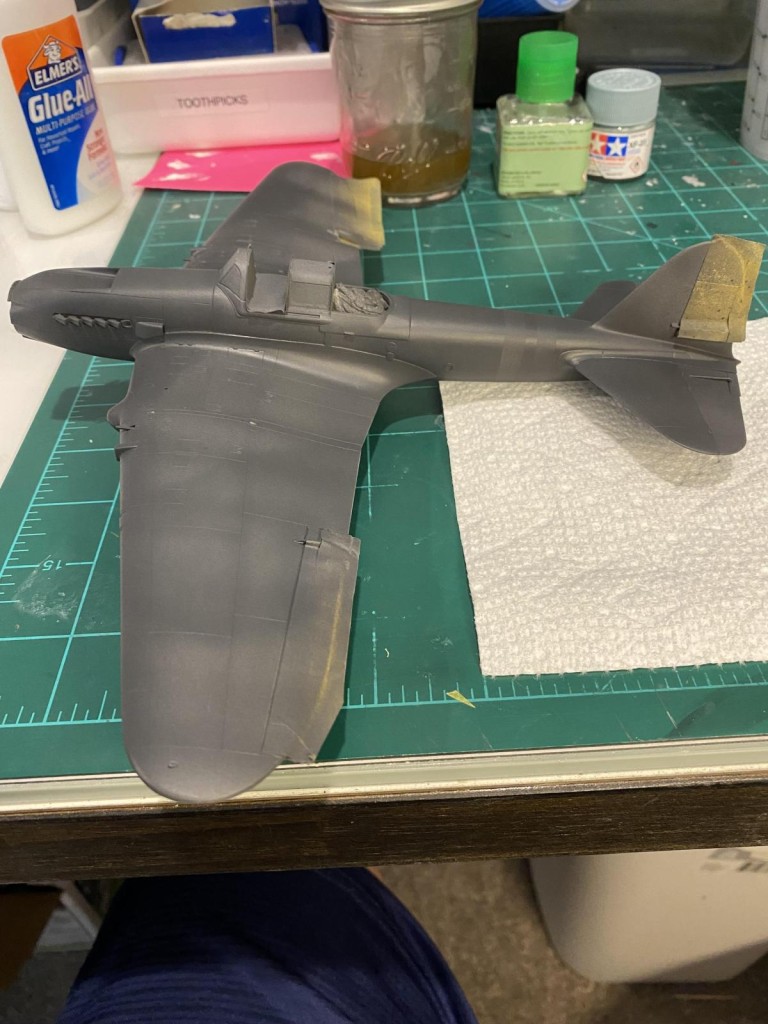
    Time to add the black over-spray. Thanks to my lack of planning, I had to replace the masks on the rudder and elevators, which I had foolishly removed too early. This was actually another mistake, more on this later.

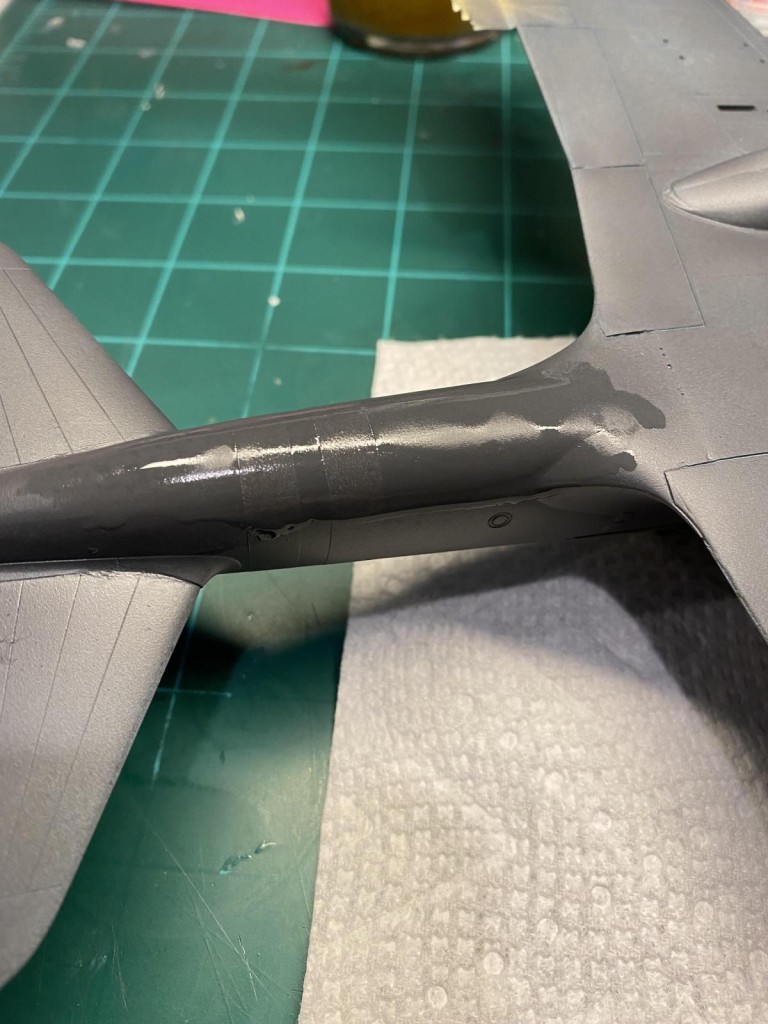
    I wanted to use chipping fluid to get the effects on the rear fuselage. My first step was to spray a layer of clear gloss on the areas that would later receive chipping fluid. This protects the underlying paint from possible damage that could occur when you are chipping.

    You want to do the chipping fluid and the final paint in one sitting. When the clear gloss had dried, I loaded up the airbrush and sprayed the chipping fluid in the desired areas. You want to add the paint layer as soon as the fluid is dry. It is harder to use if you let it cure too long. I am sure you already know this, but the chipping process only works with acrylic paint.

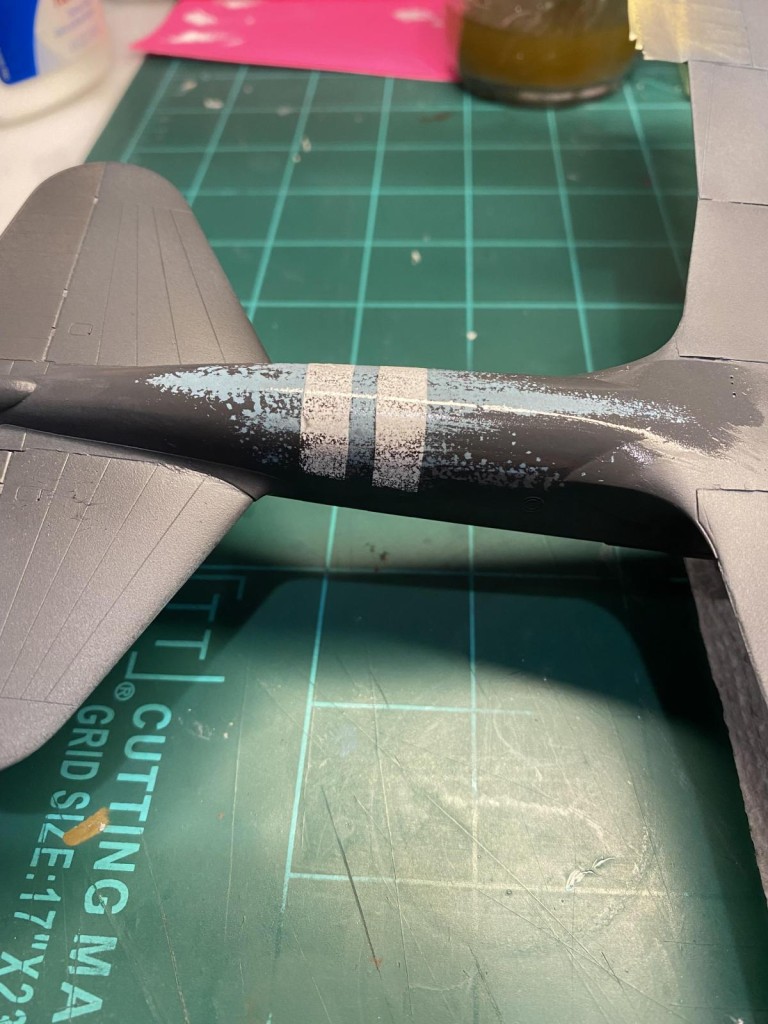
    At this point, I then plunged into the black over-spray. The over-spray on the actual aircraft has variously been described as either black or dark gray. I voted for a really dark gray created by adding some Tamiya dark gray to some Tamiya black. This layer has been described as faded to the point that you can see the camo and azur blue beneath the black. I wanted to build the layer slowly so I could control the opacity (is that a word?). I thinned the paint until it was about 80% X20 Thinner, and then started spraying. My airbrush was having fits for some reason, so I figure a complete tear-down and cleaning is in its future. I was sitting back admiring the translucent black when I realized I had left the masking on the ailerons which should be painted black along with the rest of the plane. Only the rudder should still be masked at this point. So, more to fix tomorrow.


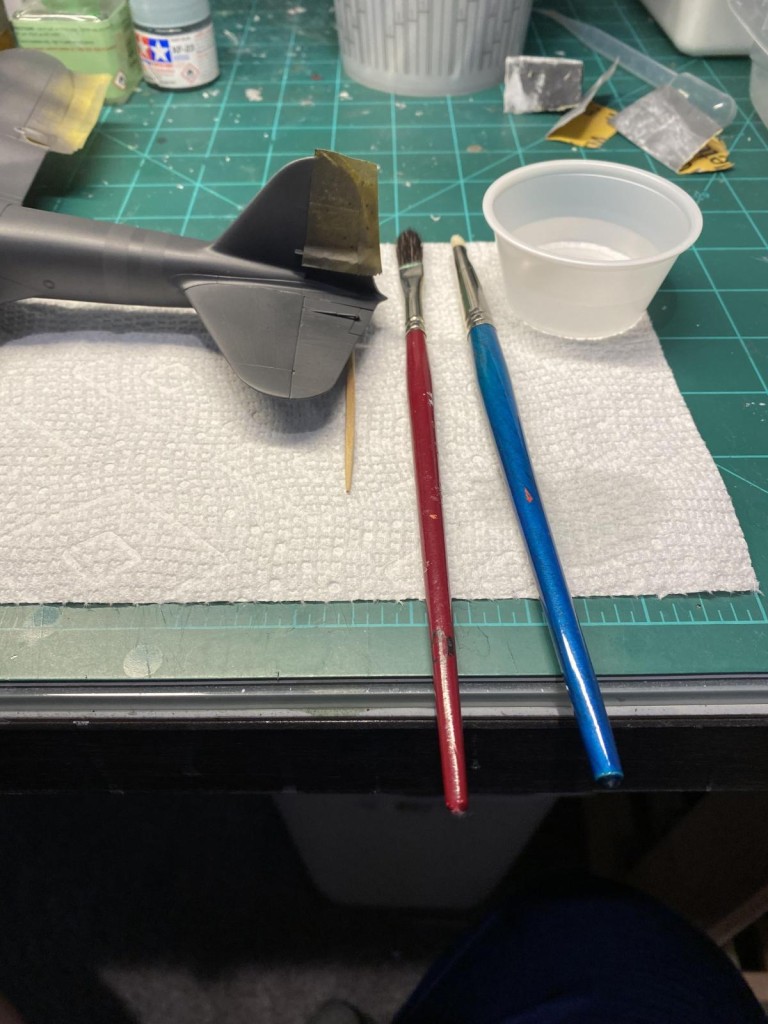
    The chipping process is fairly easy. The only tools needed are some water, a soft brush to apply the water, a stiff brush to scrub the paint, and a toothpick. You first activate the chipping fluid layer by brushing water over the area. I then take a toothpick and lightly chip the paint where I want the larger chips to appear. Then it is a simple matter to start scrubbing the area with a stiff brush to start pulling the paint up. When you are satisfied with the effect, simply dry the area with a paper towel and let the paint cure overnight.


    As I said earlier, only the rudder should have been masked when I was painting the black layer. I neglected to remove the tape from the ailerons, so I will need to fix that tomorrow. One step forward, two steps back. :o)

  • Profile Photo
    Spiros Pendedekas said 2 years, 4 months ago:

    Despite your mini adventures, your Stormovik looks really cool, my friend @gblair!
    Looking forward to your progress!

  • Profile Photo
    John vd Biggelaar said 2 years, 4 months ago:

    @fiveten, @gblair, @eb801, thanks a lot. With the upcoming holiday in Greece, I'm not expecting mine to be finished in short notice.

  • Profile Photo
    John vd Biggelaar said 2 years, 4 months ago:

    Although you are also taking little steps back from time to time, the entire progress of your Stormovik looks amazing, George @gblair
    The chipping effect looks perfect.

  • Profile Photo
    George R Blair Jr said 2 years, 4 months ago:

    Thanks, Spiros (@fiveten) and John (@johnb). I plan some touch-up today and then decals. I want to get this one done before it tramples my mojo and move on to my next model. Cheers.

  • Profile Photo
    John vd Biggelaar said 2 years, 4 months ago:

    @gblair, you are really picking up a fast pace for this one, George.
    Looking forward to the decals being applied.

  • Profile Photo
    George R Blair Jr said 2 years, 4 months ago:

    I am playing Grandpa today and babysitting my two-year old granddaughter, so I was able to get just a little bit done. I painted the ailerons that I had inadvertently left masked while I was previously painting the black/gray layer, and then I refined the exposed white stripes so they aren't quite so "spotty". I sprayed a layer of clear gloss in preparation for the decals, and then started applying the decals when the clear was dry. Not many decals to apply, so things have moved fairly quickly. These Aeromaster decals are about 25 years old, but really performed well using MicroSol/Set. Several of the decals are in two parts, where one part must be applied first, and then the second part is applied later. I know why they made them that way, but it means that the 2nd part of the decal must be placed with great precision. "Great precision" was never a part of my onboard toolkit, and even more so now that I have somehow leaped into my elder years. Anyway, part one of the decals is on the plane and drying, part two will follow soon. Cheers.

    3 attached images. Click to enlarge.

  • Profile Photo
    Spiros Pendedekas said 2 years, 4 months ago:

    Very nice progress, my friend @gblair! Decals look good on. Camo looks VERY realistic.

  • Profile Photo
    John vd Biggelaar said 2 years, 4 months ago:

    Very nice progress today, George @gblair
    To me it looks like your precision "toolkit" still works very well.
    The faded camouflage does indeed look superb.