F-111F Aardvark Desert Storm USAF 1991

Started by Chuck A. Villanueva · 69 · 4 years ago
  • Profile Photo
    Chuck A. Villanueva said 5 years, 4 months ago:

    This step I will install the nose avionics bay cover. This attaches between the cockpit and nose cone.


    The part fits perfect and set it with quick drying cement.

    Next up is to attached the tail cone which will be located between the exhaust nozzles.

    And that was a quick update for today. More to follow.

  • Profile Photo
    Chuck A. Villanueva said 5 years, 4 months ago:

    Keeping in the 72nd scale theme.


    The clear canopy is removed and the upper center console is carefully installed.

    Once attached to the cockpit, I use Tamiya tape to mask it off.

    Next to paint the nose Med Grey, this particular F-111 had a grey nose not the typical black.  

    Next up is to paint the canopy frames black.

    Then to mask off the nose and to prepare to start painting the rest of the airframe.

    Next time up. Airbrush the black lower surfaces. more to follow.

  • Profile Photo
    Chuck A. Villanueva said 5 years, 3 months ago:

    Finally getting back to finishing this F-111. With the nose and canopy masked off. Time to paint the lower surfaces Black. Using Tamiya Flat Black.


    With the black still in the bottle, I then start to pre-shade the upper surfaces.

    Now I will be ready to paint the 3 color upper SEA camo scheme. Thats next to follow.

  • Profile Photo
    Chuck A. Villanueva said 5 years, 2 months ago:

    Did I ever say that I love to paint camo? Well i do, and using Gunze Acrylics I will start the SEA scheme used on the F-111.


    Starting with Tan FS30219 applied first in the areas this color appears around the airframe. First masking off the lower black sections for a sharp edge.

    Then apply the color around and on the of the aircraft.

    Then painting the rudder and stabs.

    Next freehanding the 2nd color Med Green FS34012, filling in the areas that this color will appear feathered into the tan.

    Then finally again the stabs.

    Now finally the 3rd color, Dk Green FS34079

    Whats nice is that Gunze really flows very well, so it was an enjoyable session without stopping to unclog the tip.

    After unmasking the black edge, to take a peek for any bleeding, non found but some issues on the black to go over.

    Unwrapped the nose and again, nice finish, no bleed through, love that Tamiya tape. And no peeling of paint either.

    Now time to mask the tip of the rudder, and paint the squadron ID Blue. I used RLM 24 Blue Polly scale acrylic

    Next the wing ft edge dialectric panels are masked off and painted Tamiya Flat Black.

    Now the detail painting is completed. Time to clear coat with Future. More to follow.

  • Profile Photo
    George R Blair Jr said 5 years, 2 months ago:

    I am always amazed by the work done by someone who is proficient and neat with an airbrush. If I had used that small amount of masking tape to paint the blue on the tail I would have had to repaint the camo due to the overspray. Really good job.

  • Profile Photo
    Chuck A. Villanueva said 5 years, 2 months ago:

    Thanks George, I use a Paasche "H" single action airbrush, the type I have been using since I was 16 years old. Though this is not the original one, this is the 3rd one. I have tried others, like the Paasche VL double action, just never got comfortable with it. Have had a Badger as well. But I love my trusty simple to use "H" model, #1 tip and with low setting of air just lightly went over the top of the rudder for the blue. Trust me not always perfect. This one was easy for me knowing how and when to lay the paint. Even after all these years, i am still learning. Still a novice when it comes to NMF finishes. Only have 2 under my belt to date.

  • Profile Photo
    Chuck A. Villanueva said 5 years, 1 month ago:

    After applying the glossy clear coat using Future(now Pledge). Let it sit over night. Now time to apply the decals.

    This will be an F-111 as it appeared in Feb 1991 in the Gulf War.

    I will be using a set from Wolf Pack in 72nd scale. This will be the first I will be using WolfPack decals for the first time.

    They seemed a bit thick though glossy coming off the paper. They do slide ok and not stick too soon when first applied. Though the clear film around the subject is a bit large and need to be trimmed. Which was the case on the decals applied on the nose gear doors.

    The panel lines are subtle in this scale, yet the decals did require a bit of coaxing into them without silvering.

    Unlike most aircraft of this generation, not many decals to apply and not much in stenciling looking at a few other F-111's in theatre.

    Didn't care much for the performance of these decals. It took a few applications of strong Solvaset to get these to hunker down. Yet in the end I still suffered some silvering despite going over with a knife to try to eliminate that result.

    Not very happy with that outcome. Still the silvering is not that noticeable. But still they are there.

    [

    Also decaled the GBU_10's These are from the Hasegawa bomb set II.

    Next to shoot the satin finish coat. More to follow

  • Profile Photo
    Scott L Shank said 5 years, 1 month ago:

    Hi Chuck, I just found this WIP today. Beautiful work here, and I appreciate your comments about painting . I re-entered the hobby a couple years back and finally spent the money for an airbrush and Co2(?) tank. I'm learning VERY slowly with a double-action Badger, but having fun with every mistake... after the crying stops. Anyways, really enjoying this thread, and eyeballing my Acad FB-111 in the part-done pile. Thanks for some inspiration, and as a PS, you may check orientation of those fuselage strakes, the may be in retreat... No criticism, just trying to be helpful.

    Cheers,

    Scott

  • Profile Photo
    George R Blair Jr said 5 years, 1 month ago:

    Hi Chuck: I have one of those dumb questions that I think everyone probably knows the answer to except me. It looks like you have painted the swing wings first and then attached them to the fuselage after it was built. All of the swing wing kits I have seen require the wings to be attached when you are building the fuselage. Does this kit allow you to attach the wings after building the fuselage, or did you do some magic that allows this?

  • Profile Photo
    Chuck A. Villanueva said 5 years, 1 month ago:

    Hi Scott, thanks I appreciate that, on the strakes are you talking about the lower ones under each side of the fuselage? I don't understand "retreat". But I am open to suggestion if they are off in angle or whatever the case may be? Looking at some images of an F-111. I don't see where they are off at. I hope you can elaborate as I don't quite what you mean by retreat? Trust me I would like to know.

    Hi George, yes the kit is designed so you can remove the wings during the assembly and if you want you don't have to cement them in after your done. As the fit here is very good. You also have the option to have them fully swept with all the flaps and slats closed. The wings on this build are permanently attached.

  • Profile Photo
    Scott L Shank said 5 years, 1 month ago:

    Hi Chuck. I believe the lower fuselage strakes are backwards... as we say, "As steel sharpens steel".

  • Profile Photo
    Chuck A. Villanueva said 5 years, 1 month ago:

    Yep they sure are, need to fix that.

  • Profile Photo
    Chuck A. Villanueva said 5 years, 1 month ago:

    For a 72nd scale kit, Hasegawa really provides a well detailed nose gear. Not just a 1 piece nose strut with molded on actuators and components. They are separate parts and nicely done. Not so complicated like the newer Trumpeter kits that even the struts you have to assemble.


    The nose strut and the 2 nose wheels. Tamiya Gloss White and Tamiya Rubber Tire Black.

    Next to install the forward nose gear wall, that also has the gear door actuators. And the strut retractor actuator.

    The forward wall installed into the nose wheel bay. Again nice fit into the well.

    The nose wheel strut assembly is installed into the back of the bay. Which also is the rear wall of the wheel well. Very good design and excellent point of contact that will last the lifetime of the model.

    Finally attach the strut retractor actuator to the strut and forward wall.

    Nose gear doors installed.

    Next up the main landing gear. More to follow.

  • Profile Photo
    Chuck A. Villanueva said 5 years ago:

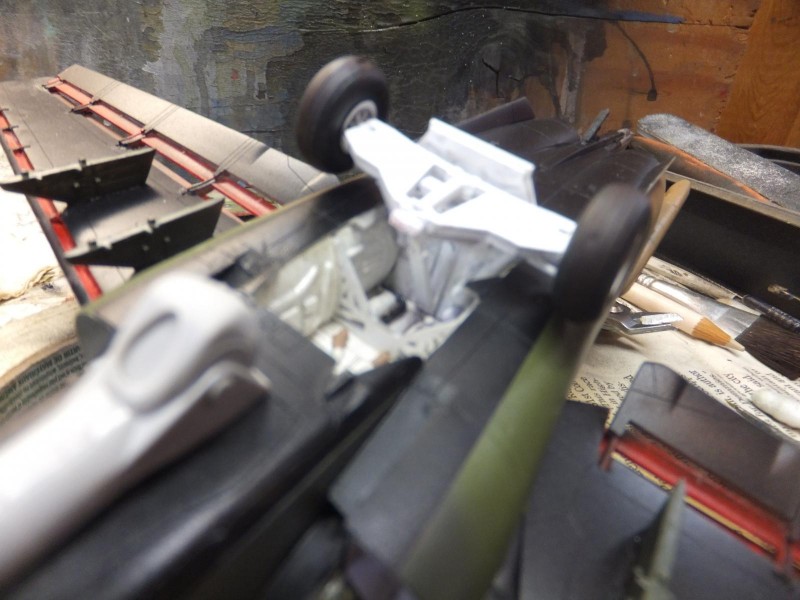
    The Aardvark has a very complicated main landing gear system. Hasegawa has replicated the system and their approach in assembling a very complicated multi component structure is excellent. Details in this scale is more than what Academy provides in 48th scale. When you first look at the steps in the construction, the arms, struts doors that are involved in assembling the main gear looks daunting at first. However what helps is that all the little bits and pieces fit as they should, which is to me the most important factor to the whole process.

    The first step build the main arms and actuators which attach to the main rear bulkhead of the gear bay.
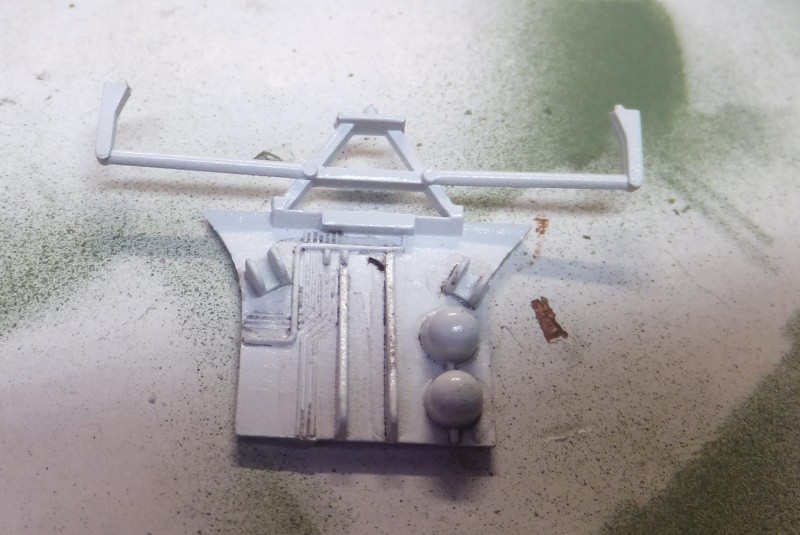
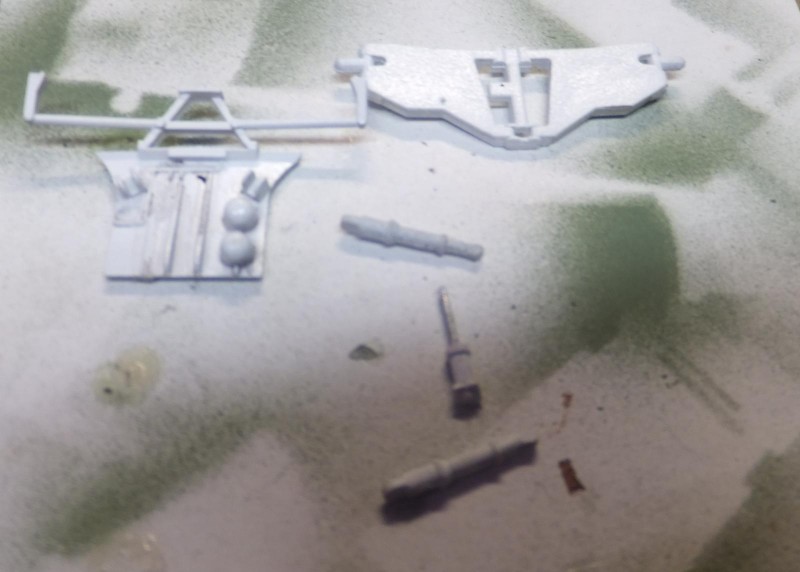
    A few bits are involved, for the first step. The most important step that set the foundation for the whole assy. By following the steps carefully it is not difficult and goes together quite easily. All the locating point for each part are as they should, not short, not long but precise locating pins in their place as pointed out in the directions.

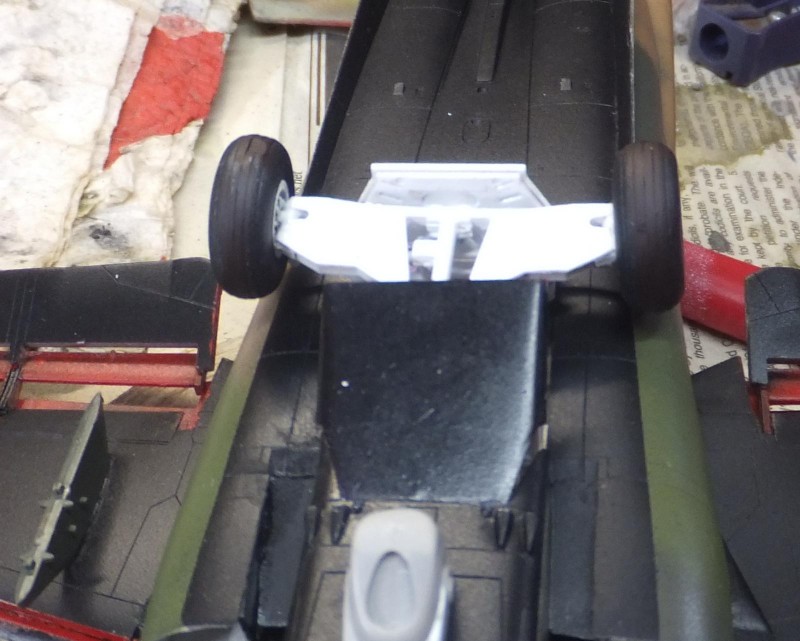
    Next up is attaching the wheels and doors with actuators.

    The layout of the wheels and associated components in completing the whole shabang.
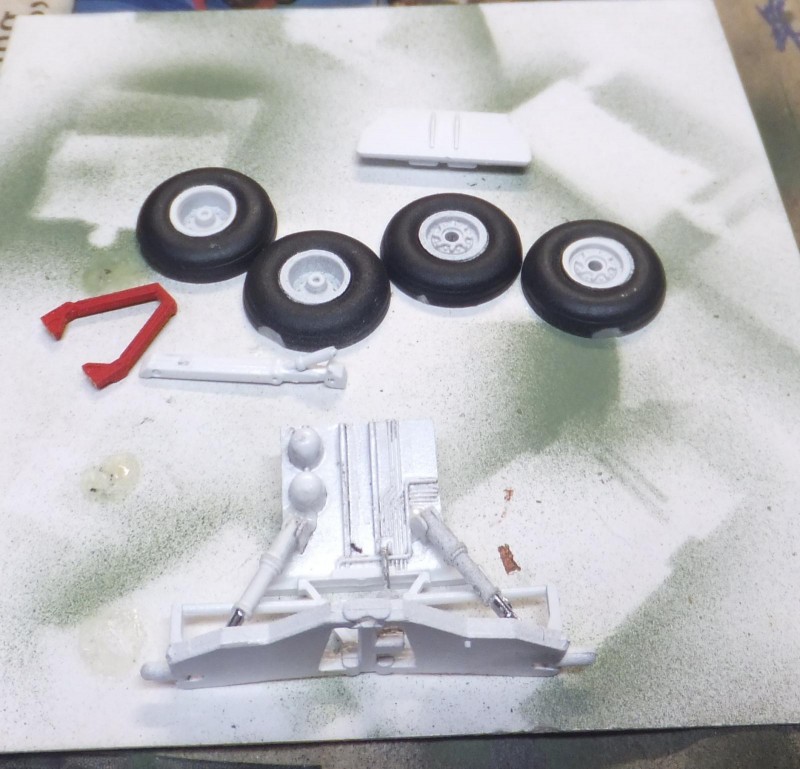
    The rear main gear door.

    The wheels are glossy white and Testors Rubber (the small bottle)

    The sub assy as it looks before step 2 of attaching the doors, actuators and wheels

    The assy now completed less the wheels.
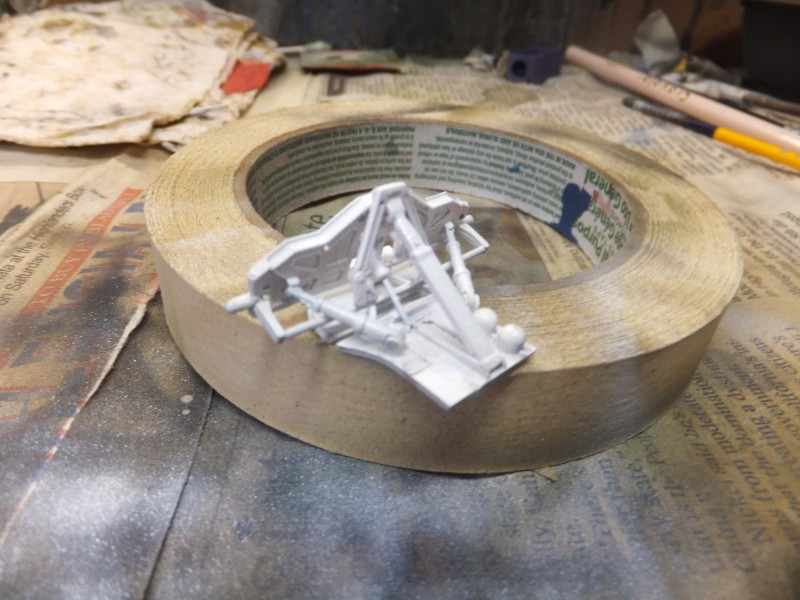
    Now the wheels are attached and is now ready to be installed into the airframe.

    The forward main gear door also serves as a dive brake during certain maneuvers. The inside of the door is MM Insignia Red Enamel as well as the door actuator.
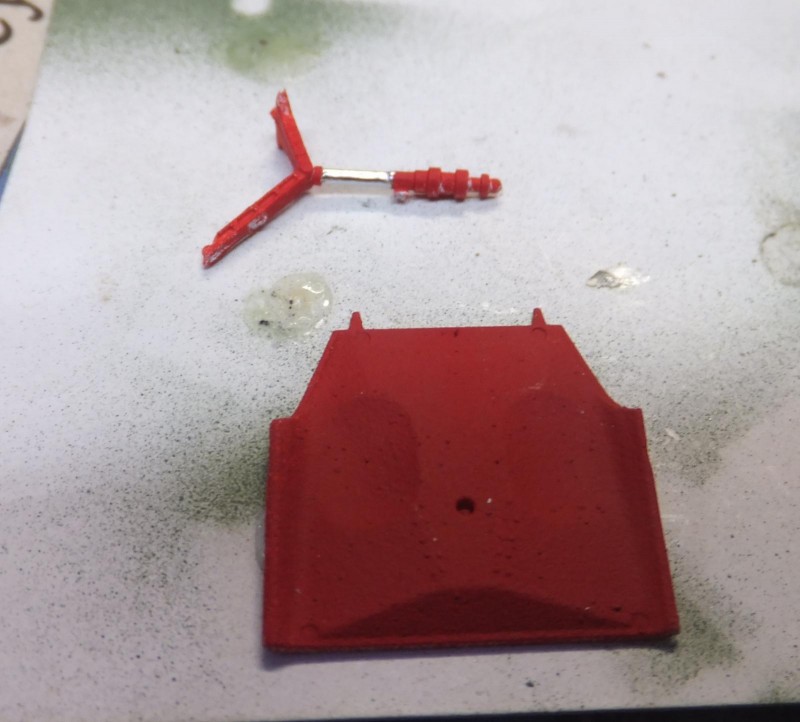
    Next to install the landing gear and dive brake door.

    Again Hasegawa has helped the process with a precise fit, very little chance of any misalignment, using the bulkhead as the main attachment point within the gear bay well. Also the forward door attachment point is excellent as well.

    Next while still working under the A/C is to attach the forward ID lamp in front of the nose gear bay.
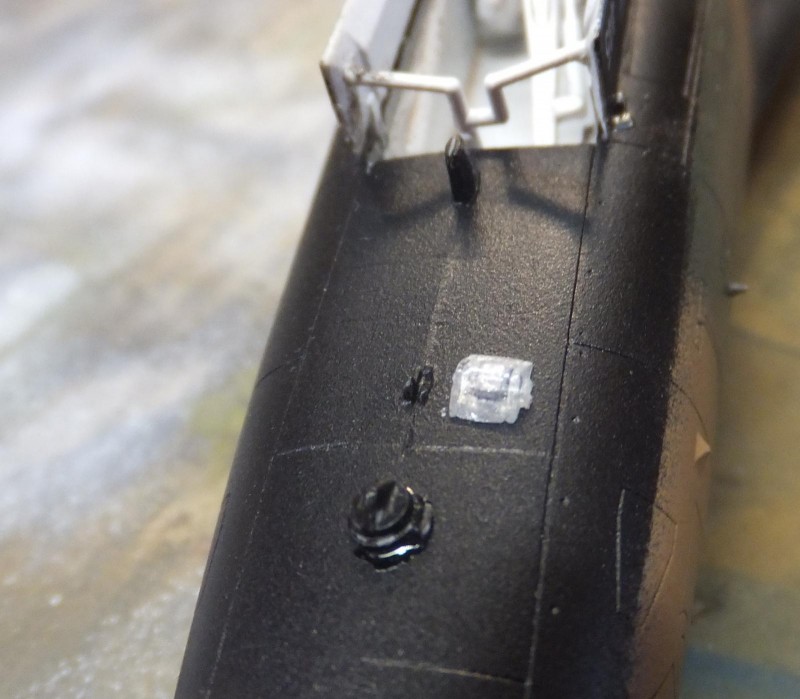
    Finally to assemble, paint and attach the Paveway pod. It will be in Olive Drab. Using Lifecolor Acrylic for this color. While in the airbrush i painted the Paveway GBU-10 bombs in this color as well. The pod glass is painted Tamiya Clear Blue with a chrome backing.
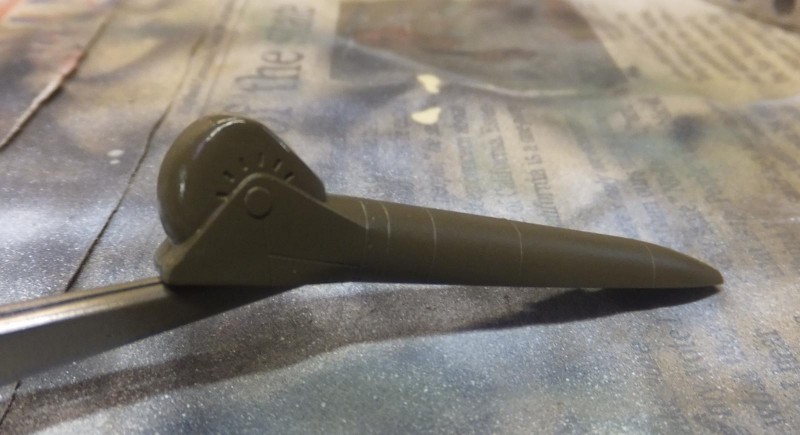
    Next up is to install the bombs and work on the detail bits on the upper airframe. More to follow.

    Happy Easter!

  • Profile Photo
    George R Blair Jr said 5 years ago:

    It's nice this relatively complex landing gear can be assembled, painted, and added after the fuselage is completed. Saves a lot of masking. Looking great!