Magic Factory F4U-1 Corsair x2, 'New Corsair on the Block'

Started by Harvey R. · 81 · 3 weeks ago · 1/48, Aviation, Corsair, F4U, Magic Factory, WWII
  • Profile Photo
    Harvey R. said 4 months ago:

    Evening folks, think it's time for another build thread on another Corsair. Or two. And if I'm building the new Magic Factory kit, we'll I suppose I'll need a Tamiya one nearby to compare it with...


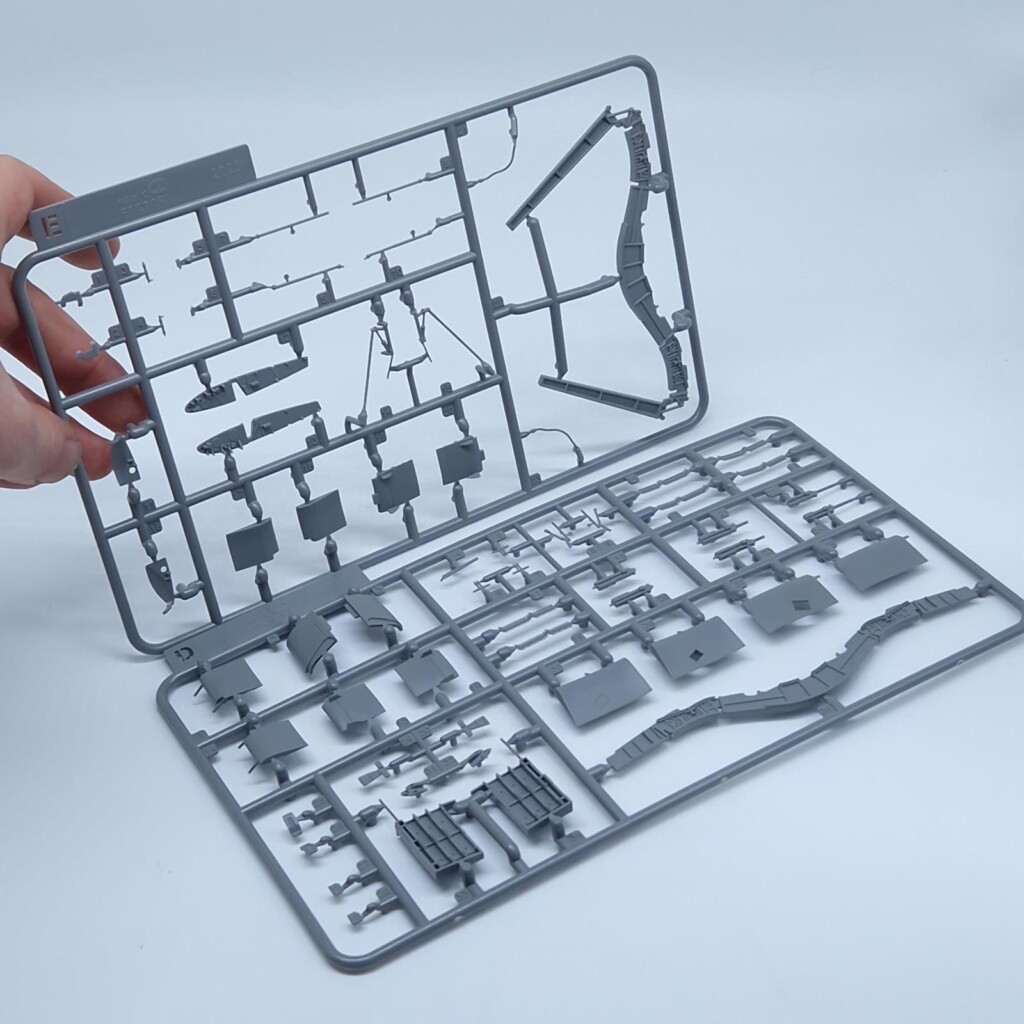
    Anyways I've had my eye on this Magic Factory kit for a while and after it being stuck in delivery limbo for the better part of 2 months it's finally here me to get my hands on. So what's in this big box?

    Well, two Corsairs and plenty of parts between them. One builds up as a F4U-1A, the other as an F4U-2 and with minimal changes you can build that up as an F4U-1 which is how mine will be done as.

    Looking at the parts and the instructions, it appears MF went and took a page out of the Tamiya 1/32nd book. It definitely appears to build more akin to a downscaled version of the Tamiya /32nd, rather than a more detailed version of the Tamiya /48, which isn't a bad thing.

    It goes without saying but the kit is more detailed than the Tamiya 1/48, but you'd expect that from a kit from 2023 compared to one from 1996. Interior detail is very nice, wheel wells look simple but good, the engine is at a glance very detailed (more on that later), the cockpit is a great improvement. Exterior details are also improved, I find the panel line work to be a bit more fine and some rivets are included though it's worth noting it's probably about 1/3rd of the amount of rivets needed. This can serve as a good base to do your own riveting, or just a good way to do chipping and weathering even if its not 100% there.

    Also worth noting at a glance that the kit has flaps with the post-war foot step in them, despite not being present on the aircraft depicted. There are parts where the flap has the cutout, and parts where the cutout is done as a recessed detail (which isn't correct either). It's also worth noting that the F4U-2 has a more accurate radome than the Tamiya depiction, which I'll likely paint up and put on my old F4U-2 model at some point during this build.

    The kit comes with 4 marking options but none appeal to me, largely due to having done 2 of the options already. I'm thinking the F4U-1A will end up as 'Ole 122', a Corsair so good looking it ended up on the box art for the 1/48 and 1/32 Tamiya kits. The birdcage may be Ken Walsh's, but the photos of it aren't ideal however my plan to do something with a bit more lively nose art won't work due to the the lack of decal and masking options.

    First Steps


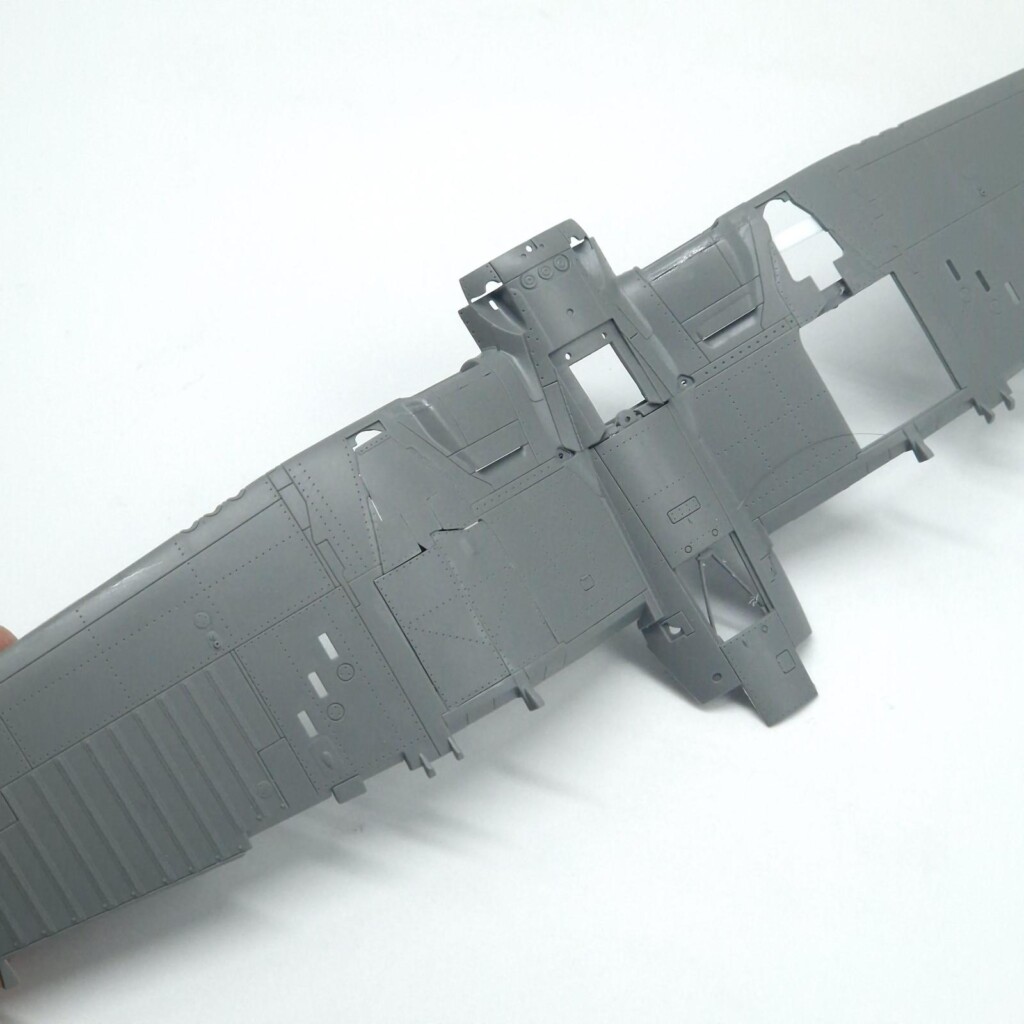
    First step for me was to work on the wing, the kit comes with one wing folded and one wing unfolded, but as as Tom Cleaver showed in his build you can easily do this as two unfolded wings if you prefer which is what I did here.

    I must say the wing definitely goes together nice, much better than the Tamiya one does, and once again mimicking what can be seen in the Tamiya 32nd. The gun bays are not needed at all so the panels are glued in place and these internals are left out. I modified one for wheels up, and the parts fit well with minimal issue when converting to building this way. Some styrene was used to help act as a brace to improve gluing points, and a little bit of filler used for any outlining gaps.

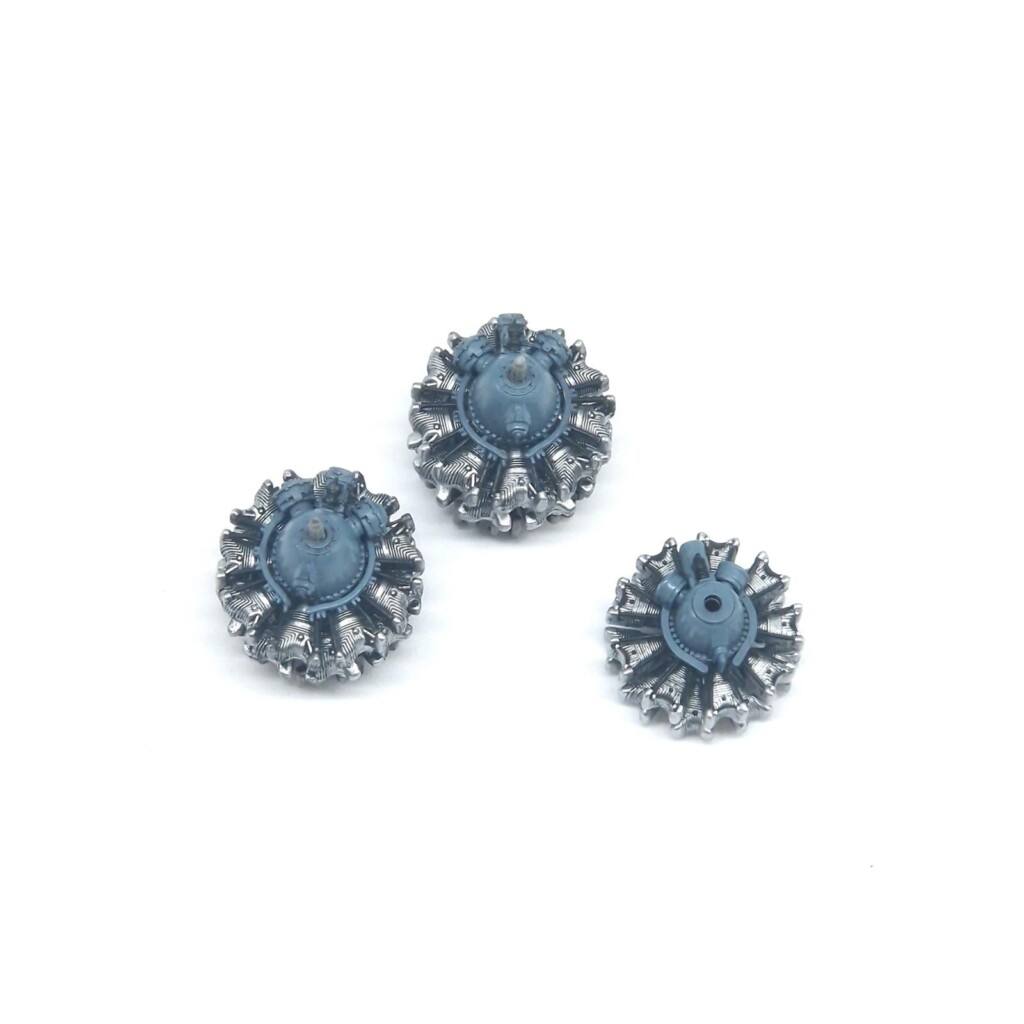
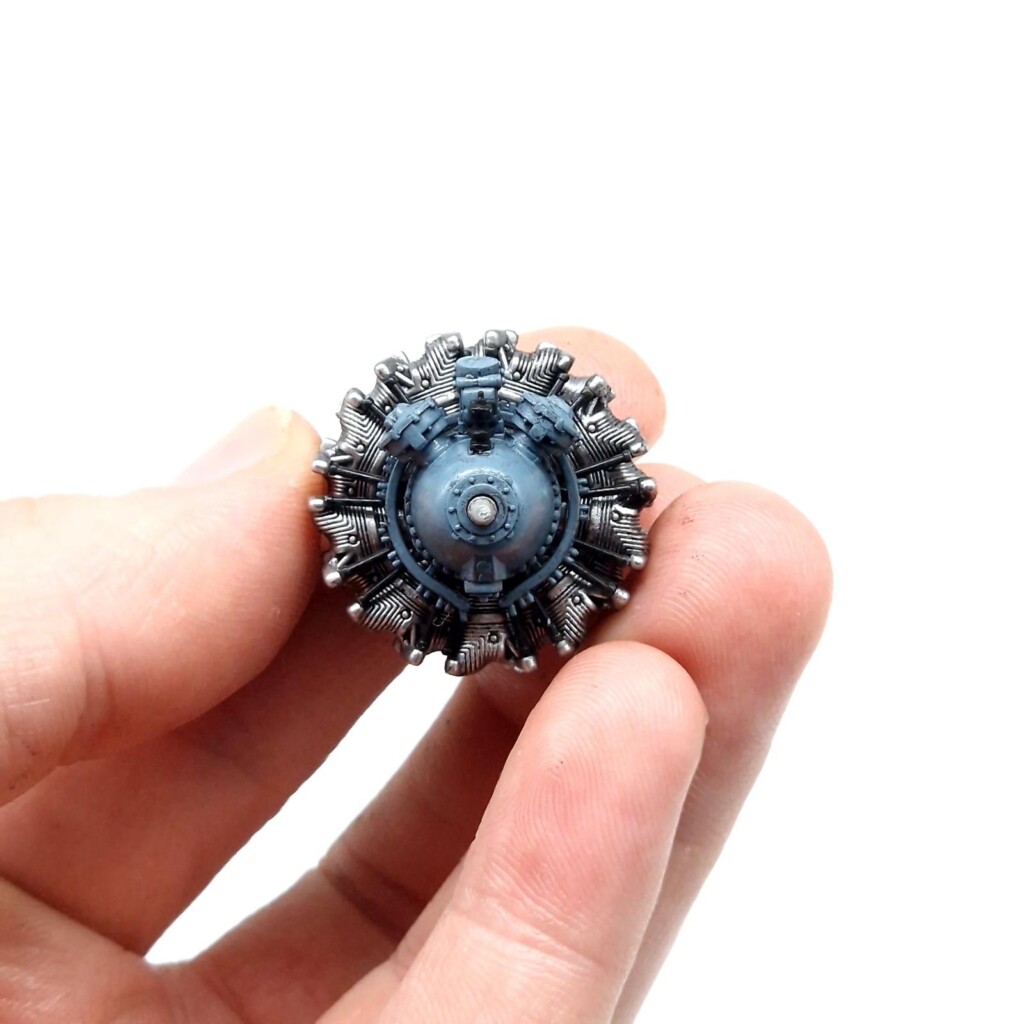
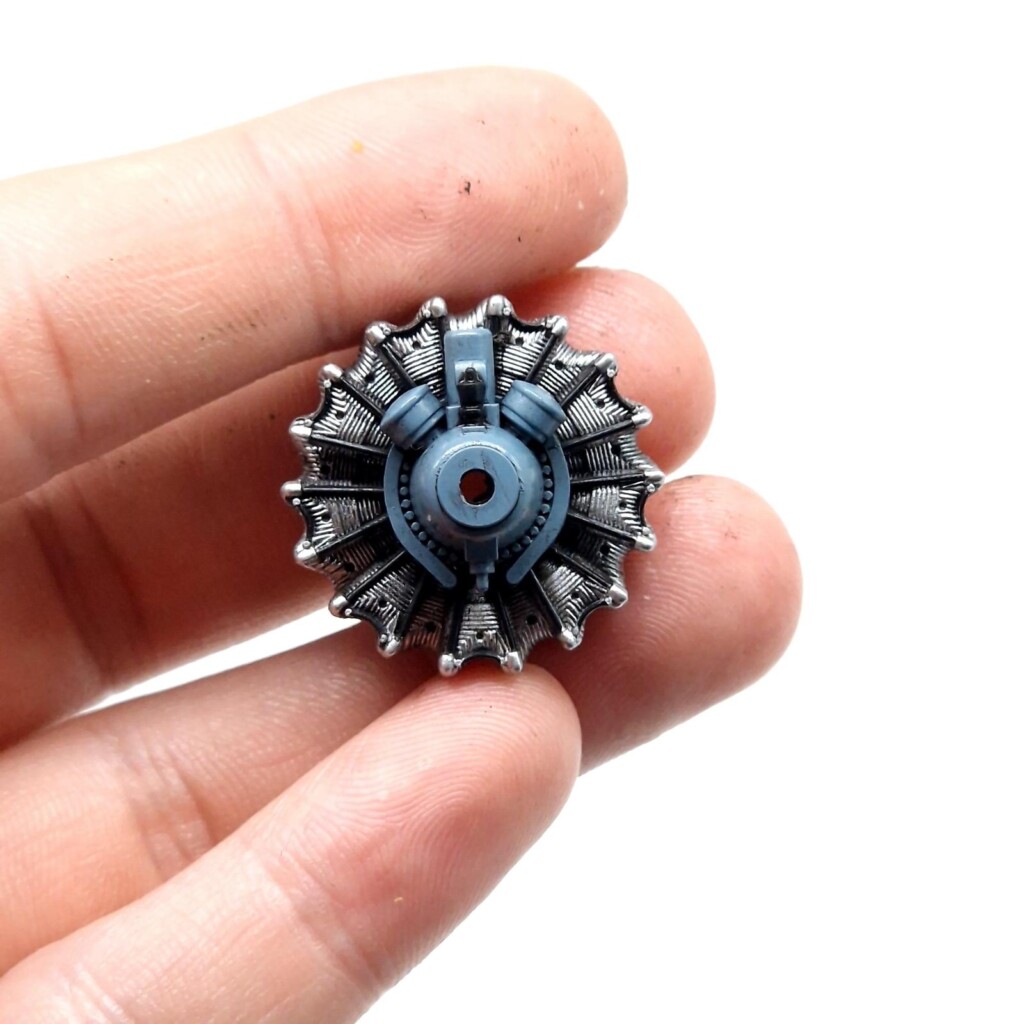
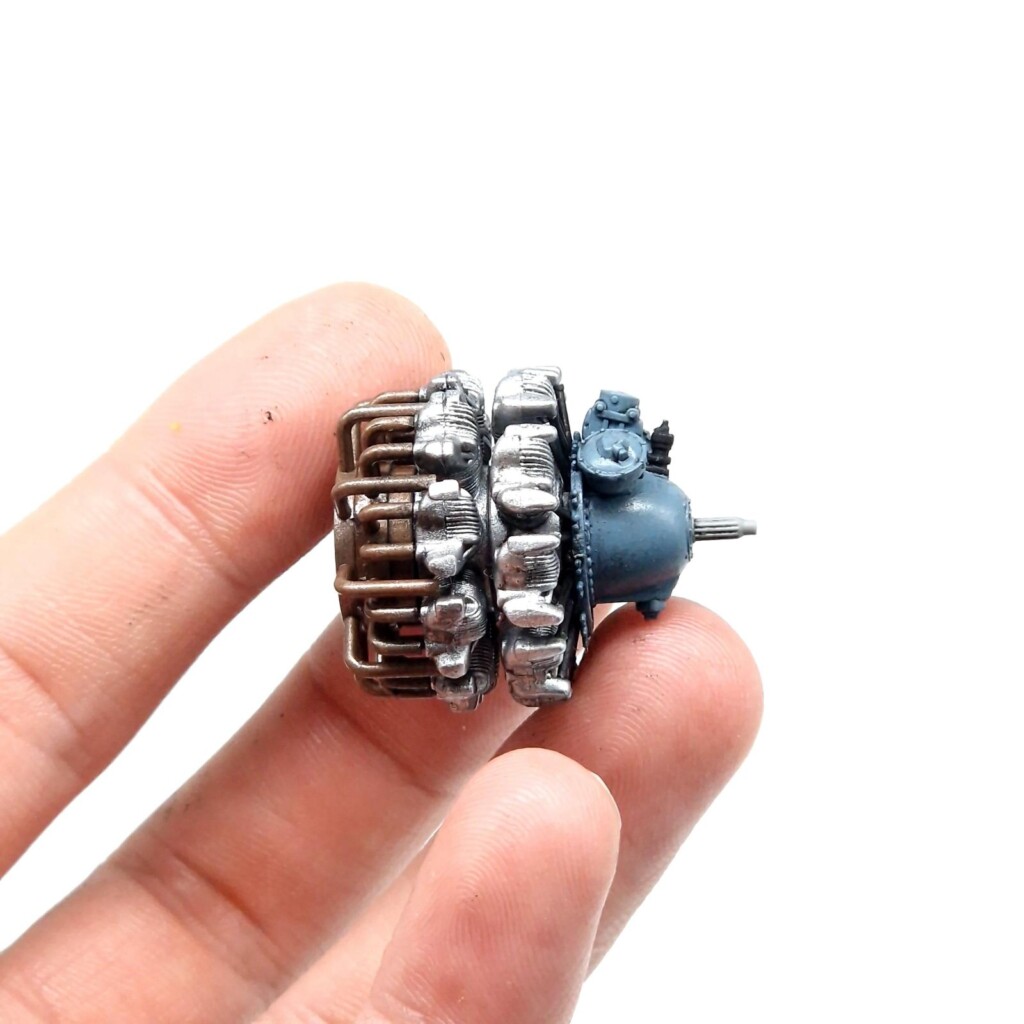
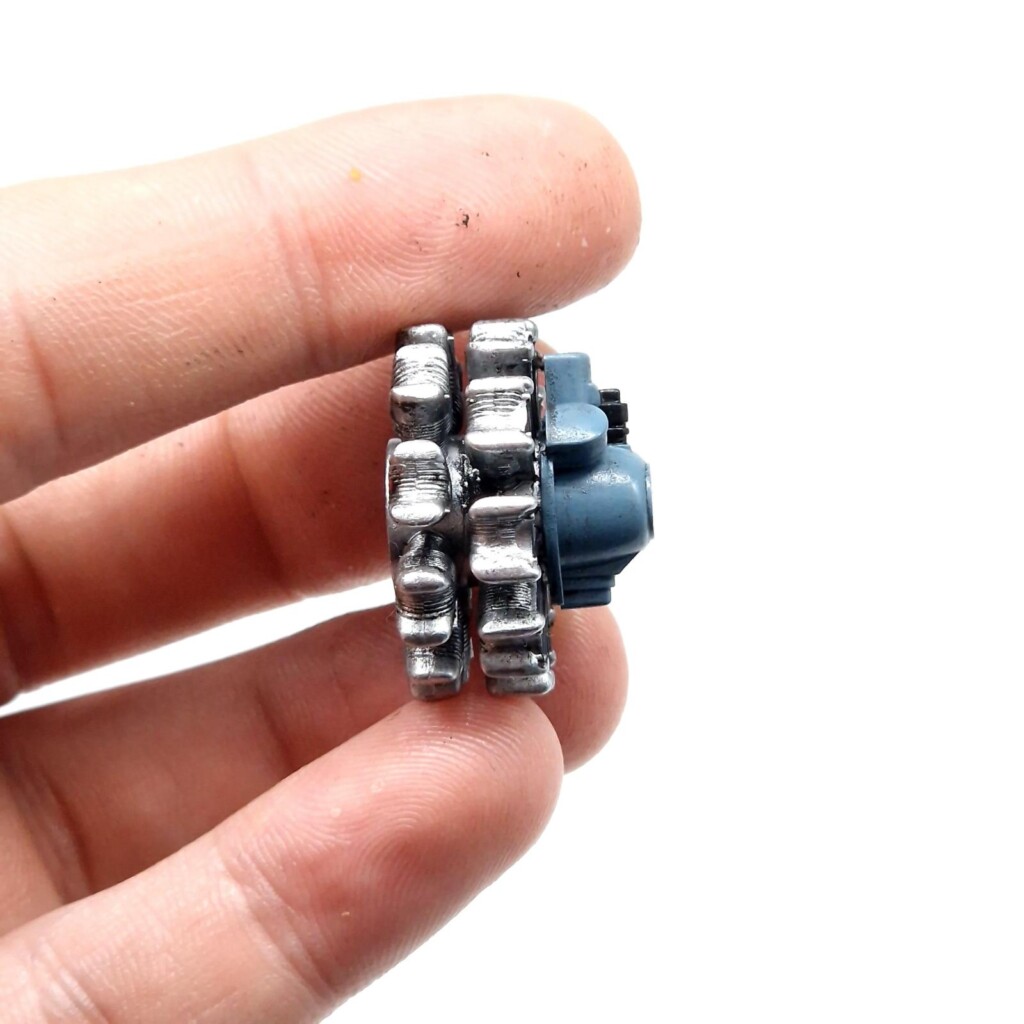
    With this hurdle done and dusted, and much more simple than expected, I moved onto the engine. The engine is far more detailed than the Tamiya especially with the crank case and it's features. That being said, the cylinder rows are divided into a front and rear half and the join here wasn't very good. While I'm not too fused since I'll be closing these away, it's worth noting that while you could get a decent looking out of box engine for an opened up display you'd need to work on that gap quite a bit to make it look nice. Also something that is rather annoying is how the black push rods are moulded into the sprue, I couldn't find a way to remove them from the sprue without damage. Overall I'd say the Hobbyboss Corsair engine is better purely due to the better fit, but of course those kits have their own issues in other areas.

    After this I started work on the cockpit, painting up the Birdcage in a bronze green interior mix. I used a similar mix to what I used in my F4F-3 ages ago but improved it slightly, I used roughly equal parts of XF-5 Green, XF-8 Blue, and XF-70 Dark Green 2, mixed well and with white added to taste. Pretty happy with the resulting shade, seems a decent match to what I can see in the 1/1 scale Birdcage restoration colours.


    Salmon pink was mixed up and sprayed around, it won't be seen but it was more to see what colours work for when I do come to using this colour later for weathering. I used MRP RAF Marking Red with white added for this.

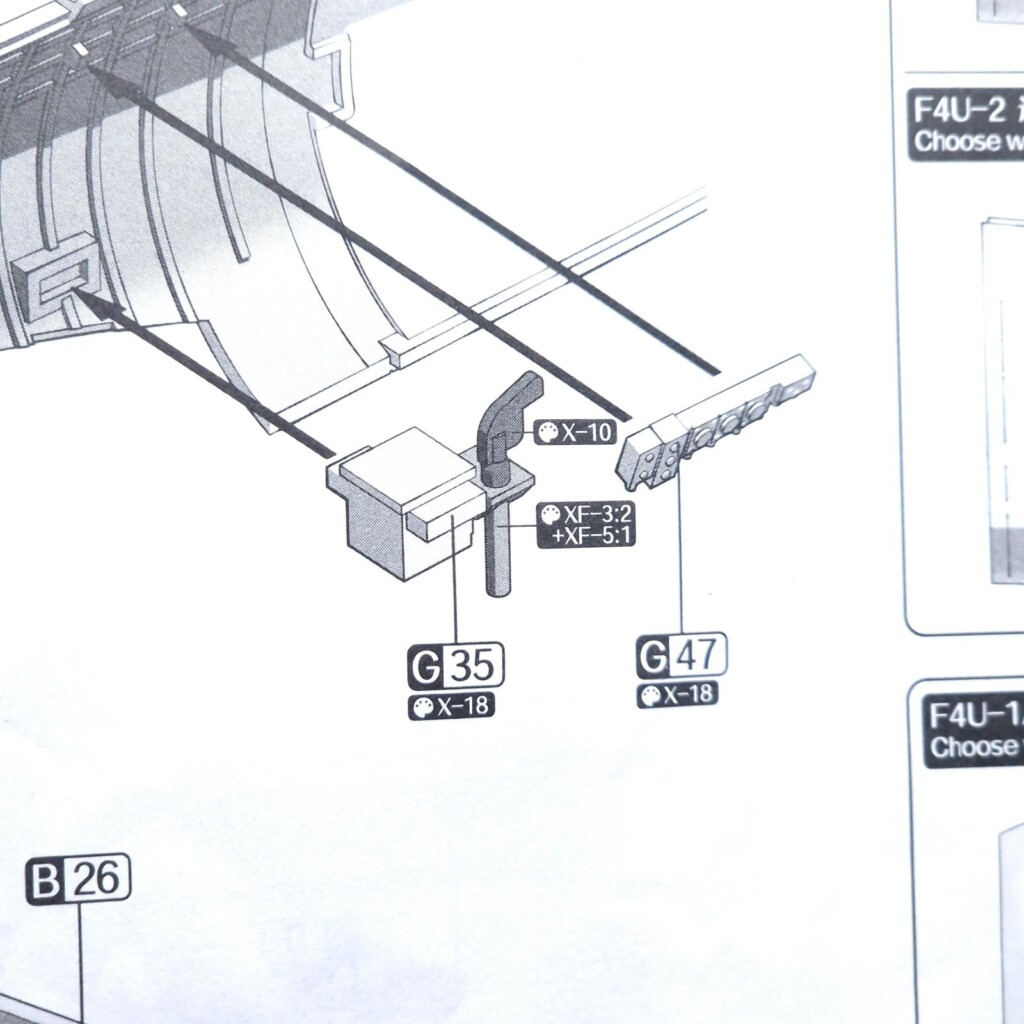
    The -1A gets tamiya XF-4 for the Zinc Chromite, and MRP Interior green for the cockpit. And so does the the Tamiya kit I'm also building at this time. When building the interior do note that the kit has the flare gun, briefly seen between March 1944 until May. This flare gun would fire down through a taped hole in the floor, but this would cause a large about of Carbon Monoxide in the cockpit so was quickly removed. On an F4U-1 don't include this part, on an F4U-1A check your dates and either remove just the gun or the gun and the tube, I can't personally say whether the F4U-2 had it or not since they're based on the Birdcage, but the decal schemes in the box are from a period that the -1A would have had it.

    And that brings us to now, where I'm currently painting up the cockpit to look nice and shiny. Worth noting that the F4U-1 will naturally get the F4U-2 parts, so the instrument panel is slightly wrong due to the addition of the radar screen. I won't be using the kit instrument decals for this, but even if I did the decal doesn't actually have this radar scope even if the plastic part does.

    Side by side with the Tamiya we can see a nice amount of improvement over the older kit, as expected

    1 additional image. Click to enlarge.

  • Profile Photo
    Tom Cleaver said 4 months ago:

    This is going to be interesting, @scalerambush.

    Sadly, Magic Factory made a deal with @#$%%$#@! Stevens International, aka the Bank Robber Importer, and a kit I got for $80 (essentially $40 for each kit, not bad) is now going for $126 due to @#$%##@! Stevens.

  • Profile Photo
    David Odenwald said 4 months ago:

    Between you and Tom @tcinla with this kit, I am seriously thinking of buying it. Luckily Sprue Brothers still has it for $69.99 plus $9.99 shipping.

    Hey it is a late Christmas present. 😉

  • Profile Photo
    Harvey R. said 4 months ago:

    $126

    That is ludicrous. I've seen it go between £54-64 here, this was £53.99 but came at the cost of that two month delay.

    @kahu So far I can recommend it, but the big make or break will be the fit of the fuselage I reckon but if it goes together like the wings then it'll be an easy recommend when they aren't going for stupid prices!

  • Profile Photo
    John vd Biggelaar said 4 months ago:

    Looking forward to this comparison, Harvey @scalerambush
    The start is really amazing with that detailed engine.

  • Profile Photo
    Harvey R. said 4 months ago:

    Paint Schemes

    Forgot to include this in the first post, I've got two decal sets for these, one EagleCals and the other HGW. I've used HGW and find them pretty atrocious in the past so better luck this time, you know many people don't look like the Eduard peelable decals? Well HGW decals require peeling (not an option not to), and when I used them prior they peeled poorer than the Eduard ones do which is probably why I don't mind the Eduard ones too much. In the worse case I've got at least 3 Tamiya decal sheets laying around with the markings needed. I'll probably pick up a generic mask set at some point too for the stars and bars.

    For the -1A I'll be doing 'Ole 122', seen on the Tamiya box art as mentioned. 'Ole 122' of VMF-111 is famous for flying 100 missions with no mechanical issues or having the engine swapped and apparently received a Presidential Citation, though I've not found a great deal of information beyond that. In the end 122 would perform around 170 missions before being displayed stateside in 1945.

    For the birdcage I'm not 100% certain but it seems to be Kenneth Walsh's Birdcage, though it was flown by other pilots at various points. The photo shows some interesting weathering options, and lots of fading. The marking set goes for this weird paint scheme which I see quite regularly depicted for this aircraft however since it is non-standard and there isn't any evidence of it beyond one black and white dirty photo, I'm going to disregard this strange scheme and go for a standard scheme albeit sun beat with repainted areas.

    'Daphne C' is another scheme if I don't want to open that paint job can of worms.

    As for the Tamiya Corsair following along, don't worry about that as it'll be built in this thread and then shelved for a paintjob in the future after I get through a couple of Christmas surprises including finally crossing off Eduard's Pony from the to-do list, but for anyone curious it will be painted in an interesting green scheme and go towards marking off a goal of getting one Corsair of every nation that used them done..

  • Profile Photo
    Tom Cleaver said 4 months ago:

    The fusleage fits better than the wings, @scalerambush. and the way they have no "centerline seam" is positively genius.

  • Profile Photo
    George R Blair Jr said 4 months ago:

    Really looking forward to this build, Harvey (@scalerambush). These are some really cool planes, and I have heard some very good things about them. I got these a couple of months ago, but they won't hit the build queue for a while. I will be taking notes on how yours go together.

  • Profile Photo
    Spiros Pendedekas said 4 months ago:

    Another superb entry and great progress, my friend @scalerambush! Looking forward to them!

  • Profile Photo
    Harvey R. said 4 months ago:

    Birdcage Cockpit

    Must admit I'm a bit out of practice with the brush, so painting isn't as good as achieved previously. Regardless I've got the birdcage painted up, the model is being held together with tape currently but so far the cockpit subassembly fits well.

    I did note that the assembly is very fiddly and weak, nothing awful but I am looking at it and thinking that if I stare at it too long it may just collapse, that won't be an issue when glued to the fuselage anyways.

    For the birdcage I'll be going for the in flight finish, so the included unpainted PE seatbelts are left out. For the -1A it'll receive these details. As for the pilot I haven't a clue what I'll do, I'm not really wanting to use a Tamiya Corsair pilot who certainly isn't aging very well and the only aftermarket seated pilot I can find is £14 before shipping, for reference a Tamiya Corsair is £20 so that's a lot for one fancy looking pilot.

    4 additional images. Click to enlarge.

  • Profile Photo
    John vd Biggelaar said 4 months ago:

    Excellent work on the interior, Harvey @scalerambush
    To me your brush painting looks perfect.
    £14 for a pilot is quite ridiculous.

  • Profile Photo
    David Odenwald said 4 months ago:

    I have that Aztec decal sheet and a few P-51Ds. Soccer War anyone?

  • Profile Photo
    Stephen W Towle said 4 months ago:

    I went to Evil-bay and ordered my kits from a importer from China. About 35.00 dollars for each. These kits are an improvement over Tamiya's legacy kit. Sort like Tamiya doing Tamiya only with reverse tech. Still if your price conscious . . . for now the Japanese kit holds water. My bet is once the magic kits get released individually it will be not hard to buy. Love the research going into this build and the color comments. Brush painting works on this one Harvey. The photo of Walshe's plane (alleged ) what colors do you paint the wheel hubs? Looks pretty dirty. Some good things are happening here.

  • Profile Photo
    Spiros Pendedekas said 4 months ago:

    The interior looks great, my friend @scalerambush!

  • Profile Photo
    Harvey R. said 4 months ago:

    @stephen-w-towle, it's a tough choice between dirty wheels in light grey or a black (ANA604 perhaps, just a guess), I'm leaning towards the former.

    Attached photos of the XF4U show how much the wheel colour can change on camera based on lighting so it can be really hard to determine from photos alone, but generally Light Grey seems the most common for a Birdcage, aluminum lacquer can be seen quite a lot, and a black/dark grey colour can also be seen. Undercarriage parts were subcontracted so there isn't really a uniform way of telling when or where colours were used.

    5 attached images. Click to enlarge.